It’s been a while since we’ve posted an original craft project for the blog, but now we’re getting back into the swing of things! Earth Day is only a week away, so we’re getting a head start on our art projects. This post features multiple projects in one. Using the links below, you can skip to specific projects, or have a browse through our step-by-step photos and animations. The focus of this activity is to provide students with an understanding of various climates throughout the world and to celebrate the diversity of these climates through dioramas.
Age: 5+
Duration: 20-30 minutes
You’ll Need:
• R52094 Set the Scene! Diorama Box
• Card paper
• Tape
• Pencil
• Crayons
• Scissors
• Plasticine or sticky tack
• Construction paper
• Glue

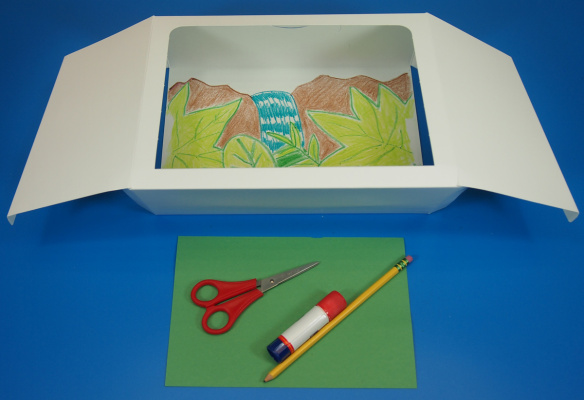
Use our R52094 Set the Scene! Diorama boxes to create real-world miniature models! The easy-fit design ensures that students spend more time creating their interiors than worrying about setting up the dioramas.
This particular diorama project focuses students on researching and creating scenes for their diorama boxes. Become informed about wildlife and habitats while designing some fun dioramas!
NOTE: The diorama scenes showcased below feature multiple animals from climates that may not share a similar region. These were put together to help diversify the step-by-step drawings. You can apply the same basic structure for the drawings to other types of animals, plants, etc.
The following tutorial is split up into 4 parts:
1. How to Put Together Your Diorama
2. Jungle Diorama
• Draw Tiger
• Draw Monkey
• Draw Toucan
• Draw Jungle Plants
3. Tundra Diorama
• Draw Tundra Plants
• Draw Polar Bear
4. Desert Diorama
• Draw Desert Plants
• Draw Camel
• Draw Snake
5. Tips for Classroom Dioramas
Click on any of the above links to jump to the section you want in this blog post. Otherwise, keep scrolling for a look at all these great ideas!
Introduction
In this portion of the tutorial, I’ll show you how to put together the diorama! Follow the step by step photographs and text to get you started on your diorama adventure!
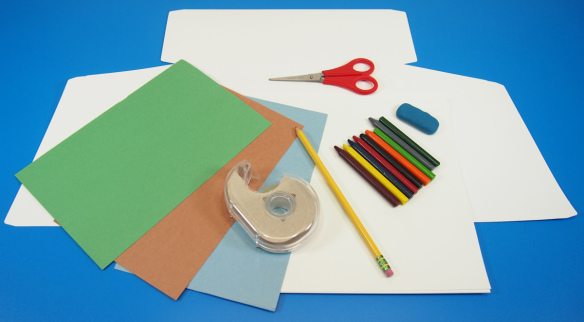
Each project requires the same basic set of materials. You can always add a bit more to your diorama projects and make them really stand out!
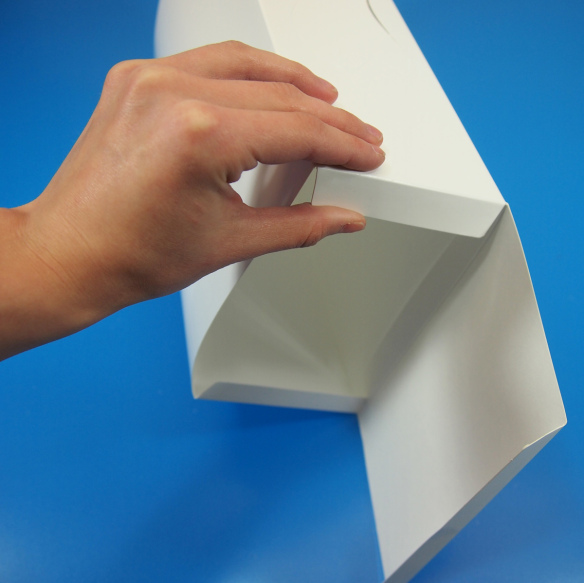
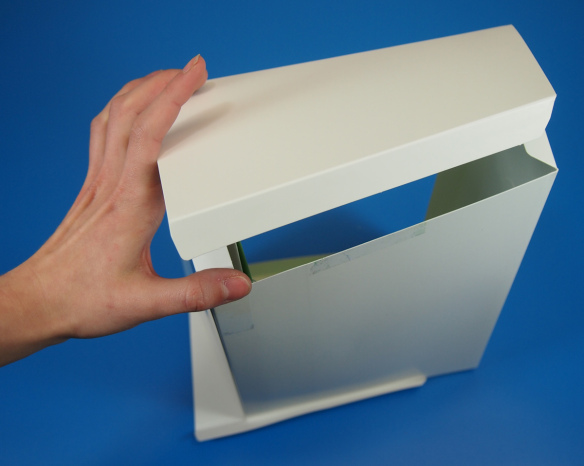
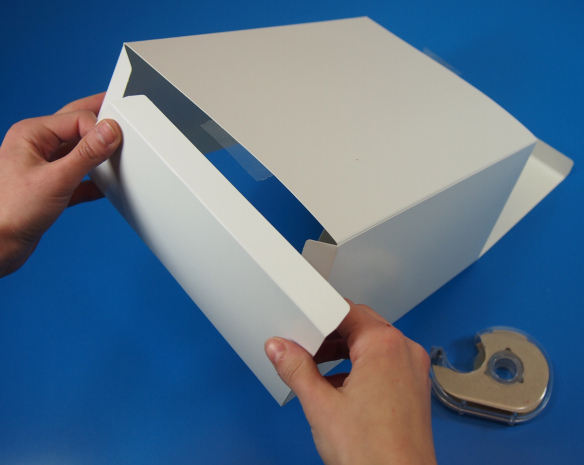
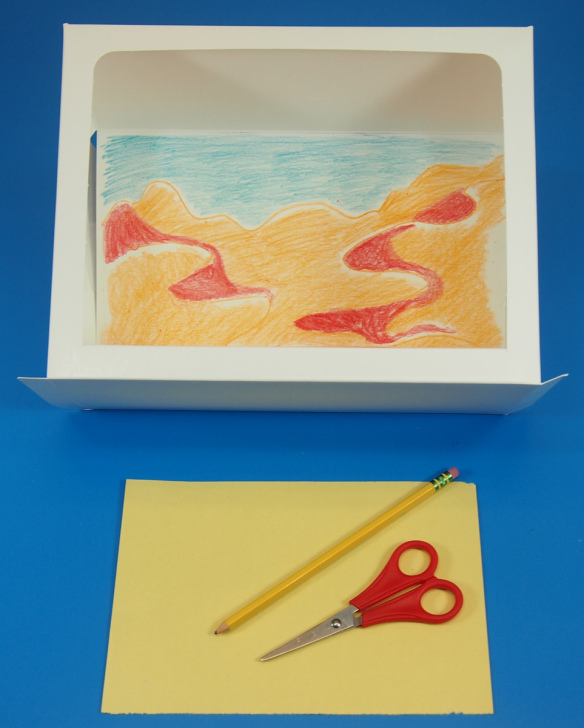
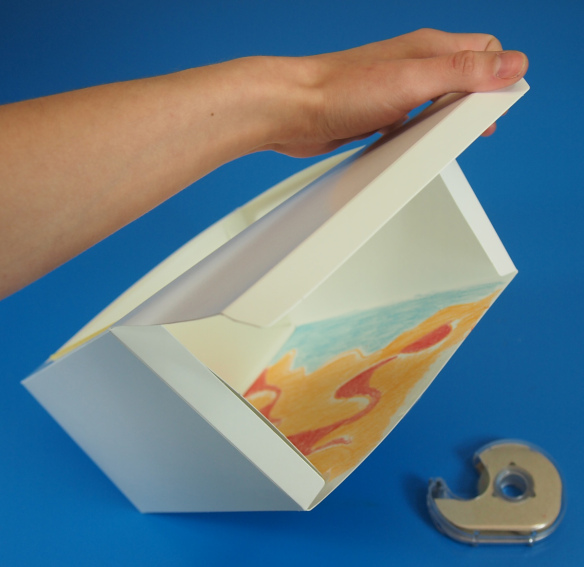
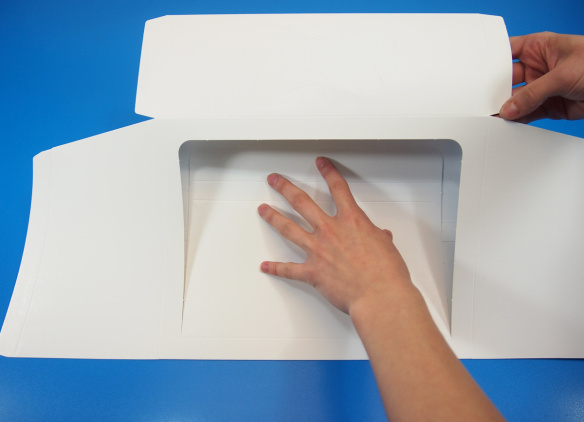 First, let’s start with assembling your diorama. The diorama already is attached on one side, so all you have to do is stand it up and fold in the sides. Push in the center “stage” piece along the scored lines. This will form a little window through which you can view the main scene of the diorama.
The center “stage” has three sections divided by scorelines near the top of the card. The first is the main section which will form the stage portion of your diorama. The second part consists of a small band that will press up against the back of the diorama. The third part is the bottom tab that will fold underneath the stage. You can secure the third part with a bit of tape. Fold down along each score line to form these parts, then press the center “stage” into the window of the diorama.
 Fold the sides of the diorama. Score lines along the edges will help you to orient where the folds are located. Repeat for the opposite side.
Locate the tabs at the top and bottom of the diorama sides. Fold the tabs in.
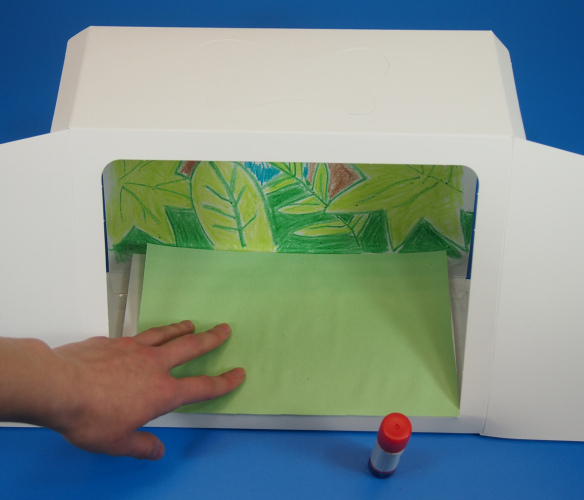
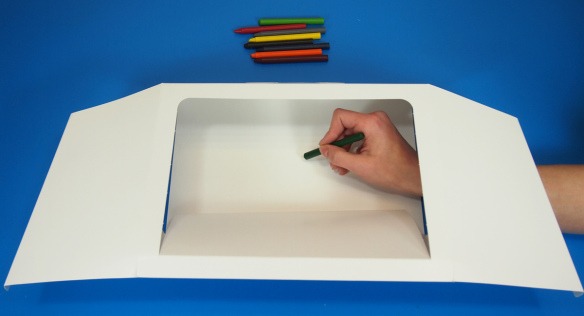 To draw on the back wall of the diorama, insert your arm through the openings on the sides. Draw all your illustrations in pencil first before going over it in crayon or pencil crayon. This way, mistakes will be easier to erase and fix when they happen.
Jungle Diorama
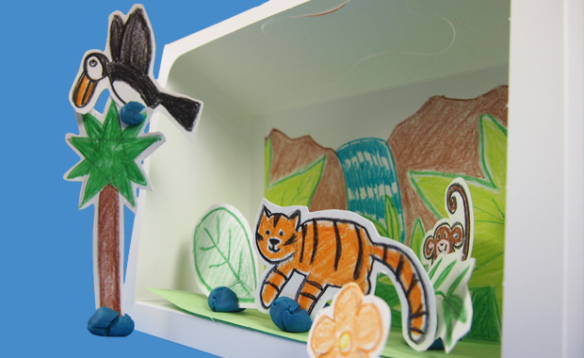
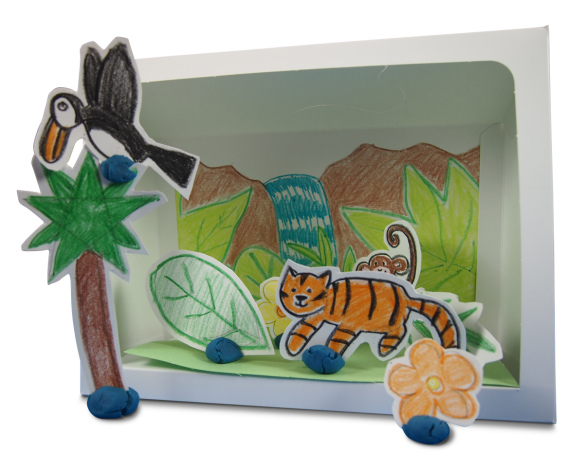
RAWR! Hear that? It’s the sound of the tiger approaching in the wild jungle. This diorama features a colorful leafy background, several animal characters such as a tiger, monkey and toucan, and plants such as a palm tree, leaves and flowers. But first, we have to draw the jungle on the diorama!
The animation above shows you how basic shapes were used to make the jungle landscape.
To start, draw a large star-like shape on one side of the diorama. Repeat for the opposite side.
To draw the leaves in the middle, draw two slightly curving lines. Each line represents a different leaf and will form the midrib. Draw V-like veins from the top of the curving line to near the bottom of the line. You can make two variations of the leaves. To make the leaf on the left, encircle the leaf veins in an oval shape. For the leaf on the right, draw additional lines beside the V-veins to make fern leaves.
Once you are happy with the design, darken all the lines in green. Color the insides of the leaves with a light green.
Take your pencil and fill in the gaps in between the leaf tendrils with a shaky line. This will be the waterfall clifftop. In the center of the clifftop, draw two lines curving downward. This will be the waterfall. Fill the outlines in either blue (for the water) or brown (for the clifftop). Color the remaining gaps in dark green.
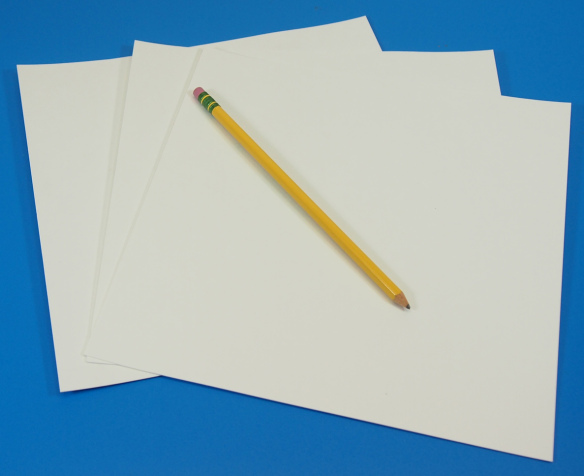
 Next, take a sheet of card paper and select a few colorful crayons. For the animals, I used varying shades of orange, brown, black and pink. The plants use a lot of green; use bright colors for the flowers.
Draw Tiger!
 We’ll start with the tiger drawing. Draw a large oval on its side. Draw a circle, roughly about the same width, overlapping one end of the oval. This will form the head and the body.
Add three drooping cylinders at the bottom of the large oval for the legs (the tiger’s fourth leg is hidden behind!). From the side opposite the tiger’s head, draw a long tail.
Add little triangles to the circle for ears. Next, draw the face: two small dots for eyes above an upside-down triangle, which is the nose. Draw a line from the bottom of the triangle point and split it off to form the mouth.
Finally, draw small curving lines along the tiger’s body to make the stripes.
 Outline your tiger in black crayon. Color in with orange. The pencil lines will faintly show through to help guide you to draw in the stripes with black crayon.
Draw Monkey!
Start off with Monkey’s body. Draw a vertical oval to make its body. At the top of the oval, draw a small circle for the head. Add a small circle to each side of the head to form its ears. Next, draw two long rectangles starting halfway down the oval body. End the rectangle shortly after the bottom of the oval body. Add a tail with a swirl at the end!
Next, outline the entire perimeter of the monkey drawing with black crayon. Fill in the Monkey with brown crayon and add details such as a face, and the inner pink for the ears.
Draw Toucan!
Toucan also features a vertical oval like Monkey’s body, and a small circle at the top for the head. Position the circle slightly off to the side. We want to show Toucan in flight! Draw the beak like an elongated U from the side of the head. Draw wings on the opposite side and add a triangle tail to the bottom of the oval body.
Outline the entire drawing with black crayon. Color the wings and tail entirely in black and the beak in orange. Leave a bit of white on the face and on the belly as you color in these parts.
Draw Jungle Plants!
We will start off with a palm tree drawing. This can be very simply done with three types of shapes: a long rectangle, a star and several triangles. Draw a slightly curving rectangle to illustrate the tree trunk. A simple five-pointed star at the top depicts the palm tree leaves. Add a few more triangles in between the five points to thicken the leaves up.
Outline the tree trunk with a brown crayon and color in. Next, outline the leaves in green crayon and color in.
Next up, we will learn how to draw the fern and large leaf for the jungle scenery. Both leaves start out with a simple curved line. Draw a series of V-shaped veins down along the curved line. To make the fern, close off the V-shaped veins with additional lines. The big leaf just needs an oval drawn around it.
Outline and color in everything with green crayon.
Note: The flowers are relatively easy to do. Draw a small circle to make the center of the flower and illustrate the petals around it. Outline and color in with crayon. Make as many flowers as you’d like!
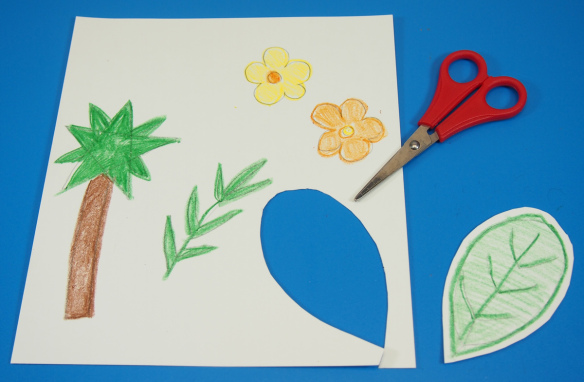
Next up, cut out all the shapes!
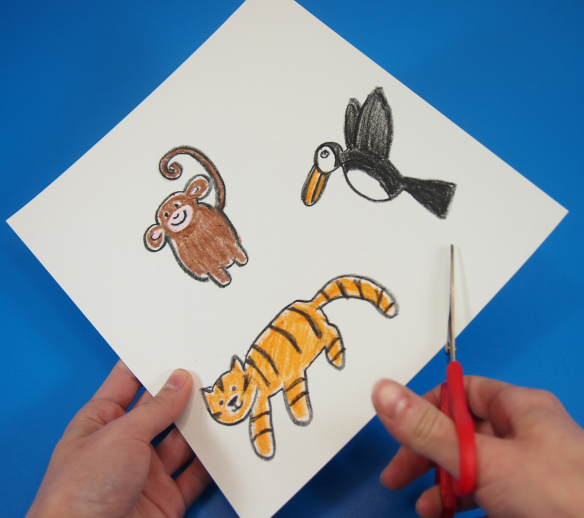
Cut out the animal shapes.
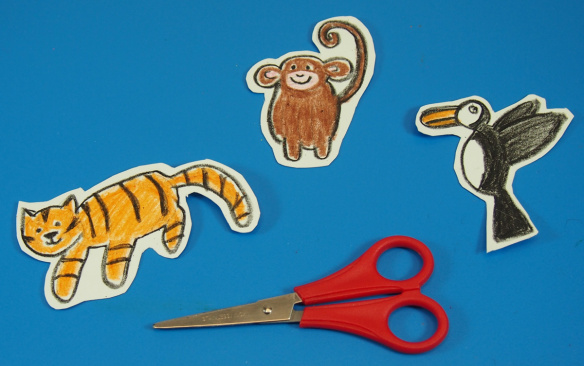
Leave a bit of a border around each figure so that the artwork won’t smudge when you are adjusting it in your diorama.
Using these basic drawing tips, you can make virtually any figure you’d like for your diorama scene. As you can see, many of the drawings require simple shapes like circles, triangles or rectangles. Once you’ve outlined everything, simply fill in the drawing with a full color.
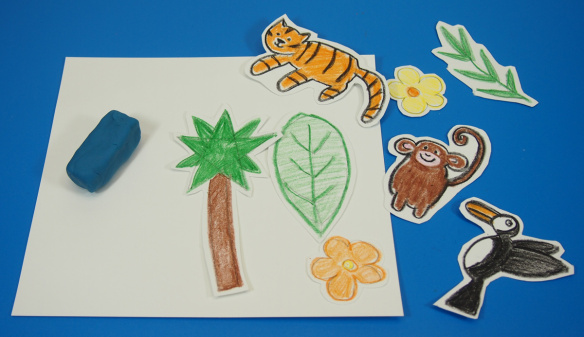
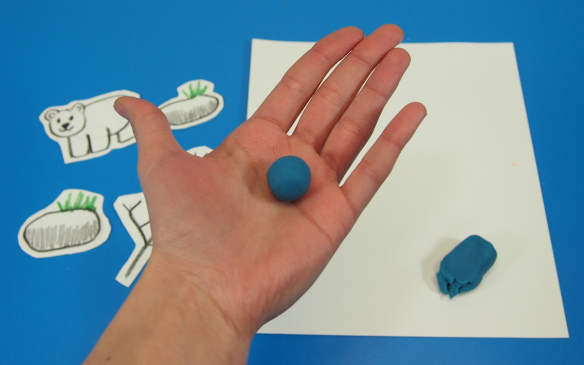
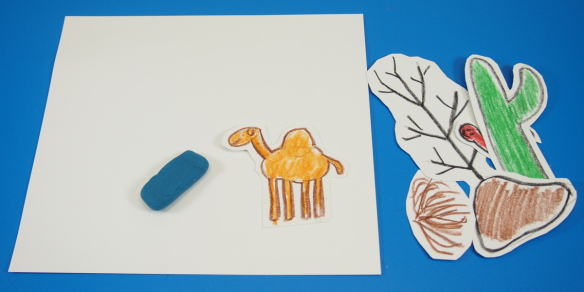
Once you have all your shapes cut out, get ready to stand them up! You will need Plasticine or a bit of Sticky Tack.
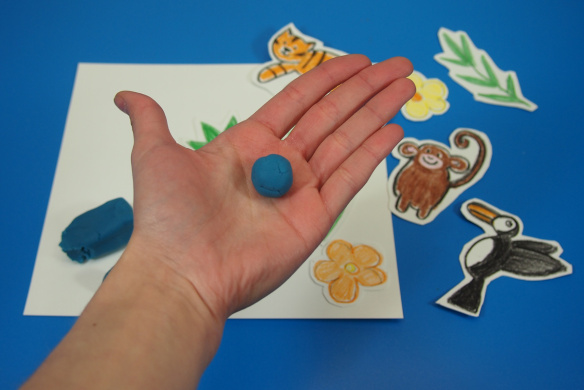
Roll up a small ball of Plasticine.
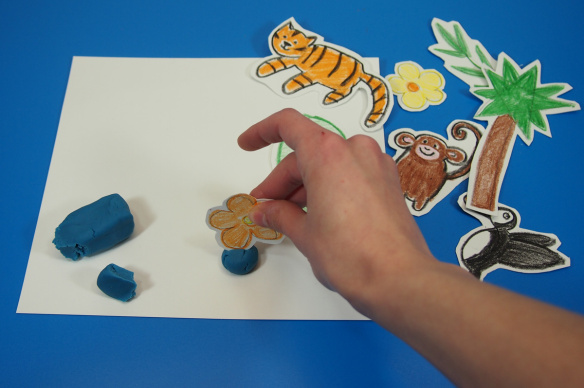 Press the Plasticine onto a flat sheet of paper, enough so it has a flat underside. Pick up one of your figures and insert it into the top of the Plasticine, just enough so it stands.
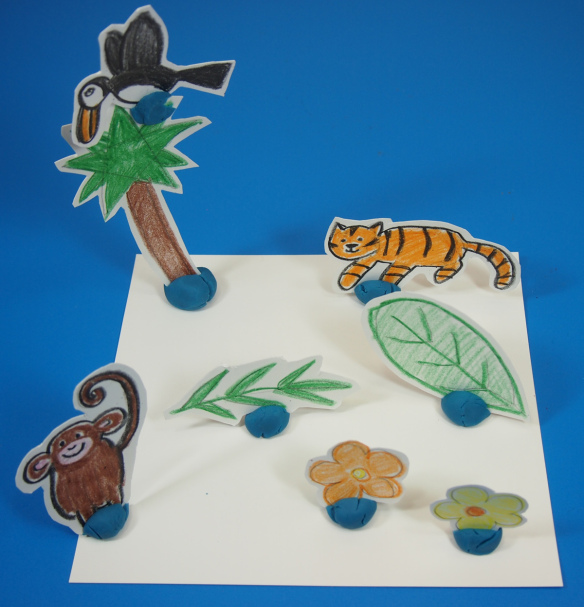
Note: Use the color of Plasticine that best matches your diorama scene. I used blue to show how to stand the figures up. You can even attach figures onto other figures, like the toucan perching on the palm tree. Just use Plasticine to hold the figures in place.
Before you place the figures inside the diorama, we have to finish putting the diorama together. You will need to find a sheet of construction paper that can fit the width and length of the diorama floor. Or, cut one to size!
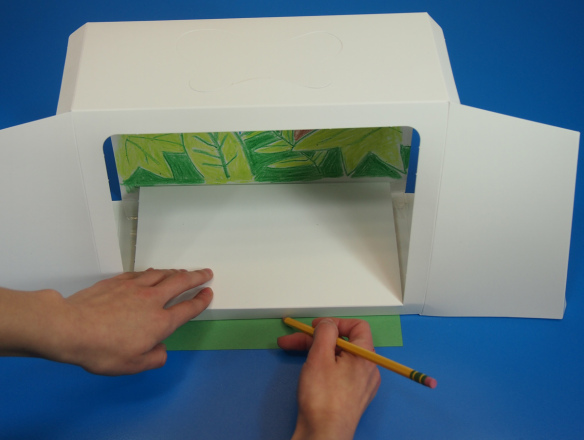
I placed the diorama on top of the construction paper and aligned the back to match. Trace along the front with a pencil.
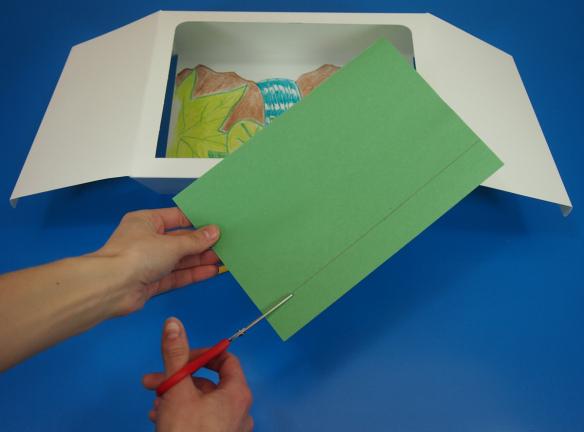
Cut along the line.
 Glue the construction paper down onto the diorama floor. I used green for the jungle floor as I feel that it matches best with the scenery.
Next, you’ll want to secure the sides. With all the tabs pre-folded, it should be easy to close the side flaps.
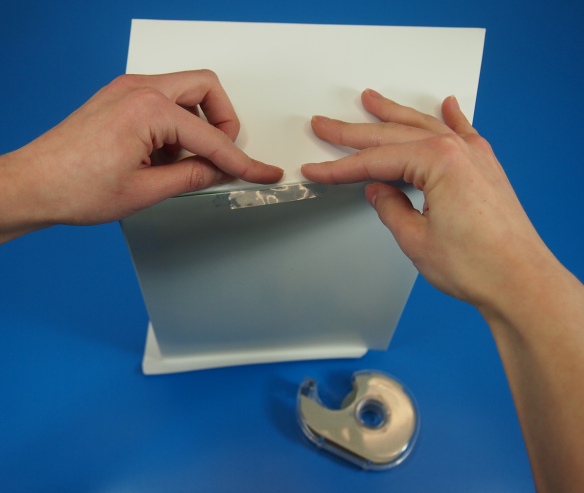
Repeat for both sides. Tape down the edges to hold the flaps in place once they are closed.
Once all the sides are sealed up, place in your characters! Position them any way you like within the diorama.
Tundra Diorama
The tundra experiences the coldest weather and the longest days, but the landscape is full of thrilling details!
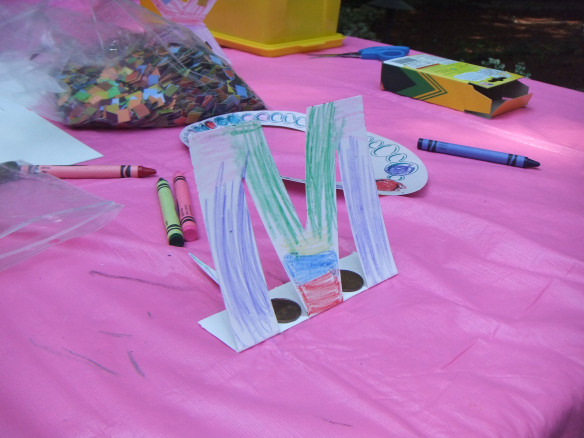
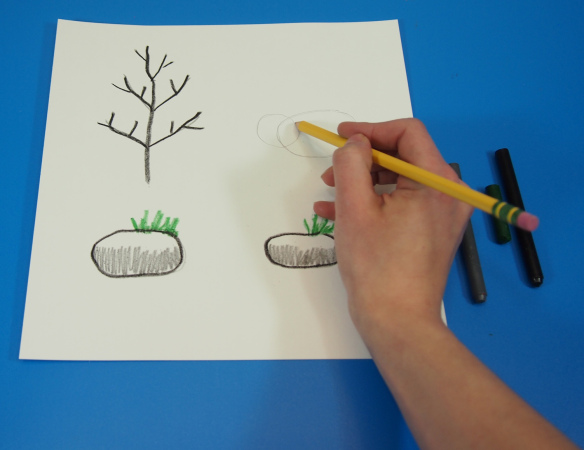
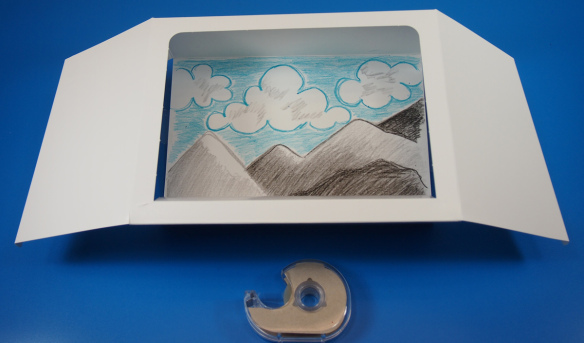
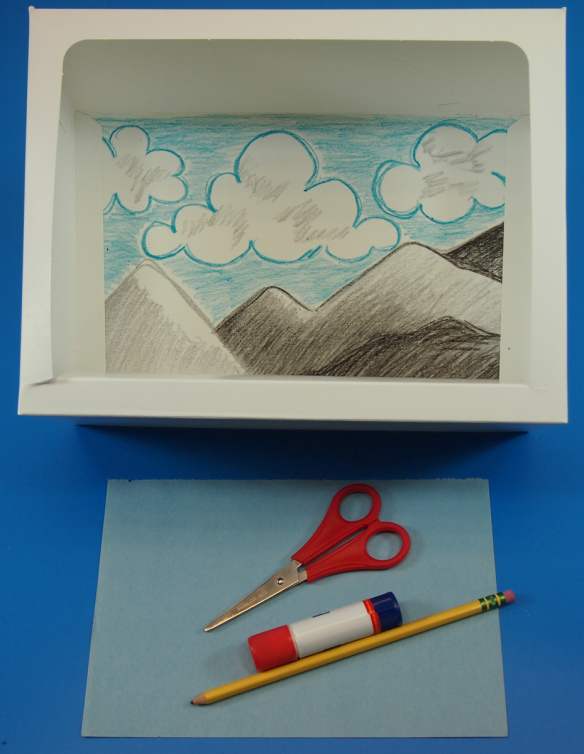
 To start off, we’ll illustrate the background for the tundra diorama. First, draw puffy clouds along the top half of the diorama background. Clouds look a lot like ice cream scoops with a few more curves at the bottom. Use the bottom half of the diorama background to draw the mountains. Draw the mountains with large, uneven M-shaped lines that continue across the page. Let the lines go as high or as low as you wish. Once these are finished, color in around the clouds with light blue. Fill in the mountains with grey. Press on the grey crayon as you get closer to the bottoms of the mountain drawings. This will make various areas on the mountains look darker to give a bit of dimension. You can also add a few strokes around the cloud formation.
 Now to design the details!
Draw Tundra Plants!
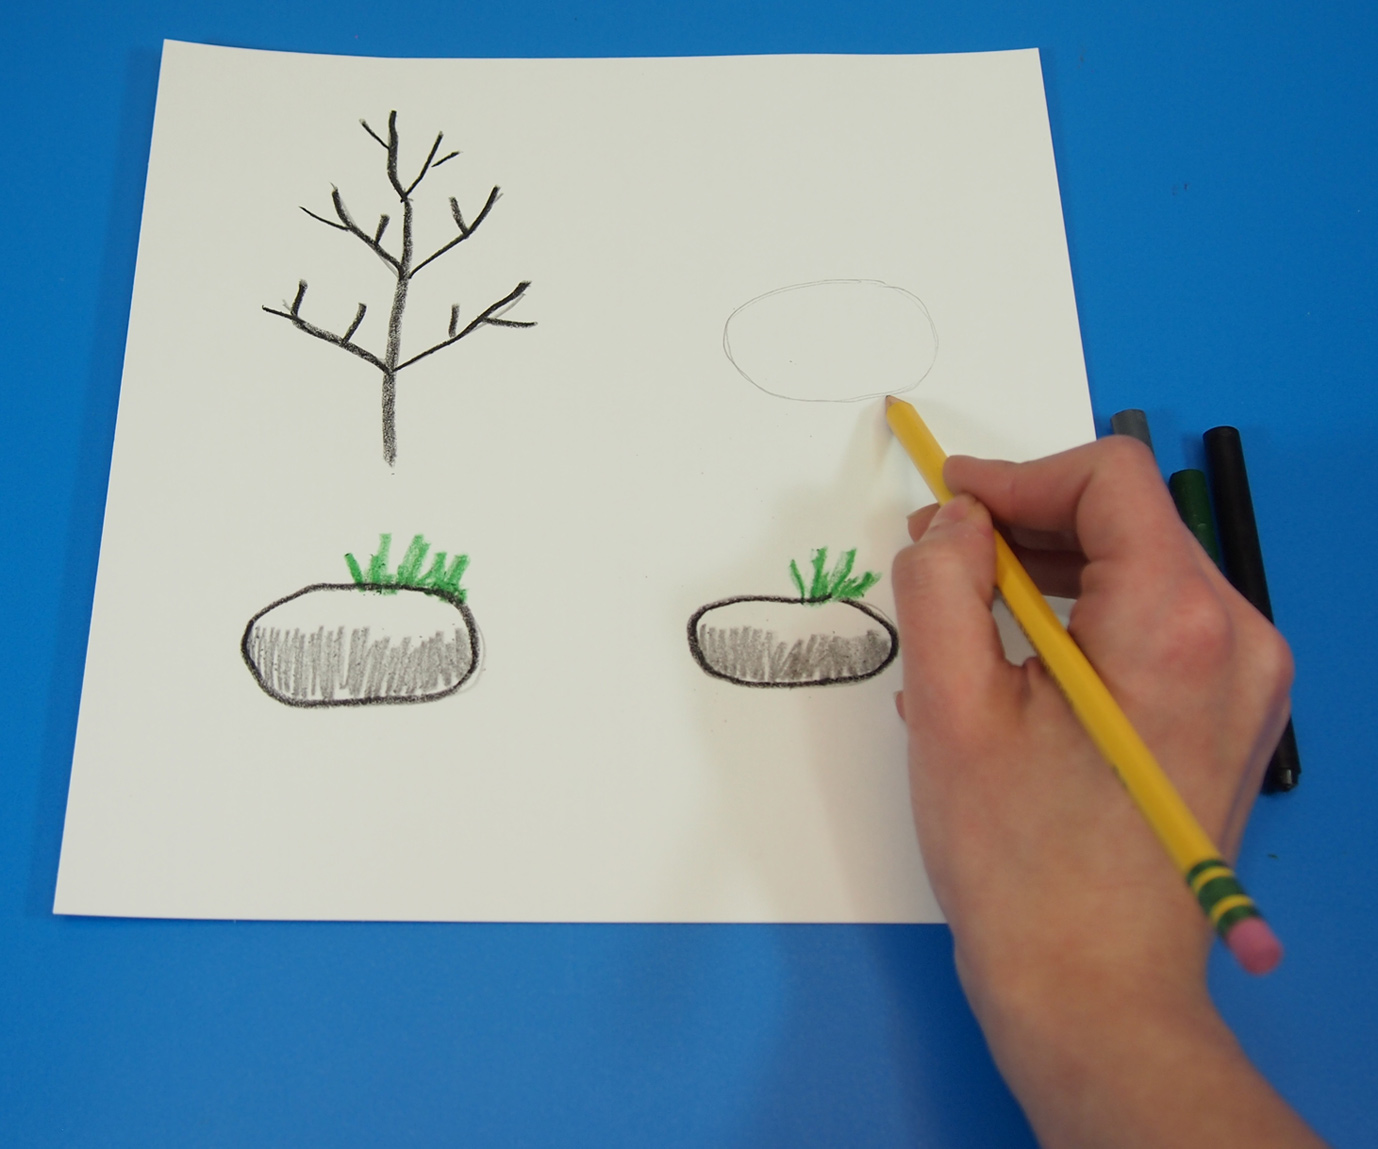
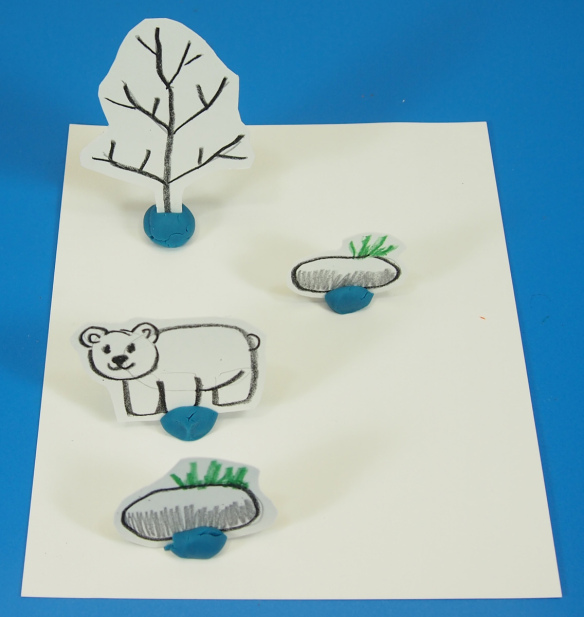
 First, let’s illustrate some tundra rocks. Make two uneven horizontal ovals. Outline them in black. Use gray crayon to draw small lines about halfway up the rock. This gives the appearance that the light is shining down on the rock, creating a shadow. Use a bit of green crayon to illustrate tuffs of small plants.
Next, draw a tree! Draw a straight line with pencil. At the top of the line, draw a V shape so that the line intersects in the middle of the V. Make the next V shape bigger below the first. Repeat a third time. Outline everything in black crayon then add small branch details.
Draw Polar Bear!
 First you’ll need to draw a light outline in pencil. This will help later when you are darkening everything in pencil. Draw a medium-sized horizontal oval. This will represent the polar bear’s body.
Next, draw a small circle overlapping the polar bear’s body on one side. This will form the polar bear’s head.
Add two small circles on either side of the head. Draw a rectangle just underneath the head. Make another rectangle right beside it. Finally, draw the third rectangle to align with the back of the oval body. Add a face. Outline everything in black crayon. You can erase the inside lines before you do this.
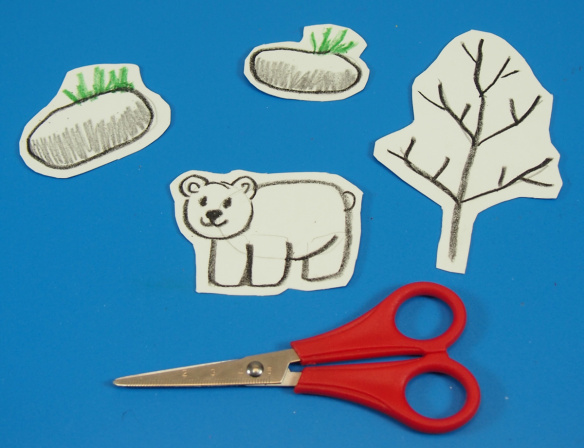 Cut out all the figures. Leave a bit of a border around the outside lines. This will make it easier to handle the card figures without smudging the drawing.
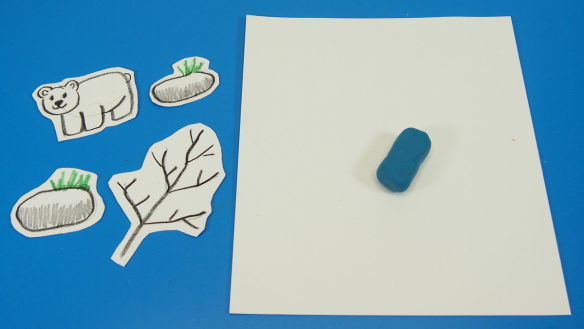
Now we can stand up our characters using a bit of Plasticine or Sticky Tack. Here, I am using Plasticine because I can shape it easier than Sticky Tack.
Roll a small amount of Plasticine into a ball.
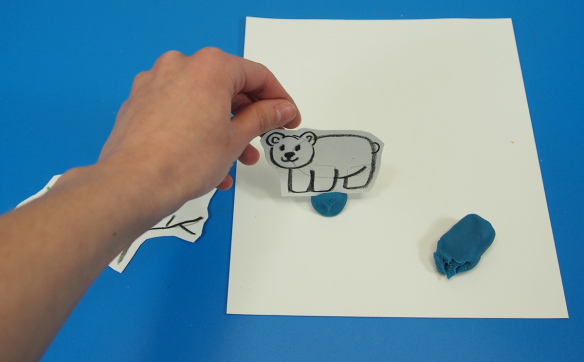
Press the Plasticine ball flat onto a sheet of paper. Insert the edge of a figure into the Plasticine ball. Press it only about halfway in.
Repeat the same for all the figures. Use a larger amount of Plasticine to make the base for larger figures like the tree.
Next, we have to finish putting together the diorama.
With the tabs pre-folded, you can fold the side flaps in. Tape the edges of the flaps to hold them in place.
To make the floor for the diorama, you will need a sheet of construction paper roughly the same width and length. If the sheet is too big, you can cut it down to size.

Align the back edge of the diorama with an edge of the construction paper sheet. Trace the front edge of the diorama onto the protruding strip of paper.
 Cut off the excess along this line.
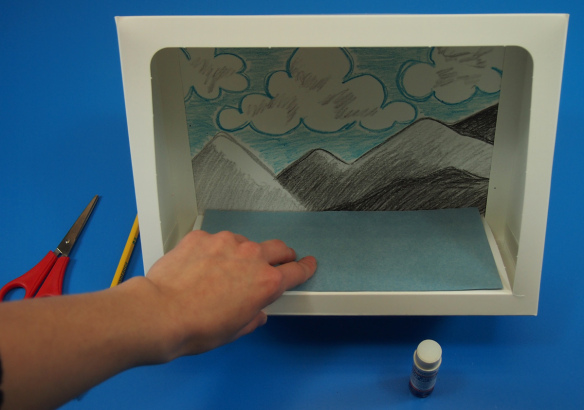
Paste the sheet of construction paper down onto the floor of the diorama.
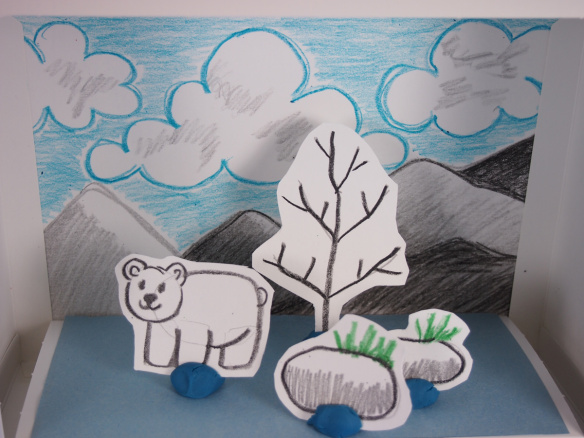
Place all the figures inside the diorama. Arrange them anyway you like!

Use the diorama for storytime! Create your own story using the characters in your diorama. Without being confined to one area, the characters can switch positions thanks to the Plasticine base.
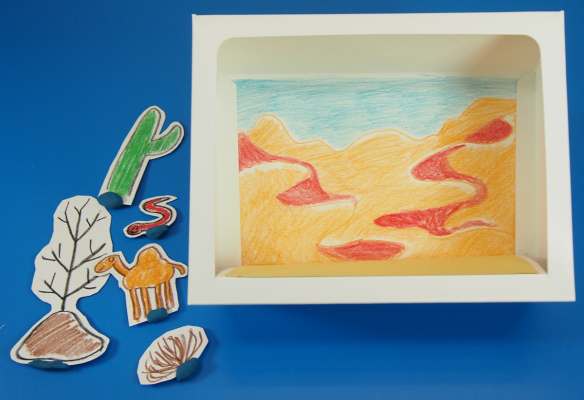
Desert Diorama
Sunny and blazing hot during the day, but cool at night, the desert is full of surprises! This diorama incorporates different types of plants and animals together–we’ll learn how to draw a camel, a snake, tumbleweed, trees and more!
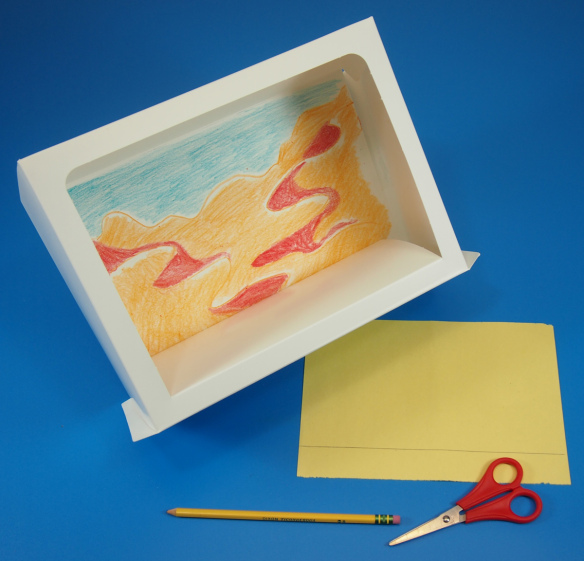
To draw the desert background, we must first choose our colors. There are plenty of warm colors to go around, such as red, yellow and orange. Draw a squiggly line across the top half of the diorama background in one of these three colors. Below the first squiggly line, I drew two more drawing closer to the bottom of the background. These look a bit like giant S’s. Next, I filled in some curves of the S with red to give a bit of depth, or the appearance of dunes. Color the rest of the desert in a bright orange or deep yellow color.
To make the sky pop out, I colored in the remaining top part of the background with a bright blue.
Draw Desert Plants!
 Illustrate a small rumply rock. Draw a straight line sticking up out of the top of the rock. This will form the trunk of the tree. Draw a V shape at the top with the straight line intersecting the V through the middle. Repeat two more times down the length of the straight line. Once you are happy with the overall appearance, outline everything in black crayon. Color the rock in brown or grey. Add in small branch details with the black crayon.
 To make the tumbleweed, draw a wide V shape. Draw a straight line up through the middle of the V. Draw little curved lines to make the brush with brown or grey crayon. Use the three straight lines as a guide.
Draw the cactus. First make a long cylinder shape with a curve at the top. Draw a curved stem segment sticking out from the side of the main cactus shape. Outline everything in black and color in with green crayon.
Draw Camel!
The camel consists of 3 basic oval shapes and a few rectangles. To start, we need to make the body. Draw a horizontal oval. Next, draw a small overlapping circle at the top-center of the oval. This will form the camel’s body and hump. You can add another circle if you wish.
Move your hand a little ways to the left from the camel body. Draw a small thin oval. This is going to be the camel’s head. Connect the head to the body with a long thin rectangle.
Next, draw four thin long rectangles starting from the bottom of the oval body.
Outline everything in a dark brown. Color the inside of the camel with a sandy brown color.
Draw Snake!
The snake is one of the easiest animals to draw. It only requires that you know how to write the letter S! Draw a big S. The top of the S will form the snake’s tail. Add a small circle to the bottom to make the snake’s head. Close up the S-shaped body by following the line back up to the top point. Finish at a point to make the tail. Outline everything in black and color in with red.
 Cut out all of your desert figures. Leave a bit of a border around the edges so that you don’t smudge the artwork when handling it. Get a small amount of Plasticine or Sticky Tack. I used Plasticine here. Roll a small chunk of Plasticine into a ball and stick it onto a flat sheet of paper so that it forms a base for your figures. Gently take one of your figures and insert it about halfway down into the ball.
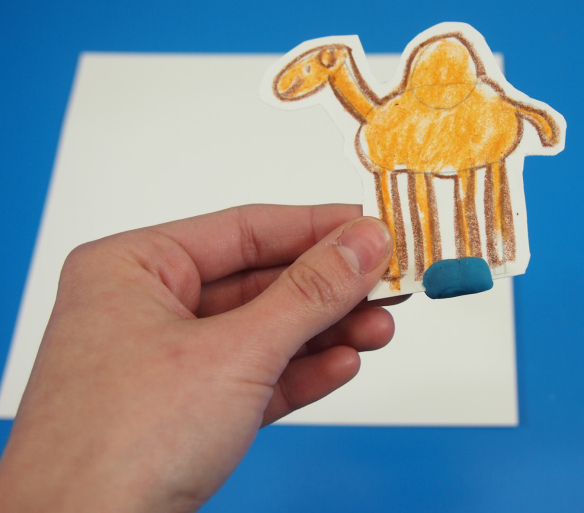
Ready for action!
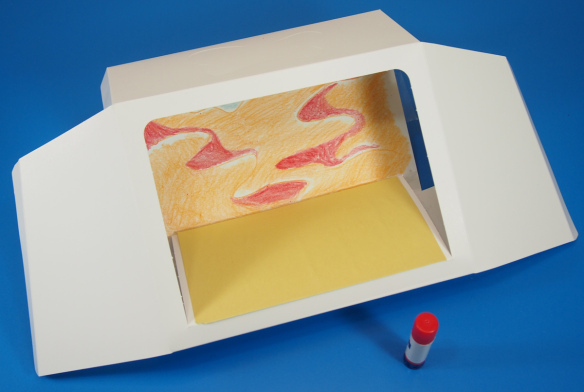
Before we can put the characters into the diorama box, we first need to finish up its design. Create a floor base for the diorama box using a sheet of construction paper. I used a color that matched the scenery of the diorama background. If the sheet needs to be cut smaller, you will need to measure the space of the diorama floor.
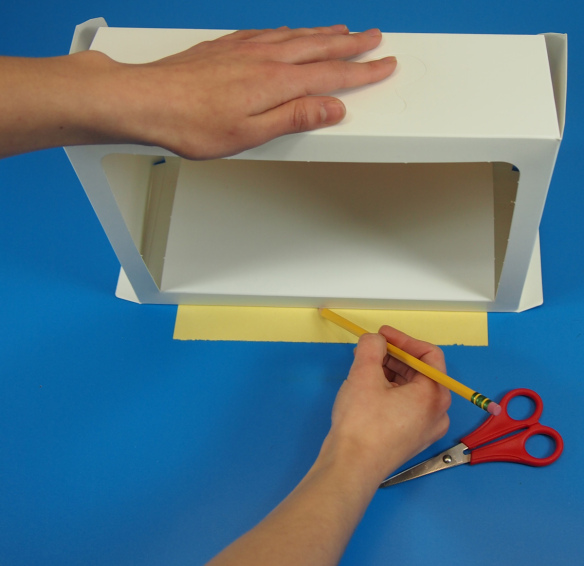
Here’s a quick tip on how to do this. Align one edge of the construction sheet with the back edge of the diorama box. Trace a line along the front edge of the diorama box.
This will provide you with a line you can cut across. Discard the small strip of excess paper.
 Glue the sheet of construction paper to the floor of the diorama box.
Fold down the sides of the diorama box and seal up the edges with tape.
Now you are ready to place your characters inside!
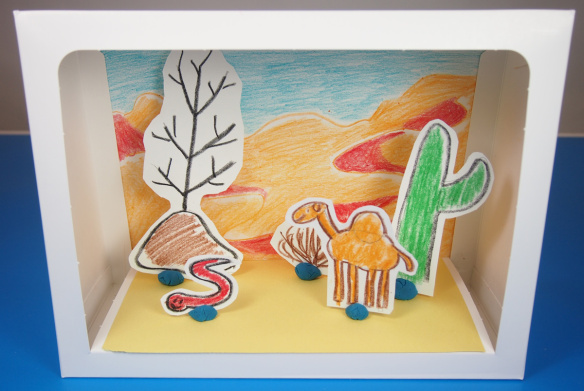
All ready for display!
Tips for the Classroom:
• Diorama boxes are a great way to showcase your students’ knowledge of different environments in the world. In order to help your students conceptualize their dioramas, it’s a good idea to draw up a list of important elements that will go into the design. One way to structure this is by highlighting main elements, such as: background, plants and animals. Note: Don’t go too big or you might not fit everything in!
• Use simple ovals and rectangles to draw all of your animal characters. The best way for students to learn is to draw from reference pictures. A good exercise to try is to use a reference photo, lay a sheet of tracing paper over top, and use basic circles, ovals and rectangles to fill in the outline of the animal drawing. This will help students understand how to draw various parts that make up a whole figure.
• Plasticine or Sticky Tack work as great bases for your animal characters. The best part about using a base is that you can rearrange your characters within the diorama at any time. Although the Plasticine will dry out, it will form a permanent base that can be used to relocate the characters within the diorama.
• If you are looking to incorporate more materials other than card paper, use Plasticine to form the plants and animals. Use the same principles for drawing animals to make your Plasticine characters. Roll small amounts of Plasticine into basic spheres, egg-shapes, rectangular prisms or cylinders. Make them larger or smaller depending on the type of animal you are making.

Thanks for viewing this post! Like us on Facebook or Tweet us on Twitter! We’d love to hear from you. Subscribe to this blog to view updates every Monday, Wednesday and Friday on great new craft projects and upcoming products from Roylco!


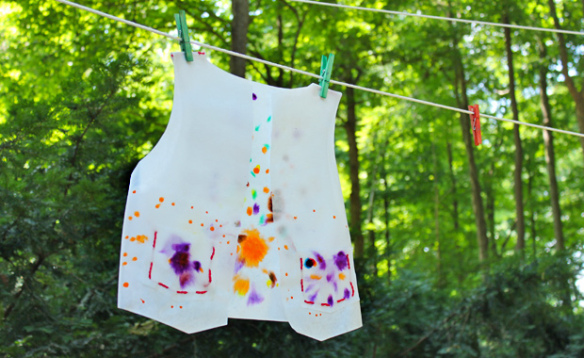
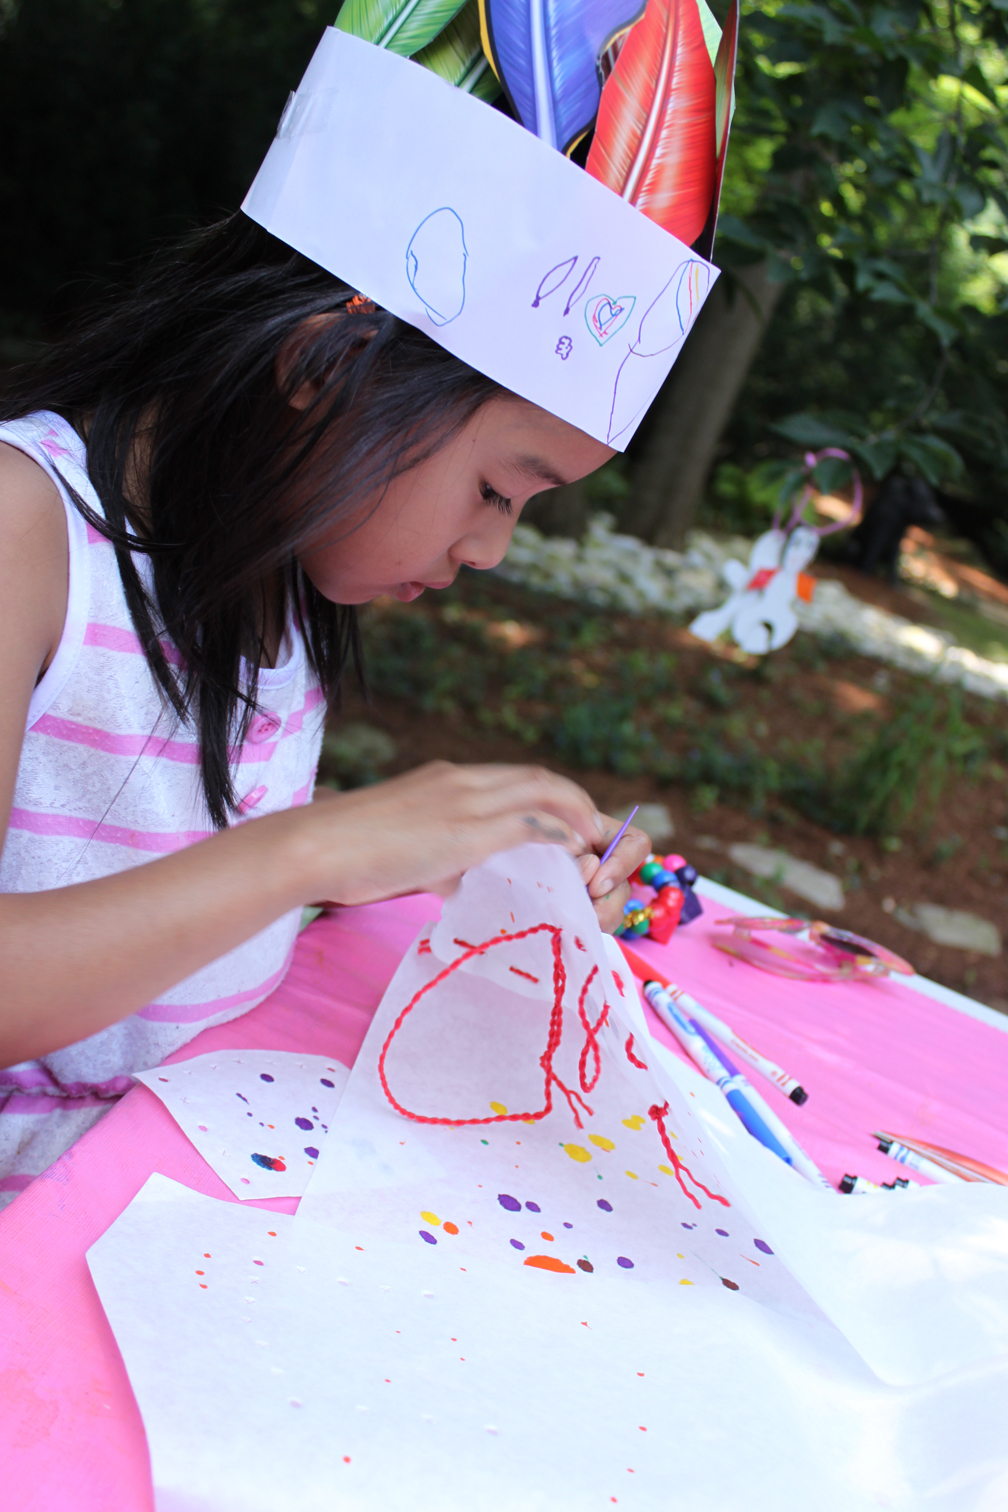
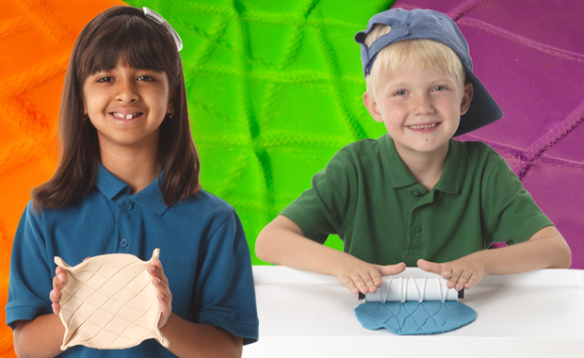
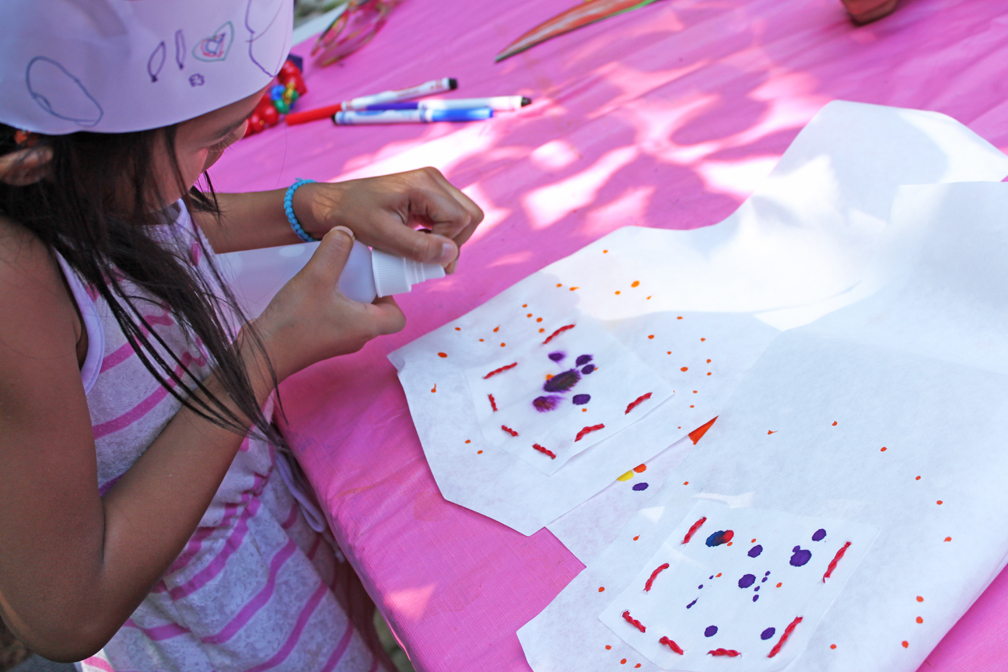 Once several spots of marker were applied to the vest, the campers used their spray bottles to spread the ink throughout the material.