Flag Windsocks

Windsock Artwork made from Color Diffusing Paper

2014-05-25-FeatureImage Make brilliant designs on Color Diffusing Paper using clear glue! Incorporate windsocks into a national holiday craft or use to cheer on your favorite team.

Age: 5+

Duration: 20 minutes

Learning Objectives: Create product art with an emphasis on using fine motor skills. Trace designs onto paper or draw freehand using references. Encourage scissor skills development. Incorporate windsock designs with themes learnt through social studies subjects or in observation of upcoming national events. Talk about significance of wind patterns and weather changes.

You’ll Need:

R15212 Color Diffusing Paper 12 x 18″

• Watercolor paint

• Plastic paint trays

R54460 Squiggle Pipettes OR paintbrushes

• Scissors

• Hole punch

• Yarn

• Tape

• Clear glue (preferrably with applicator tip)

Line-03 This activity is perfect for making a take-home craft that kids will love. You can decide to have kids draw their flag designs freehand, or print out a large flag design in black and white line-art that kids can use as a template beneath their Color Diffusing Paper sheet. In this activity, I’ve used both techniques.

Click on any of the links below to skip to a portion of this tutorial:
1. Designing your windsock

2. Making streamers

3. Assembling your windsock

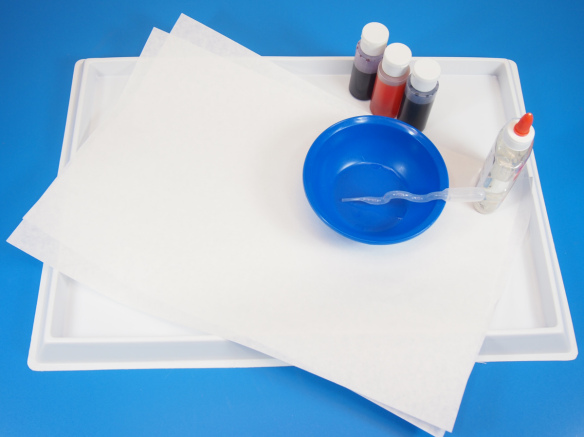
P6179636 Here, you can see all the materials I’ve assembled. Using bowls to contain the watercolor paint makes it easy for kids to keep their work-spaces clean. Pipettes are a great way to get children with developing finger muscles to experiment with different squeezing techniques.

Alternatively, use paintbrushes to apply the watercolor to the Color Diffusing sheets.
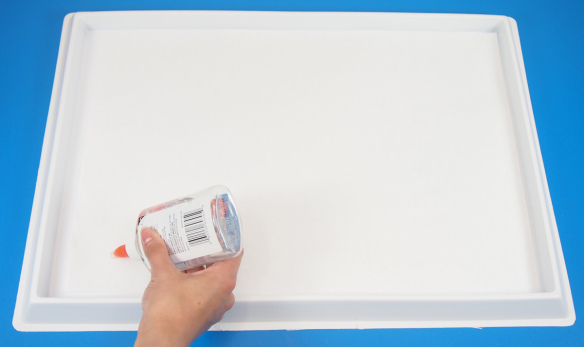
P6179640 First, decide on your design. If you decide to get students to freehand the design, it’s a good idea to print out a reference for students to look at. They can lightly pencil in their design if they’d prefer, then go over top of the design with the clear glue.

It’s ideal if the clear glue dispenser has a pointed applicator that kids can use like the point of a marker or pencil. Gently press the glue down onto the Color Diffusing Paper on top of your penciled design.
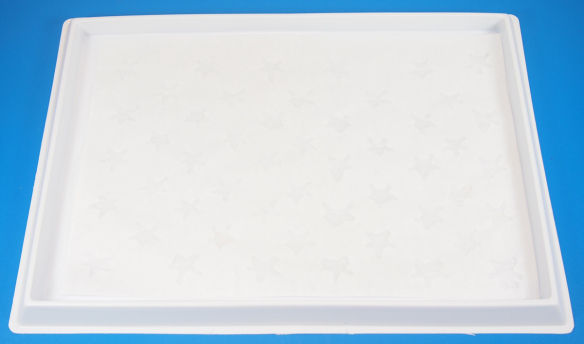
P6179642The photo above won’t clearly show the image, but I’ve “drawn” 50 stars with the clear glue in a stacked sequence. Can you guess the flag I’m making?
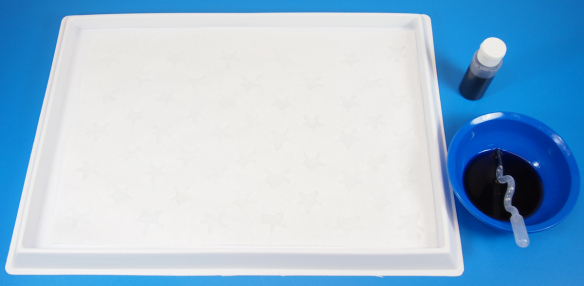
P6179644Wait until the glue is completely dry! This usually doesn’t take too long, but if you are worried about time, be sure to do the glue “drawing” on a day before your painting class. You can speed up by the process by leaving the drying artwork under an oscillating fan. Once you are ready to paint, place the Color Diffusing Paper into a plastic paint tray.

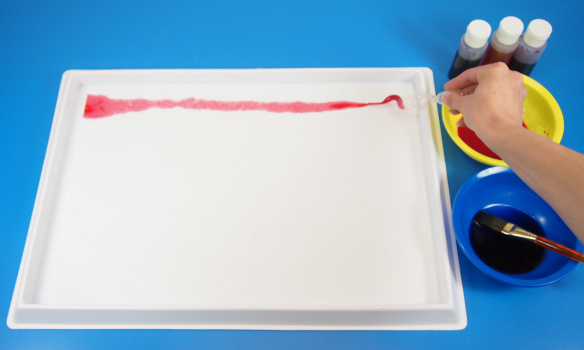
For this particular project, I’ve grabbed blue watercolor. Notice how nicely the Squiggle Pipette fits into the colorful paint bowl. You can place the bowl in the center of a group of students and have them all grab their paint from that one location.
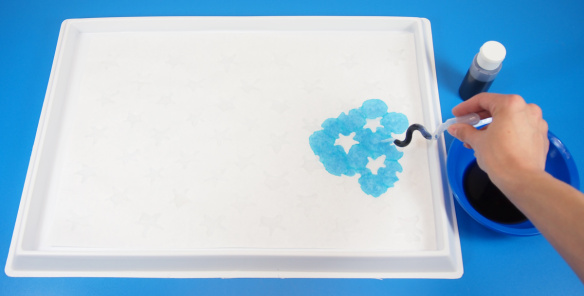
P6179664This is my favorite part!! As I release the blue watercolor paint from the Squiggle Pipette, the paint carefully avoids any place where I’ve “drawn” in the glue. This is because the glue has seeped completely through the paper and acts as a barrier to the oncoming ink.
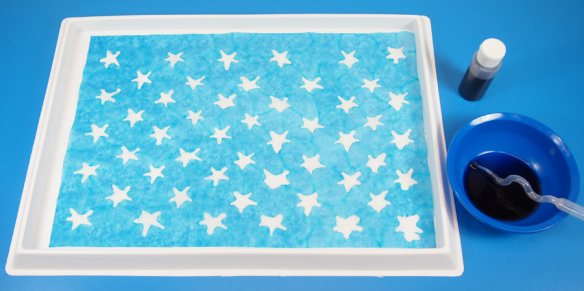
P6179668It will take a few squirts from the Squiggle Pipettes to fill the entire canvas, but it’s well worth it for the colorful effect and design popping through!
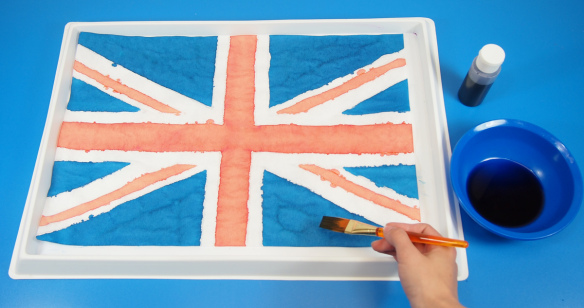
P6179671For a project like the Union Jack flag, I placed a line-art print of the flag design beneath the Color Diffusing Paper and traced out all the lines with the clear glue. Once the glue was dry, I used a paintbrush to apply the paint. This helped maintain an even layer of paint throughout the design.
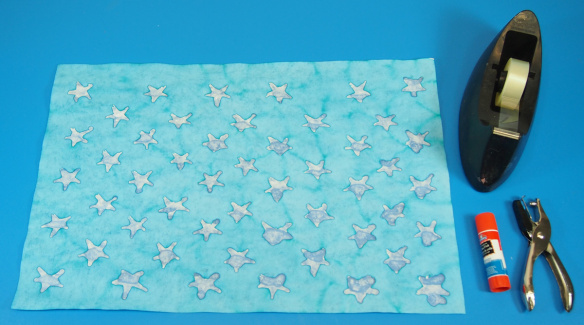
P6179714 Take your main windsock design and prepare it for lift-off!
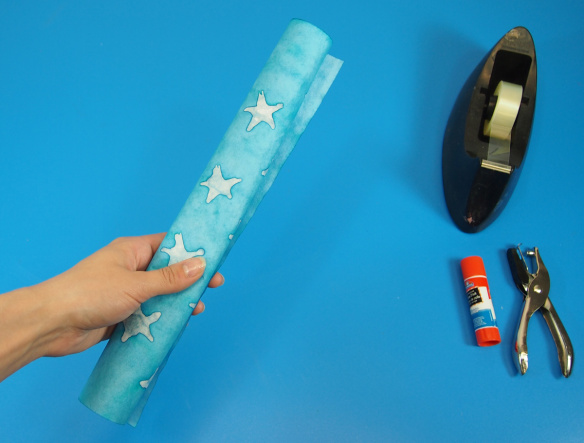
P6179717First, roll the windsock into a tight tube. This will help it retain a cylinder shape once you string it up.
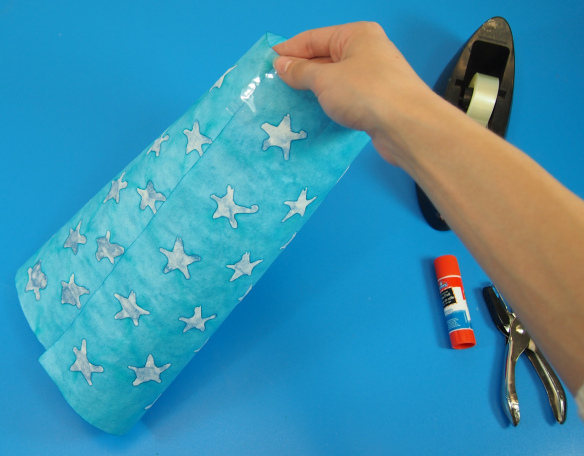
P6179719 Unwind the tube until the ends are overlapping by 2″ on both sides. Tape the edges together.
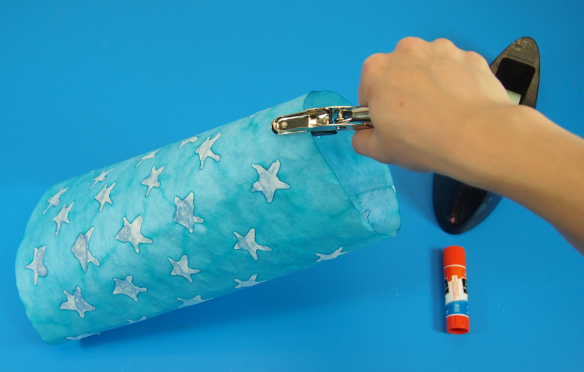
P6179724 Next, make four holes at equal intervals along the top edge of your flag windsock.
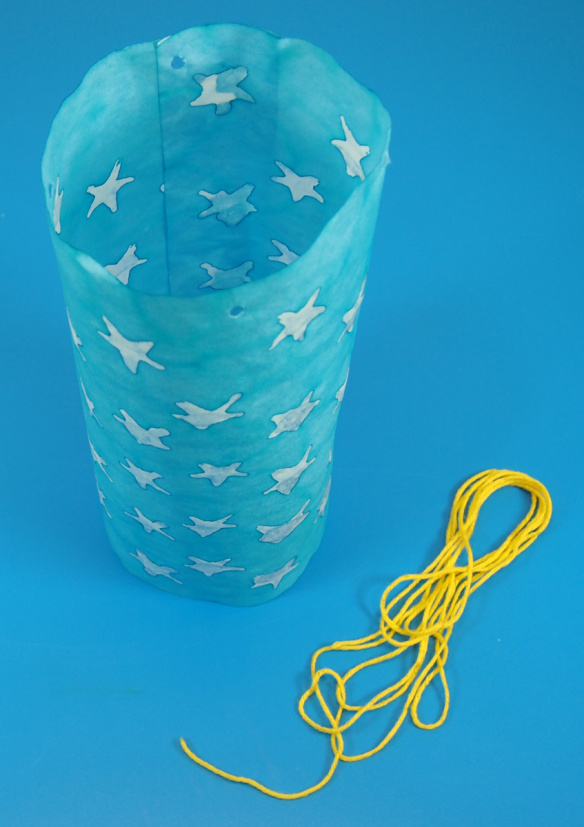
P6179726Grab a large run of yarn, about 2 yards (1.8 m) in length.
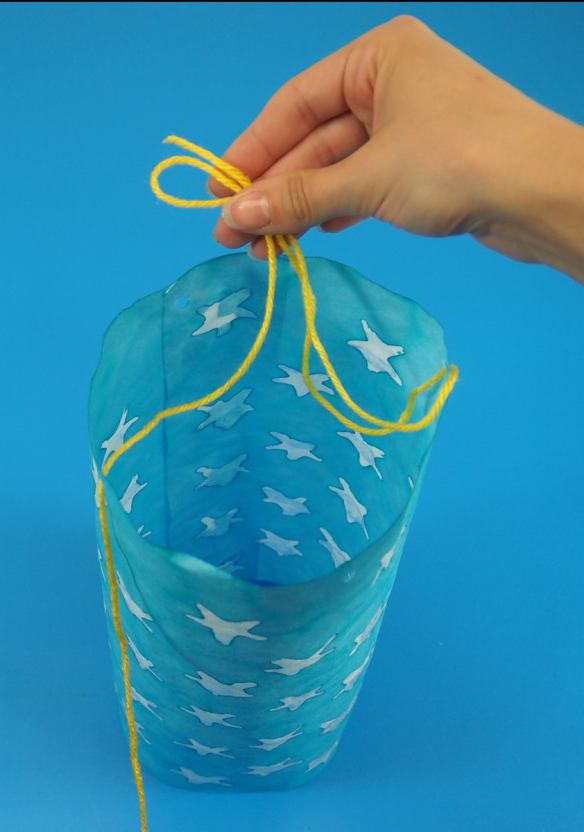
P6179729 Loop one end through a hole and hold. Make a second loop with the other end of the yarn and hold that along with the first strand. Use the remaining yarn to pass through a second hole.
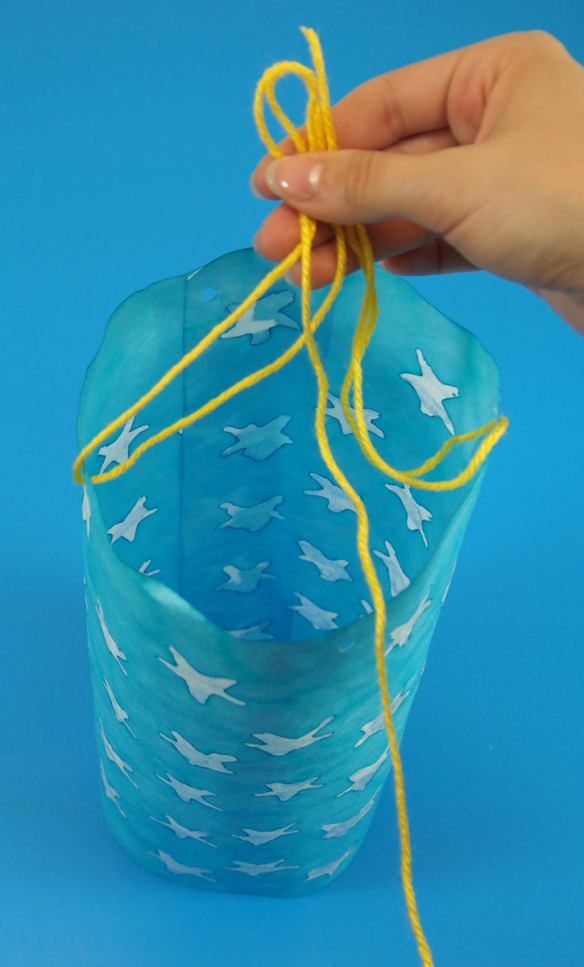
P6179731Loop back up and hold the loop in your hand along with the rest of the previous loops. Pass the end of the yarn through a third hole.
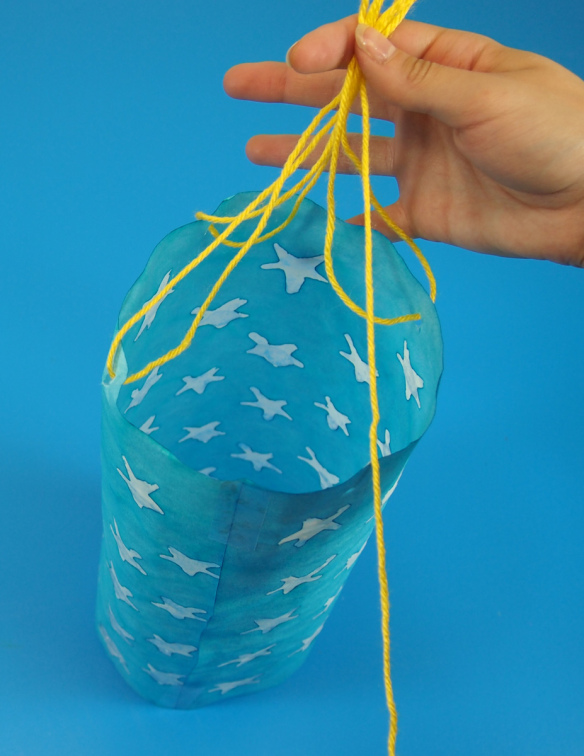
P6179732Loop back up through the hole and hold the loop in your hand with the rest. Thread the final stretch of yarn through the fourth hole.
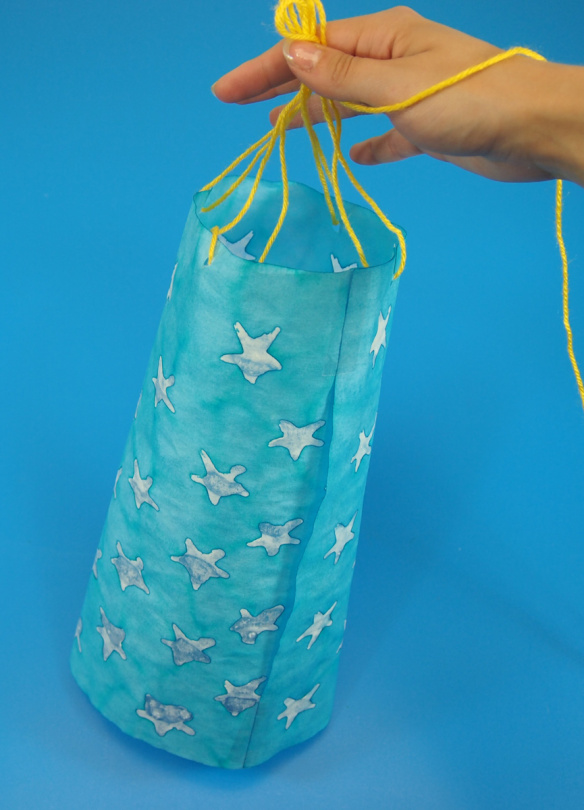
P6179734Then loop back up and hold this loop in your hand with the remaining loops. There should be some leftover length of yarn to use as the string from which you’ll hang the windsock. Twist all the loops together, as one, into a tight knot.
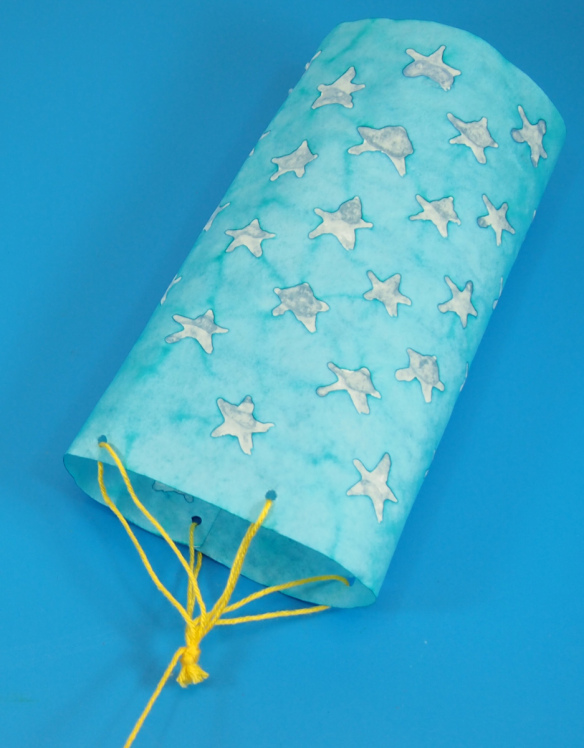
P6179737You can trim some of the excess loops above the knot part. Just make sure not to snip the long piece of string! The first part of the windsock should look something like this.  
P6179681 Now it’s time to make the streaming ends for the windsocks. Place the Color Diffusing paper lengthwise, then spread the paint any which way you’d like. Make lines, spots, color entire strips of paper or intertwine the colors together.
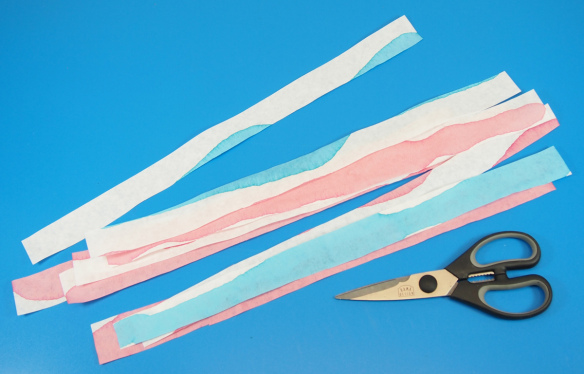
P6179712When this particular sheet of paper has dried, cut it into strips lengthwise.
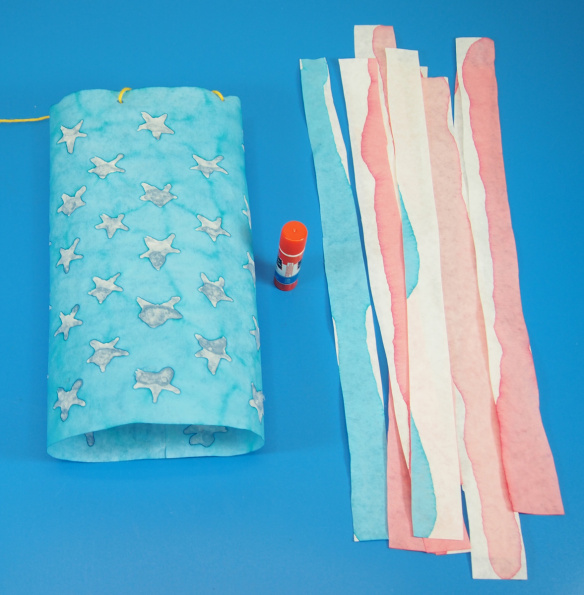
P6179747 Now grab some glue! We’re ready to attach the final portion of the windsock.
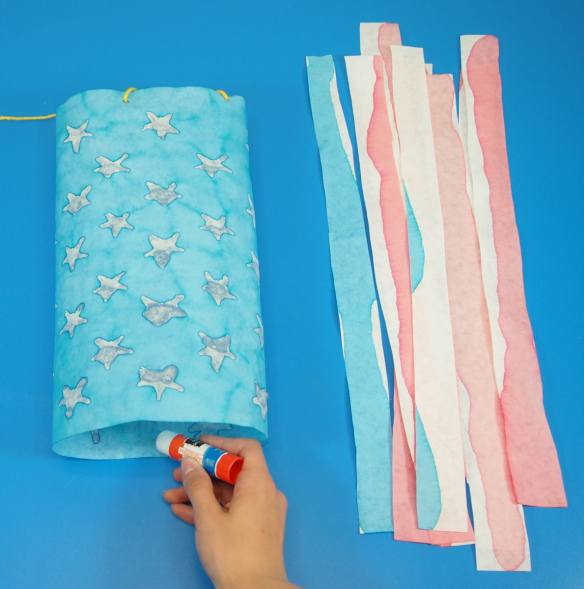
P6179748Put a bit of glue on the inside of the windsock’s bottom edge.
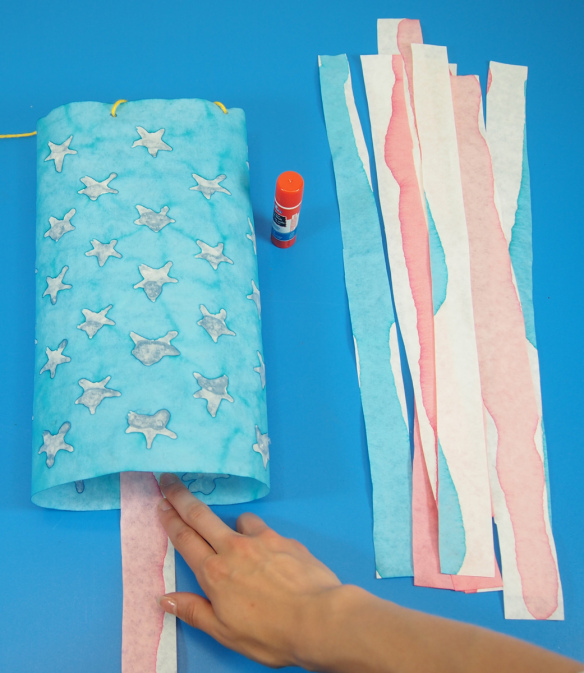
P6179749Press a streamer down onto the glued portion. Space out your streamers into equal intervals and continue all the way around the bottom of the windsock.
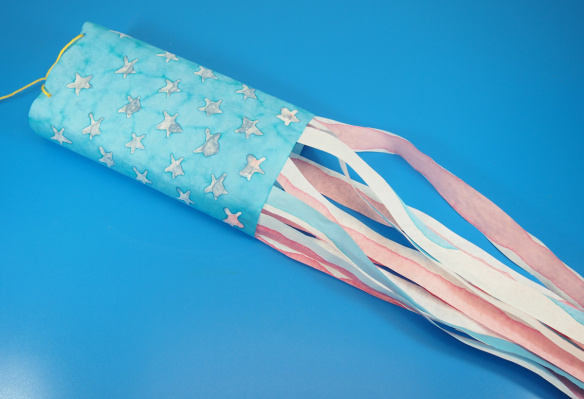
P6179752Here’s a look at our windsock! Isn’t it a beaut!
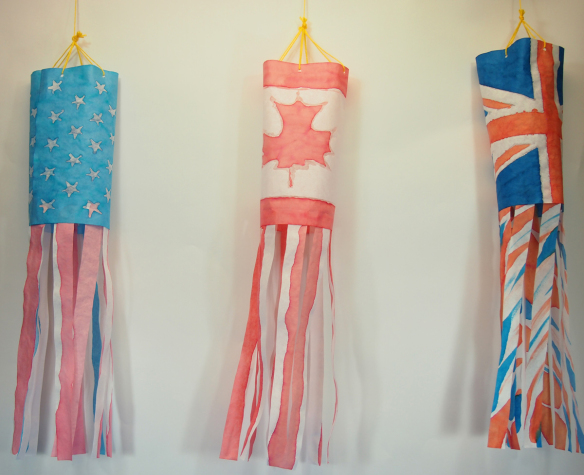
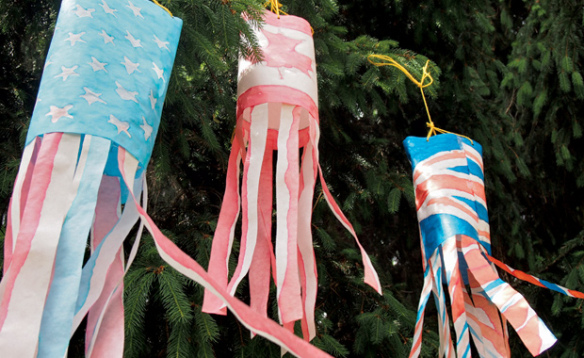
P6179757 You can see further completed designs here, including the American flag, Canadian flag, and the Union Jack!
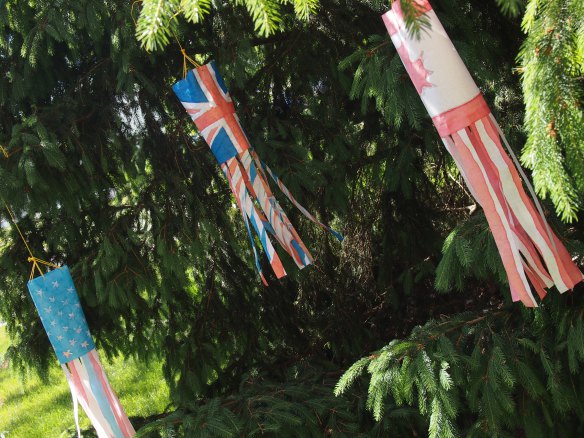
OLYMPUS DIGITAL CAMERA Here’s a shot of our windsocks fluttering outside from our local pine trees!
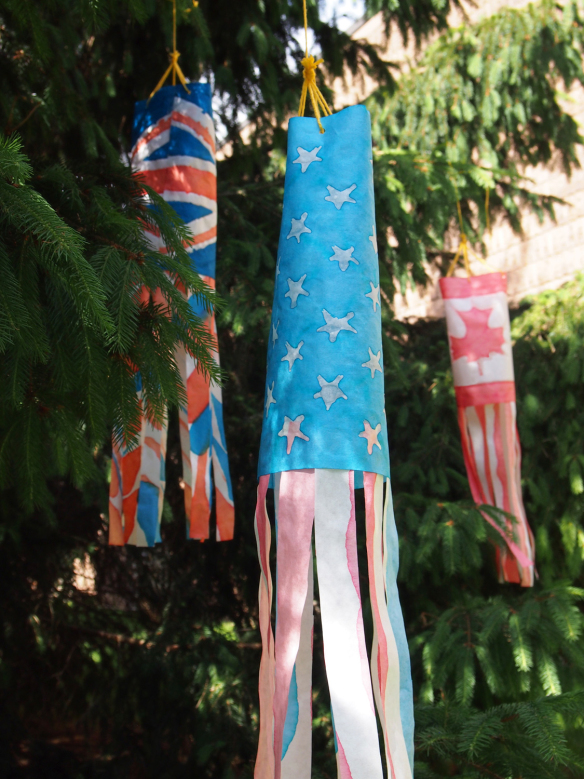
P6209823 Another gorgeous look at our lovely flag designs! Watch how they flutter animatedly in the breeze! Line-03 Thanks for checking out this post! Like us on FacebookShare this post with your friends, or Subscribe to this blog today to receive original craft project updates every Monday, Wednesday and Friday!

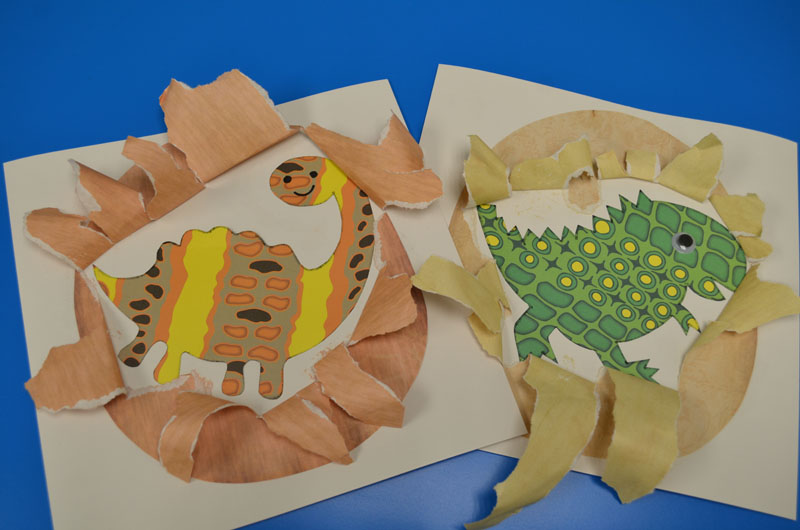
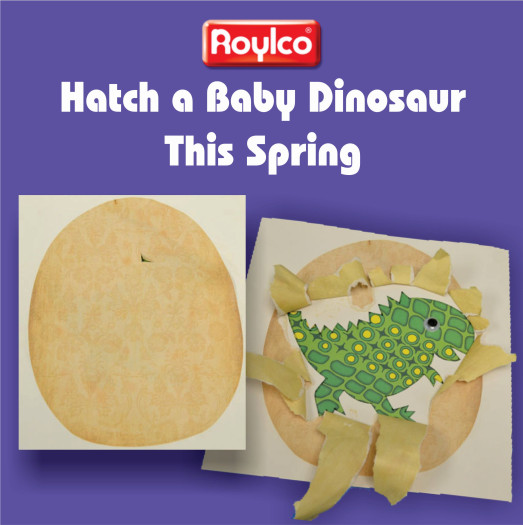
Hatch a Baby Dinosaur This Spring

Roylco baby dinosaur lesson plan

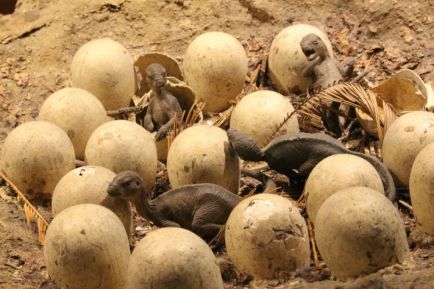
Most young children are fascinated by dinosaurs. They are curious about these mighty creatures that lived millions of years ago. Where did the dinosaur come from? Today we are going to introduce a hatching baby dinosaurs craft activity that children will love. This is a great class activity when you are teaching about dinosaurs.  You can also introduce it at the end of the dinosaur discovery tour at the museum.  Use this activity to talk about how a baby dinosaur grows inside the egg. Children will love to help the baby dinosaur hatch from the egg.

Age: 5+

Duration: 10 – 15 minutes

Learning Outcomes:  Learning evolutionary concepts. Practice drawing skills. Exercise Fine motor skills. Growing children’s interest in science.

You’ll Need:

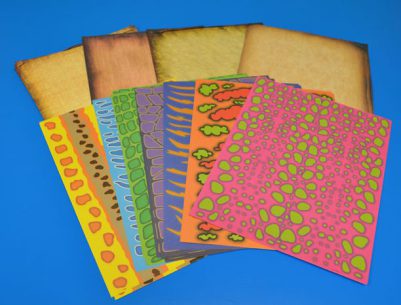
Let the children choose one piece of paper with their favorite colors and patterns (R15311 Dinosaur Print Papers).

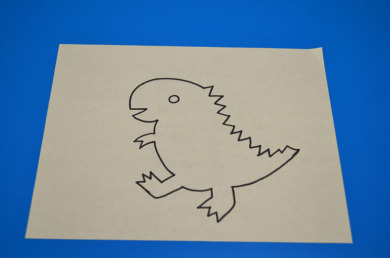
Encourage children to use a pencil to draw the baby dinosaurs at the back of the dinosaur print paper. After they draw the baby dinosaur, they can use the black marker to trace it.

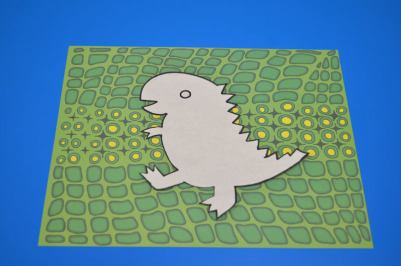
Then cut out the baby dinosaur.

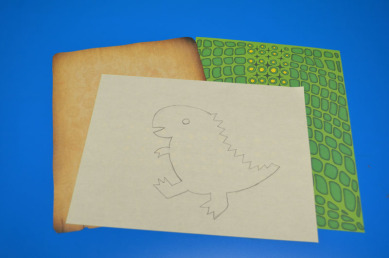
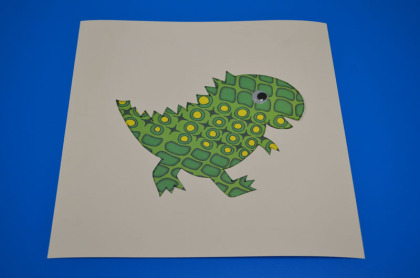
Glue the dinosaur on the white craft paper. You can glue the eye or draw the eye on the dinosaur.

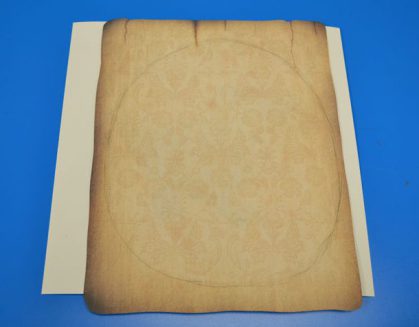
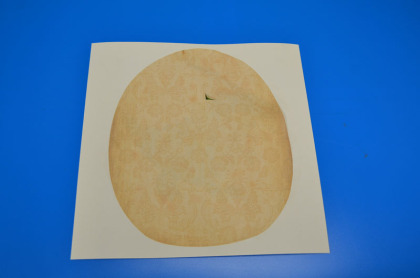
Choose a piece of antique paper ( R15286 Antique Paperthat you like and lay it on top of the baby dinosaur. Use a pencil to draw an egg outline and cut it out.

Add glue to the outline of the brown egg and place it on the white craft paper over top of the baby dinosaur. Make a small cut in the middle the egg.

Ask the children to write their names on the white craft paper and exchange their crafts.

Here comes the exciting moment of this activity.

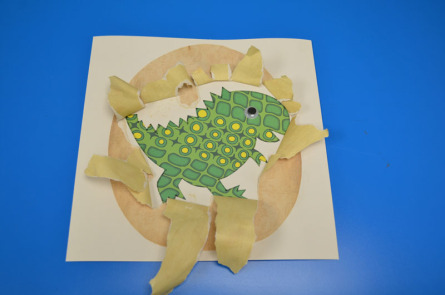
Invite children to help the dinosaur hatch from the egg by tearing open the paper (where you have made the small hole) to reveal the baby dinosaur inside the egg!

It’s a lot of fun for children to discover the different types of baby dinosaurs.

Please visit https://roylco.com/shop/r15311-dinosaur-print-papers/ for more information.

Bundle Savings

Get all the Roylco items used
in this project and save 15%!

$14.52 USD
bundled price
Add Bundle
to Cart

Let’s Make A Window Cling!

BP- Window Cling Rubbing Plates 4 Large

Age: 4+

Duration: 30 minutes (or more, depending on your design preferences), plus drying time.

Learning Outcomes:

We’re going to be mixing ingredients, painting and decorating with our creations.  We can learn about the subjects related to our rubbing plates, nature, science, etc. And, we can even have a discussion about sunlight and color as we enjoy our window clings.

Here’s what you need:

Any of our Rubbing Plates will work perfectly for this project.

Non-Toxic White Glue

Dish Soap

Food Coloring (liquid or gel)

Glitter (optional)

Brush (foam or bristle)

Sandwich Bag (optional – for detailed application of color)

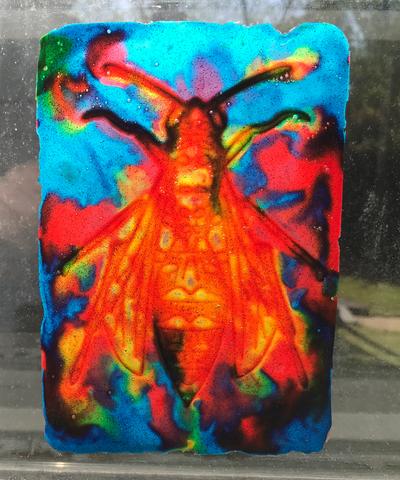
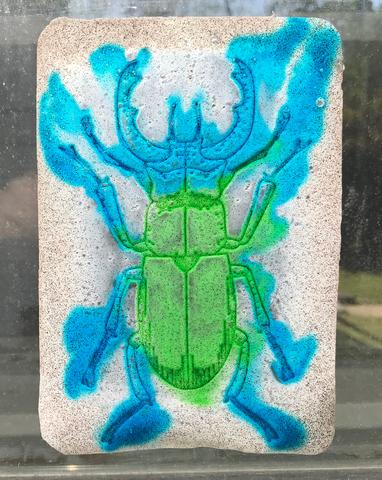
If you’ve worked with our rubbing plates before, you’re going to love this project. It’s easy — and fun to mix, make, and use! I’m using the Insect Rubbing Plates (R5803), but our entire line of Rubbing Plates can be used in this way.

We’re going to create a very cool window cling using non-toxic white glue, some dish soap, and food coloring (you can use liquid or gel food coloring — both work great).

Kids as young as 4 will enjoy this project, with some help and guidance. Kids 4+ will need minimal help but will probably have an excellent time.

Here’s how you do it:

Step 1:

Anytime you’re working with glue things can get a little messy. You’ll be doing yourself a favor if you put some wax or parchment paper down on your work surface. This will also help to keep your rubbing plates from sticking to stuff.

Step 2:

Time to mix some colors! All these materials are safe, so it’s okay to use a cup or a bowl from the kitchen to mix your ingredients.

Start with about 2 tablespoons of white glue. Add a couple of drops of dish soap. It’s okay if your measurements are not super precise.

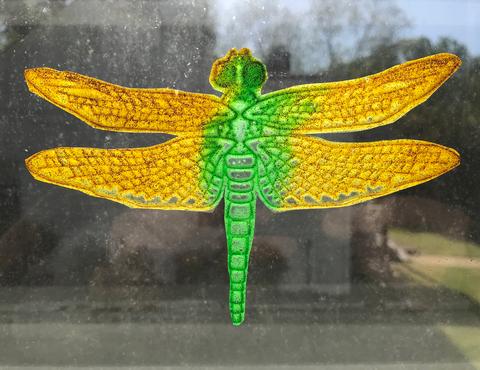
Next, add the food coloring. A little is plenty. For darker colors, add more. If you don’t have the color you need, try mixing the colors you have. You could also leave the color out to create a translucent appearance (perfect for bug wings).

Consider this:

If you want to use more than one color, you’re awesome! It might be a good idea to prepare all your colors during this step.

Also, glitter doesn’t work great everywhere — but it works great here! Add some glitter to your color during this step, and it will really add a nice, sparkly effect to your window cling. It will be so pretty when the sun is shining through!


Step 3:

Before you begin, make sure to use the side of the rubbing plate on which the pattern is sunk (not raised). It’ll help to keep the color in place.

A foam, or bristle brush, will work great for covering the bug with your mixture. For more precision, try using a pastry bag. Just pour the mixture into a sandwich bag, pushing it down to the corner, then snip a tiny hole in the point.

Really precise images will take some practice. You learn the best amount of glue as you go. But, keep in mind, the thinner the coverage, the more fragile your window cling will be.

Step 4:

We need to let it dry. Depending on how much glue you used, it could take up to 12 hours to dry.

Step 5:

Removal. You know how when you get some glue on your finger, and after it dries you peel it off, and somehow that makes you really happy? This step is like that — times 10.

Watch the edges. The glue can get under the plate, so make sure to peel any away from the back.

AHHhhh… that was fun.

Now you have a window cling!

Consider this:

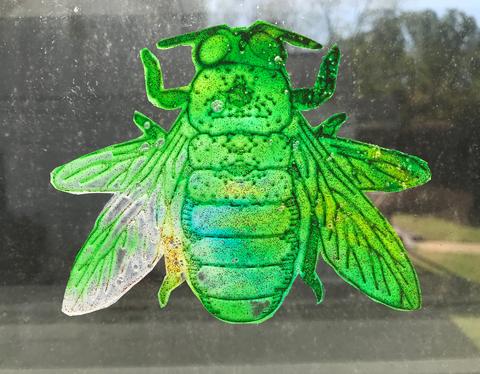
Trim the edges for a more elegant design.

Step 6:

The time has come to display your creation! Find a good spot in the window and give it a quick wipe with a damp paper towel. Be sure to dry it. Now, use your wet paper towel to dampen the flat side of your window cling. Press it firmly onto the window.

You did it!

Roylco Window Cling Tie Dye Look

Roylco Window Cling Blue and Green Bug

Roylco Window Cling Green Cut Out Bug

This is a great way to add a fun, science and nature theme to any environment —classroom, bedroom, kitchen, office — anywhere you want to hang up some inspiration.

Use your rubbing plates as many times as you like to create more window clings. Experiment with colors, color placement, backgrounds, trimming… get creative and make it your own!

Roylco Sketch Art of Kid on Tricyle

Green Screen Tips, Tricks and Technology


kids filming with green screen.jpg

Today we will explore some tips, tricks and troubleshooting strategies for making amazing green screen videos in your classroom! 

Using a green screen is much less frustrating that creating stop-motion animation, but there can be a learning curve with any new style of film making! This post is designed to walk you through the process of creating puppets, filming them, and finally editing your footage to create a finished video!

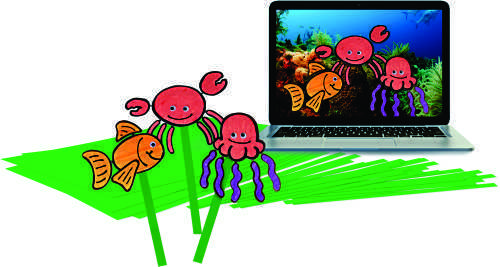
In Hollywood, green screen filming is referred to as “Chroma Keying,” and it is a technology that allows film makers to overlay one piece of footage over a background by making the green disappear! Then the background shows up behind the foreground action. We have done a picture-in-picture video to show you the before and after green screen technology:

As you can see, the green background disappears in the final video! To get started with your project, however, first you’ll need some puppets.

Create Your Own Puppets

When you are working with young students and technology, it’s important to integrate art into the process! We have created a set of 72020 Green Screen Live Action Kit Reproducible Artwork Templates for six different designs of puppet that can be used with green screen filming. When you are decorating your puppets, remember to stay away from green and blue paper, fabric, markers, crayons, pencil crayons, paint, and other accessories. When you run your footage through editing software, the blue and green in your puppets will disappear too!

For the Star, we suggest using a very lightweight cotton fabric, tracing the star template, and cutting out the shape from the fabric. Then thread beads onto each point of the star, and knot the fabric to keep the beads in place.

The second page features two heads. Try printing this sheet out on our skin tone paper, and using the templates to create “talking mouth” puppets!

The third page features smaller people shapes, but you can use folded paper, braided yarn, or strips of fabric to create movable legs.

The profiles on page four are perfect for “talking head” puppets. Use a brad to hold the top and bottom halves of the head together while allowing movement.

If you want a puppet with four movable limbs, page five of the templates is for you! Each puppet torso is accompanied by a hands and feet. Use paper, fabric, or chenille stems to create movable limbs.

Finally, we have created an accordion fold puppet! This template has no legs or arms, but when you attach the face to a decorated accordion fold body, you have a unique puppet that moves in some very fun ways!

Once your students have their puppets made and scripts written, it’s time to think about the filming process!

Filming Process

There are two major components to the filming process: the background and the foreground.

The background is what will replace the green screen in your final video. This background can be a still image dropped into video editing software, or you can film a live action background. Just remember, if you are filming a live action background, you need to be able to match the motion of the camera to the motion of the puppets filmed on the green screen. This means that it will be easier to film your puppets on the green screen if you film your background first.

Once you have your filmed background, it is time to film your green screen shots. We have found that this kind of filming (at least for a classroom setting) works best on a flat surface, like a desk or on the floor. Some key steps to take to make editing easier include:

  • Make sure the green screen is completely flat. Any folds, curves or wrinkles can create shadows, and change the color of the green. This makes it more difficult to chroma key the background out in editing.
  • Make sure the green screen is evenly lit, with no bright spots or super dark patches. This can cause weird green patches to show up in your finished video.
  • Remember, your hands aren’t green! We provide extra long sticks in the green screen kit so that you can move puppet limbs. If your hands are visible on camera, they will be visible in the finished version. It is possible (but VERY difficult!) to remove small intrusions like fingertips or long hair from the very edges of the green screen, but it’s easier in the long run to just re-film a shot if your hand gets caught on camera.
  • When you are manipulating your puppets, make sure they stay flat against the green screen. If you lift them up, the shadows may not delete smoothly in editing.
  • We strongly suggest recording dialog, music and sound effects separately, especially if you are filming puppets! That way you don’t have to film in a quiet location, and the puppeteer and camera-person can talk through the filming process as they are filming.
  • Depending on the technology available in your classroom, you can use tablets, smartphones, video cameras, go-pros or any other device for recording live footage. Just remember that the quality of your video will change with the quality of your camera! For very young filmmakers, we suggest using an iPad to film, and then importing the footage into iMovie for editing. The software is relatively easy to use, and there are plenty of online tutorials too!

Once you have your green screen footage shot, you are ready to take your project to the editing suite!

Editing Software

Editing your movie is going to change depending on your classroom’s technology, software suites, and operating systems. However, iMovie and Windows Movie Maker both feature chroma key software. If you have Adobe Premier Elements, you should have a chroma key feature and you may have a “non-red” key. The non-red key is less specific than green or blue chroma key software, and you may find that colors that are made up with blue or green fade out a little. Usually you can adjust the opacity (how transparent or not) of the background to minimize the green screen and maximize the colors in your puppets.

When you edit your movie, there are a few things to keep in mind:

  • Get rid of dead air and mistakes by trimming you video clips! Cutting out moments where nothing is happening onscreen helps keep the action moving and stops viewers from getting bored.
  • Add sound in editing! Your soundtrack can feature dialog, music or sound effects. Drag and drop your sound clips to synchronize sound with pictures.
  • Remember, most editing software allows you to split clips and move the smaller clips around, so if you didn’t film in order (and most Hollywood Filmmakers don’t), no problem!
  • Did a hand accidentally slip into the corner of the screen? Consider adding a frame or vignette in editing to hide the errant digits.
  • Do your puppets look unnaturally large or small against your background? Try scaling your puppet clips up or down in size to adjust. Remember though, this may affect how far over or how far up and down your puppets appear to move on the background.

Overall, remember to have fun! Young filmmakers can also visit the library for text resources on how to achieve certain kinds of shots and angles. This process will involve some trial and error; that’s ok! Filmmakers like Steven Spielberg, Orson Welles and Alfred Hitchcock all “broke the rules” to invent new ways to visually tell stories on film. George Lucas and Peter Jackson helped pioneer green screen technology, and our hope is to inspire students to be our next generation of filmmakers.

For additional resources about film history and film production, visit Crash Course: Film History and Production on

YouTube: https://www.youtube.com/watch?v=avAALYc7jw8&list=PL8dPuuaLjXtN-Bd-H_TGq72CN50Fpv_JX


Line-09

Like us on FacebookShare this post with your friends, or Subscribe to this blog today to receive original craft project updates every week!


Spotlight On: Green Screen Live Action Kit

green screen kit image

It’s a bird! It’s a plane! It’s…Green Screen filming!

Roylco would like to introduce you to our new R72020 Green Screen Live Action kit! Our kit includes six 18 x 24” (46 x 61 cm) plastic green screen sheets and twenty-four 1 x 18” (2.5 x 46 cm) green sticks. Go to our website, https://roylco.com, and print off instructions for 6 puppet bodies to use as stars in your videos!

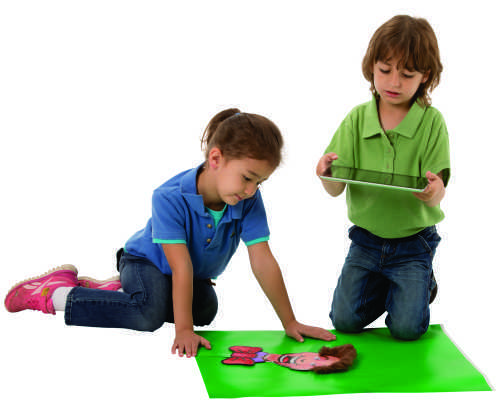
The process is simple! Start by creating your puppet using any of the templates. Tip: Avoid using green and blue when decorating your puppet—the software that will make your green screen disappear will also make any green or blue portions of your puppet disappear! Once your puppet is decorated, use the green sticks to manipulate the body (and any movable parts). The easiest way to create an awesome video is to work with the green screen lying flat on a table top with the camera (or tablet, or smartphone) held over top. This prevents shadows of the sticks from being visible in the finished video.

When you are filming your puppet, there are a few tips to keep in mind! First, keep your green screen evenly lit; shadows and bright spots mess up the editing software and you may end up with unwanted green patches. Second, remember that your hands are not green! If they end up in the shot you can edit them out but it is a challenging process. Third, remember that your background can be as complicated or simple as you want. You can choose a still image or film a background that moves!

Once you have your footage, import it into your preferred movie editing software. Depending on your device and software, this step will be a little different for everyone. Usually the software will be called Chroma Key. iMovie, Windows Movie Maker and Adobe Premier Elements Editor all have versions of this software. There are lots of online video tutorials to walk you through your fist use of chroma key software!

We have created a quick example video for you!

Line-15

Like us on FacebookShare this post with your friends, or Subscribe to this blog today to receive original craft project updates every week!

Throwback Thursday: Crafts for the Holiday Season

Feature-Image-2012XMASCelebrating the season doesn’t mean just focusing on Christmas. You can create inclusive crafts that all of your students will love to make. Here are some suggestions for fun art projects that are open ended enough to relate to Christmas, Diwali, Kwanzaa, New Years or just the first snowfall!

Practice patterning and sequencing while creating beautiful star ornaments! Roylco’s R16024 Stringing stars are a perfect craft base for holiday ornaments that students can give as gifts, hang in their homes, or use to decorate their classrooms! Check out the video we made to start creating strung stars in your classroom:


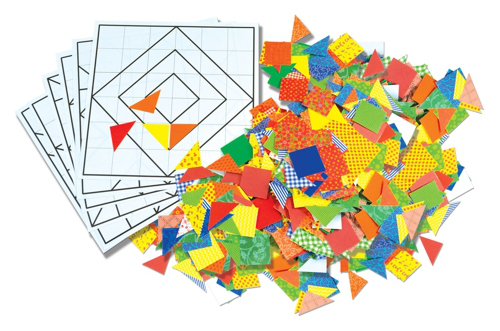
Integrate history, math and art as you put a holiday spin on Roylco’s R15665 Quilt Blocks! Each student can design their own quilt block, and add an image of a symbol of their favorite holiday tradition cut out of construction paper! Put all the blocks together to create a classroom quit that celebrates everyone’s holiday traditions!

15665 Quilt Square Mosaics_Pile.jpg

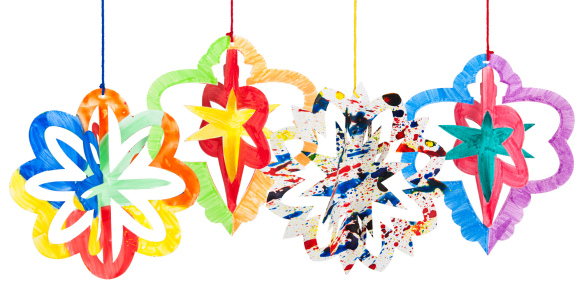
Decorate with color this season! Fold up beautiful ornaments with our special designs–use paint, crayons or markers to color in the shapes. Each of the R51081 3D Ornaments are die-cut into 3 folding designs. This means that when folded, the card ornament transforms into a beautiful arrangement that can be hung from the ceiling or as a part of a giant seasonal mobile. 51081-3D-Ornaments-art_4

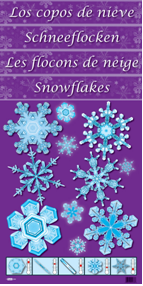
snowflakes color diffusingIntegrate the science of weather while exploring the mathematical concept of symmetry. Start with Roylco’s R2437 Colour Diffusing Snowflake Kit. The kit comes with a beautifully illustrated poster of inspiring snowflakes along wtih a guide detailing the kinds of snowflakes that are formed at different temperatures. The guide provides easy-to-understand information about snowflake formation. Once your students know about snowflakes they can make their own! Start with a pre-cut sheet of colour diffusing paper. The clever design makes it easy to fold and cut wonderful snowflakes. Colour them in with watercolour paint or markers!

Untitled-2


Study the design of snowflakes in more detail with Roylco’s R58622 Super Snowflake Stencils. The twelve beautiful designs are perfect for making wrapping paper, window art and splatter painting.

snowflake stencilssnowflakestencils

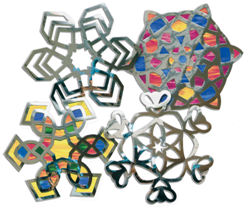
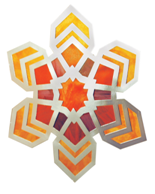
For an outstanding window decoration, use Roylco’s R52085 Snowflake Stained Glass Frames. The metallic silver snowflakes are cut from high quality foil card. Flip them over and glue on tissue paper or Roylco’s R15257 Stained Glass Paper. Light will shine through the snowflakes and cast off wonderful colours!

snowflake stained glass snowflake glass frames

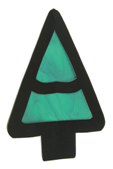
If stained glass art interests you and your students, explore the season with black construction paper. Children can start with a sheet and fold it in half and cut out shapes along the fold line. Alternatively, kids can poke their scissors into the paper and cut out shapes. For a Christmas theme, try creating a Little Town of Bethlehem townscape or make a beautiful star shining in the night sky! Flip the scene over and fill the gaps with coloured tissue paper or Roylco’s R15257 Stained Glass Paper.

stained glass winter stained glass winter stained glass winter

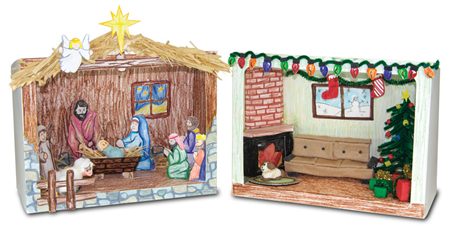
Explore holiday traditions with dioramas! Children can create dioramas on any subject. If they are interested in Christmas, they can create traditional or contemporary scenes. They can explore Christmas traditions in other cultures. Alternatively, they can make a diorama focusing on their own holiday traditions whether that’s taking a ski holiday, celebrating Kwanzaa, Hanukah or Ramadan. The scene can be anything the child is interested in. Provide some direction by putting out a mix of decorative elements such as craft buttons, coloured noodles, pompoms, fabric scraps, craft paper and modelling clay. Don’t forget to include magazines and catalogues along with scissors and glue. Children can flip through the pages and cut out pictures and glue them into their scenes. To make it easier to create wonderful dioramas, start with Roylco’s inexpensive R52094 Set the Scene Diorama Boxes.

diorama

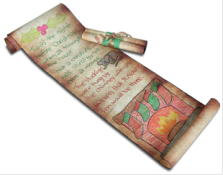
Incorporate literacy into your festive activities. Create family heirlooms by writing the story of Christmas or any religious holiday onto a sacred scroll. Alternatively, children can make up and write down their own creative stories. These stories can make marvellous gifts. The author of ‘Twas the Night Before Christmas, Clement Clarke Moore, originally wrote his poem as a Christmas gift for his family. It’s become a tradition in many Christian families to reread the poem on Christmas Eve. Start with a sheet of Roylco’s R15406 Rolly Scrolly Paper and let children compose their own stories or practice their penmanship skills by rewriting a poem or the Biblical Story of Christmas. Roll up the scroll and send it home with the students.diorama

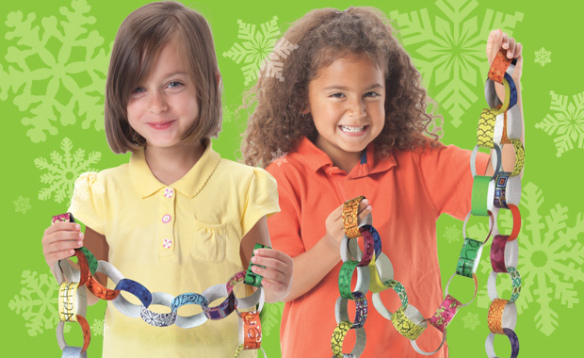
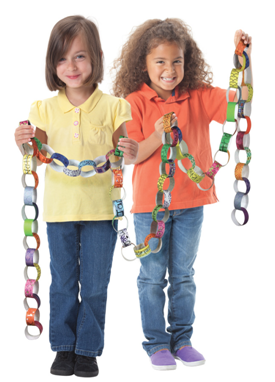
Decorate your classroom with a friendship paper chain! Traditionally paper chains are used to decorate homes and Christmas trees. Use them to celebrate your students. decorative paper chainsStart with good quality craft paper. Roylco’s R15203 Decorative Hues Paper is perfect. The sheets come in a huge range of colours. Cut off strips along the bottom of the paper. The paper is the perfect width (14 cm). Cut off strips that are 2-3 cm wide. Each child writes in his or her name on the paper strip. One student starts by looping their paper link together and taping it closed. He or she then hands the link over to the next child who threads his or her strip through the loop and tapes it closed. Go all the way around the room once or twice to create wonderfully long chains. Use them to decorate your classroom.


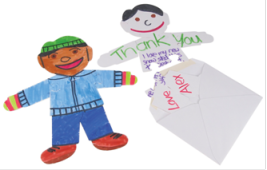
End your seasonal celebrations with Thank You Notes! Integrate writing skills with etiquette and art. Start out with a #10 envelope and Roylco’s R52056 Puzzle Me puzzles. Children write messages on the body of the puzzles and adds decorative details. They then break up the pieces and put them in an envelope to send off to a special someone!

puzzle me

It’s important to acknowledge and celebrate the season in the classroom, however, your celebrations don’t need to be limited to Christmas. Ask your students how they celebrate the season and explore everyone’s uniqueness through pictures, art and stories.

Line-20

Like us on FacebookShare this post with your friends, or Subscribe to this blog today to receive original craft project updates every week!

Steampunk Gears Mask

finished craft

Steampunk glorifies sci-fi without advanced technology! Get kids excited about this unique sci-fi genre and the beautiful artwork the genre has inspired with this sparkly mask!

Age: 5+

Duration: 20 minutes (plus drying time)

Learning Outcomes: Get creative juices flowing with this activity. Talk about a popular literary genre and the art and fashion aesthetics it inspired. Encourage creative play. Exercise fine motor skills.

You’ll Need:

Line-01

step 1

Start with one of our Color-In Masks. These masks are a fabulous craft base for all kinds of projects, and they take paint, marker, crayon and glue very well. For this project, we have chosen to paint the mask with brown tempera paint. The brown gave the mask a wooden look, which we felt stayed true to the aesthetics of Steampunk. The mask might curl up a little when you paint it. Don’t worry, it will flatten out again as it dries!

step 2

We had some very cool glittery card stock in our art room, and it just screamed Steampunk to us! One side is super glittery, the other is plain white. On the white side, we used a pencil to trace the outlines of the gear stencils.

step 3

At first, we just cut the outside of the gear stencil. That looked OK, but when we went to design our mask, we decided that it looked cooler to cut out the insides of the stencil too. This can be a tricky step, and card stock doesn’t bend very well, so our solution to get to the inside pieces was to carefully poke a hole in the middle of the sections of the gears we wanted cut out, and wiggle our scissors in that way. Once the gears were cut out, they looked awesome just on their own!

step 4

By the time we cut out all our gears, the mask was dry and it was time to design! We found that laying all the gears out before gluing them down was the best way to decide how we wanted out mask to look. Once we were happy with the design, we glued the gears to the mask. For the finishing touch, we carefully outlined the eye holes of the mask in silver glitter glue!

step 5

These fantastic masks are perfect for Steampunk-themed parties, or just good old-fashioned creative play!
Bundle Savings

Get all the Roylco items used
in this project and save 15%!

$15.28 USD
bundled price
Add Bundle
to Cart

Line-08

Like us on FacebookShare this post with your friends, or Subscribe to this blog today to receive original craft project updates every week!

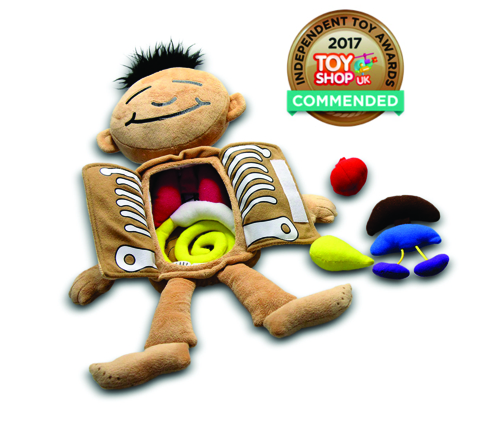
Our What’s Inside Me Doll won a 2017 Independent Toy Awards Commendation!

Doll with Award SMALL

Toy Shop UK is celebrating our R59257 What’s Inside Me Doll!

From the UK Toy Industry Awards website:

About the awards
Our awards enjoy unrivalled respect within the toy industry, thanks to being voted for – not by “experts”, “testers” or “panels” – but by those at the sharpest end of the industry… the nation’s independent toy retailers.

We are uniquely positioned to host such awards, thanks to our ever-growing network of over 900 independent toy retailers that list themselves on this website for free.

Thanks to the wholly democratic entry and voting process, the typically eclectic list of winners is made up of all kinds of companies… from household name behemoths to fledgling start-ups.

See the original post here! Images and original post © Toy Shop UK

We are so proud that our cuddly doll has been recognized! To help celebrate, this post expands on the different organs included with our What’s Inside Me Doll.

Line-14

doll in box.jpg

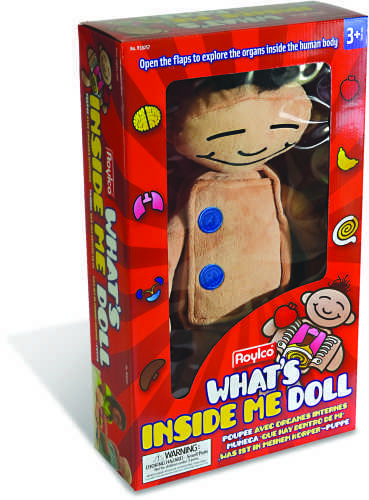
Do you want to be a doctor someday? Well then this is the place to start! Unbutton the flaps on your doll and explore! What are the names of the different organs? What do they do? Once you have taken out all the organs try putting them back in the right places. You probably know what shape a Valentine heart is. Is it the same shape as a human heart? Name the shapes of all the organs! Why is it important to know the different organs? Well… Organs help make our bodies work properly and are parts of the different systems that keep our bodies working. Systems all do different tasks in the body and they work together to keep us healthy. It is very important for doctors to know what the organs in the body are called and what they do. That way if something isn’t working properly they can figure out how to fix it. Doctors are the experts on the human body!

heart.jpg

The heart is the organ that is responsible for pumping blood through your body. Did you know the heart is a muscle? You have probably felt your heart beat faster after running. That means your heart got a workout as well as your legs! Your heart is part of you cardiovascular system. Doctors who study the heart are called Cardiologists. When you go see a doctor they will usually listen to your heart beating with a special tool called a stethoscope. The heart has four chambers in it. The top two are called the atria. The bottom two are called ventricles. They help your heart pump blood by contracting and expanding to move blood through it. If you squeeze the doll’s heart, you will hear the sounds of a heartbeat!
stomach.jpg

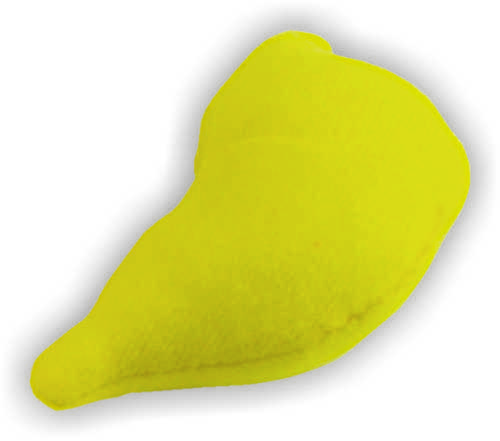
The Stomach is the organ that helps you digest your food. That means it breaks down your food into nutrients that your body uses to give you energy! The stomach is part of your digestive system. Doctors who study your stomach and digestive system are called gastroenterologists. Did you know that your stomach is comfortable when you have a liter of food in it? Your stomach uses acids to break down your food. Why doesn’t the acid break your stomach down? Because the stomach makes a protective layer of mucus that stops the acid from digesting it. If you squeeze the doll’s stomach you will hear a gurgling noise!

intestines.jpg

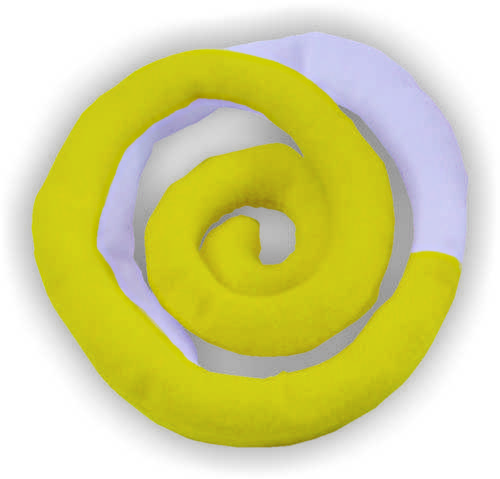
Your Intestines are part of your Excretory system. Did you know that there are two types of intestines? You have a large intestine and a small intestine. The small intestine is about 3cm in diameter and can be between 15 and 32 feet! The large intestine is about 5 feet long. That makes it shorter than the small intestine! Your intestines break down the nutrients in your food even more. They reabsorb any water that is still in the fecal matter before the waste is eliminated. If something is wrong with your intestines you call you gastroenterologist to fix it!

lungs.jpg

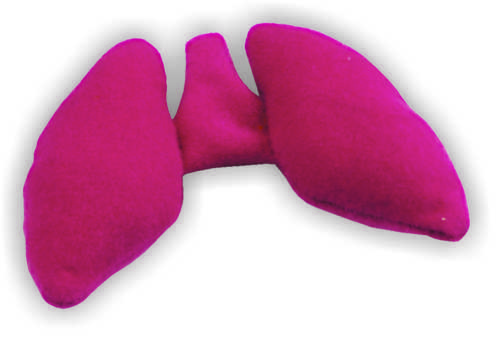
The lungs are the organ that let you breathe. They are part of the respiratory system. Respiratory comes from the word respiration which is the scientific word for breathing. Doctors who study lungs are called pulmonologists. Humans have a right lung and a left lung connected by the bronchial tubes. Did you know your right lung is bigger than your left lung? This is because the left lung has to share space with your heart. Doctors can hear your lungs by using a stethoscope! If you squeeze the doll’s lungs, you will hear the sound of breathing!

kidneys bladder.jpg

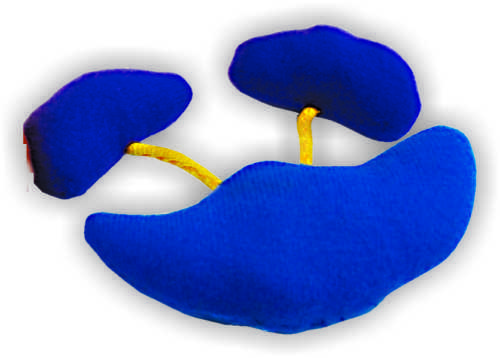
The bladder is the organ that stores your urine until you have to use the bathroom. The bladder is connected to your two kidneys by two tubes called the ureters. Working together these three organs are a part of the Urinary (or Renal) system. The kidneys remove waste and extra water from your body. There are two kinds of doctors who study the Urinary system: Nephrologists and Urologists.

liver.jpg

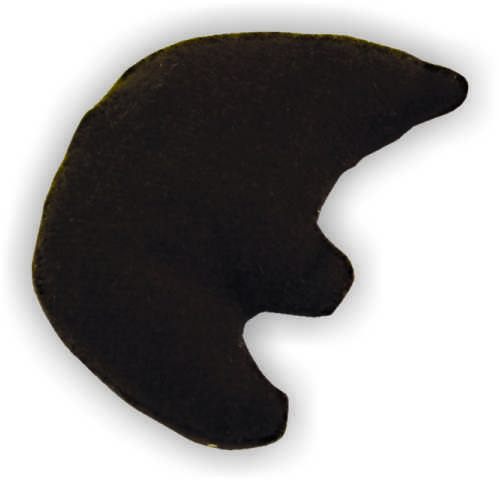
The liver is an organ that does lots of different things! The liver is part of your digestive system and it produces bile. Bile is a liquid that helps break down food. Your liver is responsible for cleaning your blood. This means your liver stores the nutrients your body can use and sends what your body can’t use to your intestines and bladder to be expelled when you use the bathroom. Just like doctors who study your stomach a doctor who studies the liver is called a gastroenterologist!

brain.jpg

Your brain is the organ that lets you think and feel. It controls and is a part of your nervous system. You may have heard people say that your brain is a muscle. Your brain is made of different kinds of cells than your muscles, so while the brain isn’t really a muscle, you DO have to practice thinking to be good at it, just like you have to practice running to be good at it. Your brain is responsible for your five basic senses, your ability to talk and understand language and to feel emotions. Your brain is protected by your skull. Doctors who study the brain and nervous system are called neurologists.

Your skull, spine and rib cage are also organs! Bones make up your skeletal system. The skeletal system is what gives your body the structure to allow you to stand or sit upright. Your spine helps you stand up. It is made from many little bones called vertebrae. Your rib cage protects your heart and lungs from damage. Did you know you have 206 bones in your body? If you ever break a bone, the doctor who can fix it is called an Orthopedic doctor.

Line-13

Like us on FacebookShare this post with your friends, or Subscribe to this blog today to receive original craft project updates every week!

This post was not sponsored for a review. At LittleFingersBigArt, our mission is to present to our readers and viewers the newest and most creative craft ideas that fans of Roylco have made on their own. Our goal is to allow you and other educators and parents to reuse our products in fun ways so that children always get the best educational experience from them!

We’d love to see more ideas like this one! If you’ve got a brilliant craft idea or have made a version of one of our crafts that you would like to share with us, send an email to us with photos, descriptions or a link to your work. We will create a feature post and link back to you with full credit. Contact us through the contact form for more details. We’d love to hear from you!


Art-A-Roni Rainbow

close cut rainbow

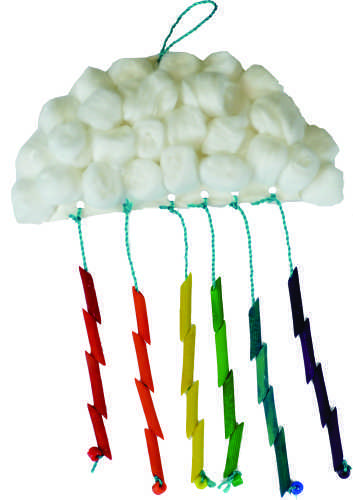
This adorable mobile is a terrific take-home craft!

Practice stringing, fine motor skills and color coordination with this tactile, beautiful craft.

Age: 4+

Duration: 15 minutes

Learning Outcomes: Explore the science of rainbows! Practice fine motor skills.

You’ll Need:

Line-01

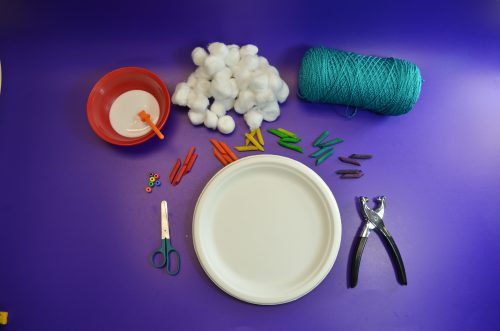
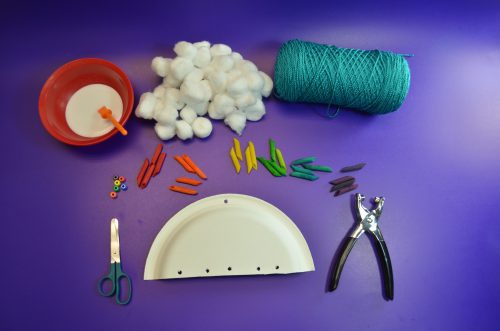
Start by assembling all your materials. To make this craft a little neater, I poured white glue into a Classroom Bowl and I’ll use a Goo Spreader to spread my glue. To begin, I sorted out four each of the long noodles in six colors, and chose a matching bead. step 1

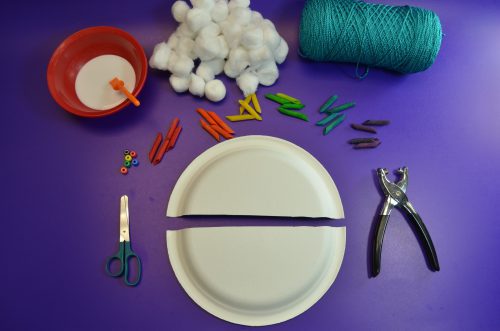
Step one is to carefully cut your paper plate in half. If you are doing this craft in a classroom setting, you’ll only need half as many plates as students!

step 2

Next, use a hole punch to make six holes in the flat side of your half plate. Try to space they roughly the same distance apart. Then punch a hole in the center of the half circle rim of your paper plate. This is where the loop of yarn to hang your mobile will go.

step 3

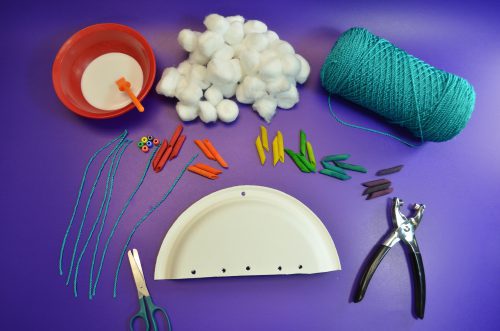
Next, cut six pieces of yarn, each approximately 8″ long. These will be used to string your Art-a-Roni to create the colored stripes of your rainbow.

step 4

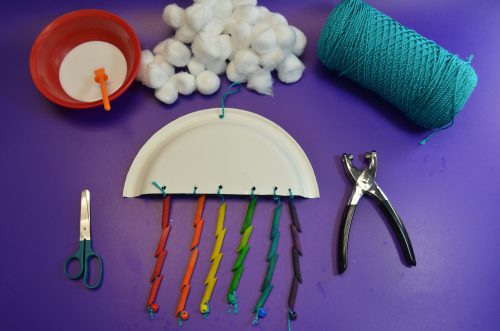
Tie the red bead to one end of your 8″ piece of yarn. Then thread your four red noodles onto the yarn. Finally, tie the loose end of the yarn to the farthest left hole in your paper plate. Repeat with the other 5 strands of yarn and colored noodles. Finally, cut a 6″ piece of yarn, and loop it through the hole in the top of your plate. Tie it in a loop.

step 5

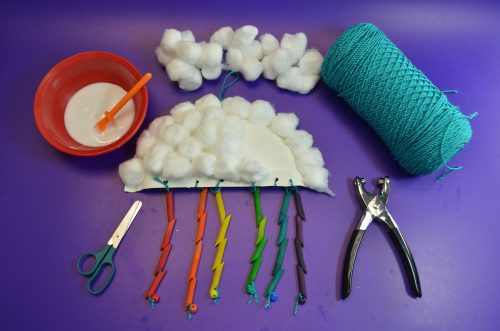
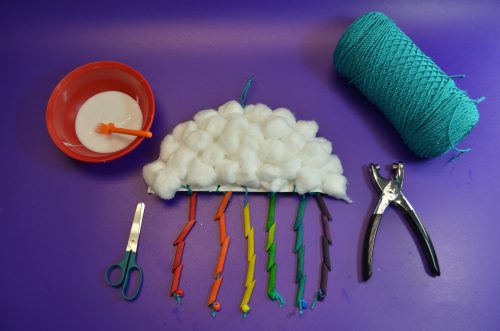
Once your rainbow strands are in place, it’s time to add your clouds! Use the goo spreader to put a thin layer of glue all over your paper plate. Stick the cotton balls onto the paper plate, and allow to dry.

step 6

Once the glue has dried, you have a beautiful mobile to take home and brighten up a room!

step 7

Other ideas to jazz up your mobile include:

  • Use our Junior Paint Spritzers to add color to your clouds! Make sure to cover the yarn and noodles with newspaper for this step.
  • Roll your noodles in glue and a little bit of glitter to add some sparkle to your rainbow!
  • Make a double layer of rainbow strings! Punch a second set of holes above and in between the first set of holes for varied lengths and extra color.
  • Instead of cotton balls, use pom poms! They can be wild colored, or they can be arranged as a rainbow to mirror your hanging strands.

Line-22

Like us on FacebookShare this post with your friends, or Subscribe to this blog today to receive original craft project updates every week!