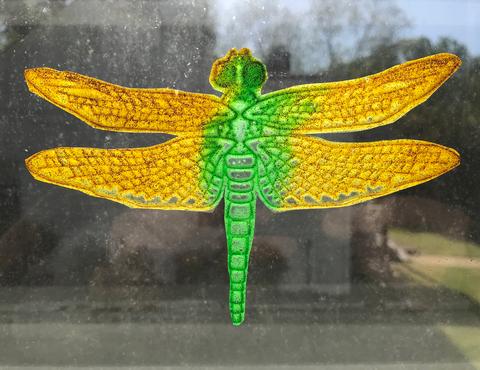
Let’s Make A Window Cling!

BP- Window Cling Rubbing Plates 4 Large

Age: 4+

Duration: 30 minutes (or more, depending on your design preferences), plus drying time.

Learning Outcomes:

We’re going to be mixing ingredients, painting and decorating with our creations.  We can learn about the subjects related to our rubbing plates, nature, science, etc. And, we can even have a discussion about sunlight and color as we enjoy our window clings.

Here’s what you need:

Any of our Rubbing Plates will work perfectly for this project.

Non-Toxic White Glue

Dish Soap

Food Coloring (liquid or gel)

Glitter (optional)

Brush (foam or bristle)

Sandwich Bag (optional – for detailed application of color)

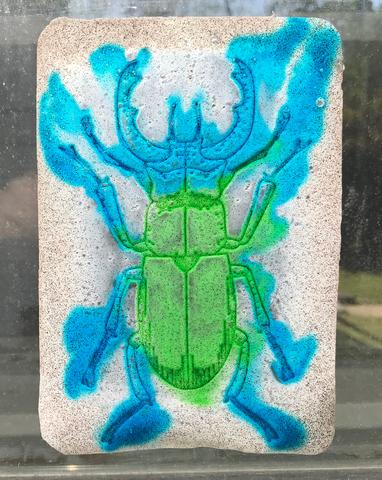
If you’ve worked with our rubbing plates before, you’re going to love this project. It’s easy — and fun to mix, make, and use! I’m using the Insect Rubbing Plates (R5803), but our entire line of Rubbing Plates can be used in this way.

We’re going to create a very cool window cling using non-toxic white glue, some dish soap, and food coloring (you can use liquid or gel food coloring — both work great).

Kids as young as 4 will enjoy this project, with some help and guidance. Kids 4+ will need minimal help but will probably have an excellent time.

Here’s how you do it:

Step 1:

Anytime you’re working with glue things can get a little messy. You’ll be doing yourself a favor if you put some wax or parchment paper down on your work surface. This will also help to keep your rubbing plates from sticking to stuff.

Step 2:

Time to mix some colors! All these materials are safe, so it’s okay to use a cup or a bowl from the kitchen to mix your ingredients.

Start with about 2 tablespoons of white glue. Add a couple of drops of dish soap. It’s okay if your measurements are not super precise.

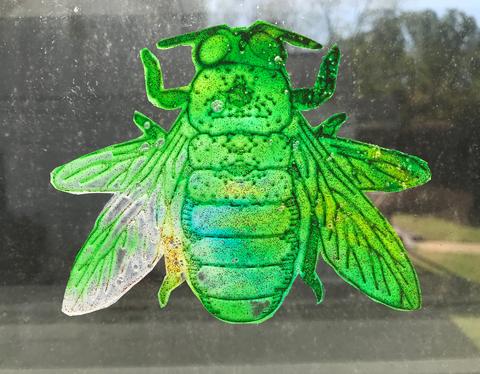
Next, add the food coloring. A little is plenty. For darker colors, add more. If you don’t have the color you need, try mixing the colors you have. You could also leave the color out to create a translucent appearance (perfect for bug wings).

Consider this:

If you want to use more than one color, you’re awesome! It might be a good idea to prepare all your colors during this step.

Also, glitter doesn’t work great everywhere — but it works great here! Add some glitter to your color during this step, and it will really add a nice, sparkly effect to your window cling. It will be so pretty when the sun is shining through!


Step 3:

Before you begin, make sure to use the side of the rubbing plate on which the pattern is sunk (not raised). It’ll help to keep the color in place.

A foam, or bristle brush, will work great for covering the bug with your mixture. For more precision, try using a pastry bag. Just pour the mixture into a sandwich bag, pushing it down to the corner, then snip a tiny hole in the point.

Really precise images will take some practice. You learn the best amount of glue as you go. But, keep in mind, the thinner the coverage, the more fragile your window cling will be.

Step 4:

We need to let it dry. Depending on how much glue you used, it could take up to 12 hours to dry.

Step 5:

Removal. You know how when you get some glue on your finger, and after it dries you peel it off, and somehow that makes you really happy? This step is like that — times 10.

Watch the edges. The glue can get under the plate, so make sure to peel any away from the back.

AHHhhh… that was fun.

Now you have a window cling!

Consider this:

Trim the edges for a more elegant design.

Step 6:

The time has come to display your creation! Find a good spot in the window and give it a quick wipe with a damp paper towel. Be sure to dry it. Now, use your wet paper towel to dampen the flat side of your window cling. Press it firmly onto the window.

You did it!
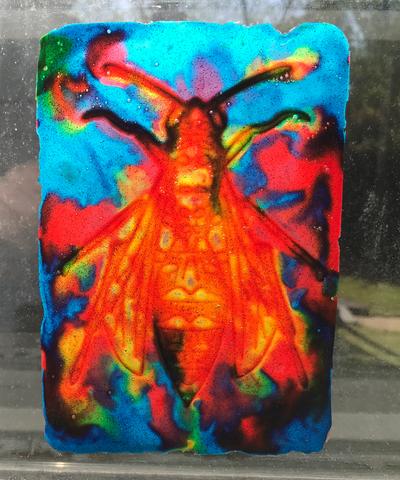
Roylco Window Cling Tie Dye Look

Roylco Window Cling Blue and Green Bug

Roylco Window Cling Green Cut Out Bug

This is a great way to add a fun, science and nature theme to any environment —classroom, bedroom, kitchen, office — anywhere you want to hang up some inspiration.

Use your rubbing plates as many times as you like to create more window clings. Experiment with colors, color placement, backgrounds, trimming… get creative and make it your own!

Roylco Sketch Art of Kid on Tricyle

Mother’s Day Crowns

2014-05-07-FeatureImage

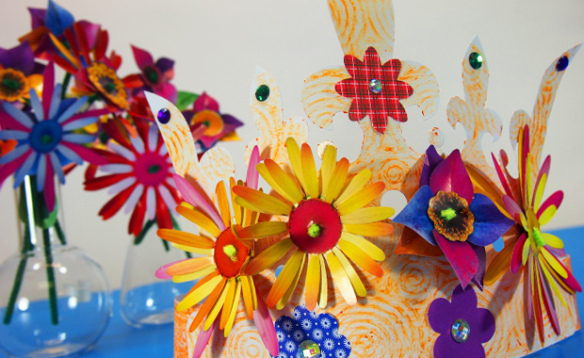
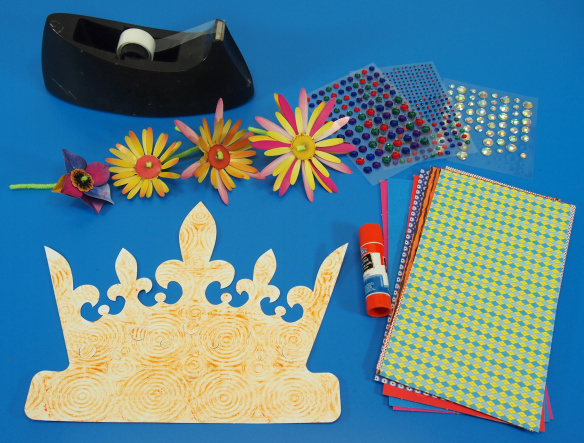
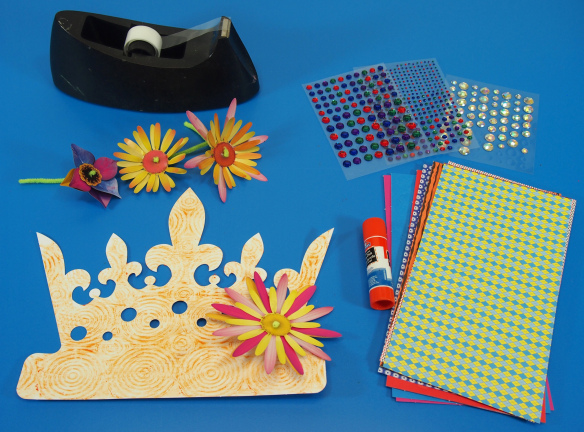
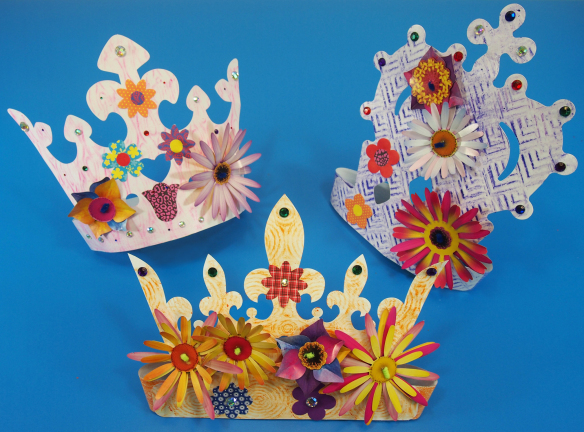
Make Mom a queen for the day with these embellished R22025 Color In Crowns! Add details with collage materials and a few of our own fun craft products, such as R24560 Bouquet Paper and R15657 Wild Flower Paper Bits!

Age: 4+

Duration: 15 minutes

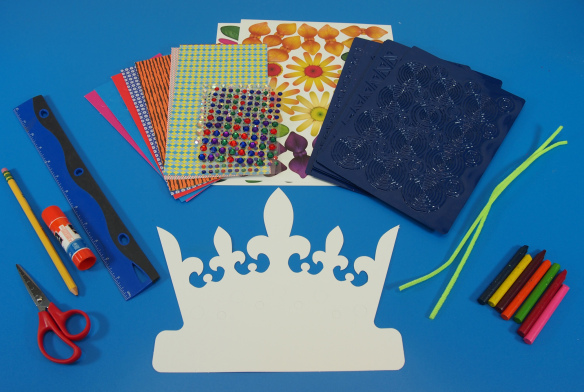
You’ll Need:

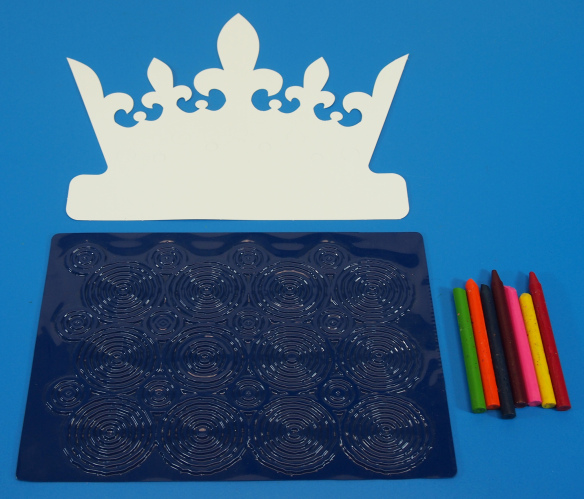
 • R22025 Color In Crowns

R24560 Bouquet Paper

R15657 Wild Flower Paper Bits

R5870 Linear Rubbing Plates

• Pipe cleaners

• Scissors

• Crayons

• Glue

• Sequins / Dollar store rhinestones

• Tape

• Pencil

• Ruler

• Strip of paper from 11 x 17″ sheet (28 x 43 cm)

Line-10

Mom will love to feel lavished with this beautiful, handmade crown. Choose mom’s favorite colors and combine printed paper flowers. Although you can embellish the crown with real flowers, you can use our life-like Bouquet Paper to add on flower combinations that will never wilt!

P1018830

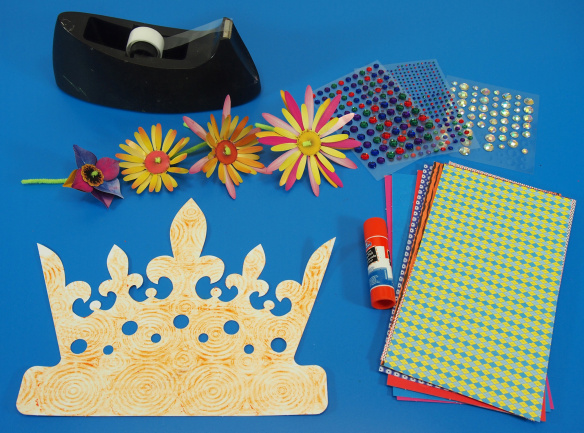
The crowns come in a variety of different styles, so you don’t have to be limited by one type. In addition, each of the crowns features die-cut holes that can be popped out from the interior of the crown. These can be used to attach the bouquet flowers. I’ll show you more in the steps below!

P1018836

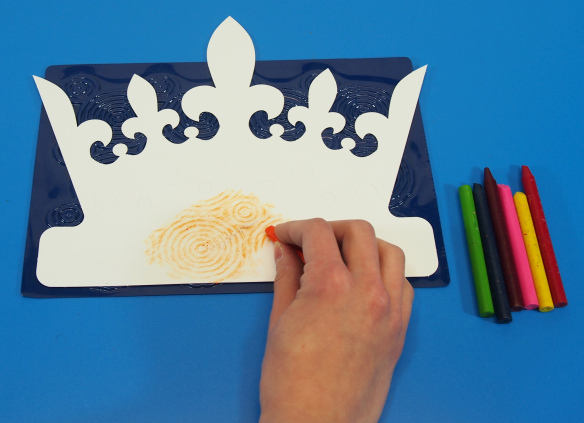
First we will rub a pattern onto the Color-In Crown. Flip the crown so that the non-glossy side faces down onto the rubbing plate pattern.

P1018838

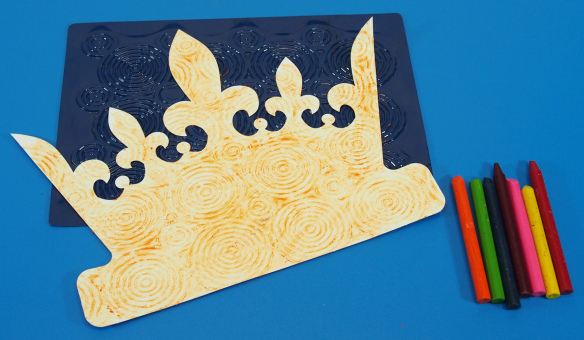
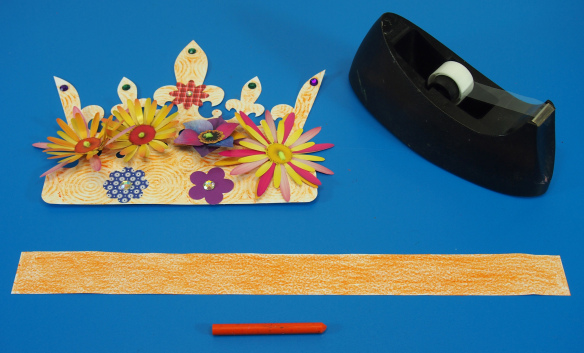
Place the crown onto the rubbing plate. Rub the side of a crayon to help distribute the pattern evenly across the crown. Choose a color that will allow the pattern to really pop out! Darker colors work best, but here, I’ve used orange and it still managed to turn out nicely.

P1018840

All finished. How does that swirl pattern look?

P1018848

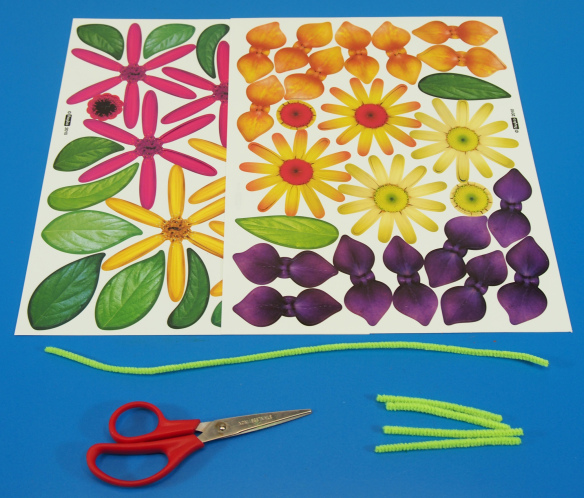
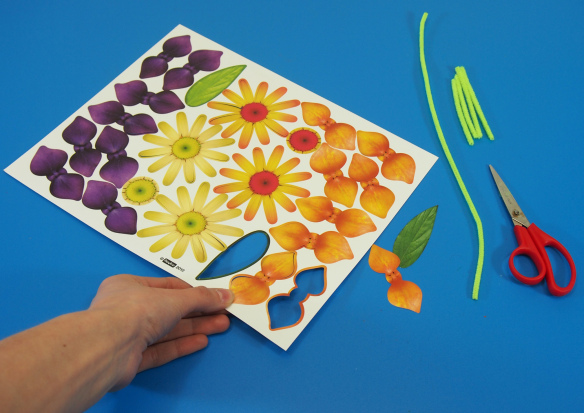
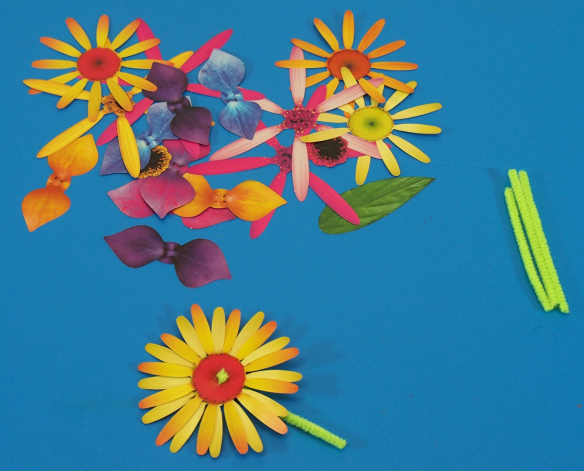
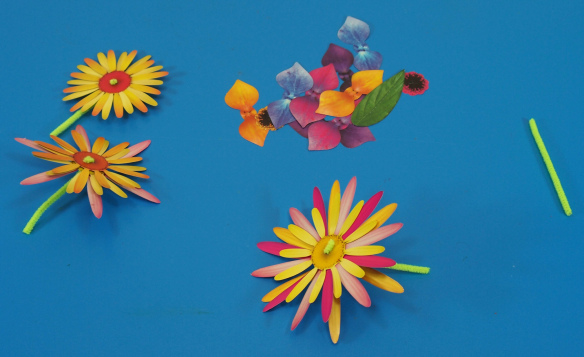
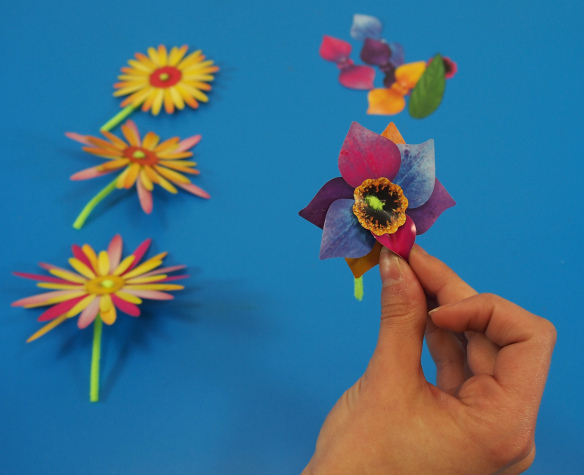
Next, we will create the flowers to decorate your Mother’s Day Crown. First, cut a length of pipe cleaner into quarters. These will be used as stems to hold the Bouquet Paper pieces together.

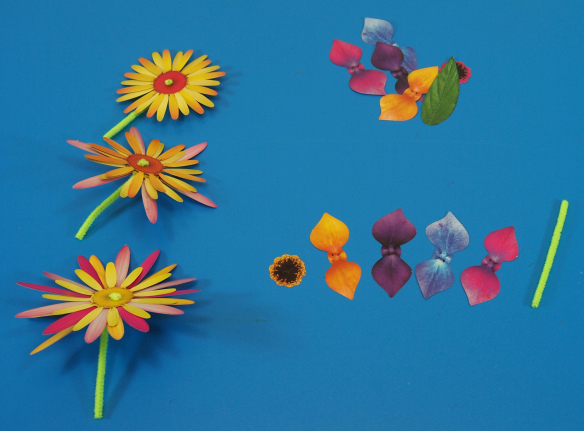
P1018852Pop out the pieces from the paper backing. The graphics are double-sided with different colors so you can easily alternate the design of your flowers.

P1018854

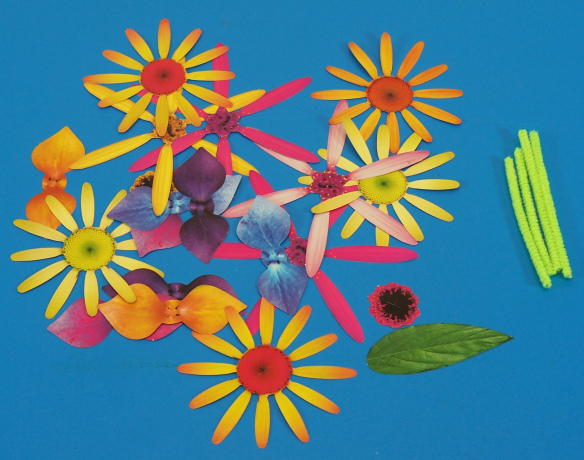
Grab a bunch of different petal colors, shapes and sizes. The Bouquet Paper includes leaf and center graphics.

P1018856

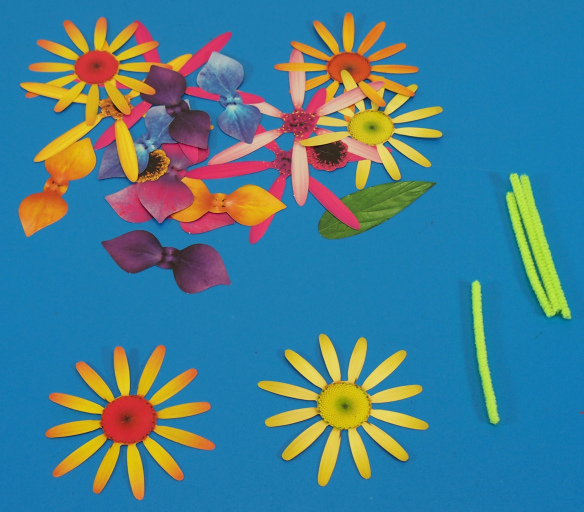
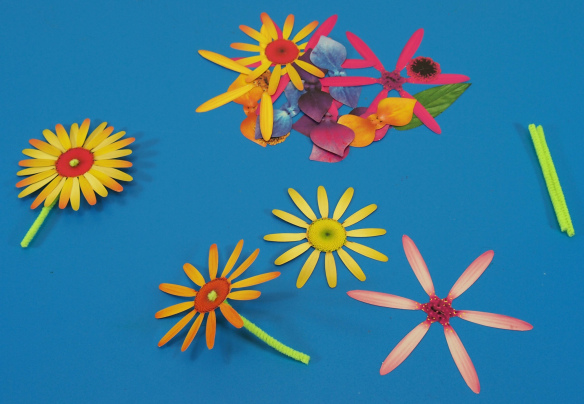
I’ll show you how to layer the various kinds of flowers I will make for the crown. First, choose a daisy-like flower with a red center and its twin with a yellow center.

P1018857

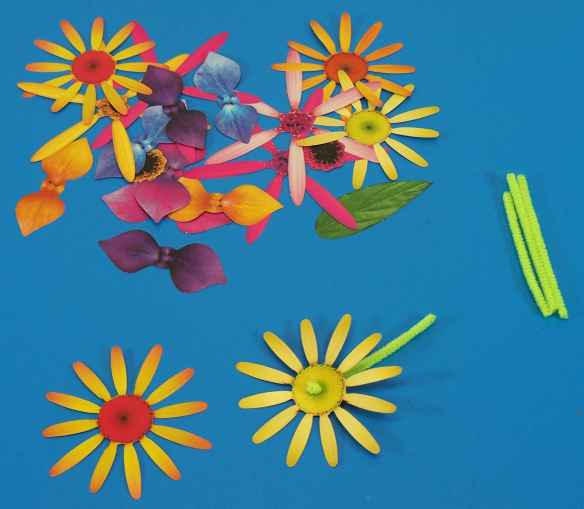
Each Bouquet Paper graphic features small nicks in the paper to help you thread pipe cleaner through. Thread one of the small pipe cleaner lengths through the yellow center.

P1018858

Continue to thread the pipe cleaner through the next flower until it sits perfectly on top of the first. Fan out the petals so that they alternate between dark orange and soft yellow. To secure, press the top of the pipe cleaner on its side like a hook.

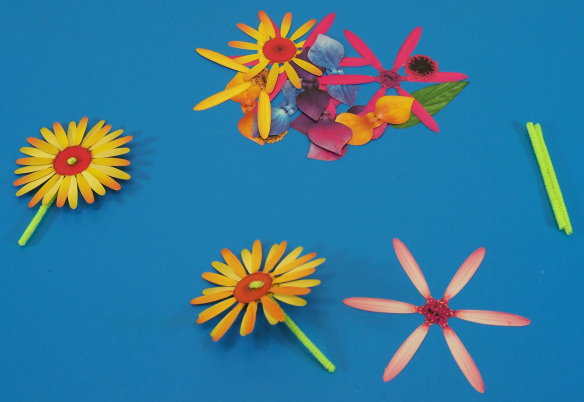
P1018861For the next type of flower, choose a daisy-like flower with a yellow center, another similar flower with a reddish-orange center and a long thin flower with light pink petals. Thread the pipe cleaner through the reddish-orange flower first.

P1018862Next, thread the yellow centered flower behind the first.

P1018863Finish with the thin pink flower behind the first two. Press the top of the pipe cleaner down to hold the arrangement in place.

P1018870

You can make further variations of these flowers using other combinations.

P1018872

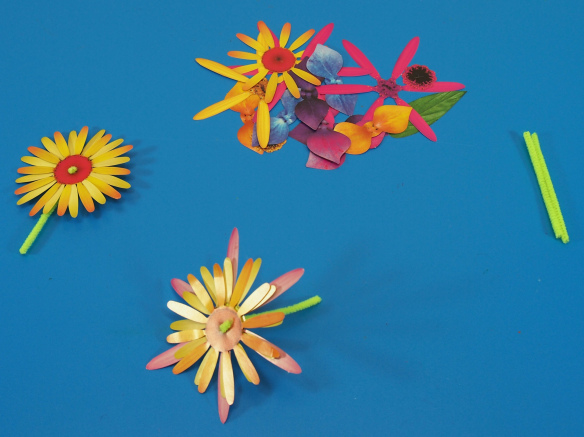
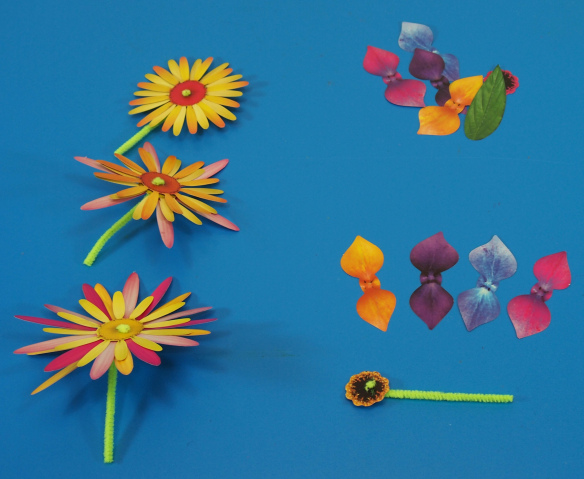
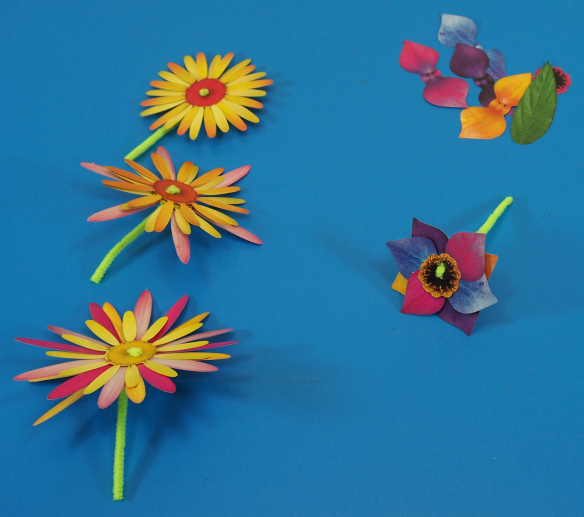
Choose the double-petal graphics in four different colors. I popped out an additional center for the final flower design.

P1018873

First, thread the pipe cleaner through the flower center. Bend the end of it to secure.

P1018877

Layer the rest of the petals behind the flower center. Fan them all out equally so you can clearly see the various colors.

P1018879

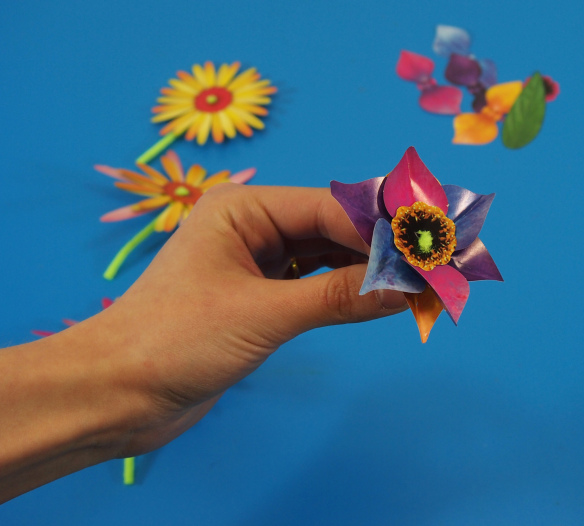
You can add dimension to the flowers to make them look even more realistic! These particular petals feature a score line along their length. Pinch the sides of the petal together to bend them inwards.

P1018885

What a neat lifelike effect!

P1018895

Now it’s time to decorate your crown!
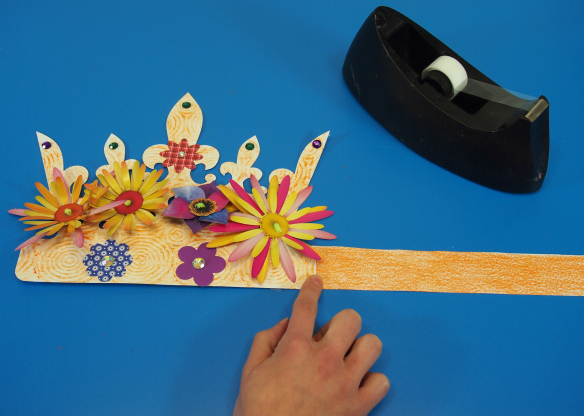
P1018896Pop out the interior cutouts. These will be helpful for stringing through the flower designs.

P1018897

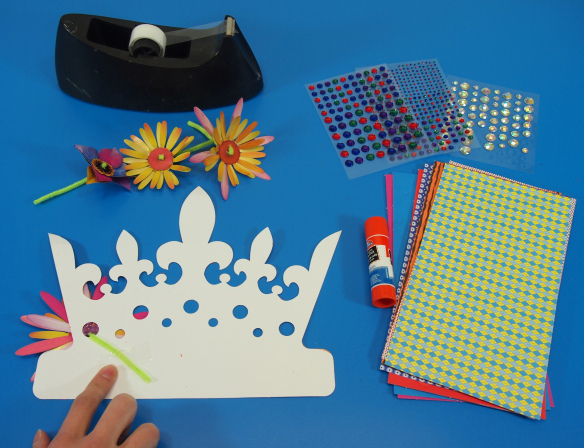
Thread the pipe cleaner stem of one flower through the popped-out opening.

P1018899

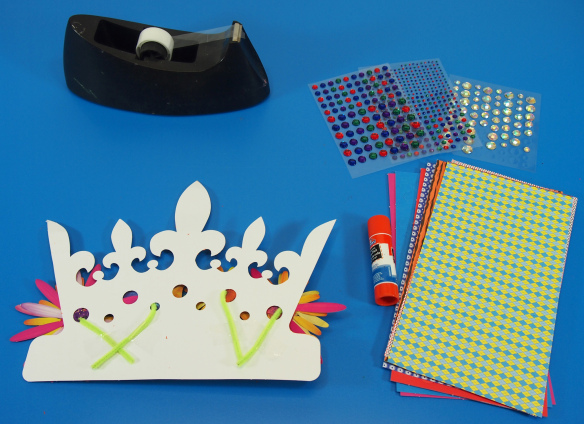
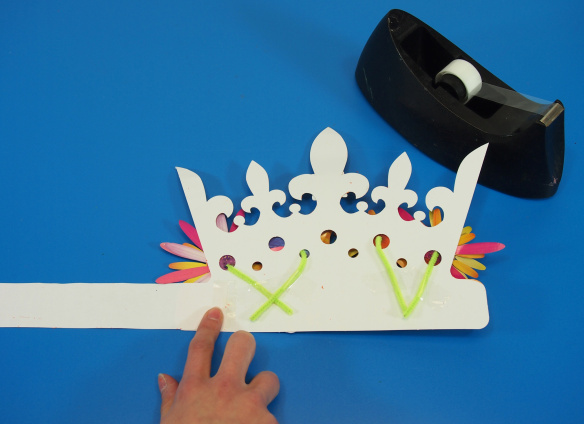
Flip the crown over to the opposite side. You will see where the rest of the stem is poking through. Tape it down to the back of the crown with tape.

P1018903

Thread the rest of the flowers through and tape down.

P1018904

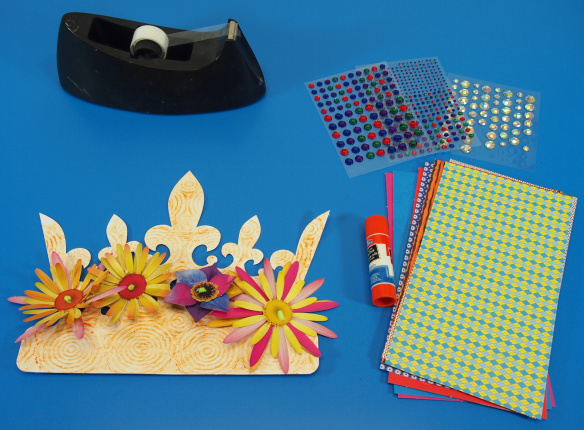
Ta-DA! Already looking fashionable!

P1018906

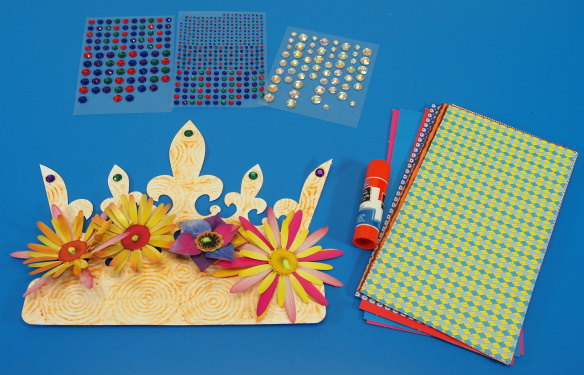
Now for some details. I pasted large rhinestones in different colors on the tips of the crown arches.

P1018908

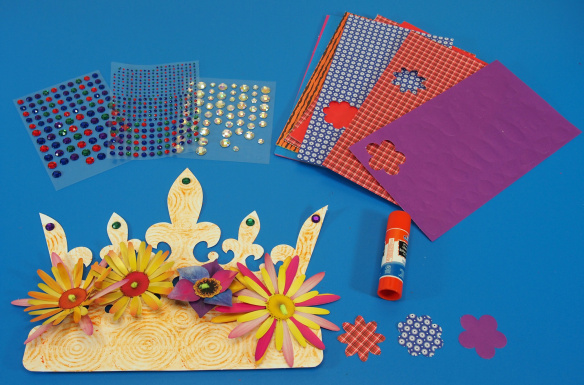
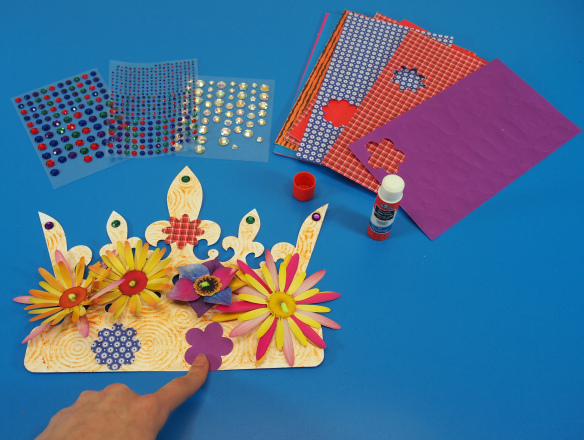
To give our crown a bit more flair, I’ve popped out various flowers from the Wild Flower Paper Bits sheets. There are over 1000 different flower pieces to choose from, so mixing and matching the various patterns is so much fun!
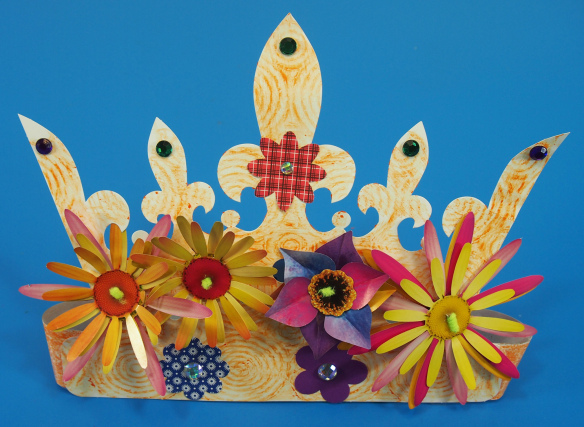
P1018910

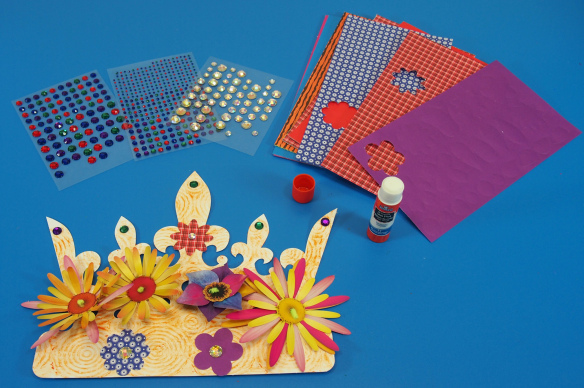
Paste on the flower bits to cover up some empty spots.

P1018912

Instead of popping out the provided flower centers for the Wild Flower Paper Bits, I decided to press in some rhinestones for the centers. So flashy!
P1018926

Next, we will need to make the headband for the crown. Cut a strip of paper from the 11 x 17″ sheet. The strip will need to be about 1 1/2″ wide and 17″ long. Color in the paper strip headband with the same color of crayon you used to make the print.

P1018929

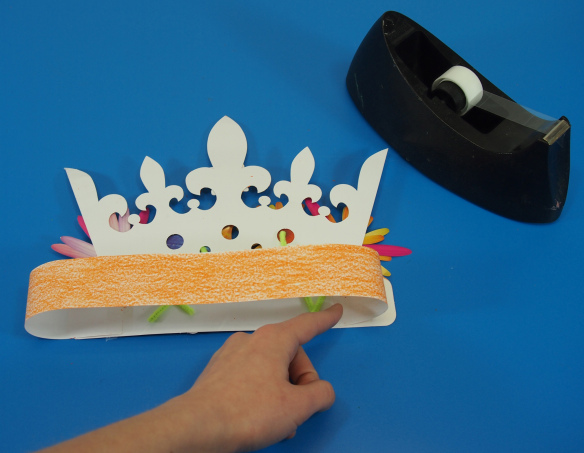
Tape the sides of the headband to the sides of the crown.

P1018932

Now would be a good time to measure the headband and see if needs to be cut at any shorter.

P1018934

Double up on tape to secure the band.

P1018943

And voila!! Ready for Mom to wear!

P1018947

Mom will be so excited! You can make crowns to celebrate any time of the year, or just to feel like royalty for one day!

Line-10

Thanks for viewing this post! Like and subscribe to us today for more craft projects and product updates every Monday, Wednesday and Friday! 

Personalized Art Totes!

2014-03-05-FeatureImage

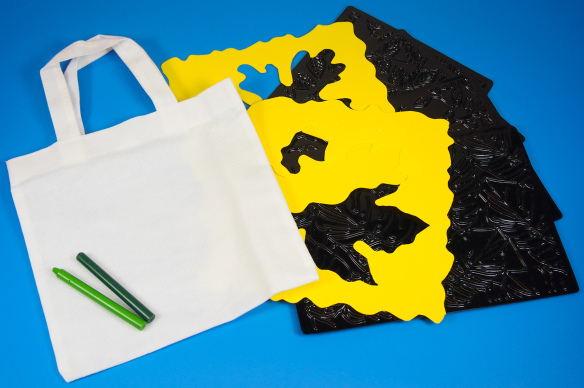
Store your art materials in personalized art totes! Make one for yourself (the ever-patient and longstanding art teacher) or invite your students to make one for you. The project is pretty simple and quick so students will love the opportunity to make more!

Age: 3+

Duration: 5-10 minutes

You’ll Need:

• Assorted rubbing plates: R5841 Optical Illusion Rubbing Plates / R5871 Organics Rubbing Plates / R5870 Linear Rubbing Plates / R5804 Flower Rubbing Plates

• Assorted stencils: R5615 Nature Stencils / R58621 Number Stencils / R58620 Fine Motor Skills Stencils / R5621 Rangoli Mega Stencils / R5618 Big Alphabet and Picture Stencils / R5522 Child’s First Stencil Set

• Crayons

• Dollar store / cloth totes

Line-09

In this project, I’ll show you how to combine stencils and rubbing plates together to make authentic-looking prints. You can separate this combination into two activities, depending on their difficulty level: Younger children can use only stencils and crayons. Color the inside of the traced shape. Older children can use specific colors for certain parts of a rubbing plate pattern.

P2044058

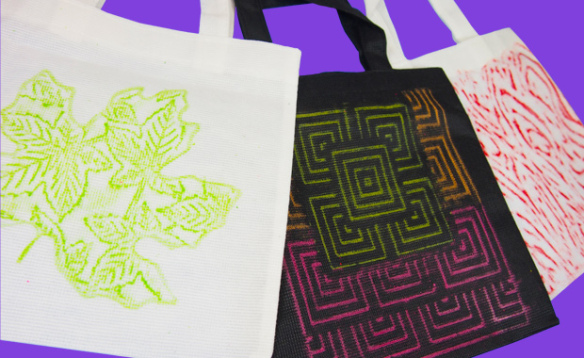
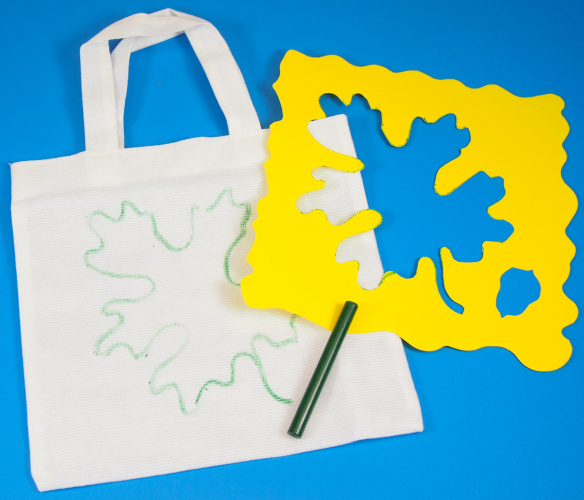
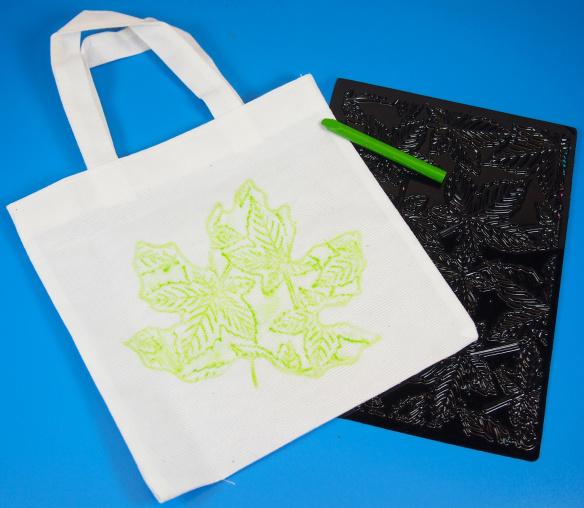
Here, I decided to make a leaf print on my art tote. To do this, I’ve selected a leaf stencil and chosen a rubbing plate pattern to match. In addition, I’ve picked two crayon shades of the color green.

P2044060

First, trace the leaf shape onto the middle of one side of the tote. Make the outline dark enough so the edges are visible on all sides.

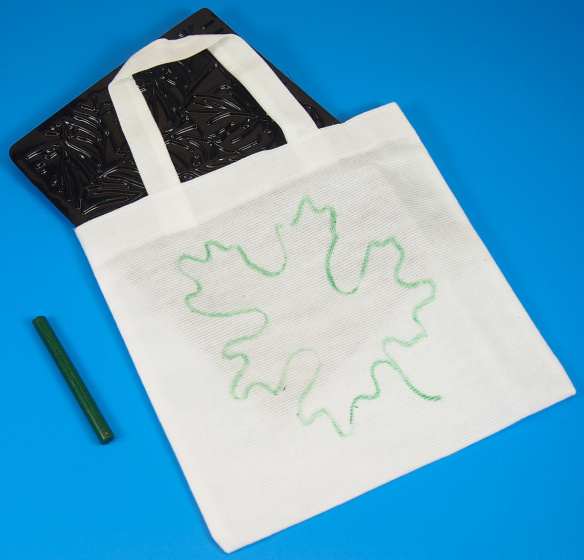
P2044062The rubbing plate fits so nicely into the tote bag, it was like it was meant to be!

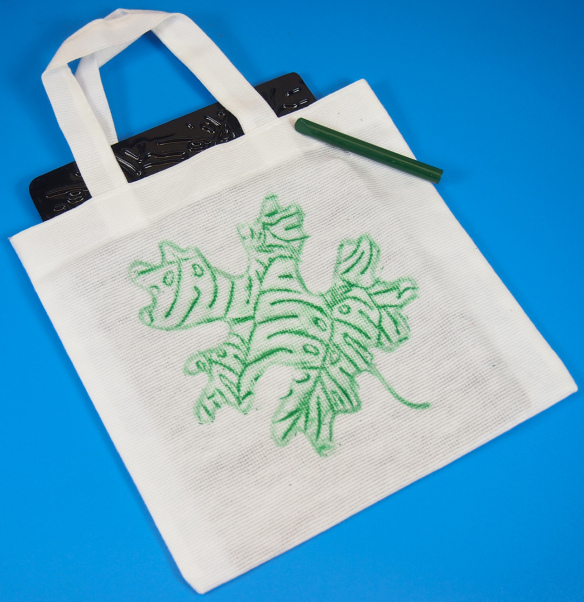
P2044064The cloth will be a lot tougher than regular paper. Be sure to use the point of the crayon to bring the pattern out. Rub the pattern all around the inside of the stencil outline.

P2044066

Repeat the same technique for the opposite side! Here, I’ve simply used a rubbing plate print and rubbed directly onto the tote, without need of a stencil. Younger students can try this technique, since it’s a basic way to decorate the art totes.

The next technique is a little tricky, however. Encourage older students to try this method out:

P2044068

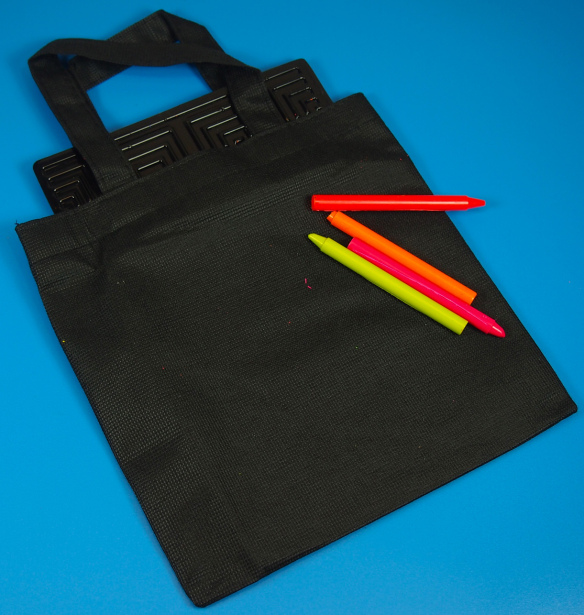
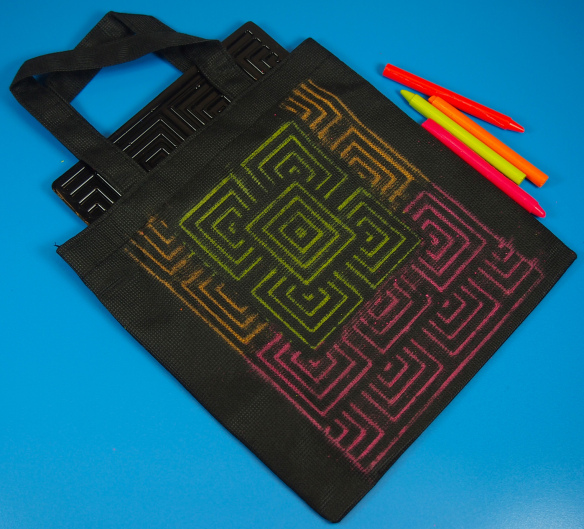
Slip an Illusion rubbing plate or something similar inside the tote. Pick out several vibrant crayon colors.

P2044069

Rub certain sections of the art tote with one color, then switch to another color when you reach a different section of the rubbing pattern. Against the black tote, the neon colors just pop right out!

P2044070

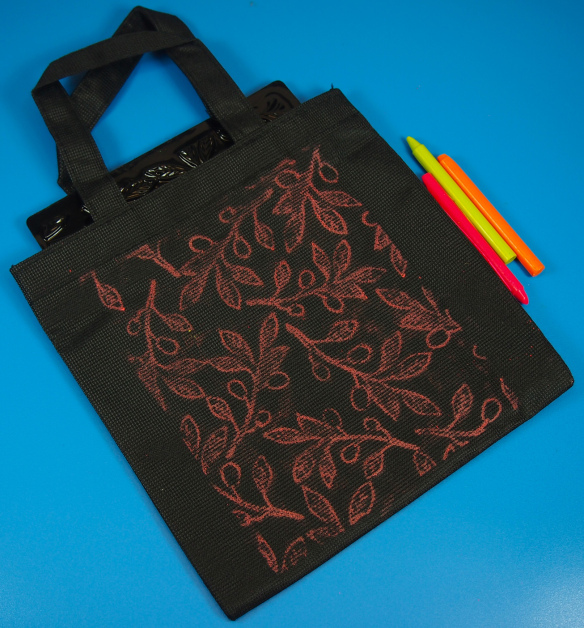
Here’s a rubbing plate print from one of our Organics Rubbing Plates.

Use your art totes to store your art materials (such as the rubbing plates, loose crayons, markers, scrap paper and so on)!

Line-09

Thanks for viewing our post! Subscribe to our blog for updates every Monday, Wednesday and Friday with new craft ideas! If you’ve made any projects using the materials in this post or would like to showcase your own ideas, send us an email to subscriber@roylco.ca!

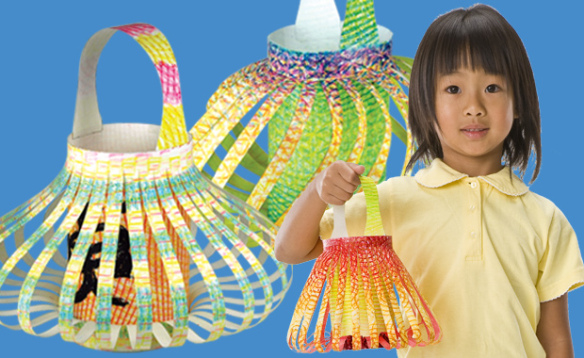
Craft Spotlight: Color-In Chinese Lanterns

2014-02-10-FeatureImageWe combined two of our products into one project with the Chinese Lantern craft posted on Wednesday. Learn more about this colorful craft using our video and description below!

The Color-In Lanterns can be used with our rubbing plates to decorate the various pieces. Simply slide any of our available patterned rubbing plates underneath the lantern pieces. Rub the side of a crayon onto the top of the lantern piece and watch as the patterns pop through! Combining colors together is half the fun with this project. While rubbing the pattern onto the lantern pieces with one crayon color, switch into a different color to create new effects!

The interior lantern tube can be embellished with stickers or other rubbing plate designs.

Hang your students’ lanterns together on a length of string. Tie the string across a classroom wall.

To see some of these ideas in action, view the video below!

Line-17Thanks for stopping by! We’d love to hear your input or receive photos of your work! Drop us a line at subscriber@roylco.ca.

Snowflake Wax Resist Art

Roylco Snowflake Wax Resist Art

Feature-Image-rubplatesnowflakesLearn the technique for making beautiful wax resist art–give your students something to work on as they return to their school routine after the holidays, and help them create an art piece that they can be proud of!

Age: 3+

Duration: 15 minutes

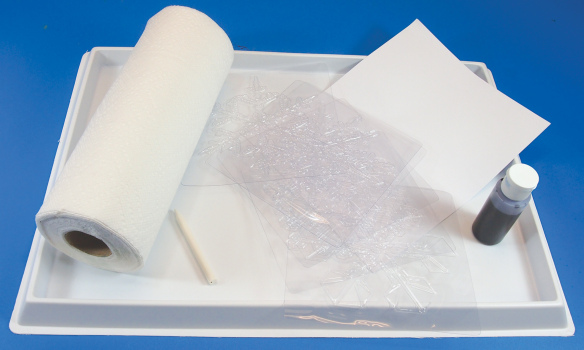
You’ll Need:

R58622 Super Snowflake Stencils

• Paper towel

• White crayon

• Blue watercolor paint

• White paper (8.5 x 11″)

• Paint tray

Line-20

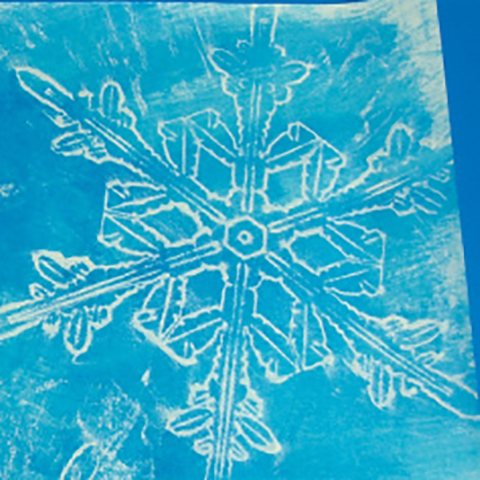
We’ve done it! Days of experimentation, combining a multitude of products and materials, testing this paint versus that crayon…. and here we are! Use our Snowflake Rubbing Plates to make simple but beautiful wax resist art. Decorate your classroom during the winter months with your students’ projects!

2013-12-12-snowflakerubplates01The paint tray is essential for keeping work-spaces clean while spreading paint onto the paper.
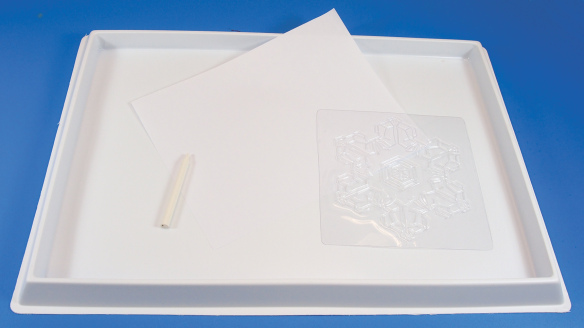
2013-12-12-snowflakerubplates02Place one of the Snowflake Rubbing Plates underneath the white paper. Tip: Tape the edges of the Snowflake Rubbing Plate to the paint tray to keep it from moving about. This will be important for the next step.
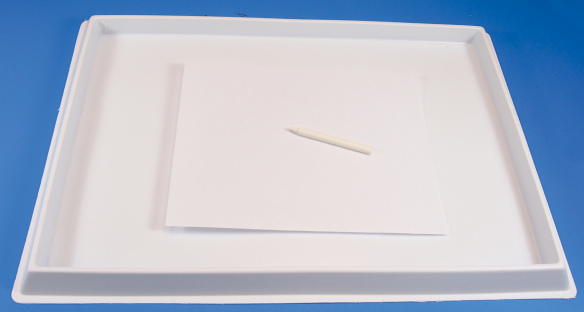
2013-12-12-snowflakerubplates03Rub the white crayon across the surface of the paper. Make sure the rubbing plate stays in one spot while you rub the page with the crayon.2013-12-12-snowflakerubplates06
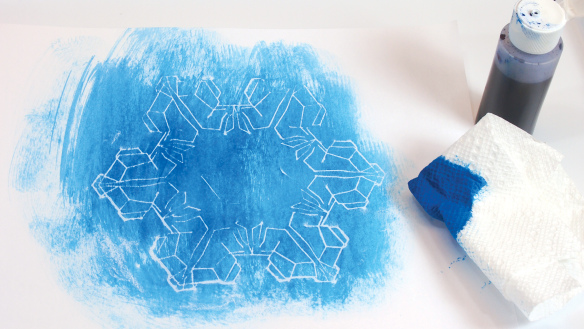
Tear one sheet of paper towel and fold it into a square. Dip a corner of the square into the blue watercolor paint. Next, dab the dipped corner onto the white crayon rubbing. Spread the paint outwards from the center. You will start to notice the crayon rubbing “pop” out from the paint color.

2013-12-12-snowflakerubplates08

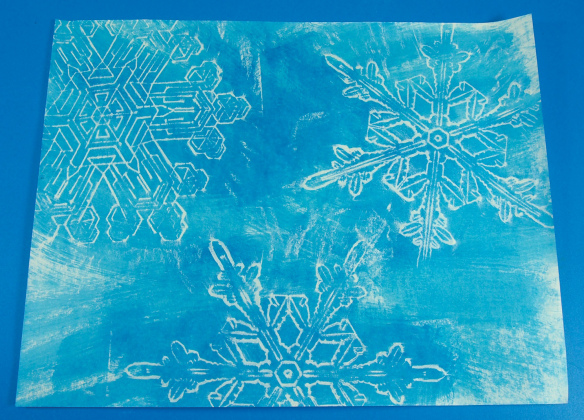
Make additional crayon rubbings at various angles on the white paper. Use different Snowflake Rubbing Plates or vary the position of the snowflakes.

Line-20

Thanks for stopping by! If you liked this craft and would like to share your version with us, send us an email to subscriber@roylco.ca with photos! We’d love to hear from you!

Tot School uses our Rubbing Plates!

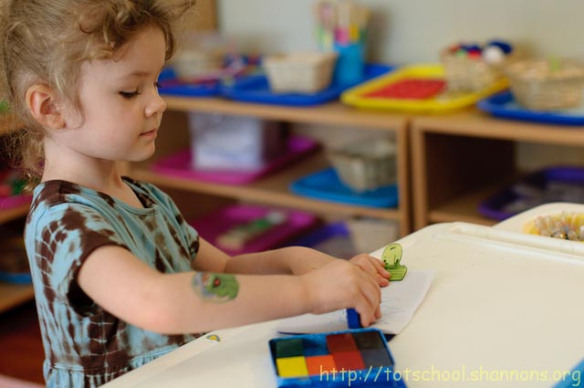
FlowerPlateRubbings-5793-1Tot School made an assortment of rubbing plate prints using our R5804 Flowers Rubbing Plates! Check out Sweet Pea’s review on how well the prints turned out!


The post, called “Rubbing Plates” was published on July 23rd 2010 and can be viewed at this link.

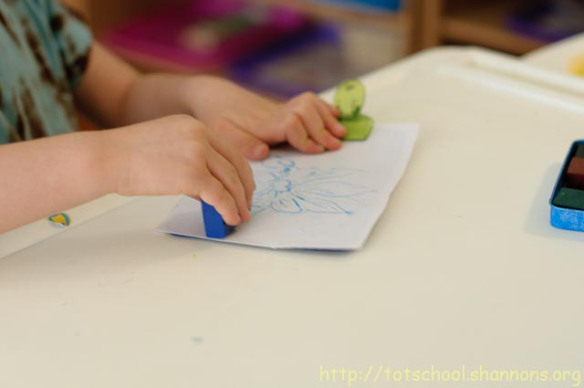
Sweet Pea’s technique for using the rubbing plates is a great start for early learners with developing fine motor muscles. Using the non-dominant hand to hold the rubbing plate and paper in place, rub crayon across the surface of the paper with the dominant hand. This helps to reinforce muscle control and encourages patience and timing while making rubbing plate prints.

FlowerPlateRubbings-5798-1

And the flowers turned out lovely! Sweet Pea found that using block crayons helps to create an even image all throughout. If you are using regular crayons, be sure to use the side of the crayon rather than the point. The point will spread too much of the crayon over the paper and will blend the rubbing plate image in with the rest of the color.

Another important tip that Shannon wrote was that the images themselves could be used for botanical lessons: Use the provided identification sheet to connect the images to real existing flowers. Learn about flowers by name and match them to the rubbing plate images!

Thanks to Shannon for this post!

Images and original post © Tot School.

This post was not sponsored for a review. At LittleFingersBigArt, our mission is to present to our readers and viewers the newest and most creative craft ideas that fans of Roylco have made on their own. Our goal is to allow you and other educators and parents to reuse our products in fun ways so that children always get the best educational experience from them!

We’d love to see more ideas like this one! If you’ve got a brilliant craft idea or have made a version of one of our crafts that you would like to share with us, send an email to subscriber@roylco.ca with photos, descriptions or a link to your work. We will create a feature post and link back to you with full credit. We’d love to hear from you!


Thanksgiving Hat

Feature-Image-featherhatcraft

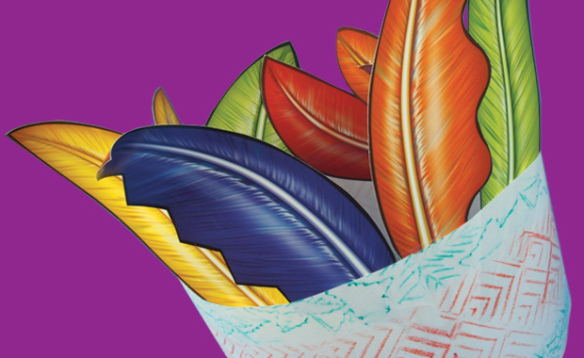
Inspired by what our crafters at the Roylco Summer Art Camp made, here’s how to put together your unique Thanksgiving Hat! Use the R28421 Scissor Skills Paper for this craft. 

Age: 4+

Duration: 15-20 minutes

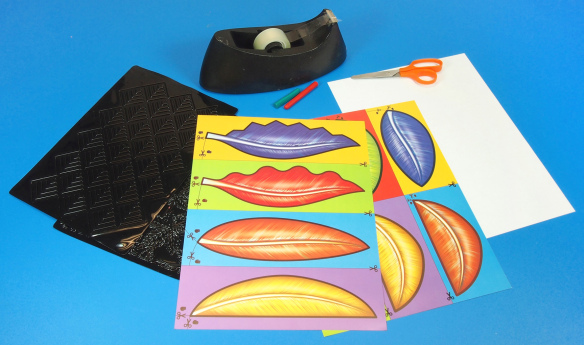
You’ll Need:

• R28421 Scissor Skills Paper

• R5870 Linear Rubbing Plates

• Sheet of paper, 8.5 x 11″ (20 x 28 cm)

• Crayons

• Scissors

• Tape

Line-06

Putting together the Thanksgiving Hat is super simple!

P9033137

For this activity, you can decorate the head band with any of our special rubbing plates!

P9033140

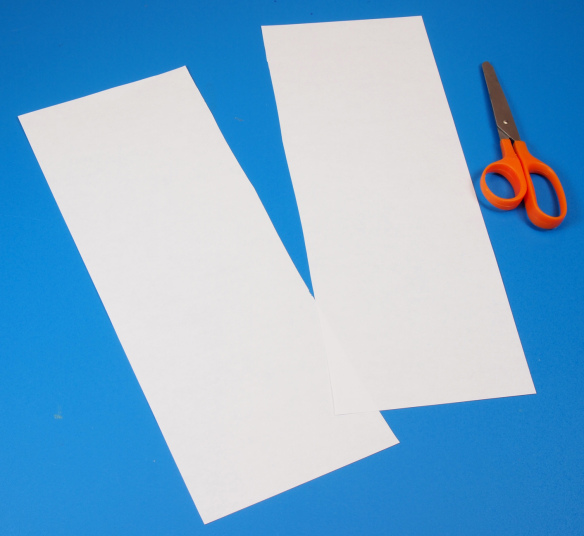
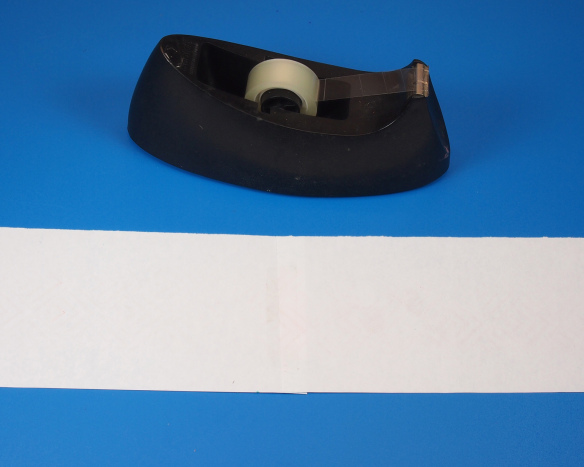
Fold a sheet of paper lengthwise in half. Unfold the paper and cut along the fold line to make two equal strips of paper. You’ll need both strips of paper for the entire headband.

P9033143

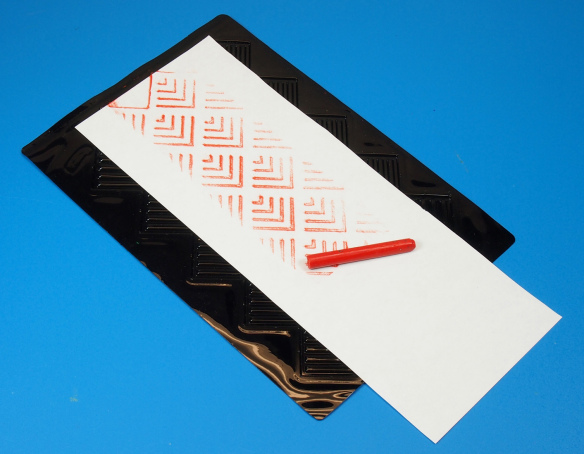
Place the headband on top of a rubbing plate. Use the side of a crayon to rub the pattern onto the headband.

P9033145

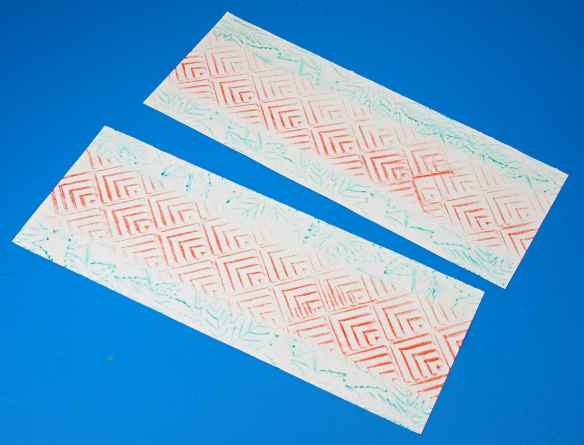
I used a different pattern for the top and bottom headband edges. Try it out with a different color too!

P9033146

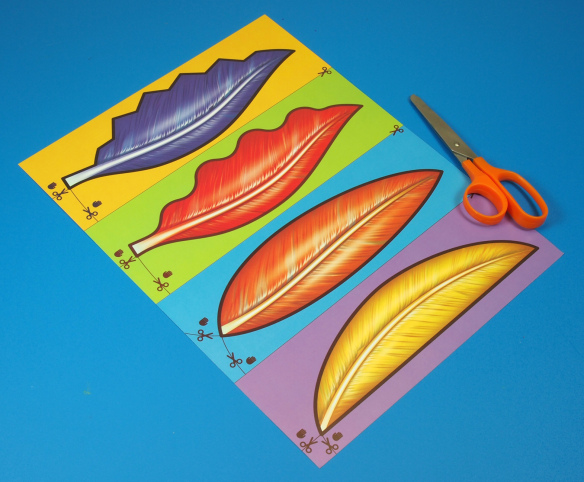
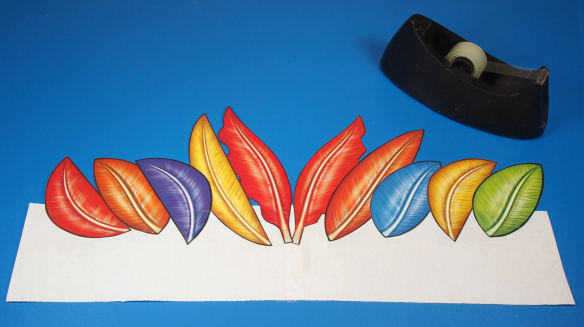
Choose one of the three types of feathers to decorate your headband with. We’ve made an easy set of feathers for beginners with which to practice their scissor cutting skills. The second set is intermediate, with wavy lines. The third, and most challenging, set features jagged edges for students to cut. Choose the most appropriate set of feathers for students to cut.

P9033155

Attach the two headband pieces together with a piece of tape. Join the two headbands horizontally to extend the length of the entire headband.

P9033160

Keep the headband flipped over to the blank side. Line up all your cut feathers along the top edge of the headband and paste onto the paper. The feathers are double-sided so you won’t have to worry about which side you paste them onto!

P9033161

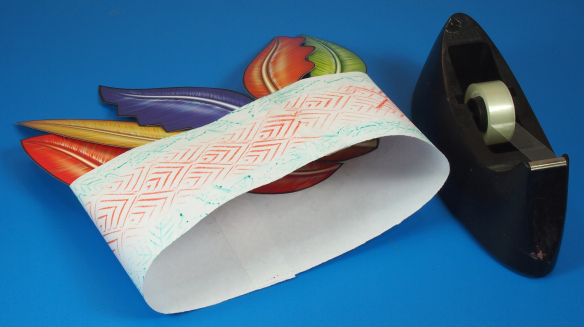
Join the edges of the headband together. Tip: First get students to adjust the headband for wearing. When they have found the right fit, tape the edges at that point.

P9033163

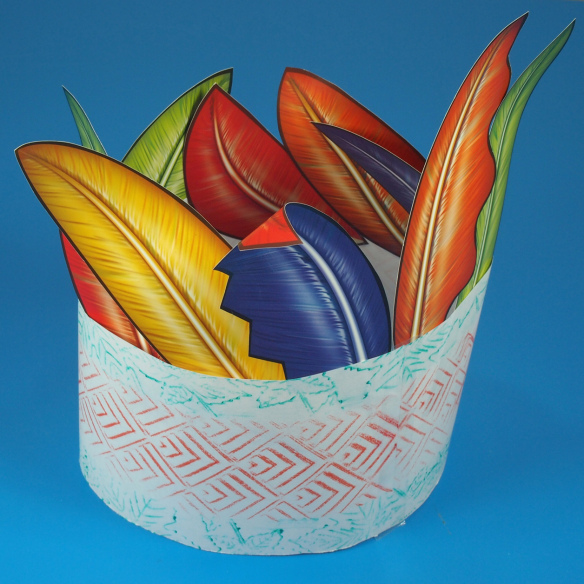
All ready for wearing! If you would like to add some dimension to your hat, curl out the ends of the feathers using a pencil.

CRAFT CHALLENGE:

What else did your students use to decorate their hats? You can use anything available in your craft supply closet or use scrap paper left over from other projects to cut out feathers. Once students have made their hats, sit your class down in a circle and talk about what each student is thankful for from the previous year.

Line-06

Send us your responses to subscriber@roylco.ca along with photos of your students’ hats! We’d love to hear from you!

Art With Ms. K uses our Fossil Rubbing Plates!

017

Ms. Katzin of Art with Ms. K used several of our rubbing plates, including R5870 Linear Rubbing Plates and R5817 Animal Skins Rubbing Plates, as texture mats for clay sculptures. She explores a variety of textures and materials and guides her students to make gorgeous clay pendants!

Ms. Katzin published her post, entitled “Kindergarten Fossils,” on January 17, 2013. She used regular clay to bring out the best textures.

0141

Our rubbing plates are great for introducing texture to pre-K art classes. For this activity, Ms. K got her students to press rolls of clay onto the textured rubbing plates. Once they removed the clay, they could shape the sides of the clay rolls into pendants.

To use the texture rubbing plates for making clay sculptures such as bowls, place a sheet of parchment paper below the clay. Roll out the clay into a flat 1/4″ thick slab. Next, choose your favorite textured rubbing plate. This next step will allow you to transfer the texture onto the clay piece.

Simply press the rubbing plates onto the clay slab and lift off. Gently loosen the parchment paper from the textured clay by peeling off the paper from the corners. When you are finished removing the clay, manipulate the textured clay slab into a curved face for a bowl or a cup. For the most adventurous, shape the clay slab into a dynamic sculpture, like an animal!

I love to see what new project Ms. Katzin comes up with–she IS the definition of art teacher in all aspects. Thanks again, Mollie!

Images and original post © Art with Ms. K.

This post was not sponsored for a review. At LittleFingersBigArt, our mission is to present to our readers and viewers the newest and most creative craft ideas that fans of Roylco have made on their own. Our goal is to allow you and other educators and parents to reuse our products in fun ways so that children always get the best educational experience from them!

We’d love to see more ideas like this one! If you’ve got a brilliant craft idea or have made a version of one of our crafts that you would like to share with us, send an email to subscriber@roylco.ca with photos, descriptions or a link to your work. We will create a feature post and link back to you with full credit. We’d love to hear from you!

Line-11

Tear Art Still Life

Feature-Image-Rubplatetornart

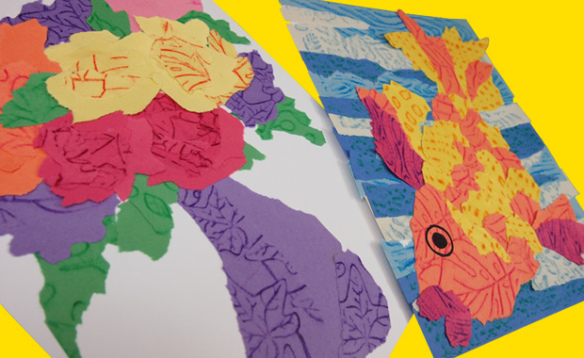
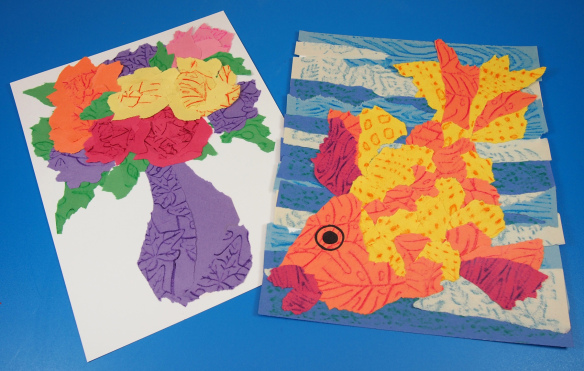
Our take on tear art uses simple materials: construction paper, crayons, rubbing plates and a bit of fine motor action! Find out how to create a gorgeous still life of a vase of summery flowers, or inspire some beachy fun with a colorful tropical fish portrait!

Age: 4+

Duration: 15-20 minutes

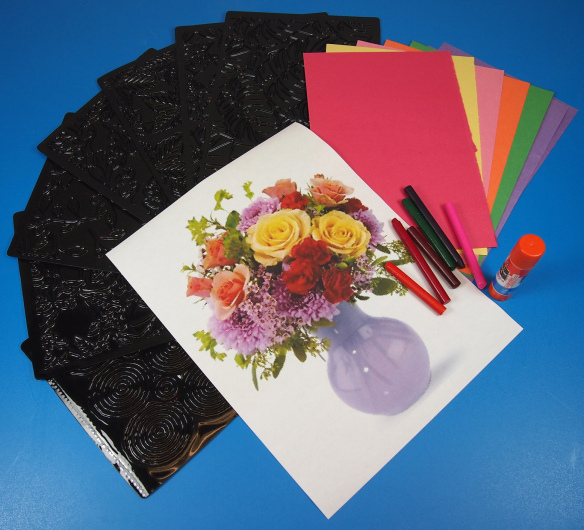
You’ll Need:

• R5871 Organic Rubbing Plates

• Construction paper in assorted colors

• Crayons

• Glue

Line-06

For this activity, I chose to use our R5871 Organic Rubbing Plates, but you could use any of our rubbing plates that create a uniform pattern throughout the rubbing area. Try some of these rubbing plates made especially from Roylco:

R5839 Texture Rubbing Plates

R5817 Animal Skins Rubbing Plates

R5841 Optical Illusion Rubbing Plates

R5870 Linear Rubbing Plates

P6242624

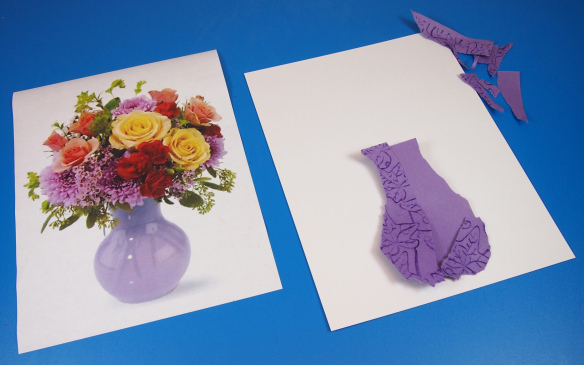
You will need to grab a reference photo to work from, such as the vase photo above. Look online for some ideas or browse through photography books for inspiration. Still life images are a great place to start for reference ideas. The subject is very clear to the viewer and usually shows something familiar, such as a vase with flowers or a basket of fruits. Once children have completed a still life image, they can try creating an action shot of an animal or a person with their tear art!

P6242626

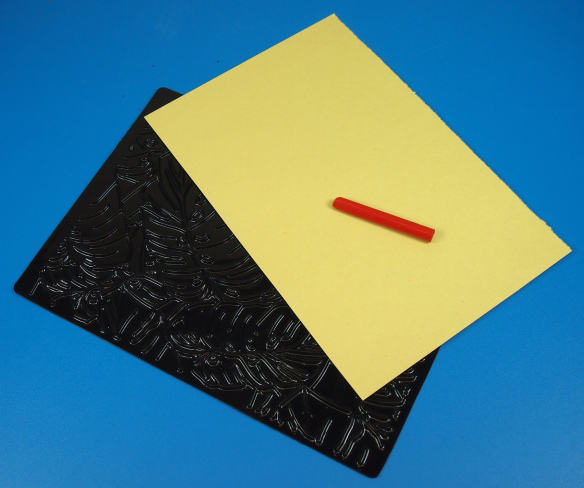
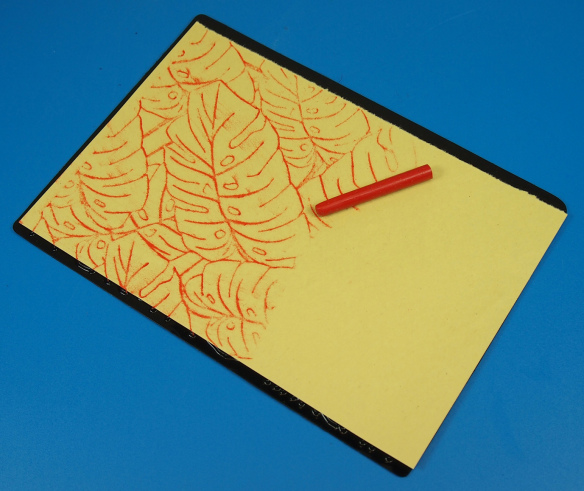
Place one rubbing plate beneath one of each construction paper color. Rub with a similarly colored crayon (or choose contrasting colors in neon for interesting effects).

P6242627

You will only need to use half of the sheet. Cover the entire sheet of paper with the pattern if you plan to separate the pages to share between students.

P6242634

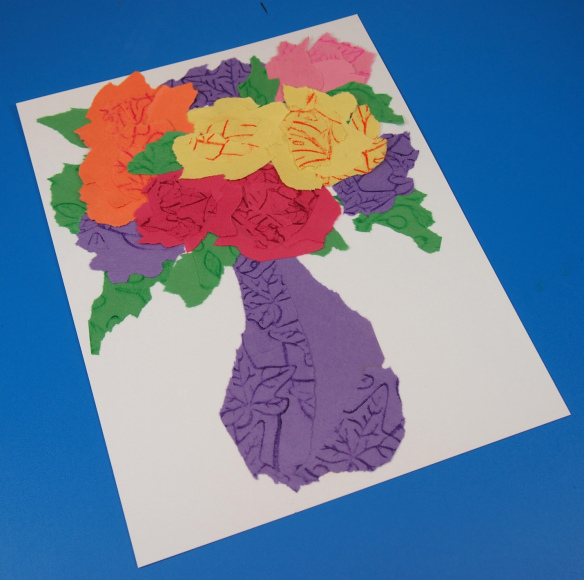
Exercise fine motor skills with crayon rubbings and tearing paper! Before you tear the construction paper, consider which colors will fill in certain parts of the illustration. For instance, the purple construction paper rubbing will serve as the vase in this image. Tear the construction paper into strips. Try not to use scissors, as that takes away from the “tear” in tear art! Keep the image in mind as you tear the paper. Since the vase is long, I tore the strips into longer sections. I tried to steer the the tear into a bowl shape near the bottom to mimic the roundness of the vase. Try it out!

Tip: Notice the glare on the sides of the vase. To achieve this effect, I used construction paper that wasn’t rubbed over. This took away from the texture while completing the look of the vase.

P6242636

Tear the rest of the pieces in larger chunks to make the flowers. Arrange the torn pieces together so that they overlap into circle-like shapes. This will appear like flowers. Tear longer pieces for the leaves, and paste them down first. Layer the flowers on top.

P6242638

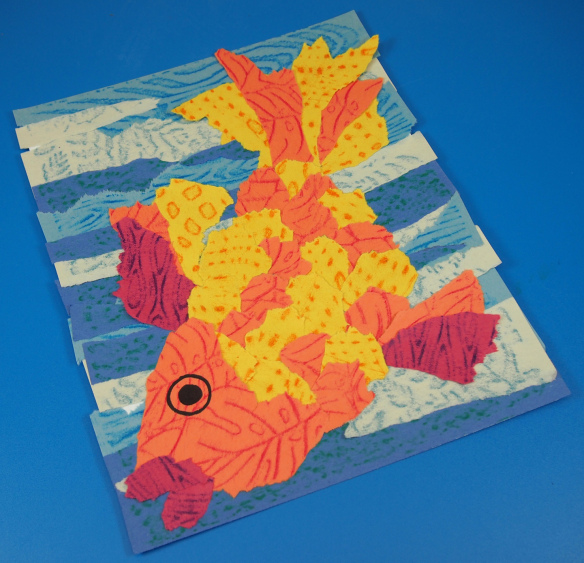
I tore long strips of blue in varying shades to make the ocean background for the tropical fish portrait. I interspersed yellow and orange paper strips together to form the fish body. Tear two large pieces of red construction paper for the fins. Tear two smaller pieces of red construction paper and angle together to make the fish lips.

P6242640

Beautiful work! There’s loads of fun you can have with tear art! I would love to see what kinds of art you create with this technique. Just send me an email with your artwork attached and I’ll write up a post about it!

CRAFT CHALLENGE:

Make a tear-art self portrait! Grab a mirror or a photo of yourself and try to recreate your likeness with torn strips of patterned paper. How artistic can you make your portrait? Send us photos of your work!!


Line-06

Send all photos, comments or suggestions to subscriber@roylco.ca! Thanks for dropping by!