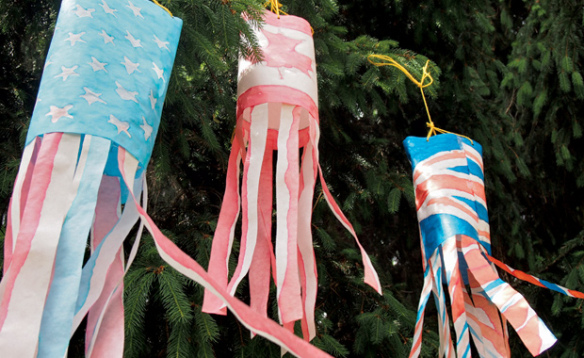
Flag Windsocks

Windsock Artwork made from Color Diffusing Paper

2014-05-25-FeatureImage Make brilliant designs on Color Diffusing Paper using clear glue! Incorporate windsocks into a national holiday craft or use to cheer on your favorite team.

Age: 5+

Duration: 20 minutes

Learning Objectives: Create product art with an emphasis on using fine motor skills. Trace designs onto paper or draw freehand using references. Encourage scissor skills development. Incorporate windsock designs with themes learnt through social studies subjects or in observation of upcoming national events. Talk about significance of wind patterns and weather changes.

You’ll Need:

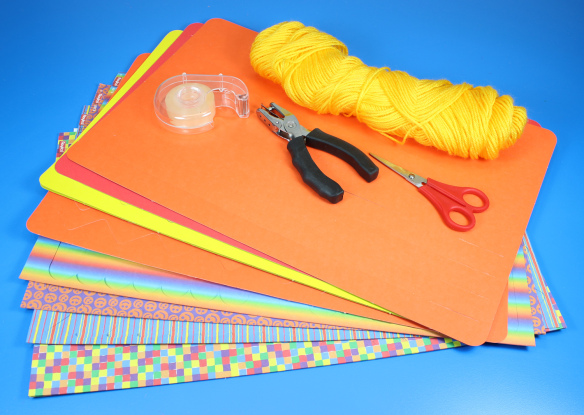
R15212 Color Diffusing Paper 12 x 18″

• Watercolor paint

• Plastic paint trays

R54460 Squiggle Pipettes OR paintbrushes

• Scissors

• Hole punch

• Yarn

• Tape

• Clear glue (preferrably with applicator tip)

Line-03 This activity is perfect for making a take-home craft that kids will love. You can decide to have kids draw their flag designs freehand, or print out a large flag design in black and white line-art that kids can use as a template beneath their Color Diffusing Paper sheet. In this activity, I’ve used both techniques.

Click on any of the links below to skip to a portion of this tutorial:
1. Designing your windsock

2. Making streamers

3. Assembling your windsock

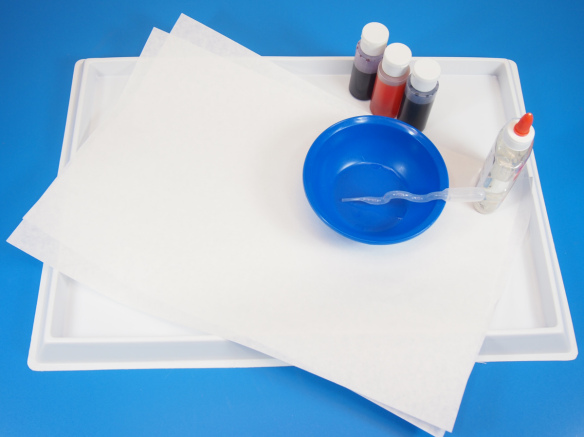
P6179636 Here, you can see all the materials I’ve assembled. Using bowls to contain the watercolor paint makes it easy for kids to keep their work-spaces clean. Pipettes are a great way to get children with developing finger muscles to experiment with different squeezing techniques.

Alternatively, use paintbrushes to apply the watercolor to the Color Diffusing sheets.
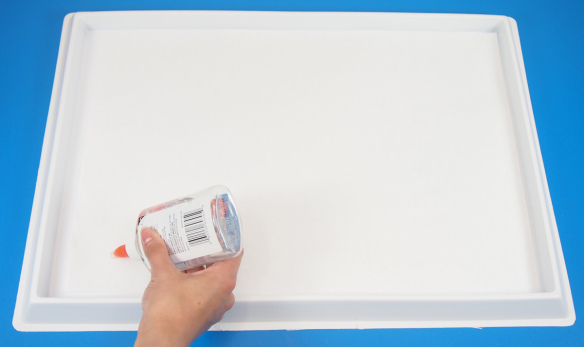
P6179640 First, decide on your design. If you decide to get students to freehand the design, it’s a good idea to print out a reference for students to look at. They can lightly pencil in their design if they’d prefer, then go over top of the design with the clear glue.

It’s ideal if the clear glue dispenser has a pointed applicator that kids can use like the point of a marker or pencil. Gently press the glue down onto the Color Diffusing Paper on top of your penciled design.
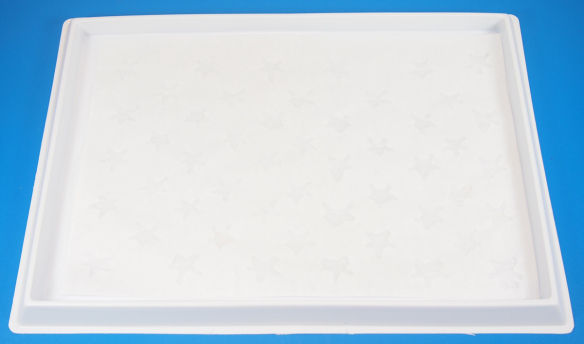
P6179642The photo above won’t clearly show the image, but I’ve “drawn” 50 stars with the clear glue in a stacked sequence. Can you guess the flag I’m making?
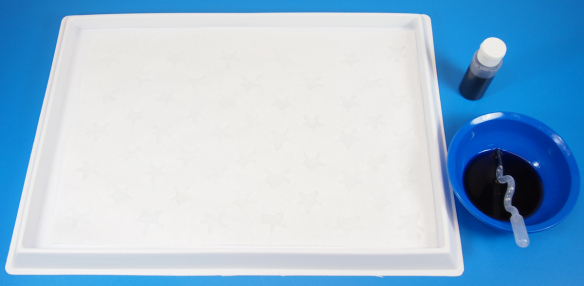
P6179644Wait until the glue is completely dry! This usually doesn’t take too long, but if you are worried about time, be sure to do the glue “drawing” on a day before your painting class. You can speed up by the process by leaving the drying artwork under an oscillating fan. Once you are ready to paint, place the Color Diffusing Paper into a plastic paint tray.

For this particular project, I’ve grabbed blue watercolor. Notice how nicely the Squiggle Pipette fits into the colorful paint bowl. You can place the bowl in the center of a group of students and have them all grab their paint from that one location.
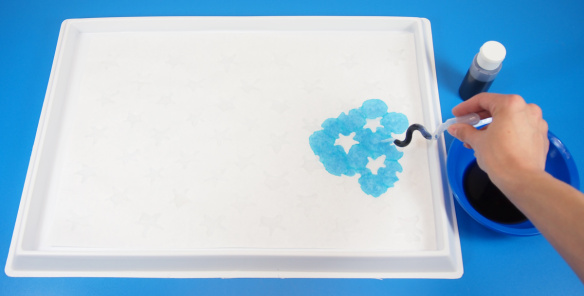
P6179664This is my favorite part!! As I release the blue watercolor paint from the Squiggle Pipette, the paint carefully avoids any place where I’ve “drawn” in the glue. This is because the glue has seeped completely through the paper and acts as a barrier to the oncoming ink.
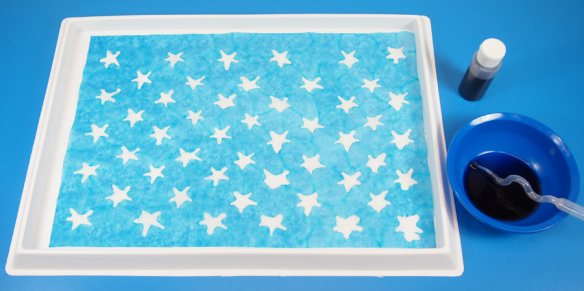
P6179668It will take a few squirts from the Squiggle Pipettes to fill the entire canvas, but it’s well worth it for the colorful effect and design popping through!
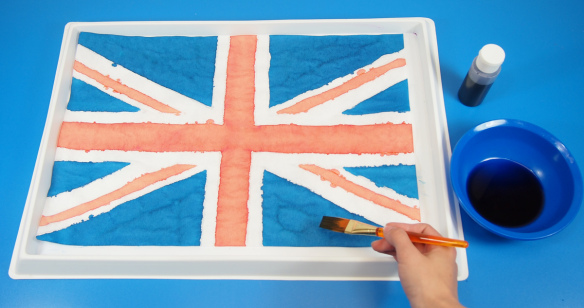
P6179671For a project like the Union Jack flag, I placed a line-art print of the flag design beneath the Color Diffusing Paper and traced out all the lines with the clear glue. Once the glue was dry, I used a paintbrush to apply the paint. This helped maintain an even layer of paint throughout the design.
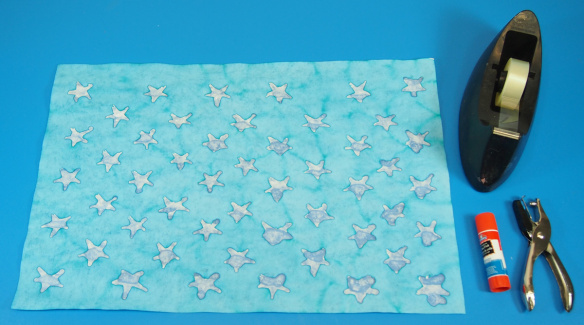
P6179714 Take your main windsock design and prepare it for lift-off!
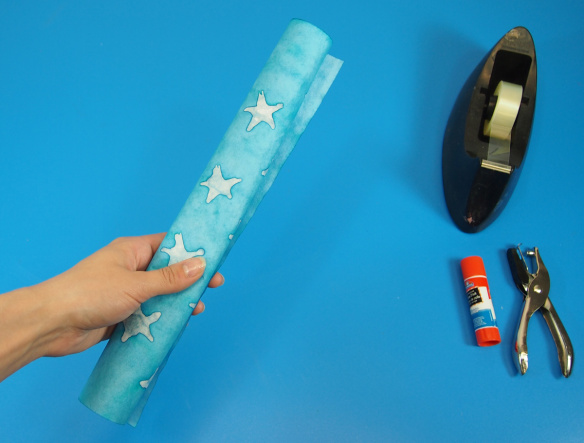
P6179717First, roll the windsock into a tight tube. This will help it retain a cylinder shape once you string it up.
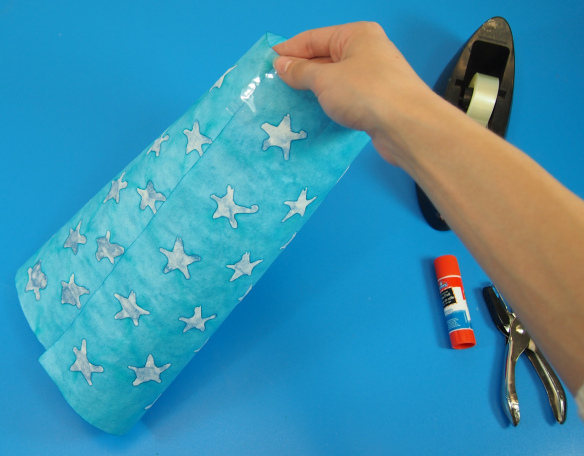
P6179719 Unwind the tube until the ends are overlapping by 2″ on both sides. Tape the edges together.
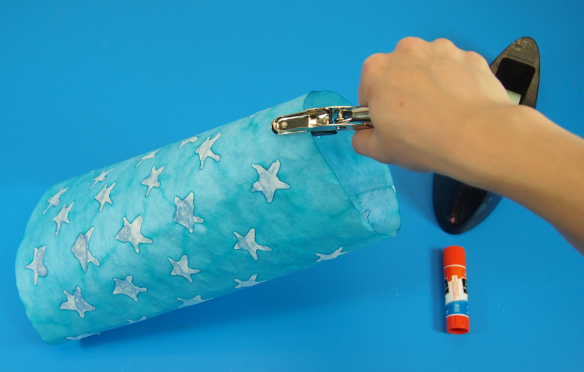
P6179724 Next, make four holes at equal intervals along the top edge of your flag windsock.
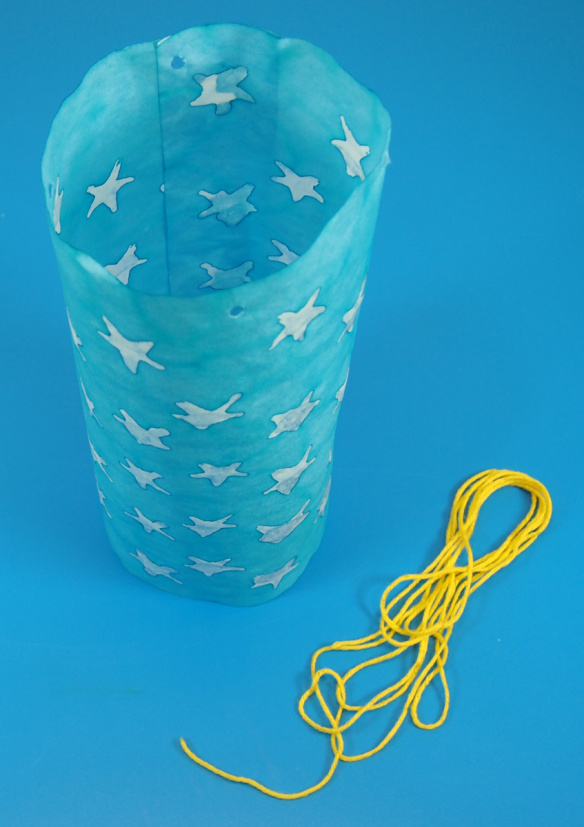
P6179726Grab a large run of yarn, about 2 yards (1.8 m) in length.
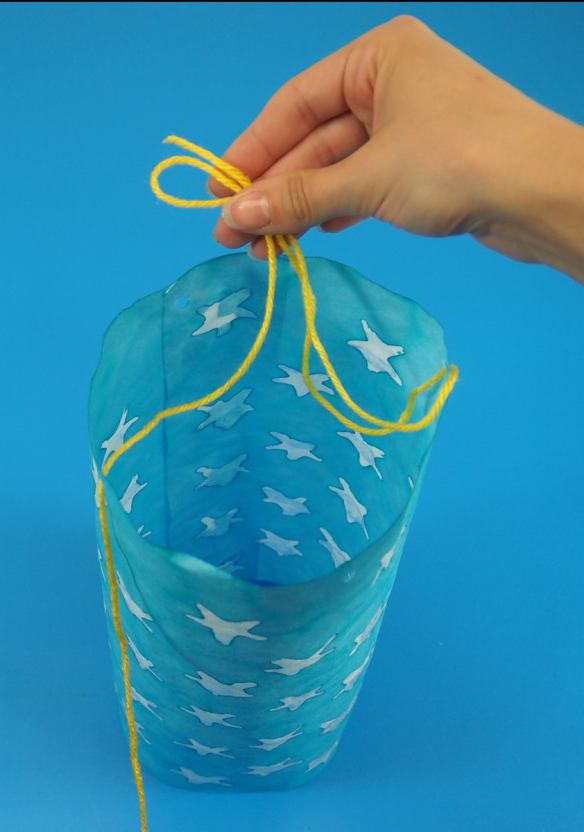
P6179729 Loop one end through a hole and hold. Make a second loop with the other end of the yarn and hold that along with the first strand. Use the remaining yarn to pass through a second hole.
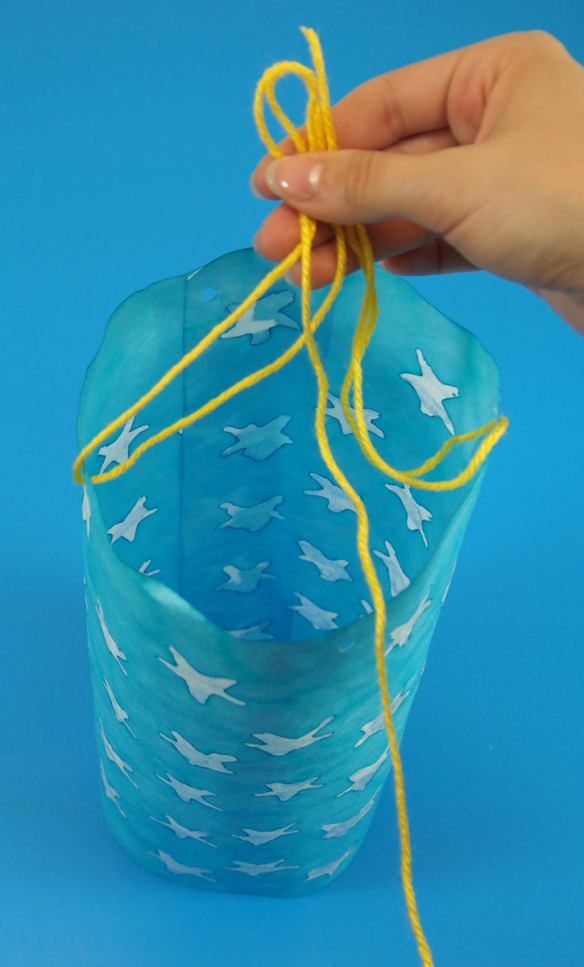
P6179731Loop back up and hold the loop in your hand along with the rest of the previous loops. Pass the end of the yarn through a third hole.
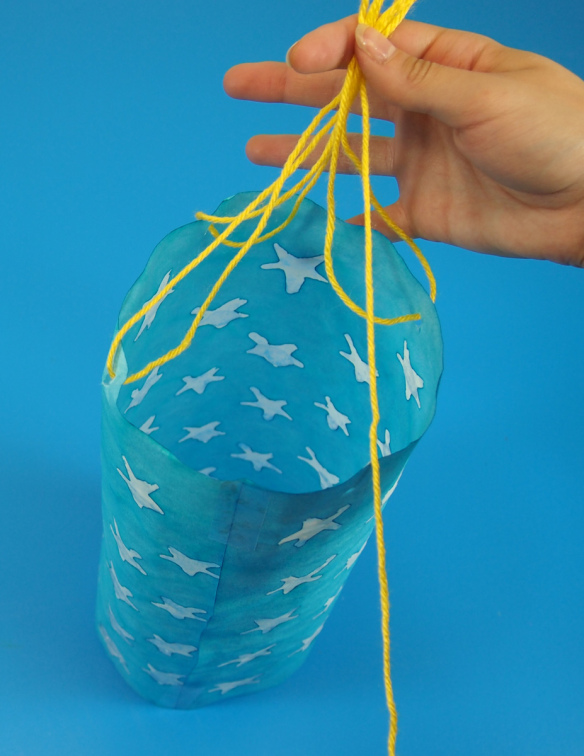
P6179732Loop back up through the hole and hold the loop in your hand with the rest. Thread the final stretch of yarn through the fourth hole.
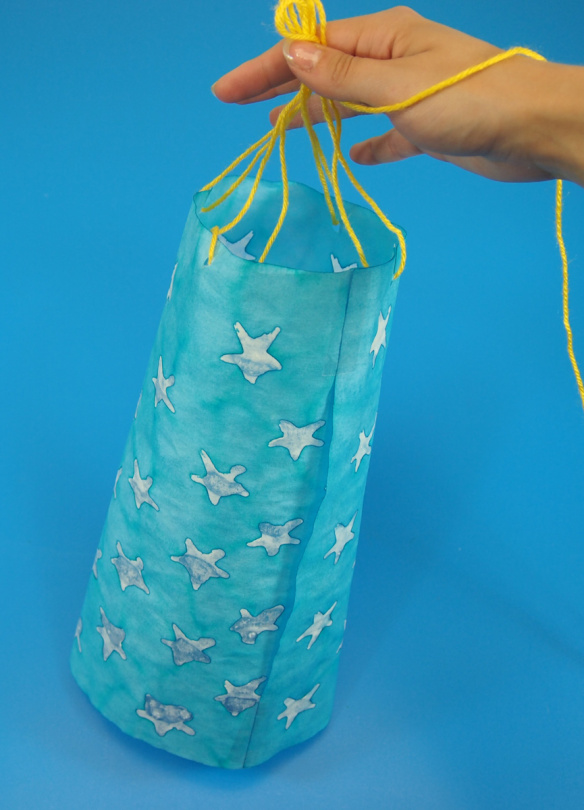
P6179734Then loop back up and hold this loop in your hand with the remaining loops. There should be some leftover length of yarn to use as the string from which you’ll hang the windsock. Twist all the loops together, as one, into a tight knot.
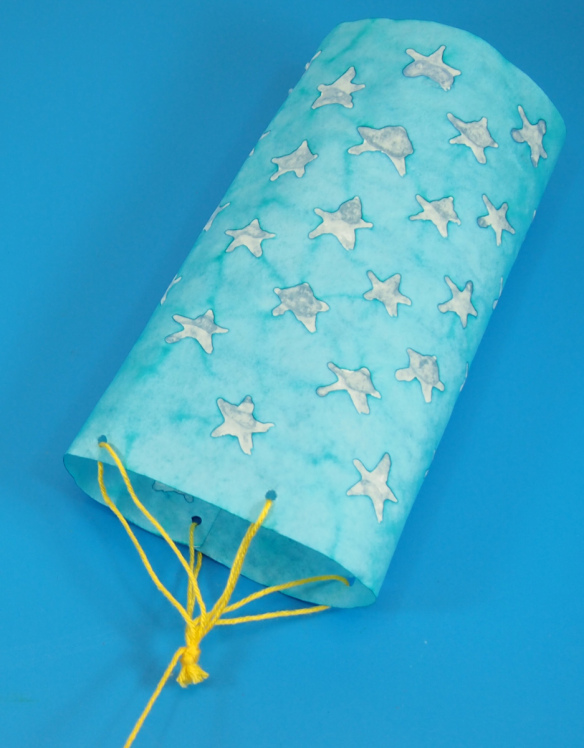
P6179737You can trim some of the excess loops above the knot part. Just make sure not to snip the long piece of string! The first part of the windsock should look something like this.  
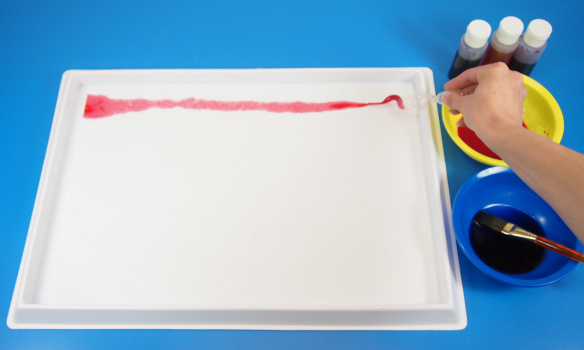
P6179681 Now it’s time to make the streaming ends for the windsocks. Place the Color Diffusing paper lengthwise, then spread the paint any which way you’d like. Make lines, spots, color entire strips of paper or intertwine the colors together.
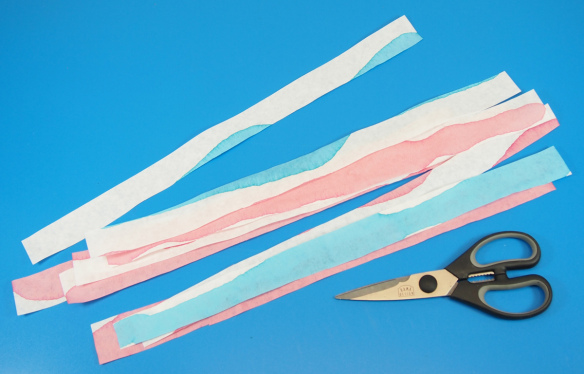
P6179712When this particular sheet of paper has dried, cut it into strips lengthwise.
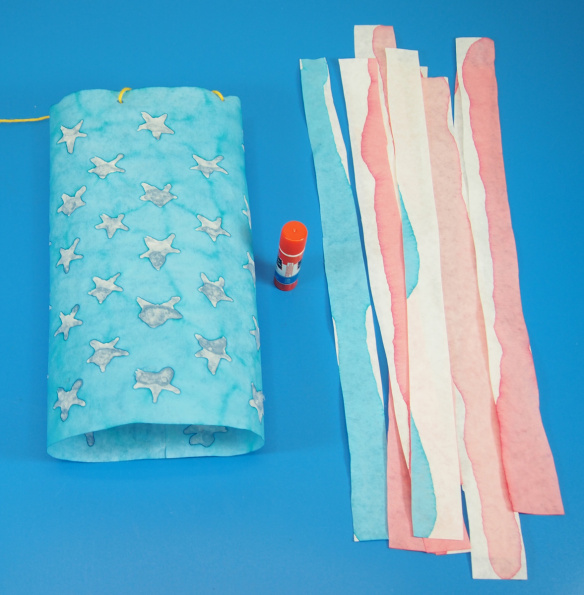
P6179747 Now grab some glue! We’re ready to attach the final portion of the windsock.
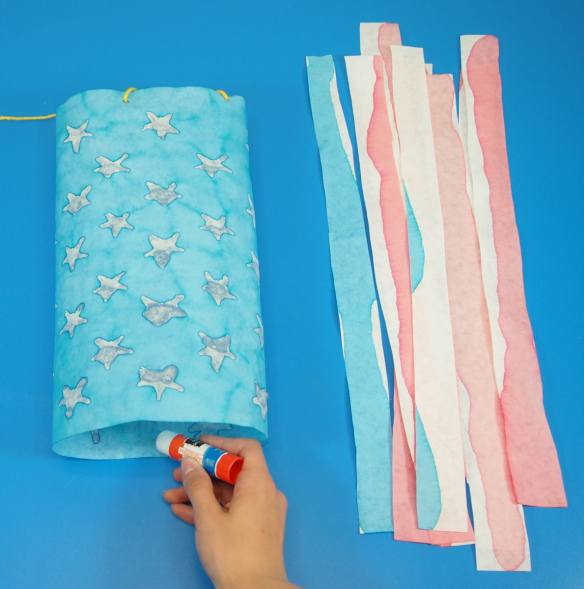
P6179748Put a bit of glue on the inside of the windsock’s bottom edge.
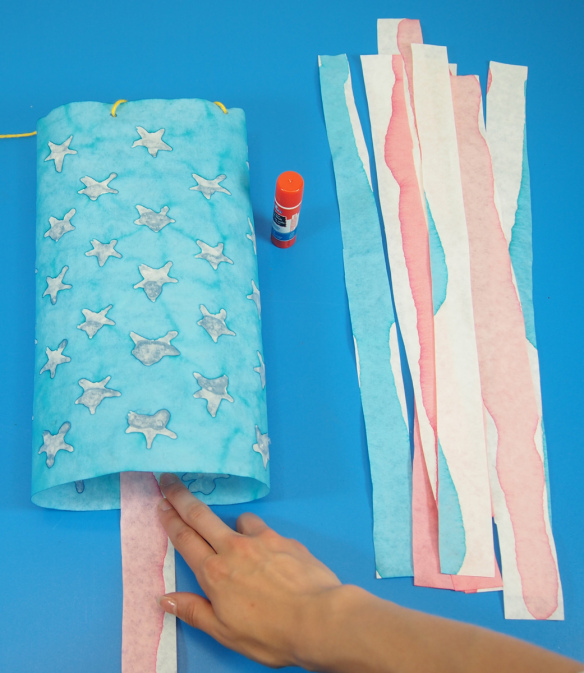
P6179749Press a streamer down onto the glued portion. Space out your streamers into equal intervals and continue all the way around the bottom of the windsock.
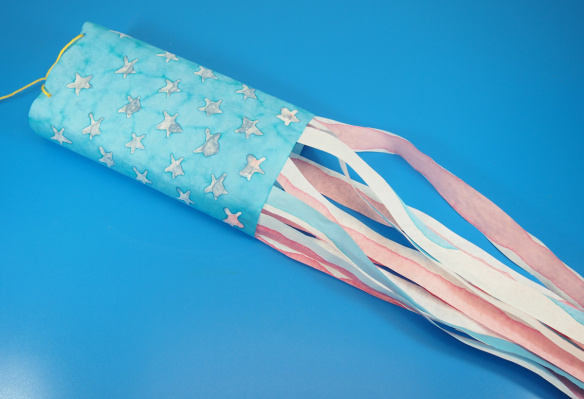
P6179752Here’s a look at our windsock! Isn’t it a beaut!
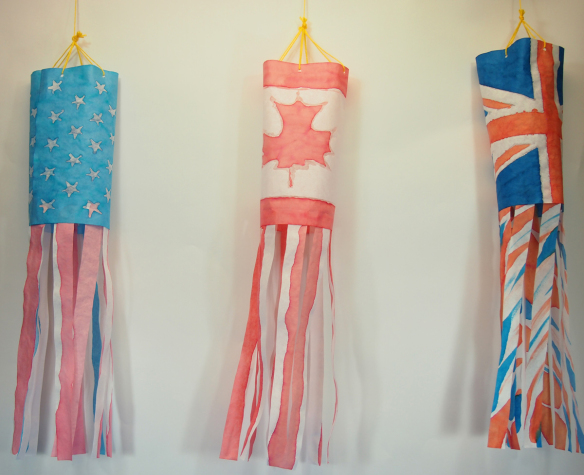
P6179757 You can see further completed designs here, including the American flag, Canadian flag, and the Union Jack!
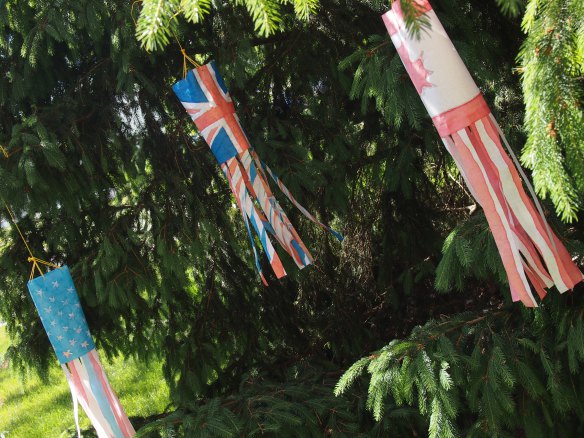
OLYMPUS DIGITAL CAMERA Here’s a shot of our windsocks fluttering outside from our local pine trees!
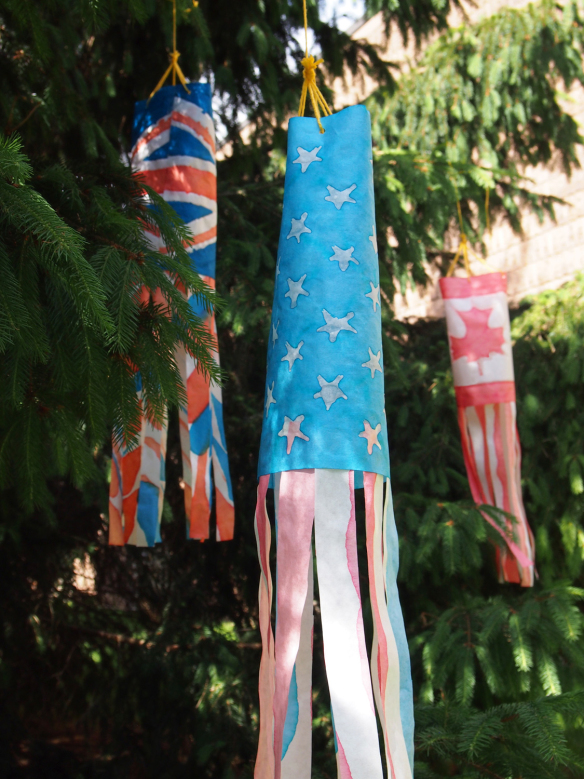
P6209823 Another gorgeous look at our lovely flag designs! Watch how they flutter animatedly in the breeze! Line-03 Thanks for checking out this post! Like us on FacebookShare this post with your friends, or Subscribe to this blog today to receive original craft project updates every Monday, Wednesday and Friday!

Let’s Make A Window Cling!

BP- Window Cling Rubbing Plates 4 Large

Age: 4+

Duration: 30 minutes (or more, depending on your design preferences), plus drying time.

Learning Outcomes:

We’re going to be mixing ingredients, painting and decorating with our creations.  We can learn about the subjects related to our rubbing plates, nature, science, etc. And, we can even have a discussion about sunlight and color as we enjoy our window clings.

Here’s what you need:

Any of our Rubbing Plates will work perfectly for this project.

Non-Toxic White Glue

Dish Soap

Food Coloring (liquid or gel)

Glitter (optional)

Brush (foam or bristle)

Sandwich Bag (optional – for detailed application of color)

If you’ve worked with our rubbing plates before, you’re going to love this project. It’s easy — and fun to mix, make, and use! I’m using the Insect Rubbing Plates (R5803), but our entire line of Rubbing Plates can be used in this way.

We’re going to create a very cool window cling using non-toxic white glue, some dish soap, and food coloring (you can use liquid or gel food coloring — both work great).

Kids as young as 4 will enjoy this project, with some help and guidance. Kids 4+ will need minimal help but will probably have an excellent time.

Here’s how you do it:

Step 1:

Anytime you’re working with glue things can get a little messy. You’ll be doing yourself a favor if you put some wax or parchment paper down on your work surface. This will also help to keep your rubbing plates from sticking to stuff.

Step 2:

Time to mix some colors! All these materials are safe, so it’s okay to use a cup or a bowl from the kitchen to mix your ingredients.

Start with about 2 tablespoons of white glue. Add a couple of drops of dish soap. It’s okay if your measurements are not super precise.

Next, add the food coloring. A little is plenty. For darker colors, add more. If you don’t have the color you need, try mixing the colors you have. You could also leave the color out to create a translucent appearance (perfect for bug wings).

Consider this:

If you want to use more than one color, you’re awesome! It might be a good idea to prepare all your colors during this step.

Also, glitter doesn’t work great everywhere — but it works great here! Add some glitter to your color during this step, and it will really add a nice, sparkly effect to your window cling. It will be so pretty when the sun is shining through!


Step 3:

Before you begin, make sure to use the side of the rubbing plate on which the pattern is sunk (not raised). It’ll help to keep the color in place.

A foam, or bristle brush, will work great for covering the bug with your mixture. For more precision, try using a pastry bag. Just pour the mixture into a sandwich bag, pushing it down to the corner, then snip a tiny hole in the point.

Really precise images will take some practice. You learn the best amount of glue as you go. But, keep in mind, the thinner the coverage, the more fragile your window cling will be.

Step 4:

We need to let it dry. Depending on how much glue you used, it could take up to 12 hours to dry.

Step 5:

Removal. You know how when you get some glue on your finger, and after it dries you peel it off, and somehow that makes you really happy? This step is like that — times 10.

Watch the edges. The glue can get under the plate, so make sure to peel any away from the back.

AHHhhh… that was fun.

Now you have a window cling!

Consider this:

Trim the edges for a more elegant design.

Step 6:

The time has come to display your creation! Find a good spot in the window and give it a quick wipe with a damp paper towel. Be sure to dry it. Now, use your wet paper towel to dampen the flat side of your window cling. Press it firmly onto the window.

You did it!

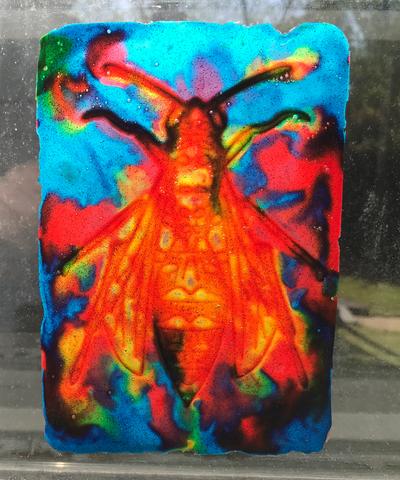
Roylco Window Cling Tie Dye Look

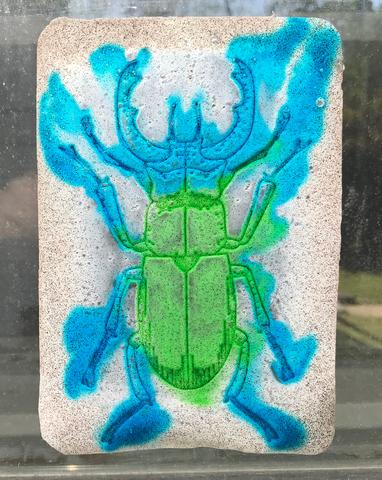
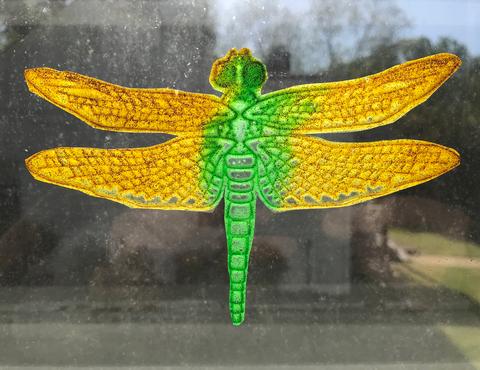
Roylco Window Cling Blue and Green Bug

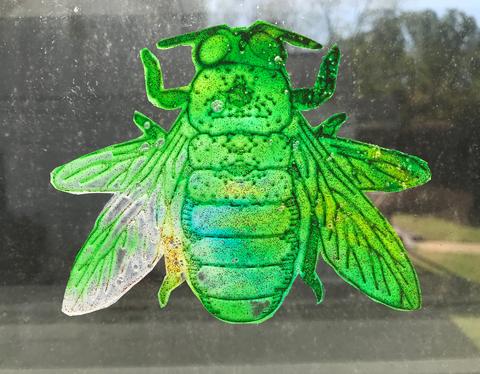
Roylco Window Cling Green Cut Out Bug

This is a great way to add a fun, science and nature theme to any environment —classroom, bedroom, kitchen, office — anywhere you want to hang up some inspiration.

Use your rubbing plates as many times as you like to create more window clings. Experiment with colors, color placement, backgrounds, trimming… get creative and make it your own!

Roylco Sketch Art of Kid on Tricyle

Make Your Own Marbled Paper

Marbled Critters FB

A couple of years ago, we introduced our Foam Paint Bottles. Now, I’d like to walk you through a sensory-rich and beautiful activity: Marbled paper! The best part about this activity is that it can be both an end product and a craft component for other projects. First, I’ll take you through the marbling process. Then I’ll show you some craft ideas!

Age: 3+

Duration: 15 minutes (not including drying time)

Learning Outcomes: Encourage sensory development with this tactile foam paint. Develop fine motor and pre-writing skills by practicing the strokes needed to write in your marbling pattern. Create a beautiful work of art that can also be re-purposed as handmade craft paper.

You’ll Need: 

Line-17

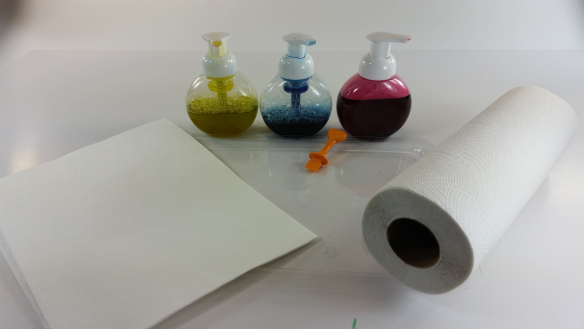
Start with an empty, clean fingerpaint tray and your foam paint bottles. I have mixed up red, yellow and blue for this project. You’ll find the instructions for mixing your foam paint here. You’ll also need plain white paper and paper towels.

FM1

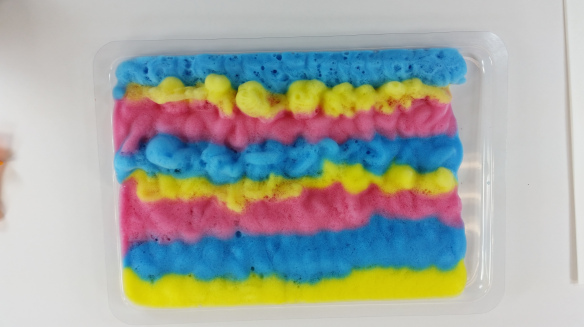
Start by pumping lines of foam paint onto your tray. A parent or teacher can do this for very young children. Older kids will have fun pumping the foam themselves. I suggest starting with parallel lines, since this pattern will be the easiest to marble.

FM3

Use this time to talk about color. What happens when red mixes with blue? Or when Yellow and blue mix? Once you have filled your tray with lines of foam paint, it’s time to marble!

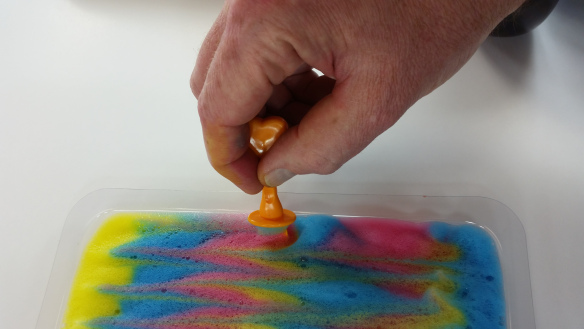
Grab your goo spreader, and carefully draw it across your lines of foam paint. Straight lines are easiest, but slightly older kids can experiment with zig-zags, curved lines, or even concentric circles. This is how you create your marbling pattern. Remember, some mixing is ok, but you want to be able to see the pattern when you make your paper print. Don’t completely mix the colors, or you’ll have a muddy brown mess.

FM4

Marbling in Progress

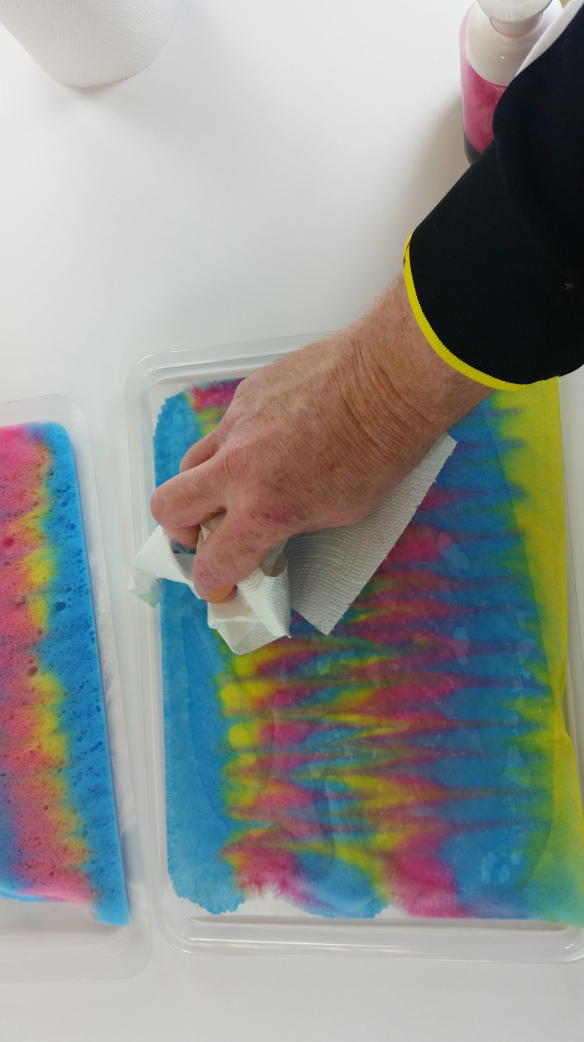
Once you are finished creating your marbling, it’s time to print it onto your paper. Simply lay a sheet of white paper or cardstock on top of the foam paint. Let it sit for a count of three, then lift it off the foam paint. Use the paper towel to quickly wipe excess foam off of your paper. FM7

Your paper should dry fairly quickly. Once it’s dry, your paper is ready to be displayed!

FM6

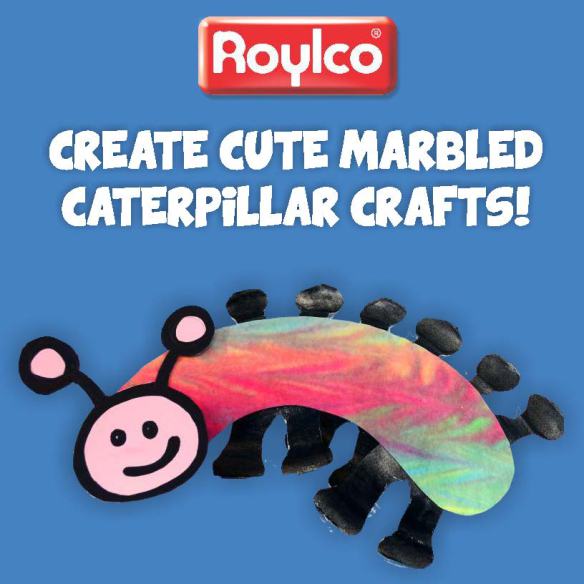
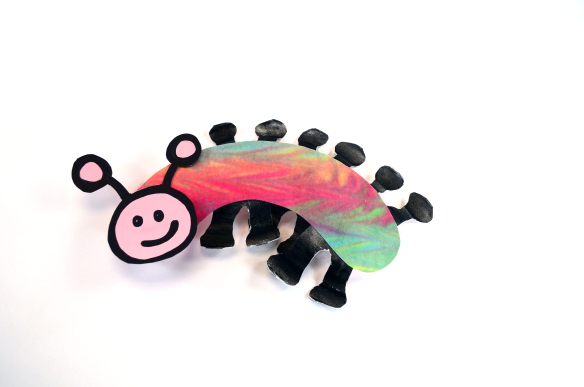
Alternatively, your paper can go into your craft paper stock and be used to create different crafts. For example, a delightful crawly caterpillar:

Marbled - Catapillar2.jpg

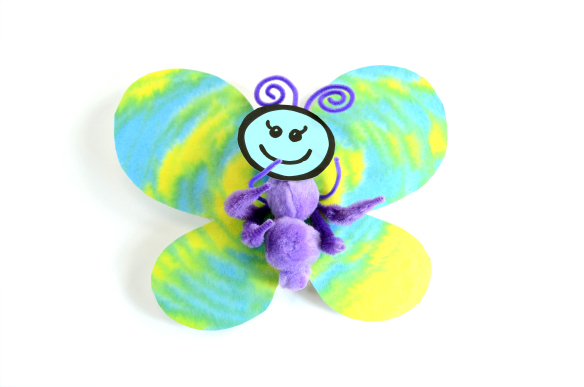
And the butterfly he will turn into:

Marbled - Butterfly1.jpg

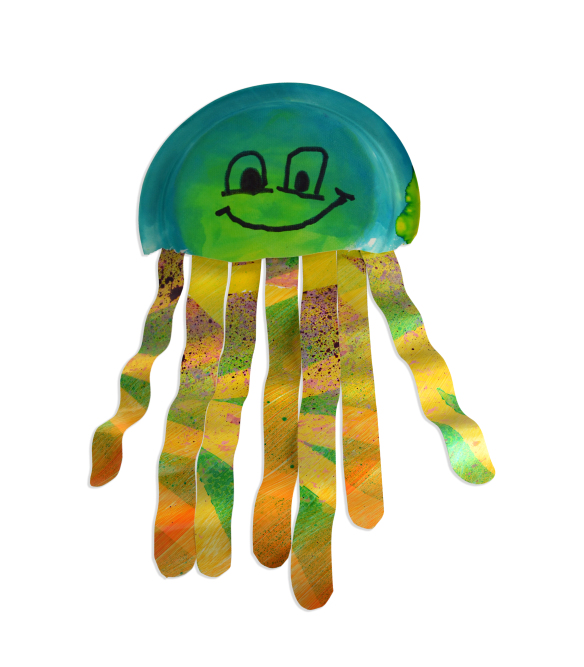
The marbling technique also works on paper plates! Use paper plates to create this playful octopus:Collage - JellyFIsh

Or another take on marbled butterflies:

Foam Paint - Paper Plate Butterfly

Line-20

Like us on FacebookShare this post with your friends, or Subscribe to this blog today to receive original craft project updates every week!

Bundle Savings

Get all the Roylco items used
in this project and save 15%!

$28.46 USD
bundled price
Add Bundle
to Cart


Sealife Weaving Mats

2015-06-29-FeatureImage

With the summer fast approaching, it’s time to get in gear for some summer crafting fun! Exercise fine motor skills while weaving mats shaped as your favorite undersea creatures! 

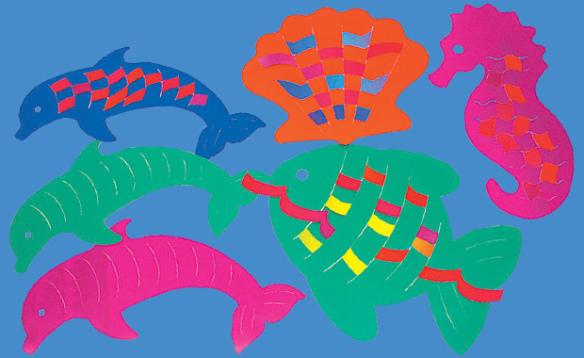
The Sealife Weaving Mats pack provides a great start for children who are honing their fine motor skills. There are 4 different shapes–a dolphin, fish, seahorse and shell–for your students to choose from. The colorful and heavy card paper is great for weaving as it holds its shape while students experiment with the over-and-under method of passing strips through the slots.

You can tape the paper strips down to prevent them from sliding as you weave them across the slots. The paper strips are cut into wave-like formations to add to the design of your woven shape.

Remember to alternate the start of the weaving so that the strips are started either one slot over or behind each row. This will ensure that you get that neat brick-like pattern as the weaving continues.

Once your students have finished creating their woven design, they can hang the finished pieces up on a display wall or take home. To extend the weaving activities even further, try out some of the tutorials below:

• Make weaving strips from Color Diffusing Paper! This special paper allows watercolors to blend together to make new interesting color designs. Wait until the paper dries, then cut it up into strips and use it to make your own colorful painted weaving mat!

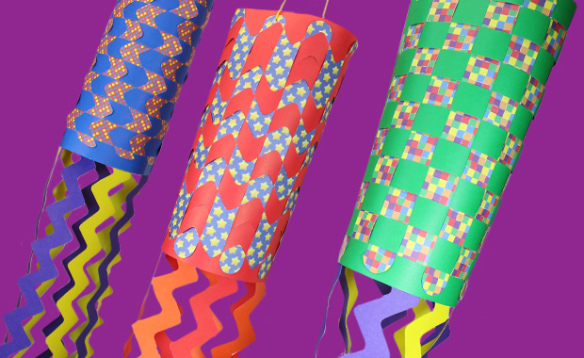
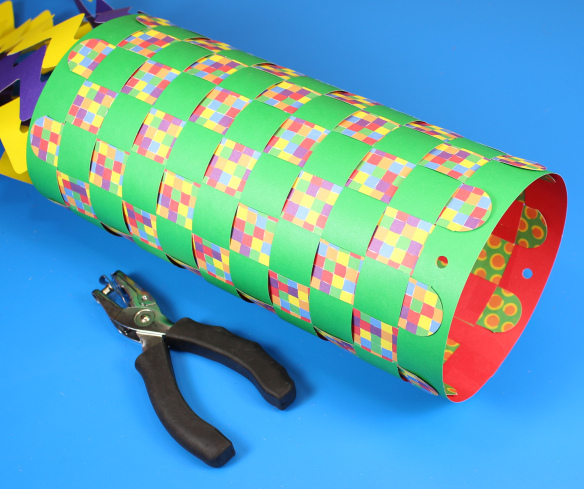
• Turn a woven placemat into a windsock with this activity! Details here!

This activity is for more advanced weaving, but is a great exercise nonetheless! Use beads and string to turn an ordinary paper plate into an extraordinary piece of art.

• Once your students get really good at weaving, make some functional items including this basket! Students can use the baskets for storing or organizing important tools such as pens, pencils, erasers, rulers and calculators inside their desks.

Line-06

Like us on FacebookShare this post with your friends, or Subscribe to this blog today to receive original craft project updates every Monday, Wednesday and Thursday!

Weaving Mat Windsocks

weaving placemat windsock

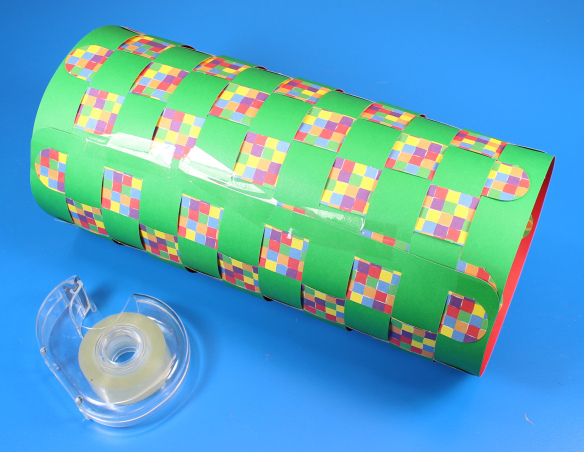
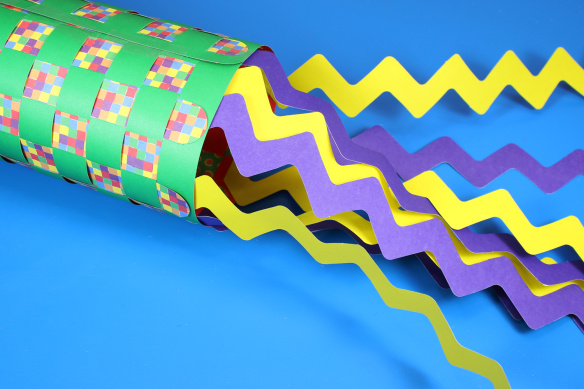
After you’ve done your spring cleaning, hang up some bright and colorful windsock decorations! 

Age: 3+

Duration: 15-20 minutes

Learning Objectives: Exercise fine motor skills with precise weaving. Make a beautiful windsock craft for summer time using a multi-step process.

weaving placemat windsock

You’ll Need:

R16019 Placemat Weaving Mats

• Hole punch

• Tape

• Yarn

• Scissors

Line-06

weaving placemat windsock

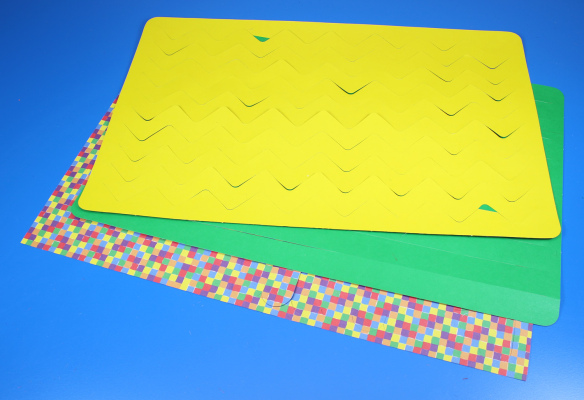
Each pack of Placemat Weaving Mats come with an assortment of beautiful patterns and designs for the placemats. The placemats will be your base for making the windsocks. Choose the one that will best represent your windsock! The slots are pre-cut for easy weaving.

weaving placemat windsock

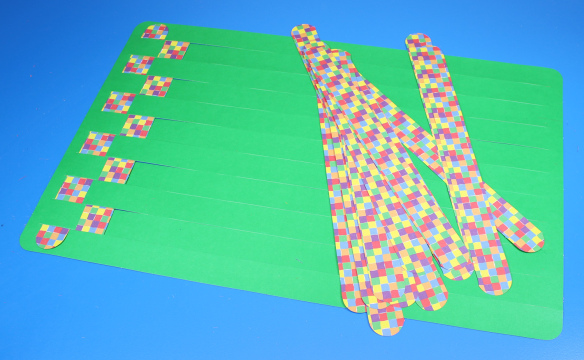
Each pack features die-cut patterned strips that can be intertwined with the placemat slots. Weaving the slots should be done in an over-and-under pattern. For each column you complete, be sure to alternate the start of your weaving.

weaving placemat windsock

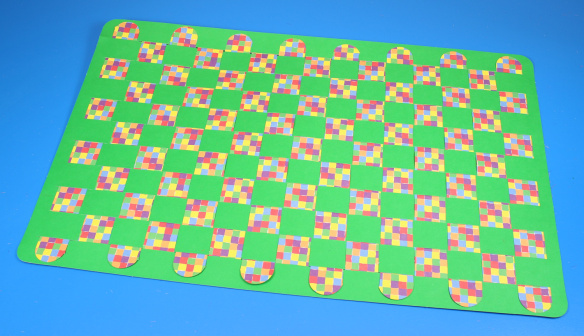
Here’s what the placemat looks like when it’s all finished and woven!

weaving placemat windsock

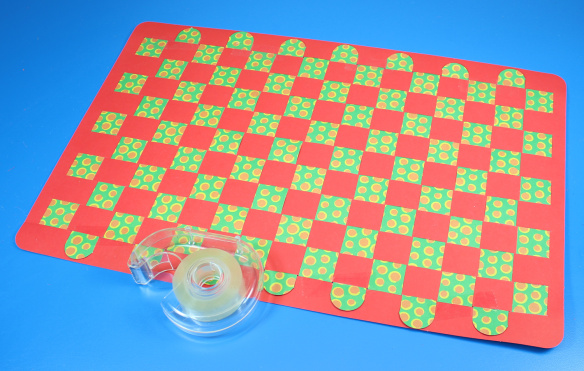
You can secure all of the strips down with tape.

weaving placemat windsock

Roll the placemat into a cylinder and secure the edges together with tape.

weaving placemat windsock

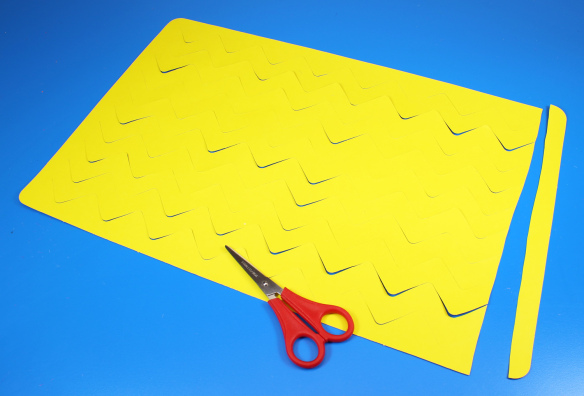
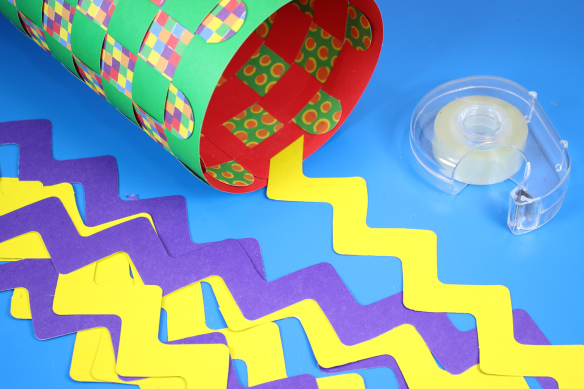
Take one of the placemats with the pre-cut weaving slots and cut along the edge on one side. Repeat for the opposite side. This will allow you to easily detach the resulting slots apart to make your own streamers for the windsock. Alternatively, you can use scrapbooking scissors to cut your streamers from tissue paper or decorative paper.

weaving placemat windsock

Tape the individual strips to the inside bottom edge of the windsock.

weaving placemat windsock

Make sure the inside edge is completely filled with streamers.

weaving placemat windsock

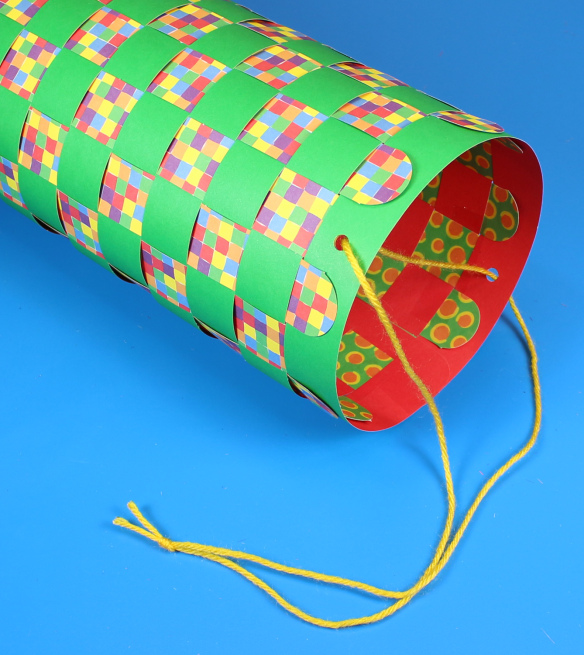
Hole punch two holes on either side of the placemat weaving mat cylinder.

weaving placemat windsock

Cut a length of yarn and tie through the holes in the windsock.

weaving placemat windsock

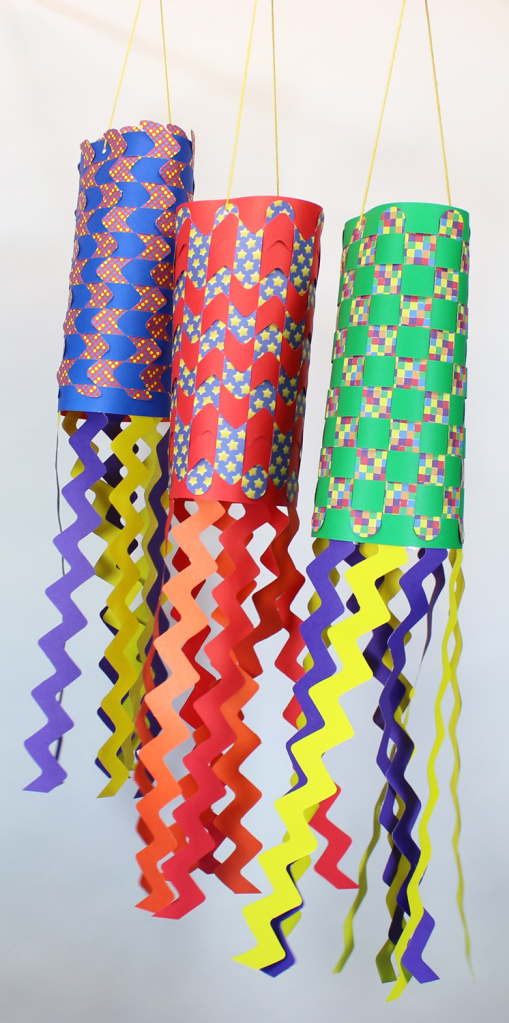
Here’s a beautiful ensemble of Weaving Mat Windsocks hung up in front of a classroom wall! How pretty does that look? Good enough for a summer art display!

Line-21

Like us on FacebookShare this post with your friends, or Subscribe to this blog today to receive original craft project updates every Monday, Wednesday and Thursday!

Craft Spotlight: Fabric Mosaics

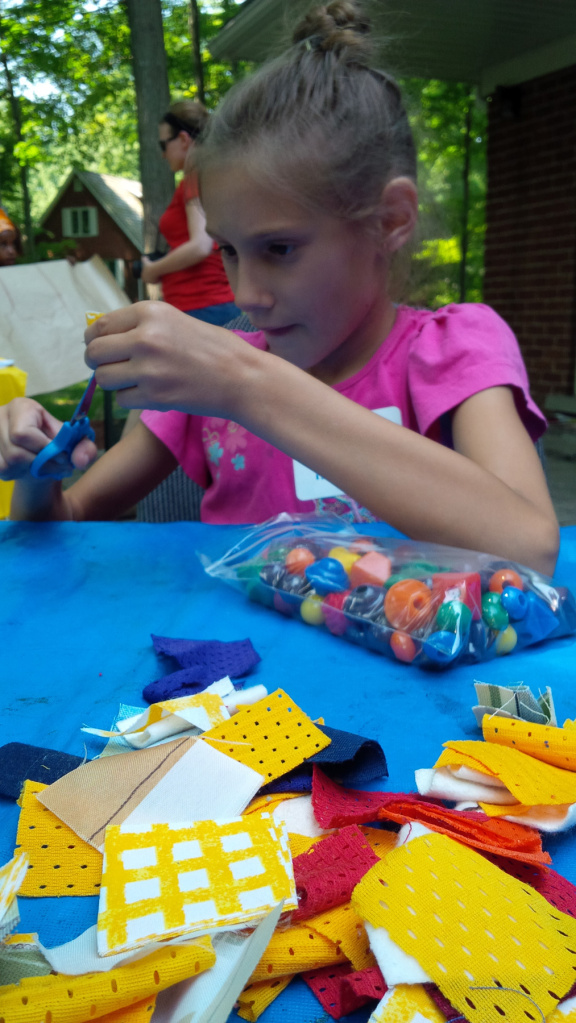
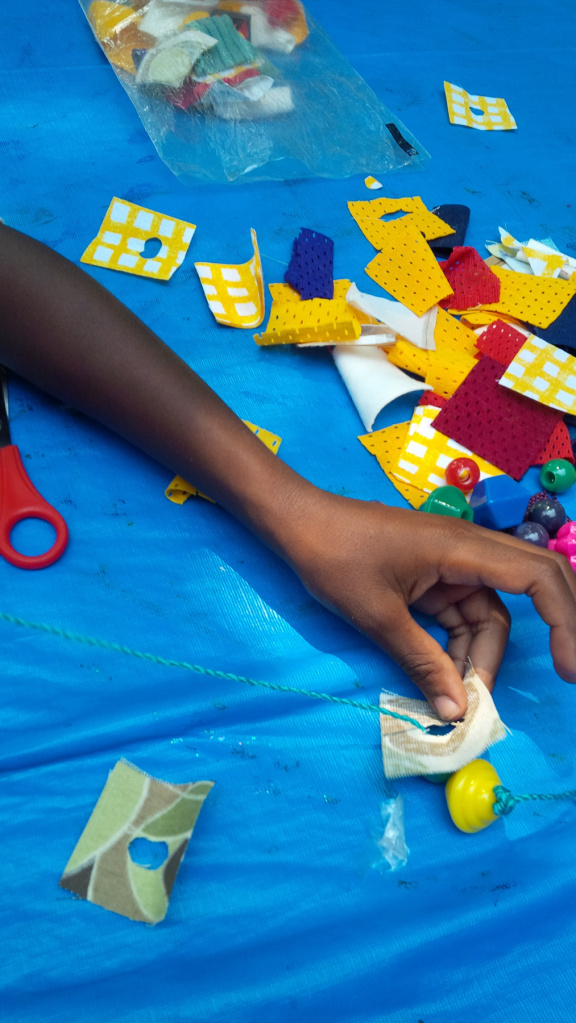
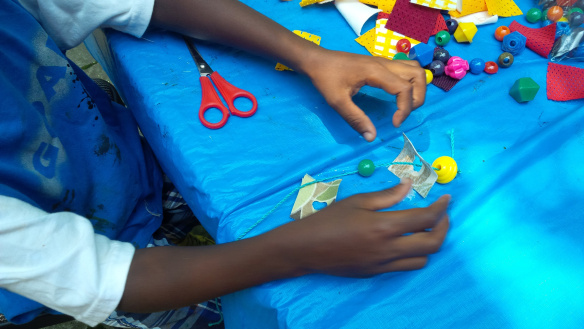
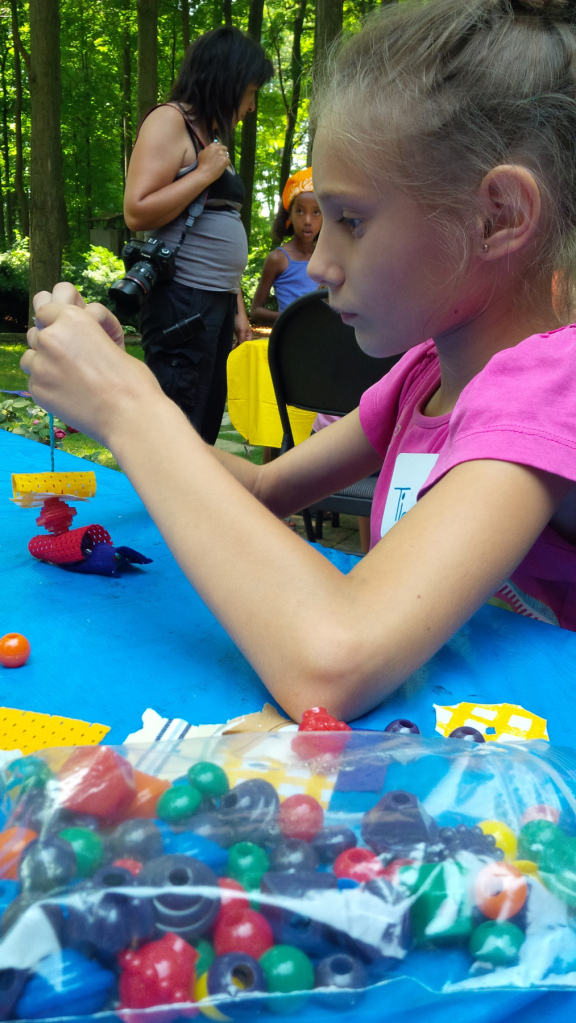
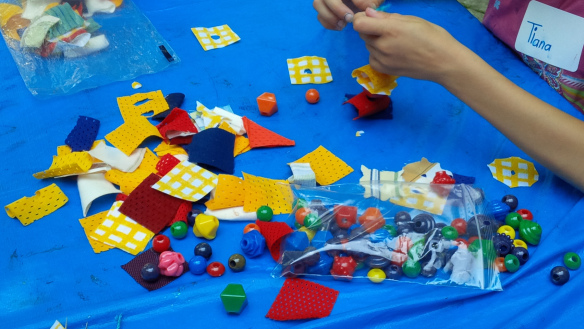
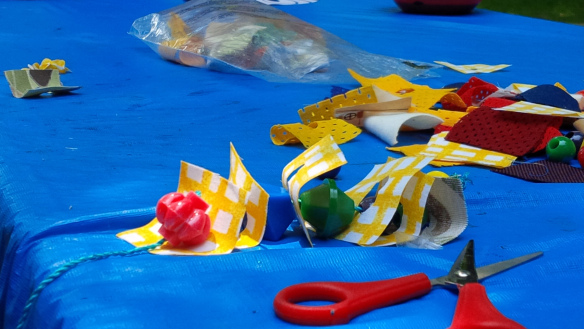
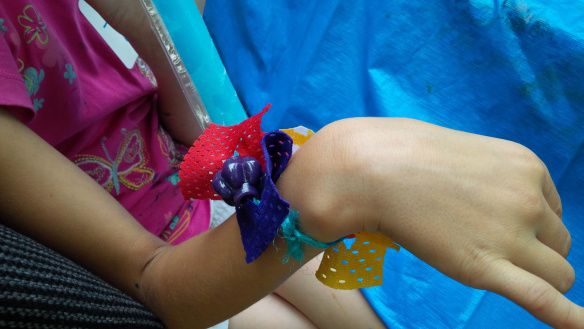
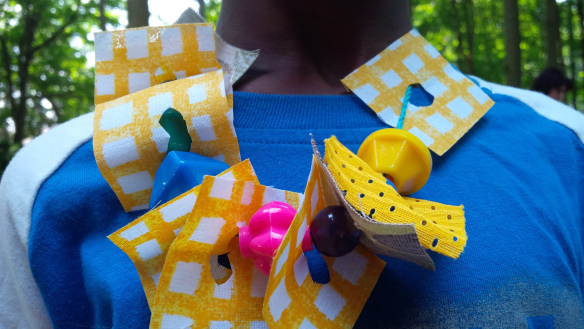
2014-06-30-FeatureImageR15651 Fabric Mosaics are great for tactile activities such as beading and stringing! Who knew! At our art camp, we tried out a technique where we interwove Brilliant Beads with Fabric Mosaics on string to make colorful and unique jewelry!_DSC0303First, we started out by folding the Fabric Mosaics in half and cutting out the center. This made a hole that we could use to string the yarn through. IMG_00000576We made sure the kids cut out the centers very carefully. IMG_00000580Once all the mosaics were cut, we tied a knot at the end of each length of yarn. IMG_00000587We first strung large Brilliant Beads up against the knots. This made sure that none of the Fabric Mosaics could slip out. IMG_00000588 Then we started layering our bead arrangements! IMG_00000596The bright colors in the Fabric Mosaic pack worked so well with our Brilliant Beads! IMG_00000606The combination was simple: alternate a Fabric Mosaic with a Brilliant Bead and back again. Keep going until the whole string is decorated or filled up! IMG_00000610Getting ready to finish up! Now we can loop the beaded string into a bracelet… IMG_00000620…like this one! IMG_00000624Or a necklace! Simple and easy, yet great fun to make! Line-18 Thanks for checking out this post! Like us on FacebookShare this post with your friends, or Subscribe to this blog today to receive original craft project updates every Monday, Wednesday and Friday!
Craft Spotlight: Bunting Flags

Feature-Image-buntingflag

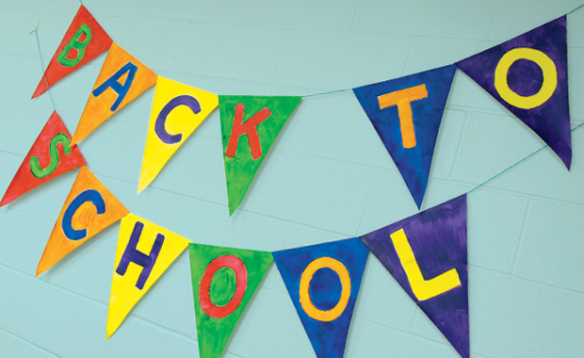
Welcome to our first Craft Spotlight post! These posts will be published every Monday to showcase our favorite craft projects developed and manufactured domestically by Roylco! This week’s feature craft is R22046 Bunting Flags! 

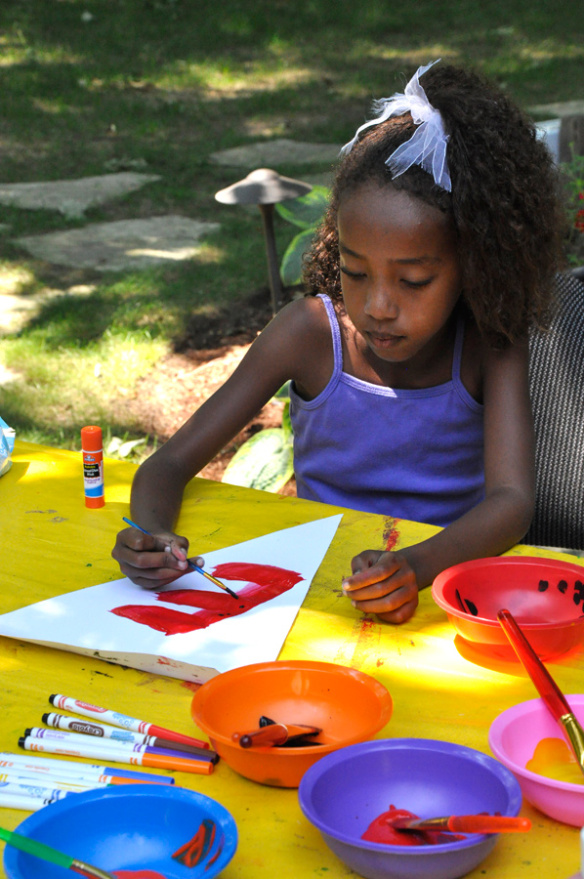
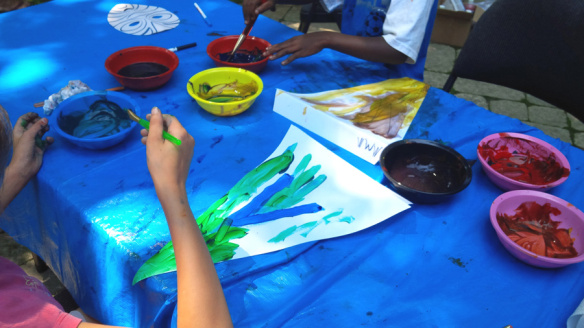
Bunting Flags are cut from heavier paper and are great for painting on! Use regular tempera paint for coloring the flags. Welcome back your class with a fun decoration or get the entire class to work on one together!

_DSC0242

We wrote the words “2013 Summer Art Camp” across our Bunting Flags during the Roylco Art Camp, and got some of our young crafters to paint all the letters of the alphabet.

IMG_00000566

Use the flags for making classroom decorations! Write one letter/number per Bunting Flag.

DSC05433

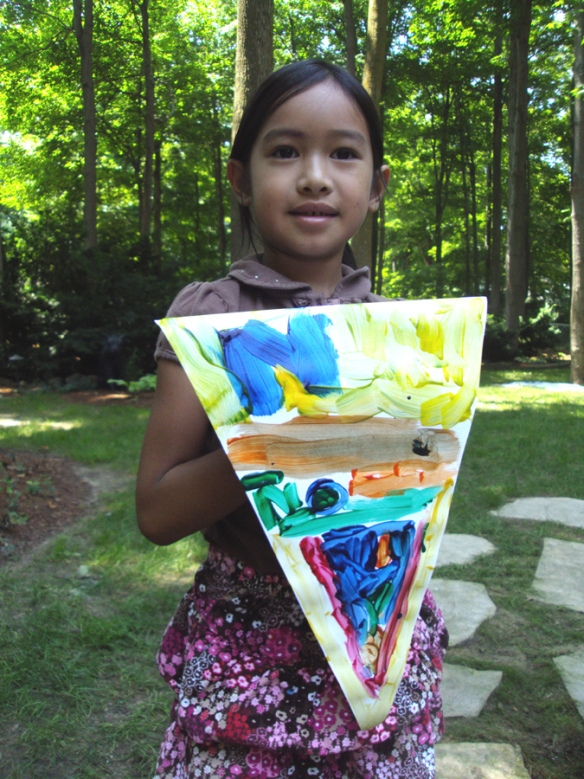
Some of our crafters even drew scenes and combined several colors together. This is a great way to explore new ways of displaying students’ artwork! All of your students’ art can be hung up along a single wall like a bunting flag line!

Line-10

Show us your students’ artwork! Hang up your students’ painted Bunting Flag artwork and send us a photo of what it looks like in your classroom. We will publish a post on your work and show the rest of the arts and crafts education world! Send us an email to subscriber@roylco.ca!

Tear Art Still Life

Feature-Image-Rubplatetornart

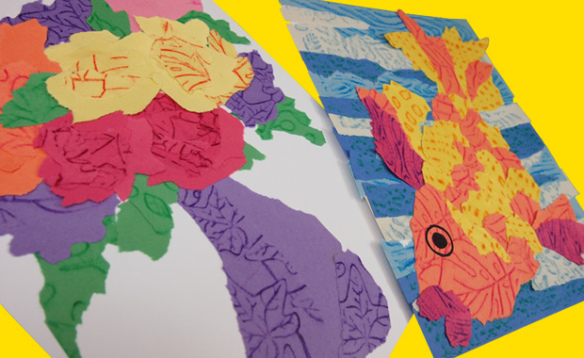
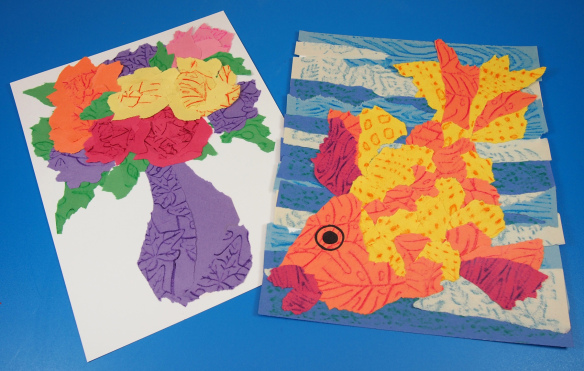
Our take on tear art uses simple materials: construction paper, crayons, rubbing plates and a bit of fine motor action! Find out how to create a gorgeous still life of a vase of summery flowers, or inspire some beachy fun with a colorful tropical fish portrait!

Age: 4+

Duration: 15-20 minutes

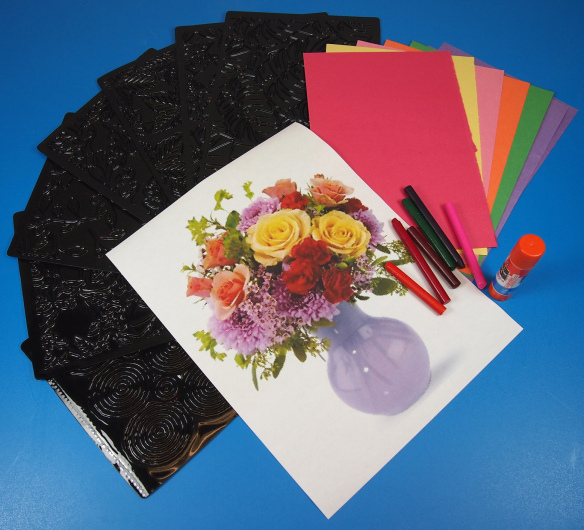
You’ll Need:

• R5871 Organic Rubbing Plates

• Construction paper in assorted colors

• Crayons

• Glue

Line-06

For this activity, I chose to use our R5871 Organic Rubbing Plates, but you could use any of our rubbing plates that create a uniform pattern throughout the rubbing area. Try some of these rubbing plates made especially from Roylco:

R5839 Texture Rubbing Plates

R5817 Animal Skins Rubbing Plates

R5841 Optical Illusion Rubbing Plates

R5870 Linear Rubbing Plates

P6242624

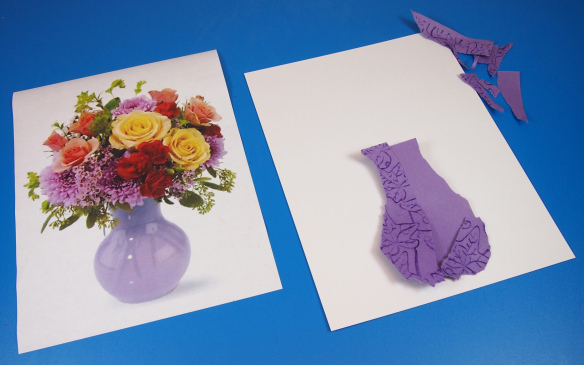
You will need to grab a reference photo to work from, such as the vase photo above. Look online for some ideas or browse through photography books for inspiration. Still life images are a great place to start for reference ideas. The subject is very clear to the viewer and usually shows something familiar, such as a vase with flowers or a basket of fruits. Once children have completed a still life image, they can try creating an action shot of an animal or a person with their tear art!

P6242626

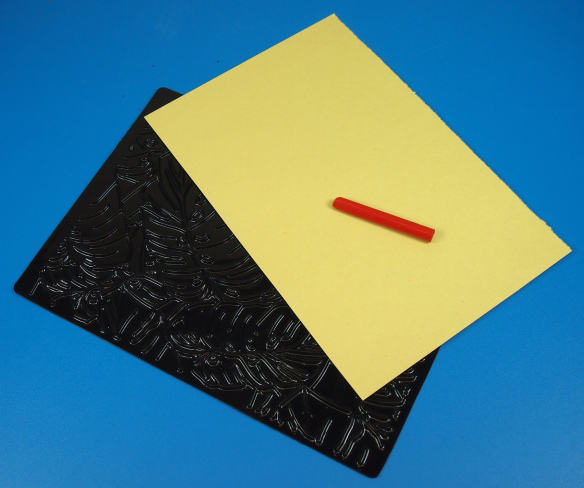
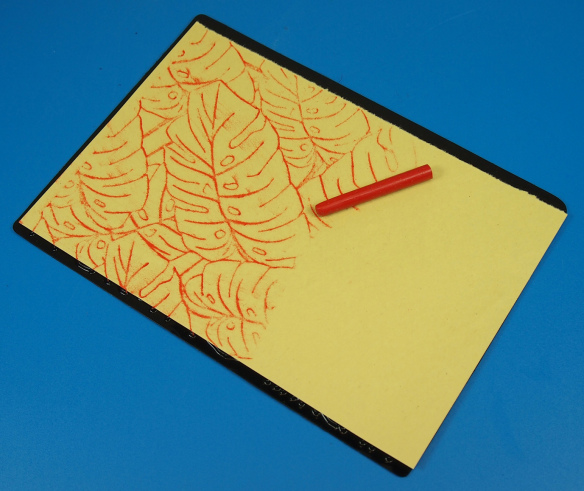
Place one rubbing plate beneath one of each construction paper color. Rub with a similarly colored crayon (or choose contrasting colors in neon for interesting effects).

P6242627

You will only need to use half of the sheet. Cover the entire sheet of paper with the pattern if you plan to separate the pages to share between students.

P6242634

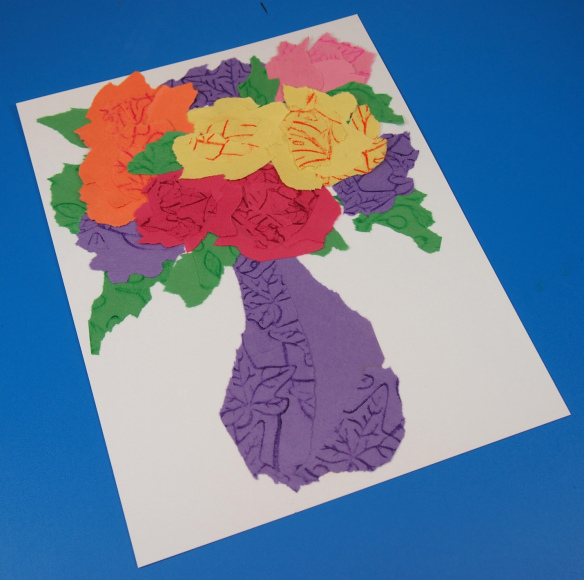
Exercise fine motor skills with crayon rubbings and tearing paper! Before you tear the construction paper, consider which colors will fill in certain parts of the illustration. For instance, the purple construction paper rubbing will serve as the vase in this image. Tear the construction paper into strips. Try not to use scissors, as that takes away from the “tear” in tear art! Keep the image in mind as you tear the paper. Since the vase is long, I tore the strips into longer sections. I tried to steer the the tear into a bowl shape near the bottom to mimic the roundness of the vase. Try it out!

Tip: Notice the glare on the sides of the vase. To achieve this effect, I used construction paper that wasn’t rubbed over. This took away from the texture while completing the look of the vase.

P6242636

Tear the rest of the pieces in larger chunks to make the flowers. Arrange the torn pieces together so that they overlap into circle-like shapes. This will appear like flowers. Tear longer pieces for the leaves, and paste them down first. Layer the flowers on top.

P6242638

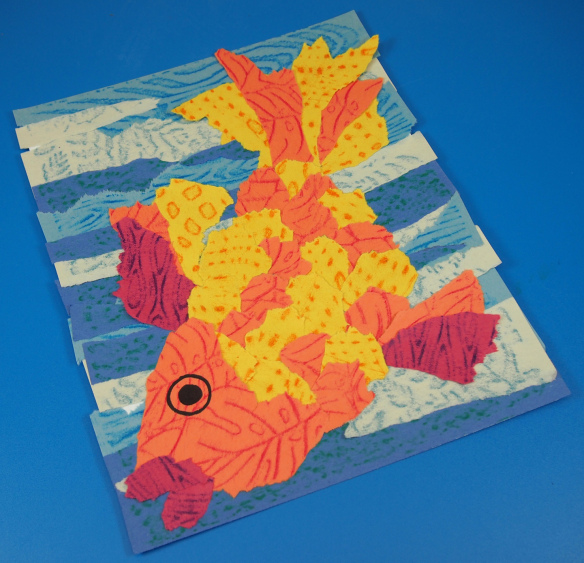
I tore long strips of blue in varying shades to make the ocean background for the tropical fish portrait. I interspersed yellow and orange paper strips together to form the fish body. Tear two large pieces of red construction paper for the fins. Tear two smaller pieces of red construction paper and angle together to make the fish lips.

P6242640

Beautiful work! There’s loads of fun you can have with tear art! I would love to see what kinds of art you create with this technique. Just send me an email with your artwork attached and I’ll write up a post about it!

CRAFT CHALLENGE:

Make a tear-art self portrait! Grab a mirror or a photo of yourself and try to recreate your likeness with torn strips of patterned paper. How artistic can you make your portrait? Send us photos of your work!!


Line-06

Send all photos, comments or suggestions to subscriber@roylco.ca! Thanks for dropping by!
Judy’s Handmade Creations uses our Bright Buttons!
Judy from Judy’s Handmade Creations used our Bright Buttons to decorate lovely handmade cards! R2131 Bright Buttons are perfect for a variety of different projects, including scrapbooking and collage! The post, entitled “Summer Mini Album 2013!!” was posted on June 27, … Continue reading