Sealife Weaving Mats

2015-06-29-FeatureImage

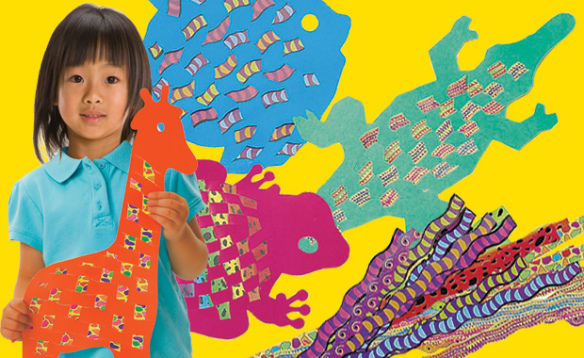
With the summer fast approaching, it’s time to get in gear for some summer crafting fun! Exercise fine motor skills while weaving mats shaped as your favorite undersea creatures! 

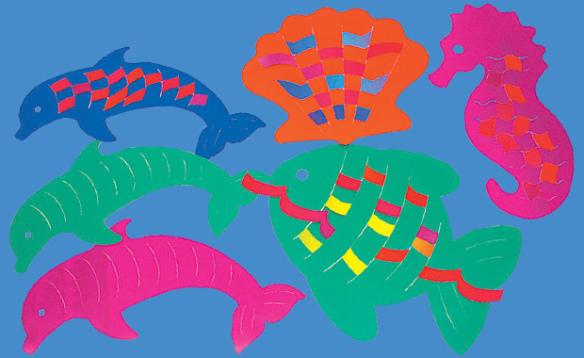
The Sealife Weaving Mats pack provides a great start for children who are honing their fine motor skills. There are 4 different shapes–a dolphin, fish, seahorse and shell–for your students to choose from. The colorful and heavy card paper is great for weaving as it holds its shape while students experiment with the over-and-under method of passing strips through the slots.

You can tape the paper strips down to prevent them from sliding as you weave them across the slots. The paper strips are cut into wave-like formations to add to the design of your woven shape.

Remember to alternate the start of the weaving so that the strips are started either one slot over or behind each row. This will ensure that you get that neat brick-like pattern as the weaving continues.

Once your students have finished creating their woven design, they can hang the finished pieces up on a display wall or take home. To extend the weaving activities even further, try out some of the tutorials below:

• Make weaving strips from Color Diffusing Paper! This special paper allows watercolors to blend together to make new interesting color designs. Wait until the paper dries, then cut it up into strips and use it to make your own colorful painted weaving mat!

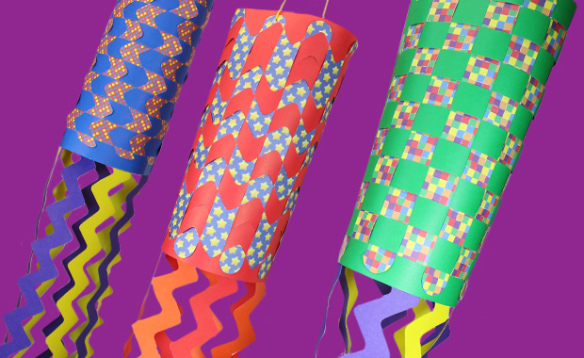
• Turn a woven placemat into a windsock with this activity! Details here!

This activity is for more advanced weaving, but is a great exercise nonetheless! Use beads and string to turn an ordinary paper plate into an extraordinary piece of art.

• Once your students get really good at weaving, make some functional items including this basket! Students can use the baskets for storing or organizing important tools such as pens, pencils, erasers, rulers and calculators inside their desks.

Line-06

Like us on FacebookShare this post with your friends, or Subscribe to this blog today to receive original craft project updates every Monday, Wednesday and Thursday!

Weaving Mat Windsocks

weaving placemat windsock

After you’ve done your spring cleaning, hang up some bright and colorful windsock decorations! 

Age: 3+

Duration: 15-20 minutes

Learning Objectives: Exercise fine motor skills with precise weaving. Make a beautiful windsock craft for summer time using a multi-step process.

weaving placemat windsock

You’ll Need:

R16019 Placemat Weaving Mats

• Hole punch

• Tape

• Yarn

• Scissors

Line-06

weaving placemat windsock

Each pack of Placemat Weaving Mats come with an assortment of beautiful patterns and designs for the placemats. The placemats will be your base for making the windsocks. Choose the one that will best represent your windsock! The slots are pre-cut for easy weaving.

weaving placemat windsock

Each pack features die-cut patterned strips that can be intertwined with the placemat slots. Weaving the slots should be done in an over-and-under pattern. For each column you complete, be sure to alternate the start of your weaving.

weaving placemat windsock

Here’s what the placemat looks like when it’s all finished and woven!

weaving placemat windsock

You can secure all of the strips down with tape.

weaving placemat windsock

Roll the placemat into a cylinder and secure the edges together with tape.

weaving placemat windsock

Take one of the placemats with the pre-cut weaving slots and cut along the edge on one side. Repeat for the opposite side. This will allow you to easily detach the resulting slots apart to make your own streamers for the windsock. Alternatively, you can use scrapbooking scissors to cut your streamers from tissue paper or decorative paper.

weaving placemat windsock

Tape the individual strips to the inside bottom edge of the windsock.

weaving placemat windsock

Make sure the inside edge is completely filled with streamers.

weaving placemat windsock

Hole punch two holes on either side of the placemat weaving mat cylinder.

weaving placemat windsock

Cut a length of yarn and tie through the holes in the windsock.

weaving placemat windsock

Here’s a beautiful ensemble of Weaving Mat Windsocks hung up in front of a classroom wall! How pretty does that look? Good enough for a summer art display!

Line-21

Like us on FacebookShare this post with your friends, or Subscribe to this blog today to receive original craft project updates every Monday, Wednesday and Thursday!

Project Spotlight: Snowflake Weaving Mats

2014-12-08-FeatureImage

Add beautiful snowflakes to your winter display with artwork your students get to make!

The R16027 Snowflake Weaving Mats kit contains 24 projects for your classroom in four unique snowflake designs. What sets each of your students’ snowflakes apart from each other is the addition of our patterned weaving strips. There are plenty of designs for students to choose. Mix and match different combinations of weaving strips for a beautiful bold look!

Weaving is a great way to encourage fine motor development as it forces fingers to expertly pass the strips over and under the slots in the weaving mat. Remember to alternate the start for each strip as you go!

When you are finished weaving all the way to the bottom of the mat, snip off the ends of the paper strips and tape the finished weave down.

You can see the process for weaving at the link below:

[youtube https://www.youtube.com/watch?v=dZM9688k1z8]

Hang up your finished snowflake designs on a display wall. Alternatively, write the name of each student on his or her snowflake and hang from the ceiling for a lovely mobile decoration.

Line-12

Like us on FacebookShare this post with your friends, or Subscribe to this blog today to receive original craft project updates every Monday, Wednesday and Friday!

Project Spotlight: Cross Weaving Mats

2014-10-27-FeatureImage

Honour the memory of our veterans’ sacrifices on Canada’s Remembrance Day, November 11, with the R16005 Cross Weaving Mats

Weaving mats help to encourage fine motor development through the act of passing the weaving strips under and over each of the successive slits cut into the colorful card crosses.

Make sure that the ends are taped off before you cut them. Once you have started on the next row, remember to start with the opposite direction. For instance, instead of starting your weaving over the slit, start under it and continue weaving over and under. This will vary up the appearance of the weaves and make it look like a checkered pattern.

Use about 4 strips per weaving strip.

The Cross Weaving Mats come in a range of different colors. Turn the card cross over to see another color on the flipside. As you weave, the colors of the weaving strips will also appear on the opposite side.

You can paste the Cross Weaving Mats up on a wallboard or attach the crosses together on a banner and hang up in the classroom as Remembrance Day decorations!

Line-19

Like us on FacebookShare this post with your friends, or Subscribe to this blog today to receive original craft project updates every Monday, Wednesday and Friday!

Craft Spotlight: Wild Weaving Mats

2014-07-07-FeatureImage

Weave wonderful animal mats using pre-cut printed strips. Create patterns while developing fine motor skills! 

The animal mats are made extra-large so you can hang the finished decorations up on a jungle-themed wall mural. They are pre-cut with slots to encourage weaving beginners to make interesting designs and learn concepts of going over and under.

R16001

These animals are ready to be decorated! Get the whole class in on the fun. Use craft feathers to glue to the birds or use metallic paint to add details to animals like the crocodile, fish or frog!

View more ideas at the PDF guide here. Watch the YouTube video below to see exactly how the mats are done.

Line-12Thanks for checking out this post! Like us on FacebookShare this post with your friends, or Subscribe to this blog today to receive original craft project updates every Monday, Wednesday and Friday!