Today we will explore some tips, tricks and troubleshooting strategies for making amazing green screen videos in your classroom!
Using a green screen is much less frustrating that creating stop-motion animation, but there can be a learning curve with any new style of film making! This post is designed to walk you through the process of creating puppets, filming them, and finally editing your footage to create a finished video!
In Hollywood, green screen filming is referred to as “Chroma Keying,” and it is a technology that allows film makers to overlay one piece of footage over a background by making the green disappear! Then the background shows up behind the foreground action. We have done a picture-in-picture video to show you the before and after green screen technology:
As you can see, the green background disappears in the final video! To get started with your project, however, first you’ll need some puppets.
Create Your Own Puppets
When you are working with young students and technology, it’s important to integrate art into the process! We have created a set of 72020 Green Screen Live Action Kit Reproducible Artwork Templates for six different designs of puppet that can be used with green screen filming. When you are decorating your puppets, remember to stay away from green and blue paper, fabric, markers, crayons, pencil crayons, paint, and other accessories. When you run your footage through editing software, the blue and green in your puppets will disappear too!
For the Star, we suggest using a very lightweight cotton fabric, tracing the star template, and cutting out the shape from the fabric. Then thread beads onto each point of the star, and knot the fabric to keep the beads in place.
The second page features two heads. Try printing this sheet out on our skin tone paper, and using the templates to create “talking mouth” puppets!
The third page features smaller people shapes, but you can use folded paper, braided yarn, or strips of fabric to create movable legs.
The profiles on page four are perfect for “talking head” puppets. Use a brad to hold the top and bottom halves of the head together while allowing movement.
If you want a puppet with four movable limbs, page five of the templates is for you! Each puppet torso is accompanied by a hands and feet. Use paper, fabric, or chenille stems to create movable limbs.
Finally, we have created an accordion fold puppet! This template has no legs or arms, but when you attach the face to a decorated accordion fold body, you have a unique puppet that moves in some very fun ways!
Once your students have their puppets made and scripts written, it’s time to think about the filming process!
Filming Process
There are two major components to the filming process: the background and the foreground.
The background is what will replace the green screen in your final video. This background can be a still image dropped into video editing software, or you can film a live action background. Just remember, if you are filming a live action background, you need to be able to match the motion of the camera to the motion of the puppets filmed on the green screen. This means that it will be easier to film your puppets on the green screen if you film your background first.
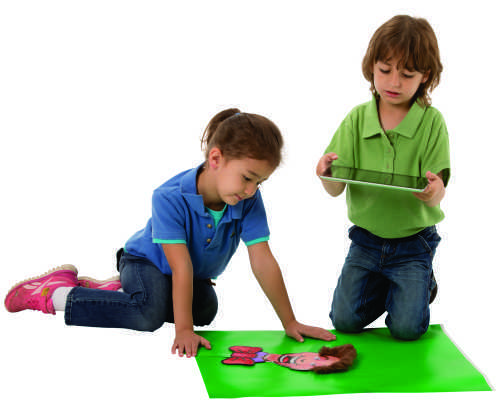
Once you have your filmed background, it is time to film your green screen shots. We have found that this kind of filming (at least for a classroom setting) works best on a flat surface, like a desk or on the floor. Some key steps to take to make editing easier include:
- Make sure the green screen is completely flat. Any folds, curves or wrinkles can create shadows, and change the color of the green. This makes it more difficult to chroma key the background out in editing.
- Make sure the green screen is evenly lit, with no bright spots or super dark patches. This can cause weird green patches to show up in your finished video.
- Remember, your hands aren’t green! We provide extra long sticks in the green screen kit so that you can move puppet limbs. If your hands are visible on camera, they will be visible in the finished version. It is possible (but VERY difficult!) to remove small intrusions like fingertips or long hair from the very edges of the green screen, but it’s easier in the long run to just re-film a shot if your hand gets caught on camera.
- When you are manipulating your puppets, make sure they stay flat against the green screen. If you lift them up, the shadows may not delete smoothly in editing.
- We strongly suggest recording dialog, music and sound effects separately, especially if you are filming puppets! That way you don’t have to film in a quiet location, and the puppeteer and camera-person can talk through the filming process as they are filming.
- Depending on the technology available in your classroom, you can use tablets, smartphones, video cameras, go-pros or any other device for recording live footage. Just remember that the quality of your video will change with the quality of your camera! For very young filmmakers, we suggest using an iPad to film, and then importing the footage into iMovie for editing. The software is relatively easy to use, and there are plenty of online tutorials too!
Once you have your green screen footage shot, you are ready to take your project to the editing suite!
Editing Software
Editing your movie is going to change depending on your classroom’s technology, software suites, and operating systems. However, iMovie and Windows Movie Maker both feature chroma key software. If you have Adobe Premier Elements, you should have a chroma key feature and you may have a “non-red” key. The non-red key is less specific than green or blue chroma key software, and you may find that colors that are made up with blue or green fade out a little. Usually you can adjust the opacity (how transparent or not) of the background to minimize the green screen and maximize the colors in your puppets.
When you edit your movie, there are a few things to keep in mind:
- Get rid of dead air and mistakes by trimming you video clips! Cutting out moments where nothing is happening onscreen helps keep the action moving and stops viewers from getting bored.
- Add sound in editing! Your soundtrack can feature dialog, music or sound effects. Drag and drop your sound clips to synchronize sound with pictures.
- Remember, most editing software allows you to split clips and move the smaller clips around, so if you didn’t film in order (and most Hollywood Filmmakers don’t), no problem!
- Did a hand accidentally slip into the corner of the screen? Consider adding a frame or vignette in editing to hide the errant digits.
- Do your puppets look unnaturally large or small against your background? Try scaling your puppet clips up or down in size to adjust. Remember though, this may affect how far over or how far up and down your puppets appear to move on the background.
Overall, remember to have fun! Young filmmakers can also visit the library for text resources on how to achieve certain kinds of shots and angles. This process will involve some trial and error; that’s ok! Filmmakers like Steven Spielberg, Orson Welles and Alfred Hitchcock all “broke the rules” to invent new ways to visually tell stories on film. George Lucas and Peter Jackson helped pioneer green screen technology, and our hope is to inspire students to be our next generation of filmmakers.
For additional resources about film history and film production, visit Crash Course: Film History and Production on
YouTube: https://www.youtube.com/watch?v=avAALYc7jw8&list=PL8dPuuaLjXtN-Bd-H_TGq72CN50Fpv_JX

Like us on Facebook, Share this post with your friends, or Subscribe to this blog today to receive original craft project updates every week!