New Product Highlight: Dinosaur Unruly Rulers

Get ready for an art adventure! This set of 6 stencils is fun and useful. Use these Dinosaur Rulers to create your own Dinosaur. Trace around the stencil and add colors when finished.

Age: 3+

Duration: 15-20 minutes

Learning Objectives: Mix and match dinosaur elements to create unique prehistoric animals. Use colored pencils, markers and crayons to decorate your dinos. The simple designs are easy by a wide range of ages.

You’ll need:

  • Crayons, Pencil crayons or markers to design and decorate the dinos
  • Scissor
  • Glue Stick
line-08.png (585×76)

Take a stencil and place it onto a paper. Start tracing the interior edges to draw a perfect dinosaur.

Trace all the body parts starting from head to toe. Mix & match all the elements to give it a proper shape.

Finish the dinosaur shape off with a tail. Here you can see how well the patterns transfers onto the sheet.

Now, it’s time to give colors to this dinosaur. Start filling the shape with your preferred color of crayons and decorate it with your favorite color combination.

To make it more unique, cut out the dinosaur. Choose any picture or a piece of craft paper and glue it on it.

It’s a lot of fun for children to discover the different types of dinosaurs. Try all Dinosaur Rulers and make your own Dinosaur.

Please watch the full video here: https://youtu.be/VM-YXhzKXcw
Visit our website https://roylco.com/shop/dinosaur-unruly-rulers/ for more information.

Hatch a Baby Dinosaur This Spring

Roylco baby dinosaur lesson plan

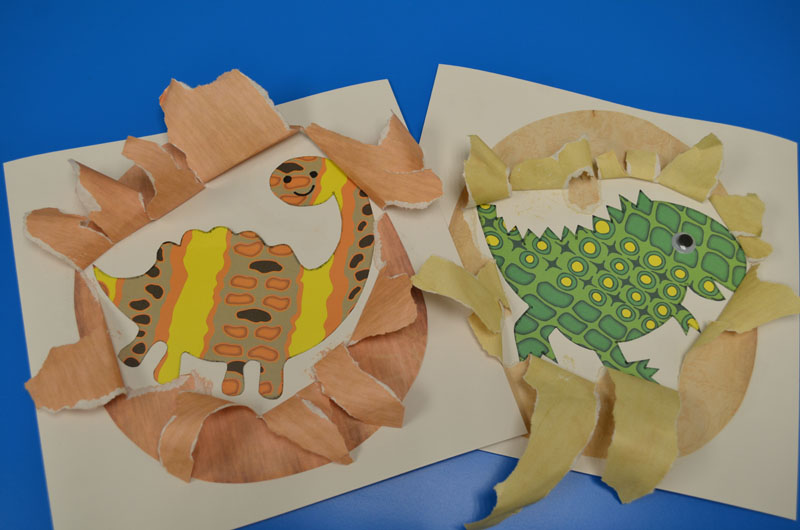
Most young children are fascinated by dinosaurs. They are curious about these mighty creatures that lived millions of years ago. Where did the dinosaur come from? Today we are going to introduce a hatching baby dinosaurs craft activity that children will love. This is a great class activity when you are teaching about dinosaurs.  You can also introduce it at the end of the dinosaur discovery tour at the museum.  Use this activity to talk about how a baby dinosaur grows inside the egg. Children will love to help the baby dinosaur hatch from the egg.

Age: 5+

Duration: 10 – 15 minutes

Learning Outcomes:  Learning evolutionary concepts. Practice drawing skills. Exercise Fine motor skills. Growing children’s interest in science.

You’ll Need:

Let the children choose one piece of paper with their favorite colors and patterns (R15311 Dinosaur Print Papers).

Encourage children to use a pencil to draw the baby dinosaurs at the back of the dinosaur print paper. After they draw the baby dinosaur, they can use the black marker to trace it.

Then cut out the baby dinosaur.

Glue the dinosaur on the white craft paper. You can glue the eye or draw the eye on the dinosaur.

Choose a piece of antique paper ( R15286 Antique Paperthat you like and lay it on top of the baby dinosaur. Use a pencil to draw an egg outline and cut it out.

Add glue to the outline of the brown egg and place it on the white craft paper over top of the baby dinosaur. Make a small cut in the middle the egg.

Ask the children to write their names on the white craft paper and exchange their crafts.

Here comes the exciting moment of this activity.

Invite children to help the dinosaur hatch from the egg by tearing open the paper (where you have made the small hole) to reveal the baby dinosaur inside the egg!

It’s a lot of fun for children to discover the different types of baby dinosaurs.

Please visit https://roylco.com/shop/r15311-dinosaur-print-papers/ for more information.

Bundle Savings

Get all the Roylco items used
in this project and save 15%!

$14.52 USD
bundled price
Add Bundle
to Cart

Origami Dinosaurs

These adorable dinosaurs are the perfect addition to a diorama or as a Father’s day gift to a dino-rrific dad!

Age: 4+

Duration: 10 minutes

Learning Outcomes: Integrate art and science! Exercise fine motor skills. Create adorable take-home art.

You’ll Need:

Line-01

We loved dinosaurs as children and since the real things are sadly extinct, these adorable paper versions of brontosauruses are the next best thing!

The taller dinosaur is simple to fold, and can be made by students as young as four. Since origami instructions can be complicated and difficult to follow when they are written, we have created a video to show you how to fold this adorable dinosaur:

The longer dinosaur is more challenging to fold, and is more suited to older students. Here is the video with the folding demonstration:

The brontosaurus, or Thunder Lizard, was a four-legged herbivore that lived in the late Jurassic. The largest brontosaurs weighed up to 15 tons and measured up to 22 m (72 ft) long from head to tail. Historically, the Brontosaurus was believed to be too big to support its own weight on dry land, so paleontologists thought they must have lived partly submerged in water, maybe in swamps. Today, however, brontosaurs are thought to have lived just on land.

Ideas

  • Once you have folded your brontosaurus, you can add them to birthday or Father’s day cards.
  • Use them with our diorama boxes to add pizzazz to research and reports. fathers day dino diorama.jpg
  • Want to decorate your classroom? Use a hole punch to create holes in your dinosaurs, and string them on yarn to create dinosaur garlands! The 8 different designs and various color schemes of the dinosaur paper will ensure that your garlands will be bright and beautiful.
  • Try using our economy origami paper to fold these dinosaurs. The smaller paper and smaller size of the finished dinosaurs makes them perfect for pop-up cards or necklaces!

dinos different sizes.jpg

Line-22

Like us on FacebookShare this post with your friends, or Subscribe to this blog today to receive original craft project updates every week!

Craft Spotlight: Big Huge Dinosaurs!

2014-05-12-FeatureImage

To give your Big! Huge! Dinosaur a unique appearance, use balloon painting! This cool technique keeps little fingers clean while generating a fun painting experience.

R75424 Big! Huge! Dinosaurs are perfect for large scale fingerpainting projects. The sheet itself reaches roughly 3 feet in length, but you don’t need a whole lot of paint to cover it up! Fingerpaints spread evenly across the special paper material, especially when children are eager to fill in all the blank parts of the canvas.

DSCF7082


Designing the dinosaur’s skin is the best part. What colors will you choose? And what kinds of patterns will you organize the colors in? To help simplify this process, we asked our little artists to use balloons!

_DSC0166Dip the balloon in paint.

_DSC0168And stamp all over the dinosaur canvas!

DSCF7067Our campers loved being able to make their own impressions with the balloons!

_DSC0170Some of the balloons were used just like paintbrushes. The paint was spread evenly across the surface of the dinosaur.

DSCF7071

Why were balloons important to use? Well, the rubber of the balloon expands and contracts when it’s applied against another surface.

_DSC0177

This helped to create a splotchy, ripply effect on the dinosaur paper, making it look like the dinosaur’s skin!

DSCF7072

Although some students may feel overwhelmed by the largeness of the dinosaur canvas, the dinosaurs are perfect for group painting activities. Combine groups of students together to develop fine motor skills while creating a work of art!

R75424

We have great project ideas available at the PDF guide, which you can access here!

Line-09

Thanks for viewing this post! Like us and subscribe to our blog today for updates every Monday, Wednesday and Friday! Send a line through our contact form and link with us today to get you started on your own crafting journey.