Groundhog Day: Will he see his shadow or not??

groundhog day craft

In anticipation of the upcoming Groundhog Day on February 2nd, predict with your students whether or not the groundhog Punxsutawney Phil will see his shadow or not with our R42006 Groundhog Day Craft!

groundhog day

The Groundhog Day craft has everything you need to make your own representation of the Punxsutawney scene when Phil sticks out his head. Will he make it outside to see his shadow or not with the impending blizzard? Time will tell!

The legend goes that when Phil comes out of his hibernation burrow in February, he may or may not see his shadow. If he sees his shadow, Phil will return back to his burrow and there will be 6 more weeks of winter! However, if the opposite happens, and no shadow is seen, then there will be an early spring.

Phil is known as a prognosticator or someone who predicts something. Let’s hope his prediction is right!

groundhog day

The kit comes with 24 printed card scenes. The print features a generic sky with a sun. Find your own groundhog in the kit and start decorating! You can glue the groundhog to the center pop-out tab, then add details around him, such as clouds, flowers or snowflakes.

Make your prediction then see what happens on February 2nd!

Line-15

Like us on FacebookShare this post with your friends, or Subscribe to this blog today to receive original craft project updates every Monday, Wednesday and Thursday!

Craft Spotlight: Project Leaves with a Thanksgiving Turkey project!

2014-09-22-FeatureImageIt’s never too early to start thinking about seasonal crafts for the classroom, no matter what time of year! Prepare for Thanksgiving with our true-to-life sized R51080 Project Leaves in a variety of colors and shapes. Use the Project Leaves to create the tail feathers and simple construction paper cutouts to make the turkey head and body. 

Project Leaves feature different colors on each side of the leaf shapes. You can use the shapes to talk about the changing seasons or adapt your fall science unit to include lessons about leaf identification.

R51080

Encourage students to engage with nature while appreciating the science behind it! Students can draw the veins within the leaf shapes to learn about leaf development. Trace out the shapes of the leaves onto sheets of paper, then cut them out and paste into a leaf collage!

Use leftover or traced Project Leaves to make a Thanksgiving turkey decoration! Learn more below.

Age: 4+

Duration: 10 minutes

Learning Objectives: Combine various leaf shapes together into a pleasing arrangement to make the turkey tail feathers. Use scissor skills to make a cut and paste project.

You’ll Need:

R51080 Project Leaves

• Gluestick

• Brown, orange and yellow construction paper

• Marker

• Scissors

Line-07

Celebrate Thanksgiving with a turkey decoration that all your students can take home!

P1010327Select 3-4 Project Leaves to make up the turkey’s tail feathers. Alternatively, you can trace the outline of the Project Leaves onto sheets of construction paper and cut them out. You’ll want to choose colors that work with the look of the craft.

P1010328Select the construction paper you will use to make the body. To save on construction paper, you can cut a sheet in half and divide between two students.

P1010330Fold the sheet in half lengthwise.

P1010331Draw a backwards B shape from the fold line. This will be the turkey’s body.

P1010332Cut along the drawn lines and unfold the resulting piece.

P1010333Next, pull out a light-sand colored sheet of construction paper.

P1010336Cut out a little turkey wattle and little turkey feet.

P1010337Finally, get a sheet of yellow construction paper. 

P1010338Cut out a turkey beak.

P1010340Paste the turkey beak, wattle and feet onto the turkey body.

P1010351Make your selection of Project Leaves for the turkey feathers.

P1010352Align two of the leaves together. You will need to angle them outwards.

P1010353Place the third leaf in the middle of the two leaves. This helps to round out the look.

P1010354Finish off with your decorative leaf shape. Place it right on top. Now you’ve easily layered the turkey back feathers!

P1010355Paste the turkey body on top of the leaf arrangement.

P1010356Paste the turkey features on top.

P1010357Finish off with eyes for your turkey. Draw them in with permanent marker or pen.

P1010358Now get ready for a big celebration! Paste the turkeys along a banner and hang up on a wall or arrange your turkeys in a Thanksgiving display!

Line-07

Like us on FacebookShare this post with your friends, or Subscribe to this blog today to receive original craft project updates every Monday, Wednesday and Friday!

Craft Spotlight: Farm Animal Masks

kids crafts barnyard masks

Dress up, learn facts, exercise and play farm with Farm Animal Masks! These pre-printed, coated masks are the perfect tools for encouraging students to participate in dramatic play and physical education!

There are 8 different animals to choose from, so your students get quite a bit of variety! Choose between a cow, duck, goat, rabbit, horse, pig, sheep and chicken.

kids crafts barnyard masksTo wear the masks, attach a pipe cleaner to either side. Join the pipe cleaner at the back. The masks are pre-punched with holes to allow pipe cleaner or string to be threaded through. We find that pipe cleaner works best for adjustments, as you can always twist it tighter to hold it in place.

kids crafts barnyard masksWe played several fun games while wearing the masks. Sing “Old McDonald Had a Farm” and get students to call out their animal’s signature sound!

kids crafts barnyard masksWe set up a miniature tent (made of Color Diffusing Paper sheets and Newspaper Builders) to make a “playpen” for these duckies!

kids crafts barnyard masksPlay hop-scotch on the grass! Use grass marking spray or form square boxes from our Straws and Connectors to get your hoppity friends moving.

kids crafts barnyard masksWe gave our funny friends some crafts to work on while wearing their Barnyard Masks. This helped some of our shy kids open up, as wearing a mask made them feel more confident.

kids crafts barnyard masksLook at that hop! This bunny’s ready to take off!

kids crafts barnyard masksThanks for hanging out, everybody!

Line-12

Like us on FacebookShare this post with your friends, or Subscribe to this blog today to receive original craft project updates every Monday, Wednesday and Friday!

Craft Spotlight: Nature Stencils

2014-08-04-FeatureImage

Use detailed Nature Stencils to draw beautiful pictures while developing fine motor skills and encouraging image association. Each shape has a coordinating border to add interest to students’ drawings.

The stencils kit features many different types of flora and fauna that can be used to discuss animal and plant ecology. Click on the link to view the product at our website!

Another great feature about the stencils is the size: large enough for little fingers to trace all the fine details without frustration. A good way to practice tracing is to use the specialized image border. By tracing along a straight plane, students will develop their own techniques for tracing and can apply those techniques to the more complicated images on the interior of the stencil.

The best part is that one stencil becomes a two-in-one. Pop out the interior of the stencil to duplicate the image that students can trace. As a result, while one student traces the interior of the stencil, or practices with the intricate border, an advanced student can grip the inner shape and trace without the need for extra support.

Use the traced outline as a guide for developing scissor skills! Cut out the resulting shape to make decorations for classroom walls. Check out our project video below!

Line-11

Thanks for checking out this post! Like us on FacebookShare this post with your friends, or Subscribe to this blog today to receive original craft project updates every Monday, Wednesday and Friday!


Bug Rubbing Plates

2014-07-28-FeatureImage

Find out how we used our Bug Rubbing Plates to make stunning suncatchers! The raised edges on our rubbing plates make it easy to develop impressions of the assorted designs. Create beautiful prints using simple materials!

Age: 5+

Duration: 5-10 minutes

Lesson Objectives: Exercise fine motor skills. Use one hand to hold designs down, while coloring with crayon using the other hand. Create art project with different mediums. Develop art project using process-based applications, while achieving visually pleasing results. Use main imagery of rubbing plates to discuss animal biology and ecology.

You’ll Need:

R5843 Bug Rubbing Plates

• Crayons

• Clear plastic page covers

• Rubber grip mat

Optional:

• Tape

Line-06

The rubbing plates come in a wide variety of designs, and are great for exploring thematic subjects while developing fine motor skills. Our Insect Rubbing Plates, very similar to our Bug Rubbing Plates, were memorably used in a textile printmaking process, featured in a guest post. The plastic plates are made specifically for small hands to work with, so your students will appreciate how easy it is to work with the plates.

The process is quite simple: Place a rubbing plate underneath a canvas. Rub a crayon across the canvas to produce the rubbing plate pattern line-for-line! It’s a great way to make multiple prints while experimenting with different crayon colors or materials.

IMG_2381

Grab the materials you’ll need for this activity. It’s a good idea to cover your workspaces with a craft tablecloth that will catch any crayon shavings from your students’ projects.

IMG_2385Place the rubber grip mat onto the tablecloth. This type of material can be find at most dollar variety stores. This will eliminate the need for taping anything to the actual tablecloth, however, if you feel you need a better hold on the canvas, tape is another option.

Center the rubbing plate on top of the rubber grip mat.

The plastic page cover can be located at office supply stores. Place that on top of the rubbing plate.

IMG_2414

Choose darker crayon colors for this activity. Some of our art campers used lighter colors, but you can add defining lines with a layer of darker crayon. Unwrap the crayon from its paper wrapping and use the long side of the crayon to rub across the plastic sheet. Rub primarily over the rubbing plate’s raised design to get the best effect.

IMG_7508Depending on how light the crayon color, students might not get to see their designs until they are finished. This is a good way to get students guessing what their final pieces might look like.

IMG_7510Once you are finished, lift up the plastic page cover from the rubbing plate to reveal the design!

IMG_2417You can cut the design out from the plastic page cover and punch a hole at the top. Hang the designs on a window!

_DSC0117

Thanks to our creative crafters for starring in this craft post!

Line-06Thanks for checking out this post! Like us on FacebookShare this post with your friends, or Subscribe to this blog today to receive original craft project updates every Monday, Wednesday and Friday!

Craft Spotlight: Architecture Paper

2014-07-14-FeatureImage

Draw houses and fill in the details with Architecture Paper! This special paper takes the best elements of a building, and spruces them up with a range of gorgeous designs. Switch out a brown door for a red door, add planters beneath the windows or place a statue in front. 

There’s lots you can do with the Architecture Paper. Most of the elements are made up of basic shapes that you can use to introduce young students to geometric concepts.

IMG_2548We used a large roll of brown art paper to provide our crafting friends with a backdrop for their artwork.

IMG_2543We drew several different “house” or “building” shapes and then asked the crafters to fill in the details using the Architecture Paper.

IMG_2539The crafters cut out the basic shaped architecture elements and pasted them onto the brown paper.

IMG_2538It was easy to spread on the glue using our fantastic Goo Spreaders. Simply pour a bit of white school glue into a plastic container to allow groups of children to use the glue from one station.

IMG_2552

To add some dimension to their cityscape, we asked the crafters to glue down cotton balls, which represented clouds in the skyline.

IMG_2589Here’s a look at our lovely neighborhood!

_DSC0360Thanks so much for all the fun!

Line-13

Thanks for checking out this post! Like us on FacebookShare this post with your friends, or Subscribe to this blog today to receive original craft project updates every Monday, Wednesday and Friday!

Craft Spotlight: Fabric Mosaics

2014-06-30-FeatureImageR15651 Fabric Mosaics are great for tactile activities such as beading and stringing! Who knew! At our art camp, we tried out a technique where we interwove Brilliant Beads with Fabric Mosaics on string to make colorful and unique jewelry!_DSC0303First, we started out by folding the Fabric Mosaics in half and cutting out the center. This made a hole that we could use to string the yarn through. IMG_00000576We made sure the kids cut out the centers very carefully. IMG_00000580Once all the mosaics were cut, we tied a knot at the end of each length of yarn. IMG_00000587We first strung large Brilliant Beads up against the knots. This made sure that none of the Fabric Mosaics could slip out. IMG_00000588 Then we started layering our bead arrangements! IMG_00000596The bright colors in the Fabric Mosaic pack worked so well with our Brilliant Beads! IMG_00000606The combination was simple: alternate a Fabric Mosaic with a Brilliant Bead and back again. Keep going until the whole string is decorated or filled up! IMG_00000610Getting ready to finish up! Now we can loop the beaded string into a bracelet… IMG_00000620…like this one! IMG_00000624Or a necklace! Simple and easy, yet great fun to make! Line-18 Thanks for checking out this post! Like us on FacebookShare this post with your friends, or Subscribe to this blog today to receive original craft project updates every Monday, Wednesday and Friday!

Summer Birdcage Craft

2014-06-18-FeatureImageA craft birdcage makes a great take-home craft and adds a nice finishing touch to the Color Reveal Birds project.


Age: 5+

Duration: 20 minutes

Learning Objectives: Practice scissor skills while cutting paper strips. Exercise fine motor skills through continuous coloring motions. Observe amazing changes in the appearance of artwork through special color reveal technology.
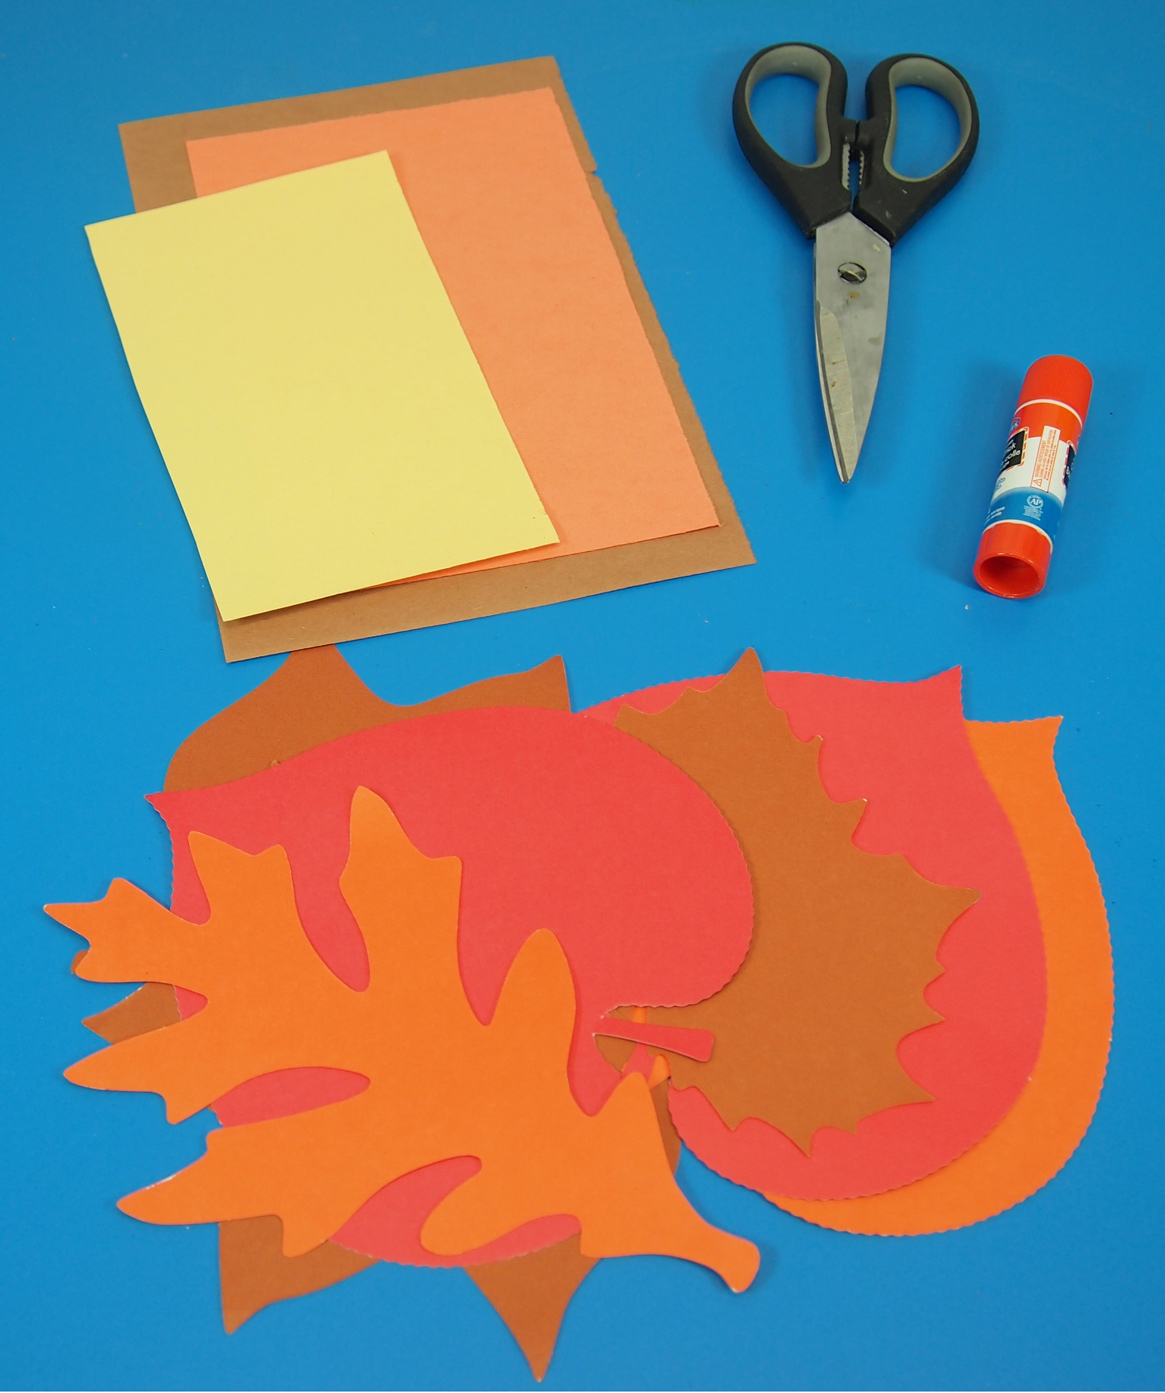
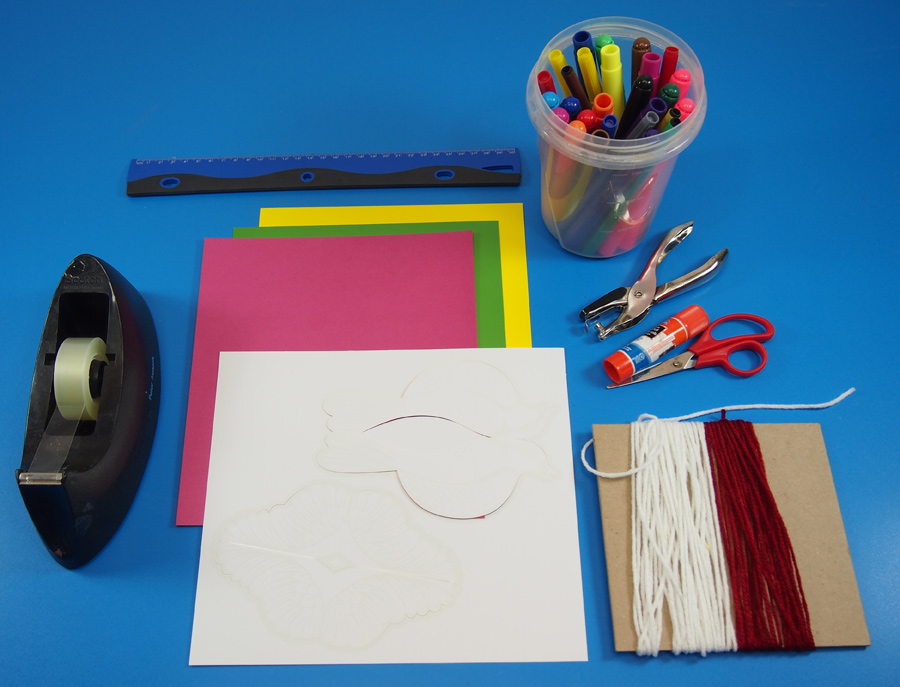
You’ll Need:

R75504 Color Reveal Birds

R22052 Double Color Sheets

• Scissors

• Ruler

• Pencil

• Markers

• Hole punch

• Tape

• Yarn

Line-19

The best part about making this birdcage is that you already have the main centerpiece–the bird–made up from the Color Reveal Bird project, so you don’t have to spend extra time looking for and cutting out templates to color in. Simply color in and wrap up in a colorful birdcage!

P6109512

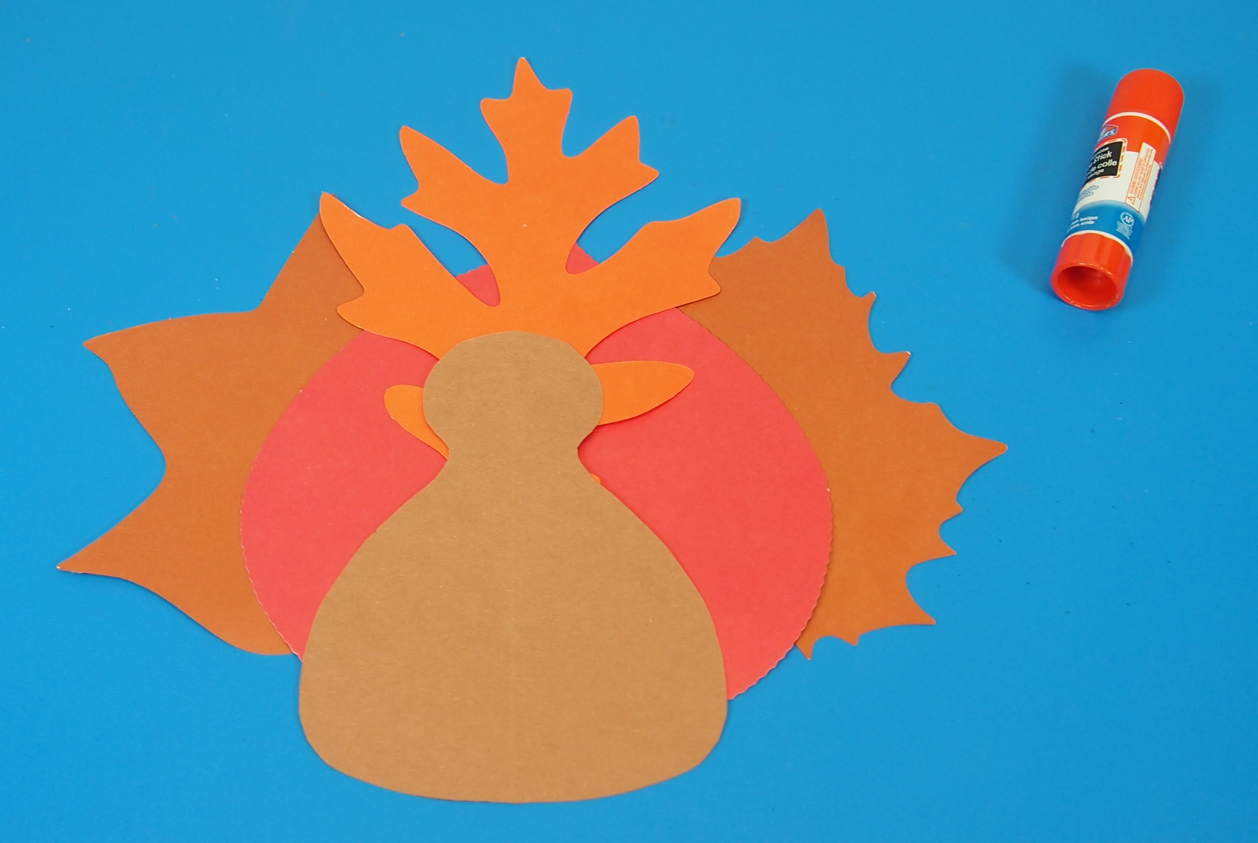
In case you missed the earlier Craft Spotlight post, I’m going to show you just how to put together your Color Reveal Bird first.

P6109516

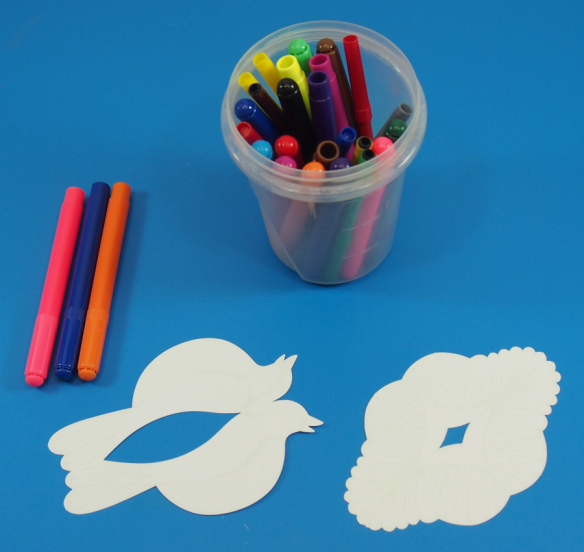
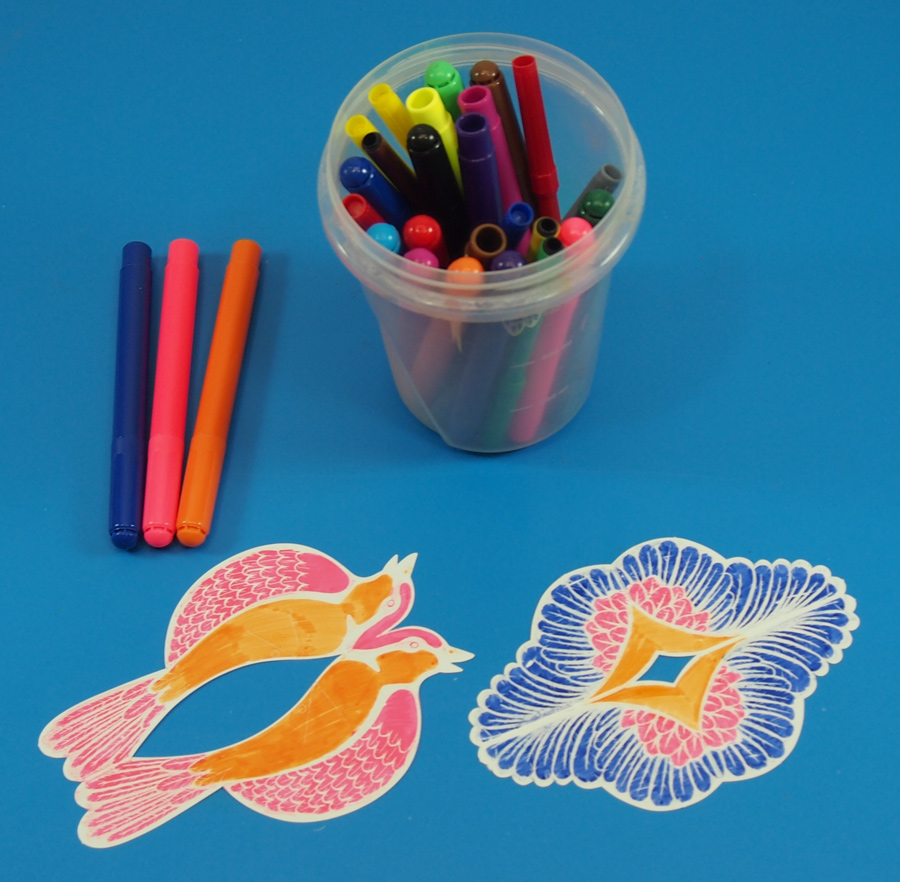
Choose your marker colors!

P6109523

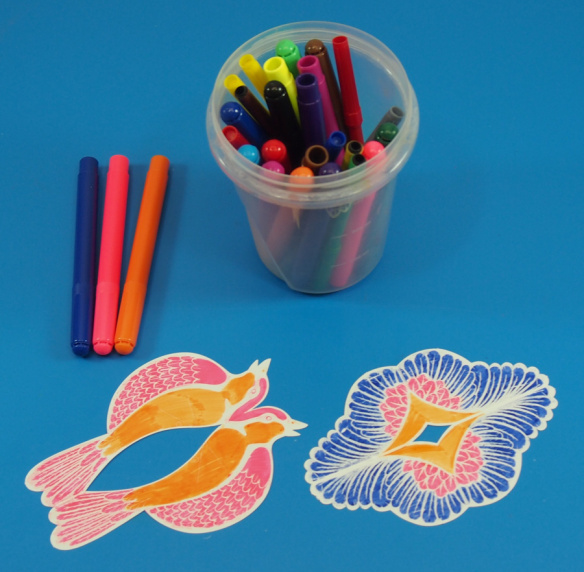
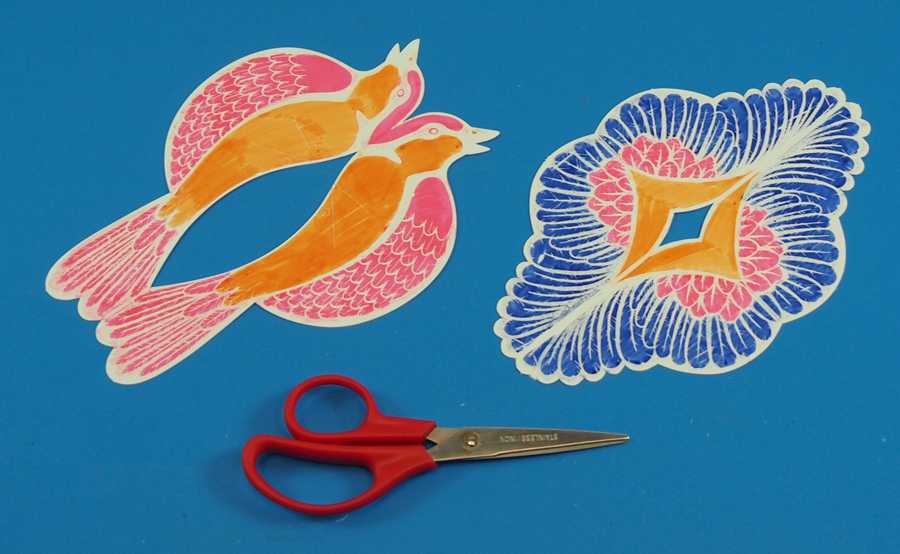
When you rub the marker across the surface of the bird body and wings, you’ll start to see a beautiful design appear!

P6109526

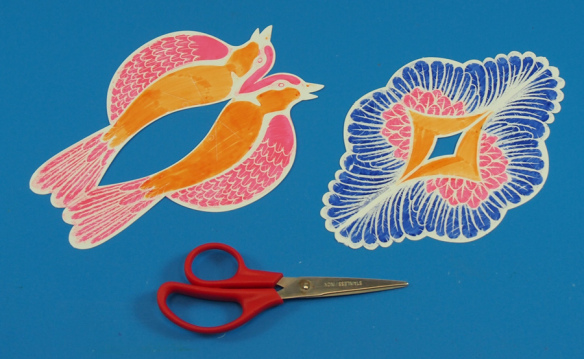
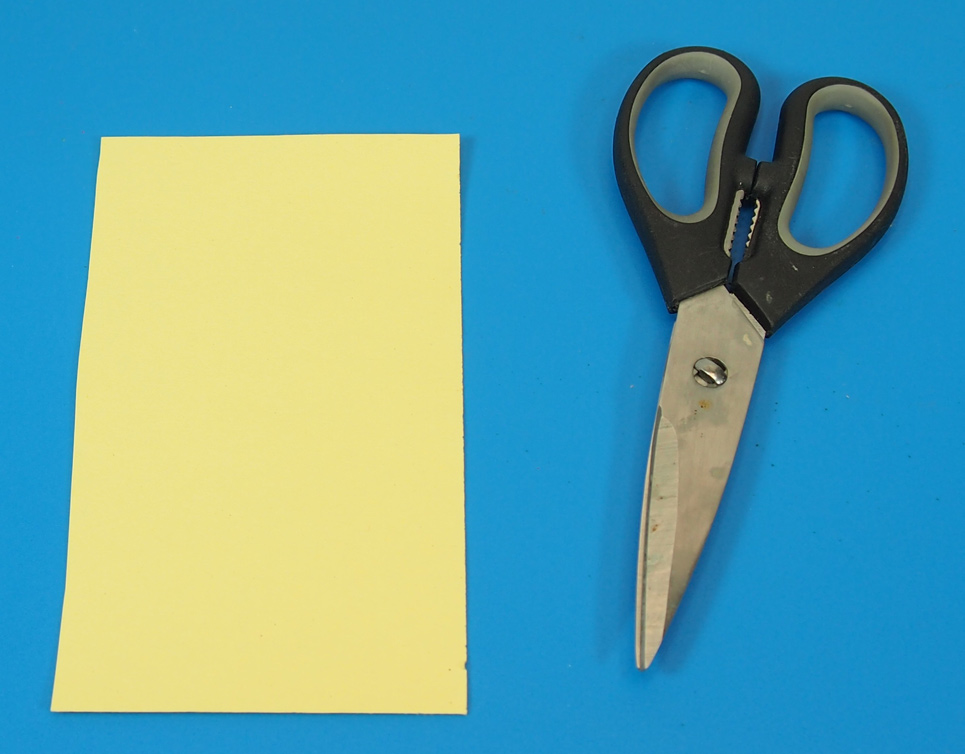
Once you have both pieces fully colored in, you can start to assemble them. For this step, you will need a pair of scissors.

P6109528

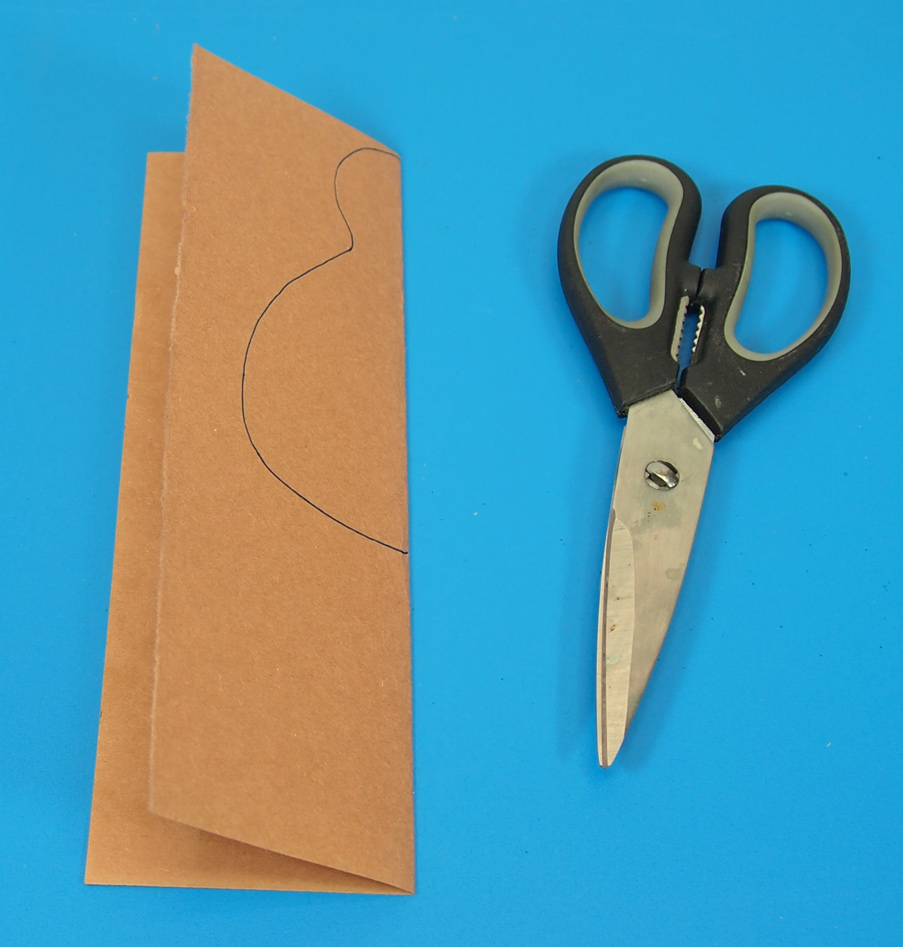
First, let’s fold the bird body and wings in half. Both pieces are scored along the middle so folding should be easy!

P6109533

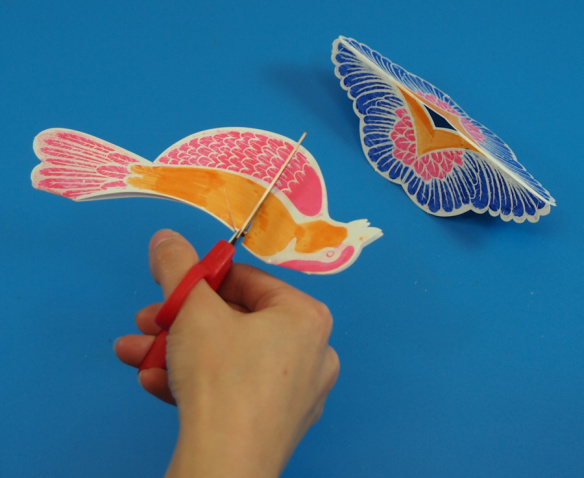
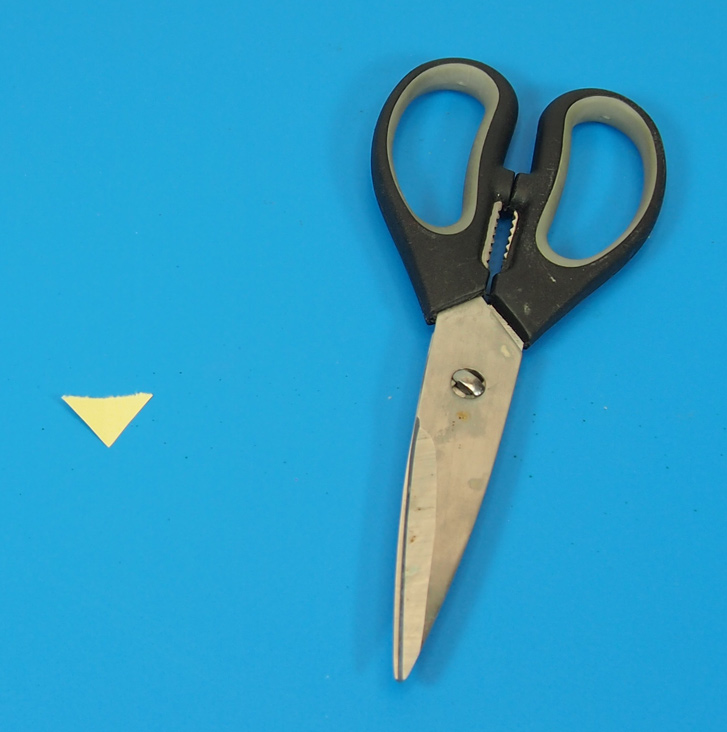
There are two triangle shaped slots on the bird’s back. The wings fit right into those slots, but you will need to loosen up the opening. Take your scissors and fit them right along the slot opening. Cut into the bird body at about an 1/8″ of the way down.

P6109537
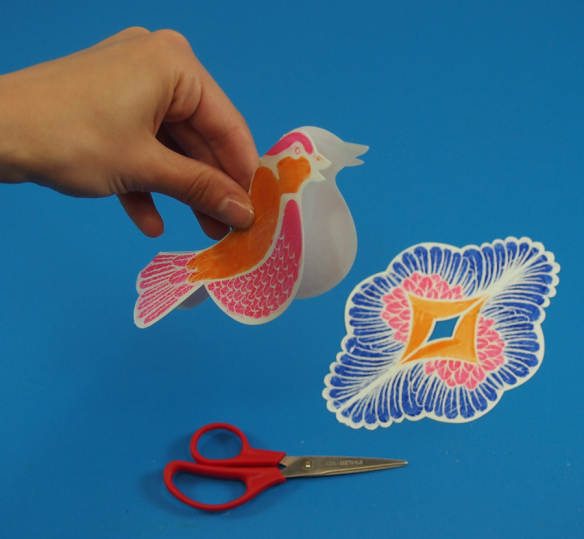
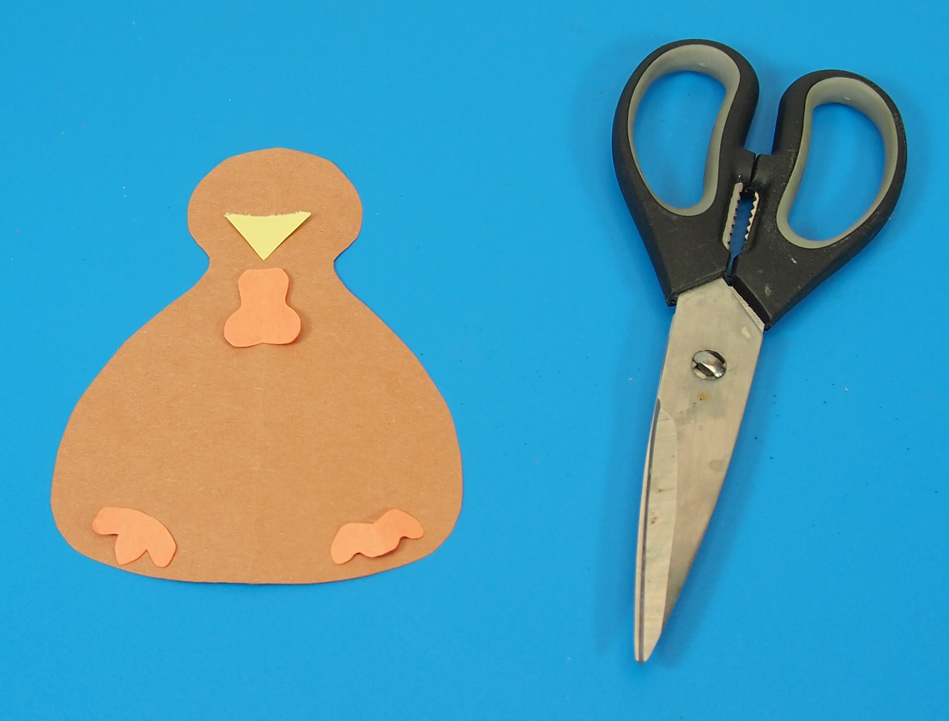
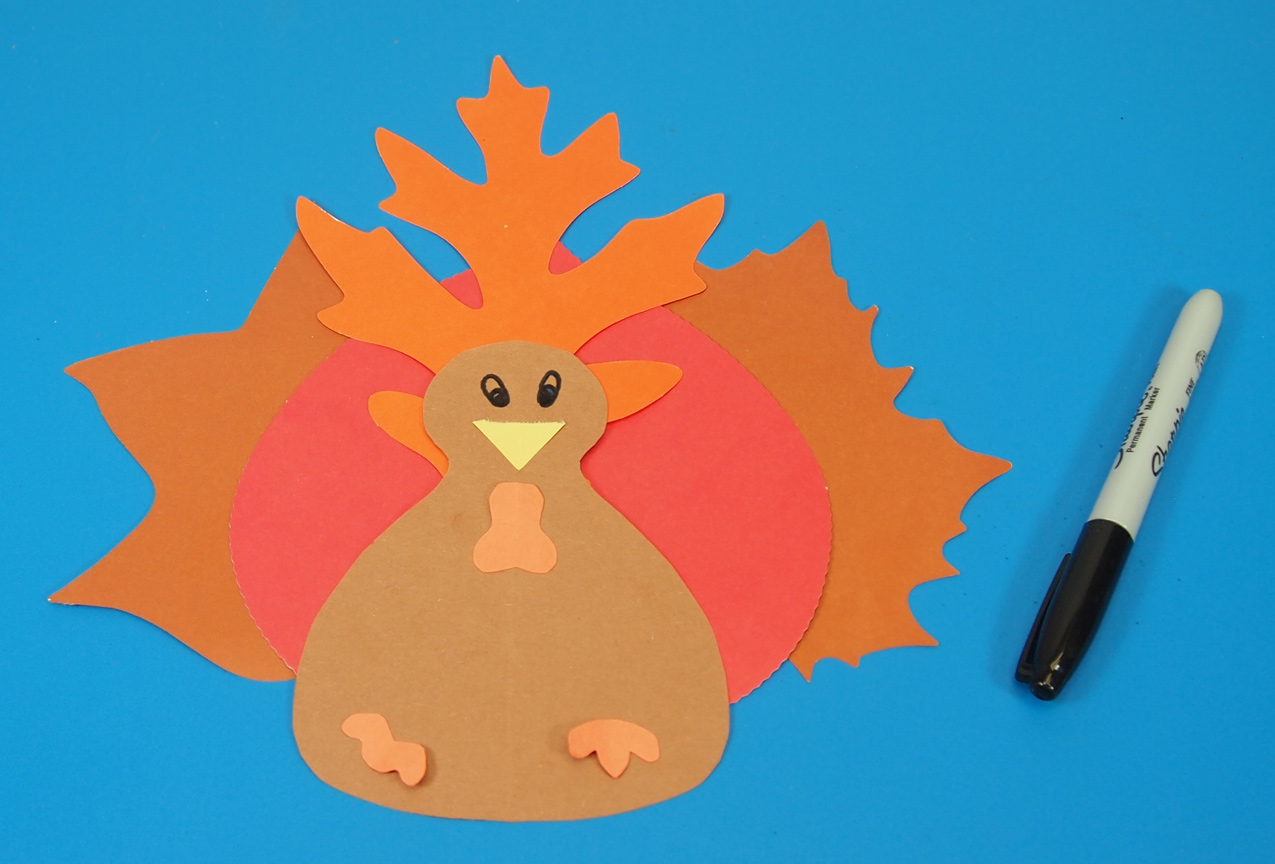
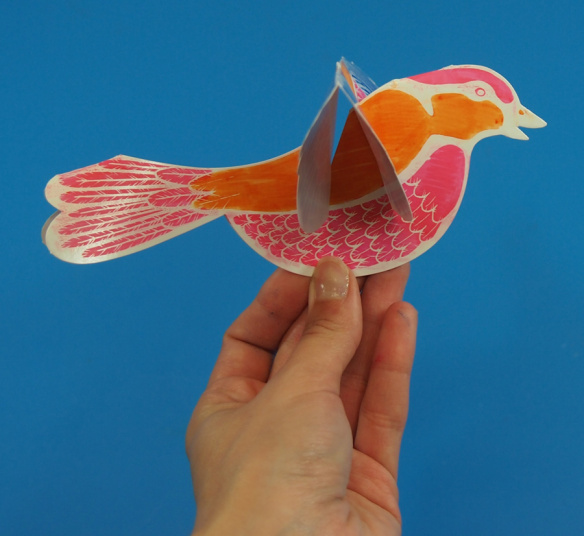
The wings fit directly onto the triangle slot. Turn the wings sideways as you slide them into the slot. Push the front of the wings into the forward slot, and the back of the wings into the rear slot.

P6109538

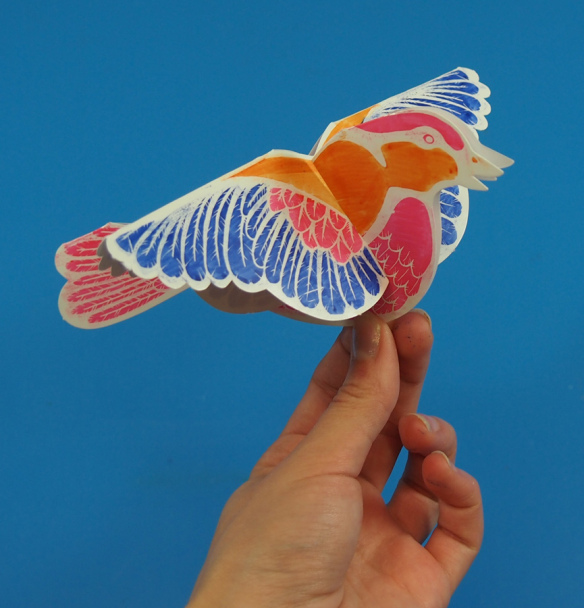
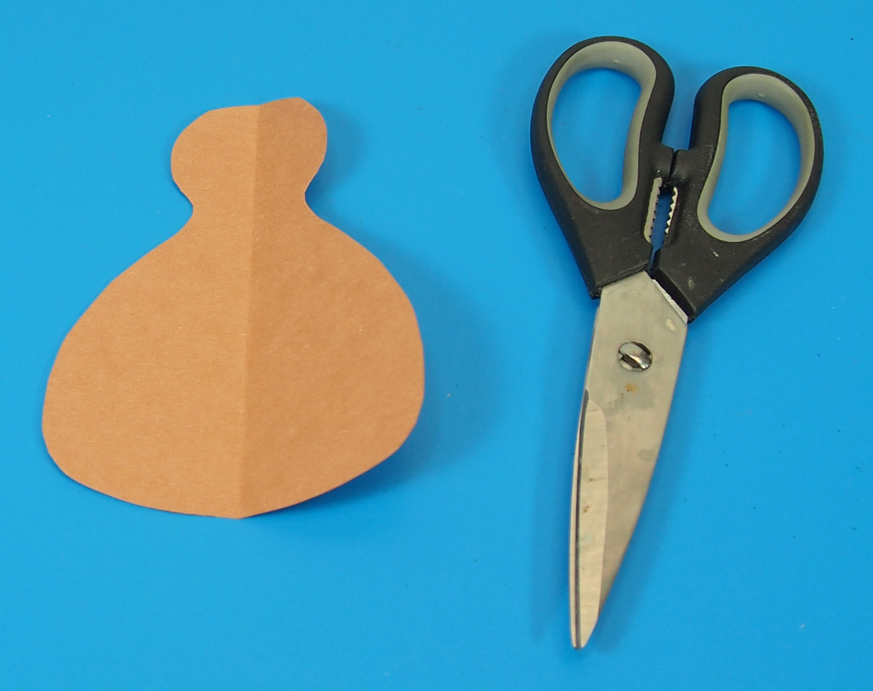
Here’s a front view of the Color Reveal Bird. It’s ready to fly off!

P6109542
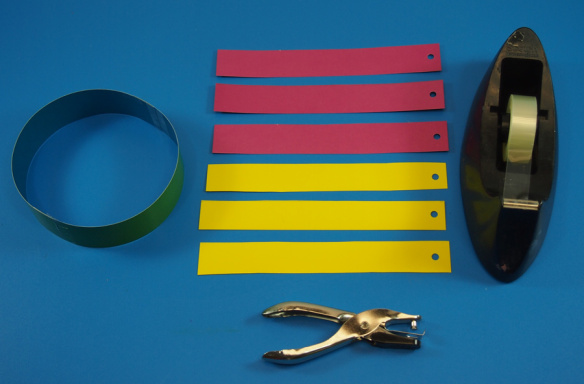
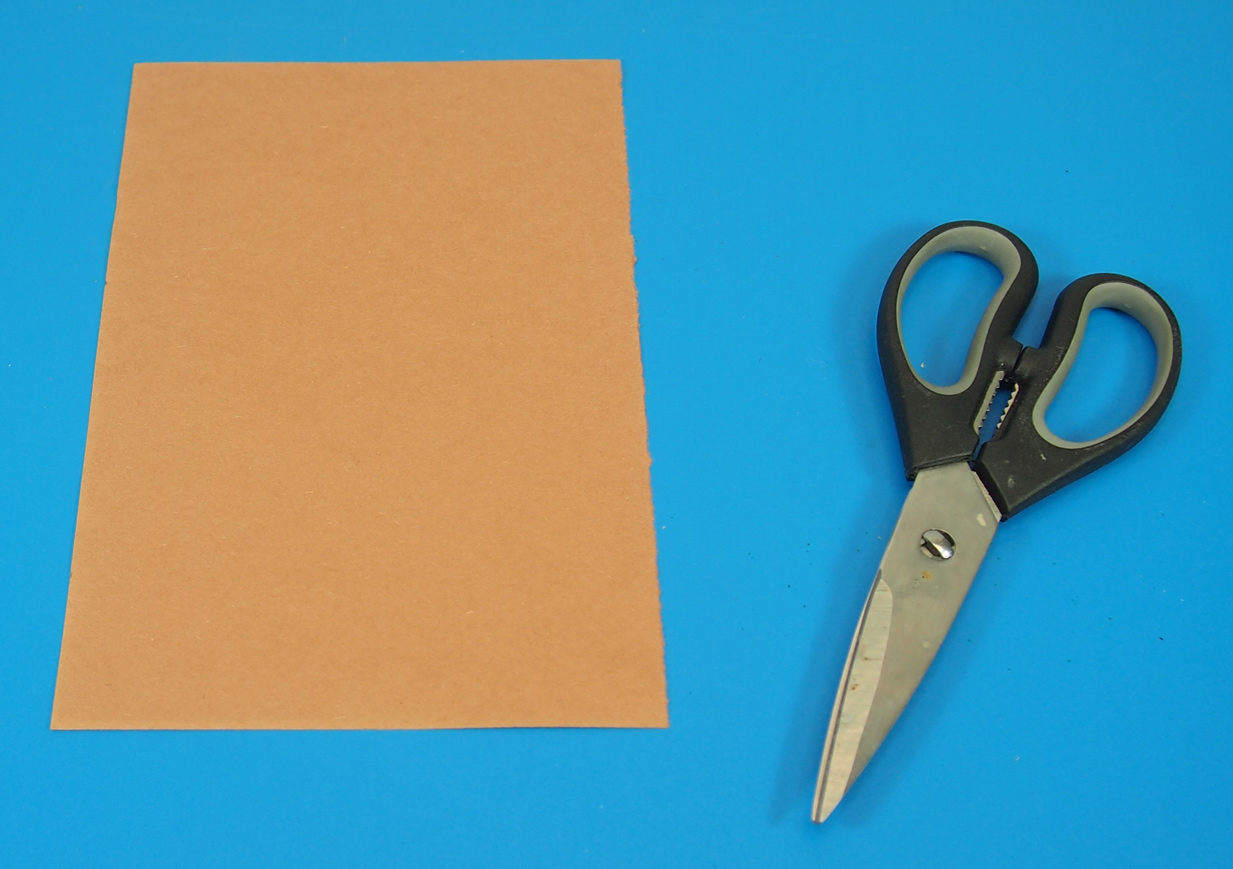
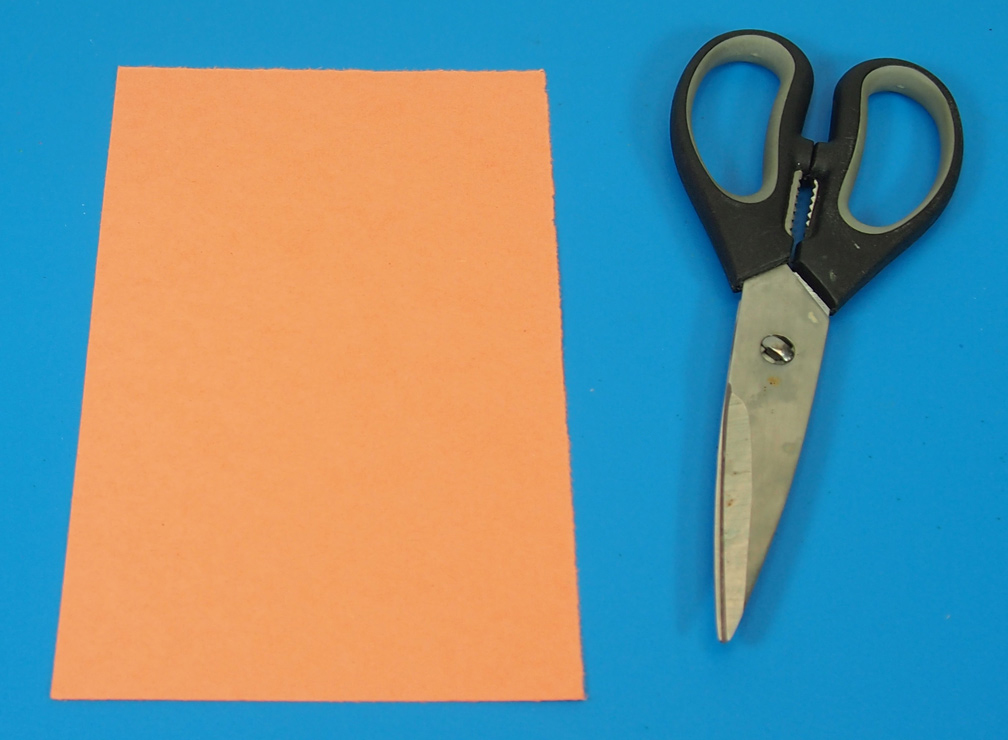
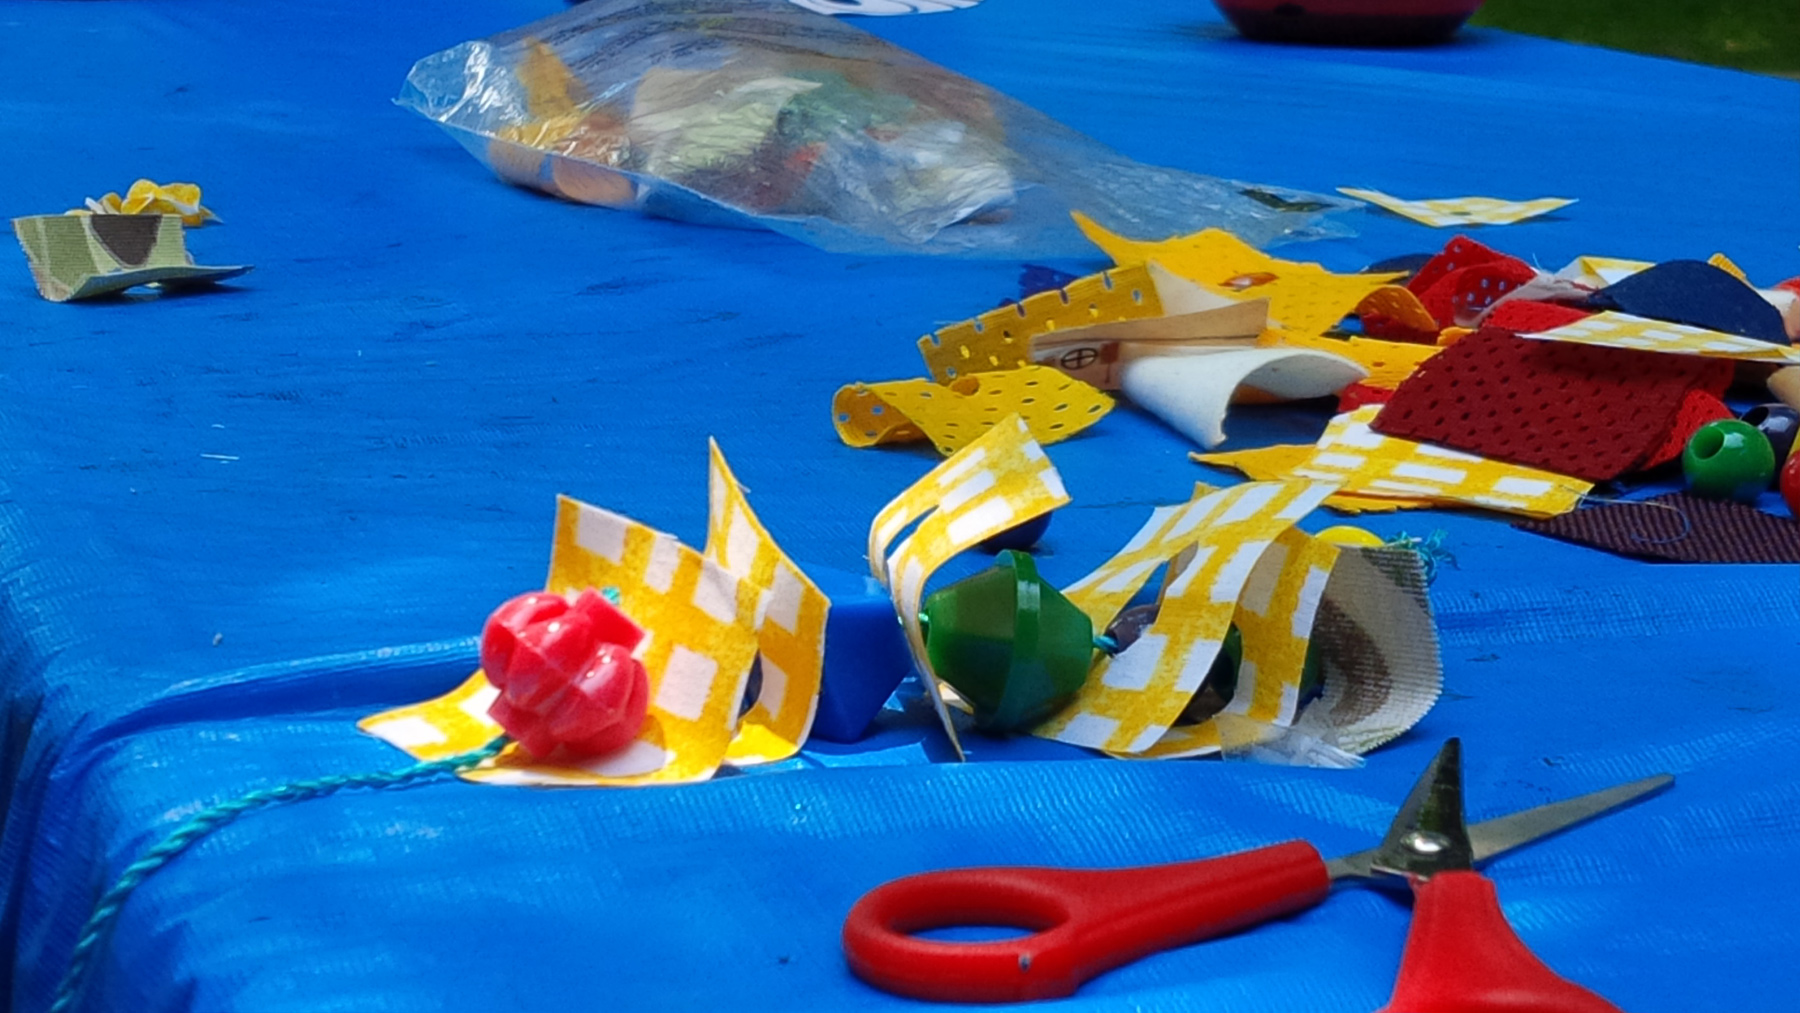
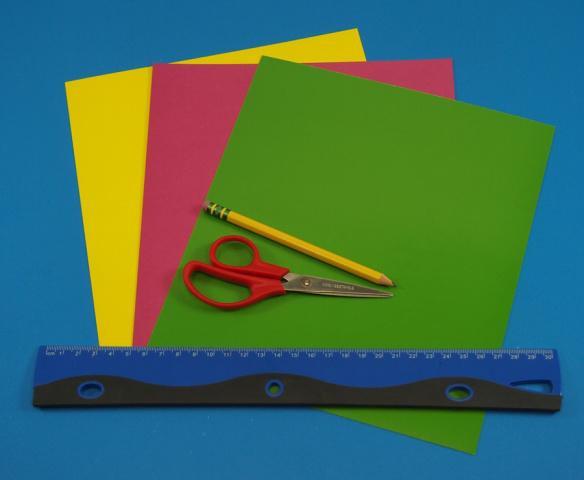
Now we will make the birdcage itself. Grab your materials and pick out colors for the decorative cage. The Double Color Cards are double-sided so the bars for the birdcage will show off a variety of colors.

P6109552

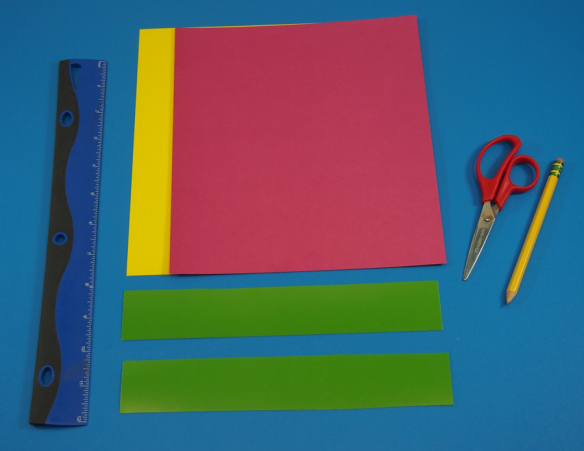
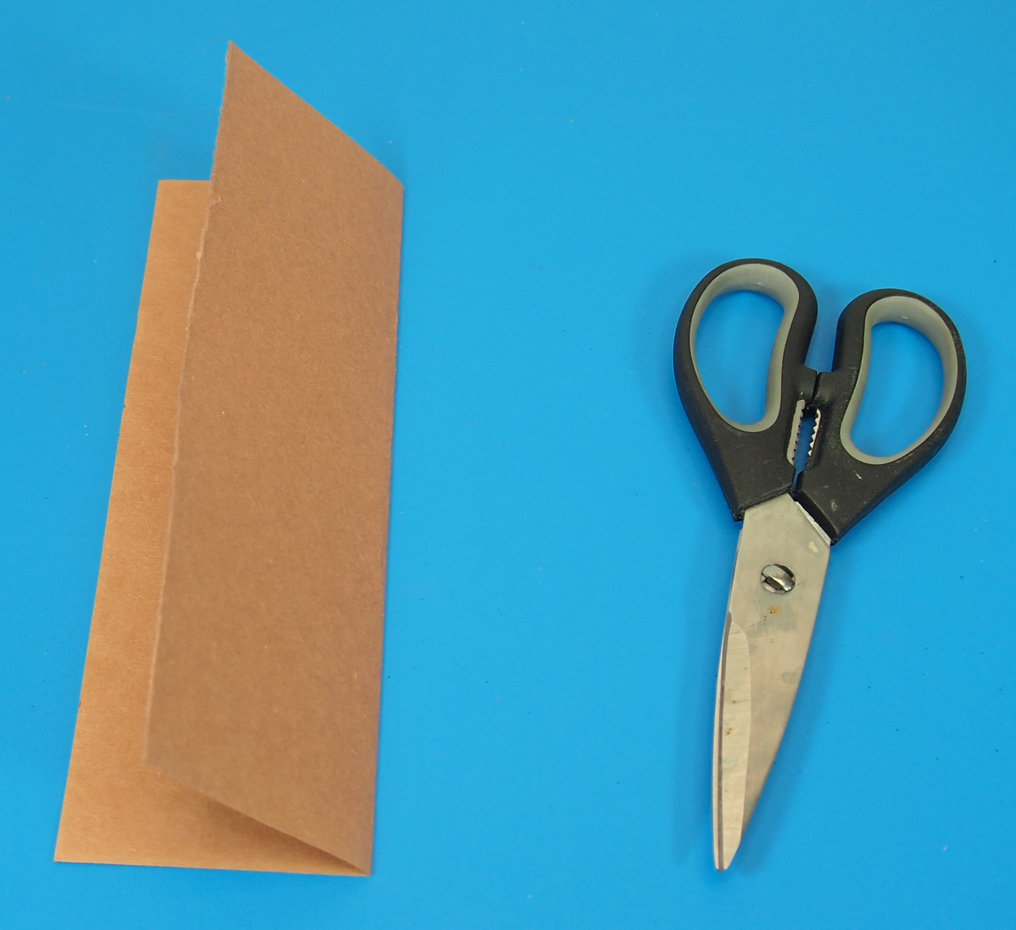
Cut out two 1 1/2″ (4 cm) thick strips along the long side. These will form the base of the birdcage.

P6109560

From the rest of the Double Color Card sheets, cut strips along the long side that are 1″ wide (2.5 cm). These will form the bars for the birdcage.

P6109568
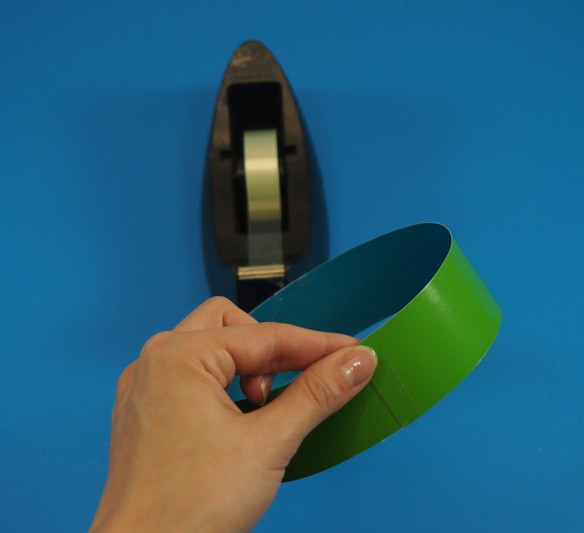
Take the two larger 1 1/2″ strips and join the ends together with tape. This will form a round base.

P6109574Hole punch each of the smaller 1″ strips at the top. These holes will help you to hang up the birdcage as well as the Color Reveal Bird inside.

P6109577
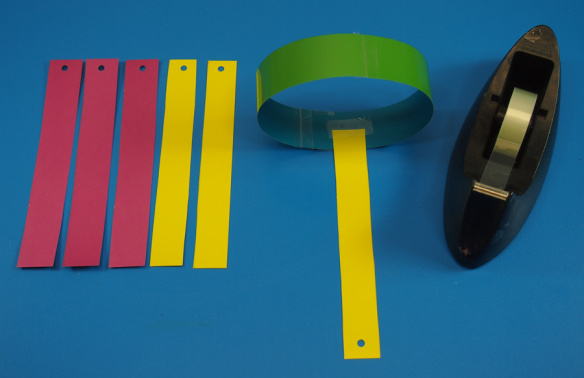
Now we are ready to assemble the birdcage! Tape the 1″ strips onto the birdcage base at the end opposite from the hole-punched end. Tape the end close to the top edge of the birdcage base for a longer set of bars, or closer to the bottom edge for a shorter set of bars.

P6109580
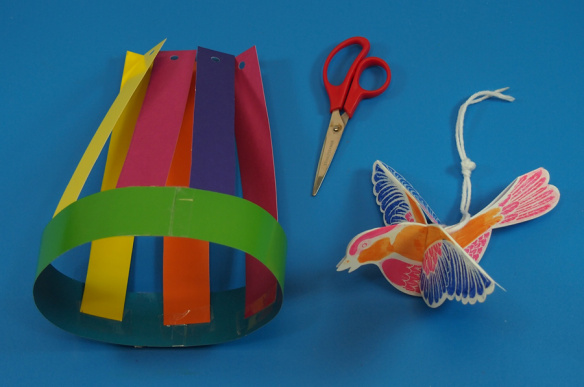
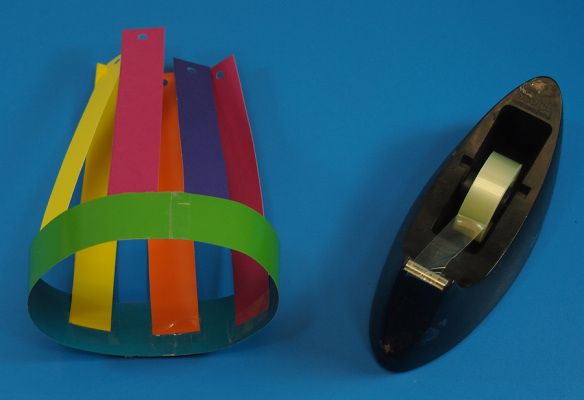
Repeat for the rest of the 1″ strips until you get something that looks like a funky hat!

P6109582
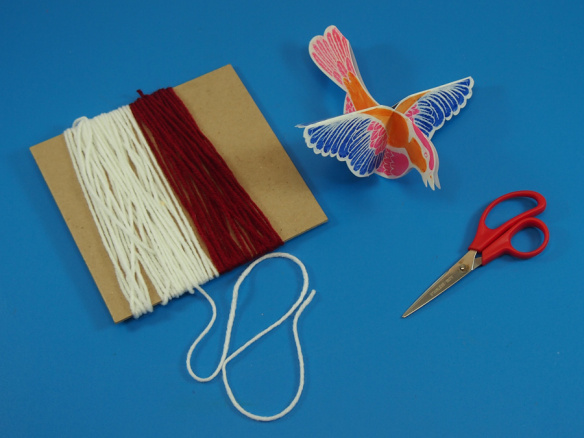
Set your birdcage aside until you have the Color Reveal Bird strung up. Cut a fair sized amount of yarn that will be used to hang the bird and hang the birdcage.

P6109591There is a small hole at the top of the bird’s back. Thread the string through and secure the yarn with a large-sized knot.

P6109594
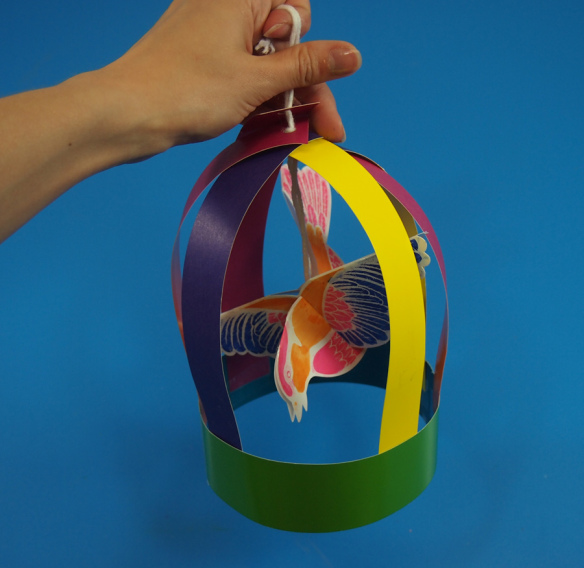
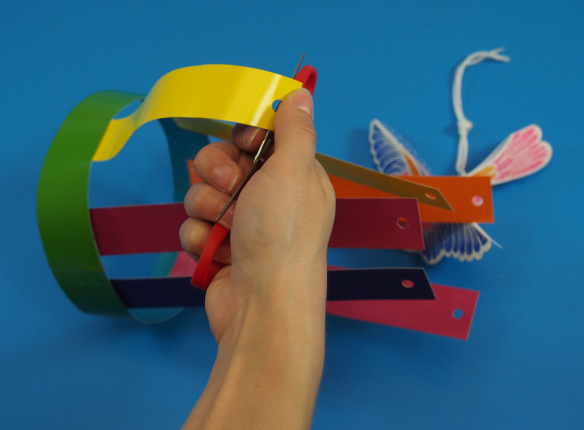
In order to make the birdcage appear more rounded, you will need to use the blunt end of a pair of scissors or a pencil to gently curl the birdcage bars.

P6109596

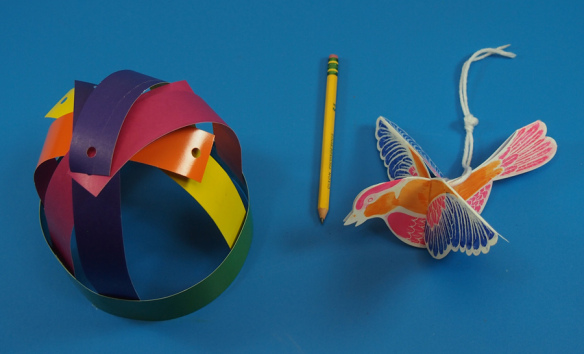
The bars should curl over and onto one another. This will help make stringing easier. Thread the ends of the yarn from the Color Reveal Bird through the holes in the paper strips. The knot you made should stop the bird from passing up too close to the top of the birdcage.

P6109600

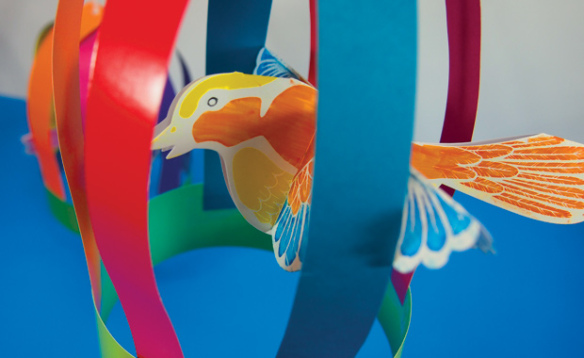
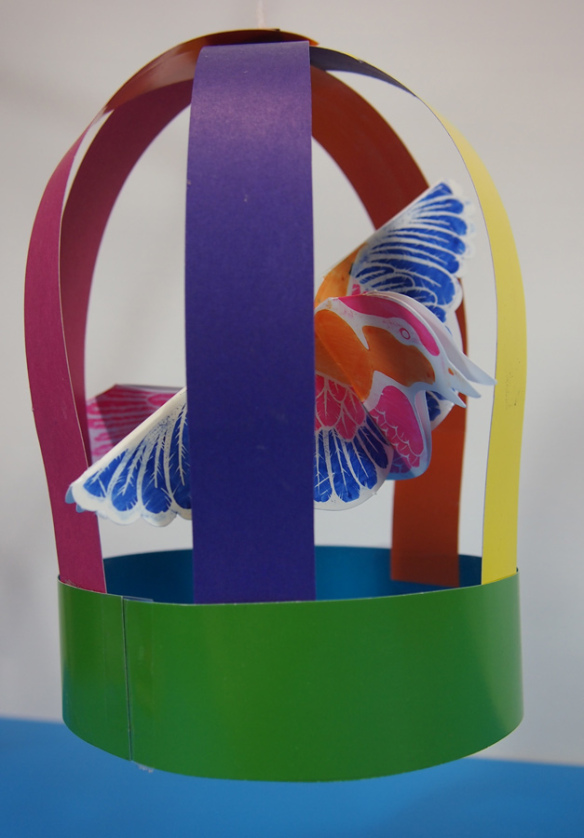
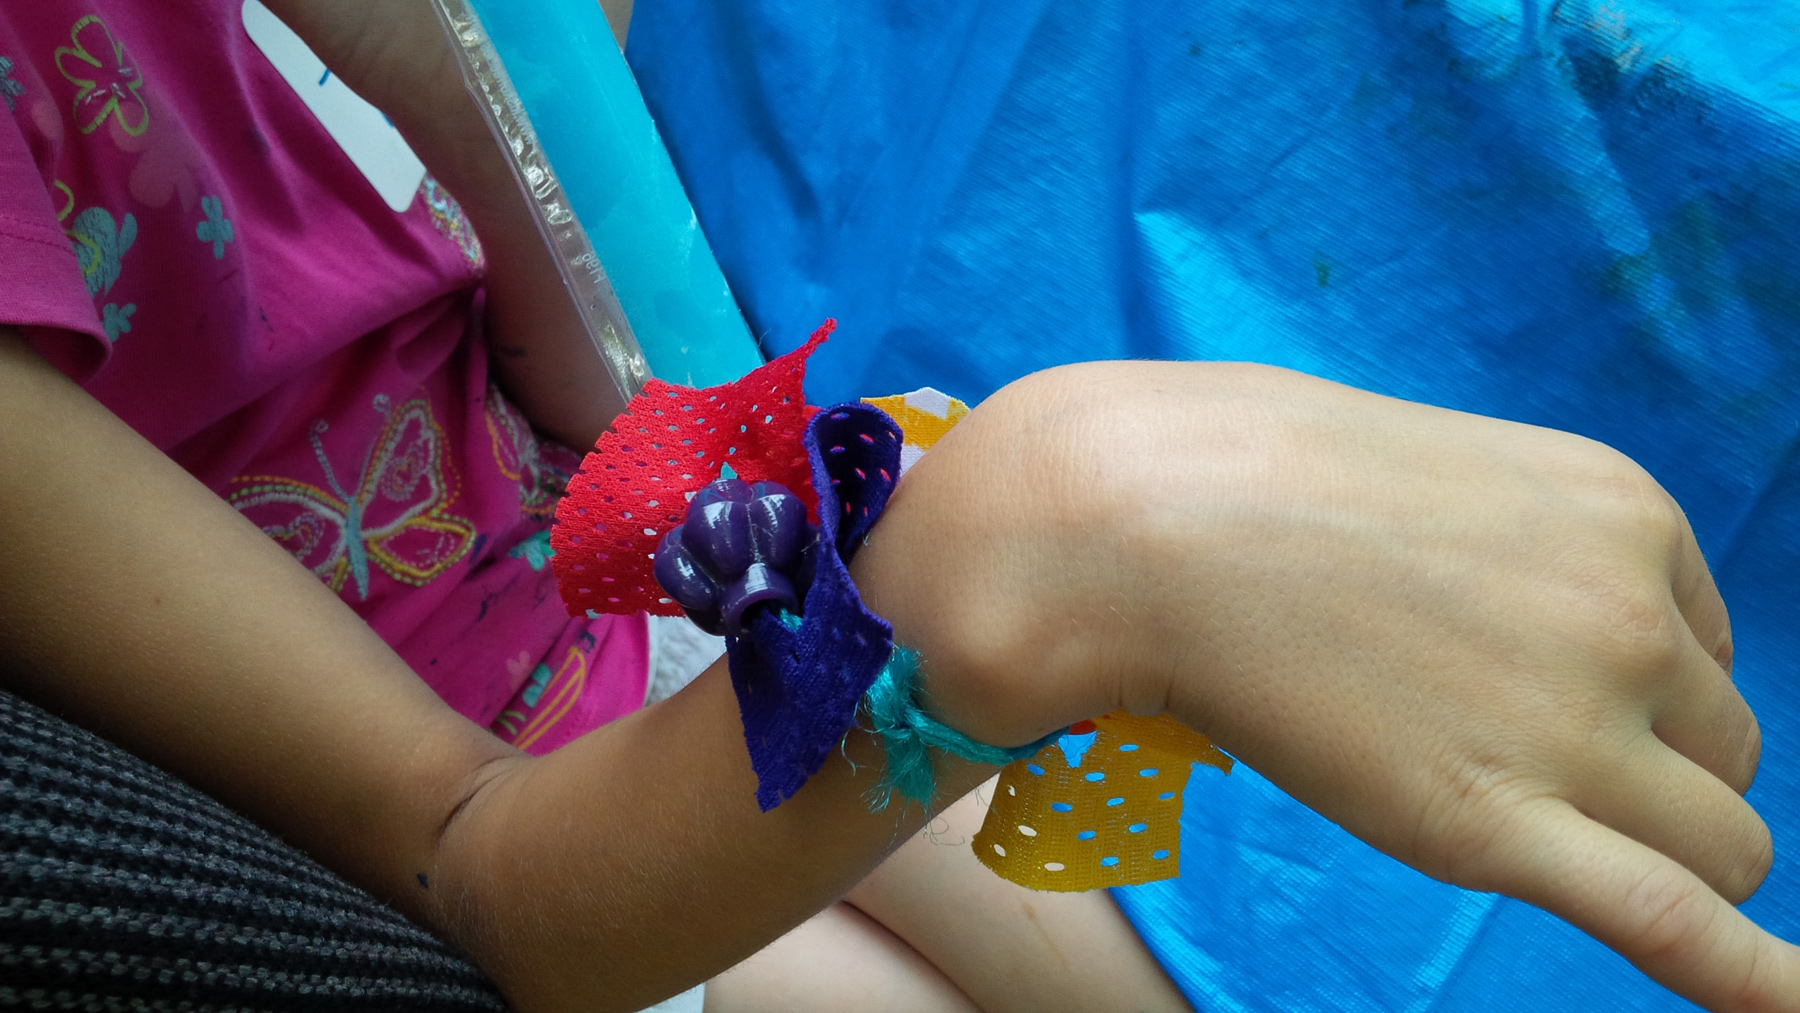
Like so! You can make another knot at the top of the birdcage to hold all the strips in place, or simply knot the two ends together and hang from a desired location!

P6109609

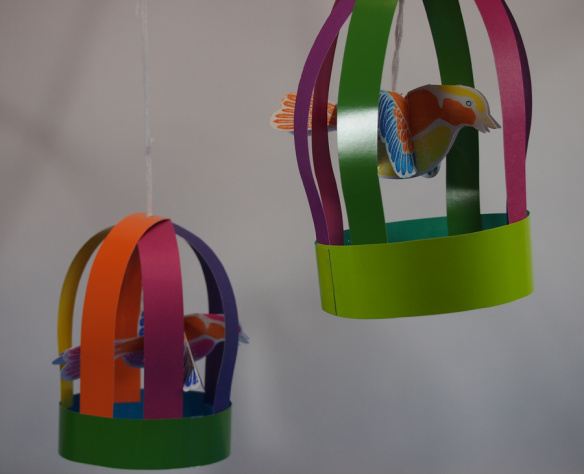
Here’s what a few of our birdcage projects turned out to look like! Notice how vibrant the colors are. This will look beautiful hung from the ceiling in a children’s bedroom or outside in the garden!

P6109619

Line-19

Thanks for checking out this post! Like us on FacebookShare this post with your friends, or Subscribe to this blog today to receive original craft project updates every Monday, Wednesday and Friday!

Snowflake Wax Resist Art

Roylco Snowflake Wax Resist Art

Feature-Image-rubplatesnowflakesLearn the technique for making beautiful wax resist art–give your students something to work on as they return to their school routine after the holidays, and help them create an art piece that they can be proud of!

Age: 3+

Duration: 15 minutes

You’ll Need:

R58622 Super Snowflake Stencils

• Paper towel

• White crayon

• Blue watercolor paint

• White paper (8.5 x 11″)

• Paint tray

Line-20

We’ve done it! Days of experimentation, combining a multitude of products and materials, testing this paint versus that crayon…. and here we are! Use our Snowflake Rubbing Plates to make simple but beautiful wax resist art. Decorate your classroom during the winter months with your students’ projects!

2013-12-12-snowflakerubplates01
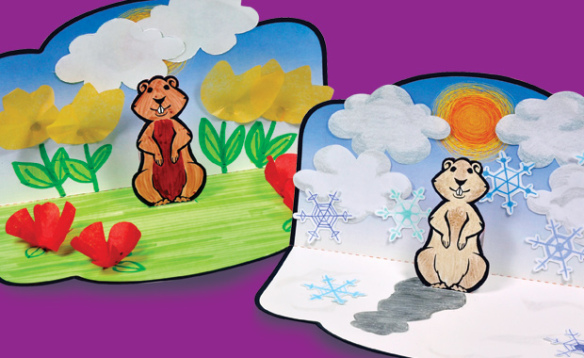
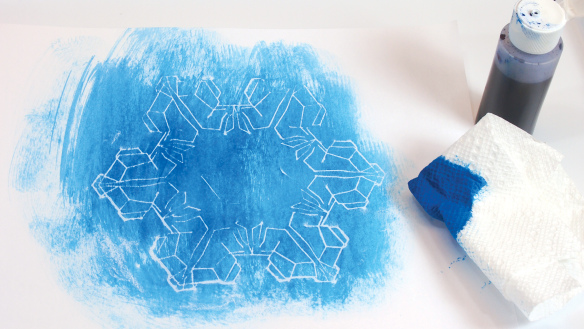
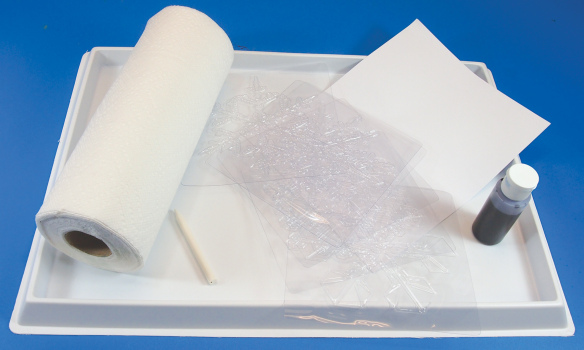
The paint tray is essential for keeping work-spaces clean while spreading paint onto the paper.

2013-12-12-snowflakerubplates02
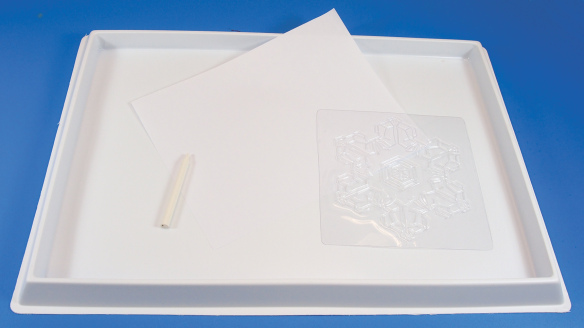
Place one of the Snowflake Rubbing Plates underneath the white paper. Tip: Tape the edges of the Snowflake Rubbing Plate to the paint tray to keep it from moving about. This will be important for the next step.

2013-12-12-snowflakerubplates03
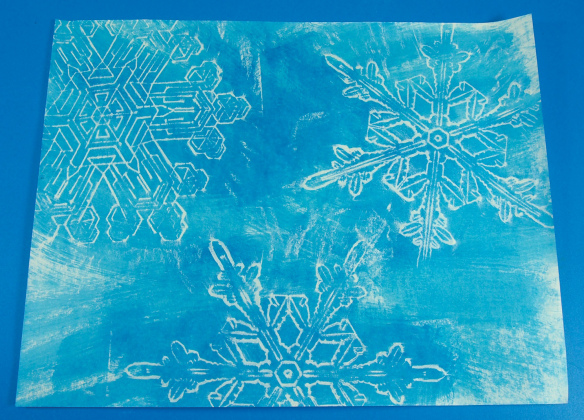
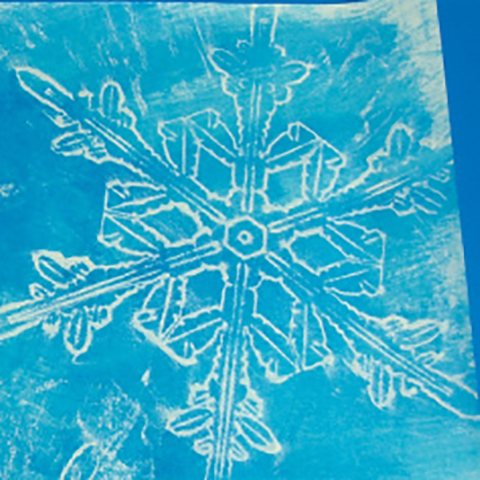
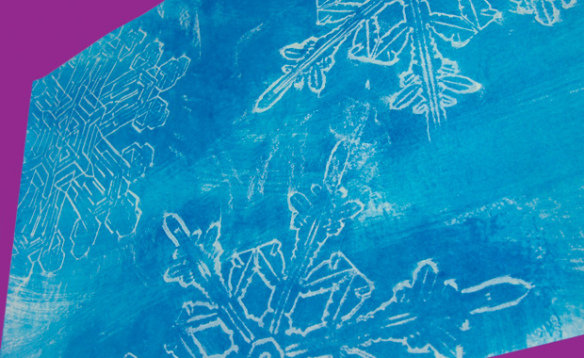
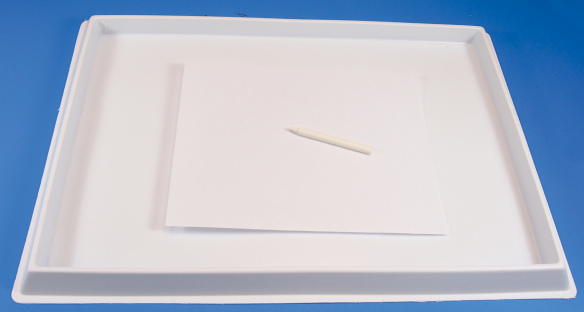
Rub the white crayon across the surface of the paper. Make sure the rubbing plate stays in one spot while you rub the page with the crayon.2013-12-12-snowflakerubplates06

Tear one sheet of paper towel and fold it into a square. Dip a corner of the square into the blue watercolor paint. Next, dab the dipped corner onto the white crayon rubbing. Spread the paint outwards from the center. You will start to notice the crayon rubbing “pop” out from the paint color.

2013-12-12-snowflakerubplates08

Make additional crayon rubbings at various angles on the white paper. Use different Snowflake Rubbing Plates or vary the position of the snowflakes.

Line-20

Thanks for stopping by! If you liked this craft and would like to share your version with us, send us an email to subscriber@roylco.ca with photos! We’d love to hear from you!