Make Chinese Lanterns for Chinese New Year

The Chinese Lantern Festival is a Chinese festival celebrated on the fifteenth day of the first month in the lunisolar Chinese calendar. It marks the final day of the traditional Chinese New Year celebrations, and it falls on March 2nd for 2018.During the Lantern Festival, children carry paper lanterns and go out at night. People also go to temples to solve riddles on the lanterns.

Age: 5+

Duration: 8-10 minutes

Learning Outcomes: Explore cultural assumptions and symbols. Practice folding and taping. Exercise Fine motor skills. Create a cute take-home craft.

You’ll Need:

Ideas:

  • Use your own imagination and add some decorations to the lanterns.

Bundle with Textured Rubbing Plates

Bundle Savings

Get all the Roylco items used
in this project and save 15%!

$25.06 USD
bundled price
Add Bundle
to Cart

Bundle with Optical Illusion Rubbing Plates

Bundle Savings

Get all the Roylco items used
in this project and save 15%!

$25.06 USD
bundled price
Add Bundle
to Cart

Animal Face Pencil Toppers

finished craft.jpg

Need a five-minute craft that stops fights over pencils? These adorable button pencil toppers are perfect!

Age: 5+

Duration: 5 minutes

Learning Outcomes: Practice fine motor skills, animal names, and clearly mark pencils so students don’t lose them or argue over whose pencil is whose!

You’ll Need:

Line-11

This craft is quick, easy and fun!

Start with a chenille stem. Fold the stem in half, and slide both ends through the button holes. Then give the loose ends a twist to secure the button. Next, carefully wrap the chenille stem around the eraser end of the pencil. It’s that simple! Now students have an animal friend to work on assignments with.

Line-18

Like us on FacebookShare this post with your friends, or Subscribe to this blog today to receive original craft project updates every week!

Lace Paper Dolls

OLYMPUS DIGITAL CAMERA

Add beautiful trims and details to your paper dolls with R22054 Lace Paper!

Age: 4+

Duration: 10-20 minutes

Learning Objectives: Use multiple materials to make details. Talk about fashion and how to combine details to make interesting combinations of clothes. Discuss proportions, clothing arrangements and combining pattern and color. Exercise scissor skills.

OLYMPUS DIGITAL CAMERA

You’ll Need:

Line-07

OLYMPUS DIGITAL CAMERA

Choose your Paper Doll of choice and lay it onto a sheet of Fabric Paper. Trace around the edge of the Paper Doll. To make the pants, trace only around the legs and connect the lines when you remove the doll. Similarly, trace around the upper body area to make the shirt.

OLYMPUS DIGITAL CAMERA

Cut out the resulting tracings. Use different types of paper sheets to add a variety of pattern and color to your Paper Doll’s overall outfit.

OLYMPUS DIGITAL CAMERA

Glue the pieces down onto your Paper Doll.

OLYMPUS DIGITAL CAMERA

The lovely lace patterns in our Lace Paper are perfect for adding little details and embellishments to your Paper Doll’s outfit. Trace around the outside of your doll’s sleeve/arm area if needed.

OLYMPUS DIGITAL CAMERA

Cut scalloped edges with special scrapbook scissors or develop an advanced scissor skill by cutting a wavy line! Glue the strips down onto the edges of the separate clothing pieces.

OLYMPUS DIGITAL CAMERA

Even use the Lace Paper to make the hair! Cut out little sections and wisp the ends.

OLYMPUS DIGITAL CAMERA

Here is another example of how you can combine lovely patterns of the Fabric Paper! Explore wonderful, wacky combinations and make your characters come to life!

Bundle Savings

Get all the Roylco items used
in this project and save 15%!

$21.90 USD
bundled price
Add Bundle
to Cart

Line-03

Thanks for checking out this post! Like us on FacebookShare this post with your friends, or Subscribe to this blog today to receive original craft project updates every Monday, Wednesday and Friday!

Welcome Back to the New Year!

top ten list feature image

Now that we’ve rung in the New Year, we are excited to share our ideas with you over the next little while. Stay tuned for blog posts in a range of subjects, using tools that you already have in your classroom!

We hope that you’ve enjoyed a year of posts from Little Fingers Big Art. Here’s a recap of 10 of our favorite posts:

1.IMG_0139

Use jelly on the Light Cube for a great sensory activity!

2.2015-02-25-FeatureImage

Make lucky four leaf clovers for St. Patrick’s Day, coming up in March!

3.

P1016562

Combine letters in a Word Mobile to generate literacy creativity in students!

4.

Image-04

Guest post from Rebecca Milling about the wonderful creations made with our Straws and Connectors at St. Jerome’s Children’s Home in Nakuru, Kenya.

5.

P1016903

Check out this neat step-by-step tutorial on how to make 3D wall art!

6.

IMG_0811

Use our Tube Crafts to make a birdfeeder… or critterfeeder!

7.

P1016967

Make beautiful tissue paper birds–a great fine motor skills activity!

8.

Animation

Check out our awesome Action Shapes People! Customizable action figures that your students can use for stop-motion animation projects!

9.

Collage-a-Saurus-FeatureImage

Imagine what dinosaurs really looked like with our Collage-A-Saurus and Dinosaur Paper Sheets!

10.

OLYMPUS DIGITAL CAMERA

Turn old doodle paper into wrapping paper for someone’s birthday or for Christmas time!

These are our top ten for the year! Share your favorite post online with your friends.

Leave us a comment to let us know what kinds of posts you would like to see more of!

Line-09

Like us on FacebookShare this post with your friends, or Subscribe to this blog today to receive original craft project updates every week!

Repurposed Brown Paper Art (Christmas Edition)

IMG_7757

We always hear about great ways to get kids thinking creatively, while doing some sort of double duty. By this, I mean putting down brown packing paper onto tables to protect the surfaces, while giving kids the ability to draw or doodle to their hearts’ content! Well… what do you do with that paper after it’s all done? Read on for more, but a word of advice: DON’T throw it away!!

Age: 3+

Duration: 15 minutes

Learning Objectives: Create artistic talent, generate creative thinking skills. Repurpose old art in a new and fun way.

You’ll Need:

  • Brown Wrapping Paper
  • Markers/pencil crayons/crayons/pens
  • Tape
  • Scissors
  • Ribbon

Line-03

Click to view slideshow.

Over the years, we’ve worked with children at various art camps and picked up a few pointers along the way. One of our good educator friends gave us this hint: cover up workspaces with brown wrapping paper. Get the students to doodle when they are bored or need some creative stimulation. It’s always good to have a canvas available at all times!

But what do you do with it when it’s all filled up?

P1010379

Remove the brown drawing paper off the table and cut the best artwork out into large rectangles (about a meter or yard wide, depending on how big the previous workspace was).

OLYMPUS DIGITAL CAMERA

Flip the rectangle sheet over. Place a boxed item such as a new toy or a small keepsake into the center of the wrapping paper.

OLYMPUS DIGITAL CAMERA

Fold in the long sides. Cut off any of the excess and tape the two edges in place. Fold down the sides as you would for wrapping a gift and cut off any other excess. Tape the sides closed.

OLYMPUS DIGITAL CAMERA

This is what you’ll be left with after you flip it right side up.

OLYMPUS DIGITAL CAMERA

To give your wrapped present extra special flair, add on a gold ribbon or bow. Tie it in the center and curl the ribbon with scissors.

OLYMPUS DIGITAL CAMERA

A great way to spread Christmas or birthday cheer any time of year!

Line-14

Like us on FacebookShare this post with your friends, or Subscribe to this blog today to receive original craft project updates every week!

Jack O’ Lantern Weaving Mats

jack o lantern weaving mats

Weave beautiful bright patterned strips through lovely weaving mat pumpkins, pre-cut for a ready-to-use fine motor activity!

Weaving mats are a great way to encourage fine motor development in young children. It’s a skill that’s inherent to finger work as tying the laces on one’s shoe or learning to use a writing tool.

jack o lantern weaving mats

The Jack-O’Lantern Weaving Mat kits come with 24 pumpkin weaving mats, and several different patterned strips.

jack o lantern weaving mats

Weave the strips horizontally across the mat, going over and under each progressive slot. As you start the next row, be sure to begin weaving the opposite way that was done in the row prior. So for instance, if you started the row by first weaving under, start the next row by weaving over.

jack o lantern weaving mats

Here is a close-up of the process as one of our art campers finishes up her pumpkin weaving mat.

jack o lantern weaving mats

You can choose several different patterns of weaving strips that are all thematically printed to accentuate the pumpkin weaving mat.

jack o lantern weaving mats

Each weaving mat is accompanied with glowing Jack-O’-Lantern features in various shapes and designs. Mix and match the features to make a unique Jack-O’-Lantern!

jack o lantern weaving mats

The last step is to decorate the pumpkin faces with two additional leaf graphics. Paste them directly onto the pumpkin face.

jack o lantern weaving mats

Paste the green vines to the tops of the pumpkins. Use the blunt edge of a pair of scissors to curl the vines. You can paste the pumpkin weaving mats onto a length of ribbon to use as a classroom decoration!

Line-13

Like us on FacebookShare this post with your friends, or Subscribe to this blog today to receive original craft project updates every Monday, Wednesday and Thursday!

Constructa Clips Neighborhood

constructa clips house neighborhood

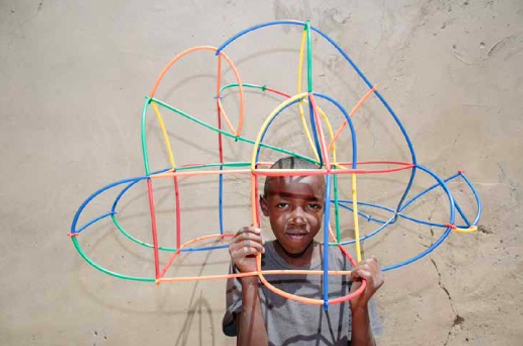
Constructa Clips are our versatile building toys–combine recyclable materials using the handy clips, and create anything from vehicles to robots, buildings and more! In this project, we got our campers to contribute to the development of a model neighborhood using simple materials. 

Age: 4+

Duration: 10-15 minutes

Learning Objectives: Open discussion with students about communities, neighborhoods and city planning. Discover all the various aspects of running and maintaining a community, including building up city centers and living spaces. Talk about the different types of living structures (condominums, bungalows, two-storey houses, semi-attached or townhomes, etc). Move your discussion towards an “All About Me” lesson. Ask students to picture their own homes and build them using the card materials and Constructa Clips. Alternatively, get students to brainstorm what their “dream homes” would look like/include.
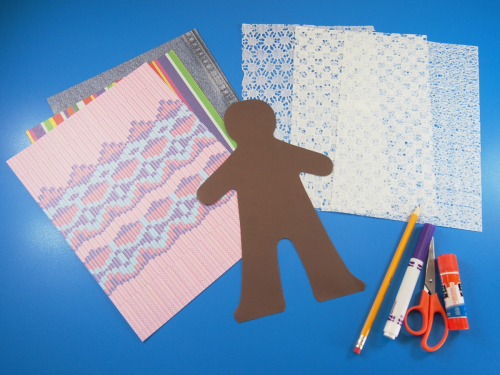
constructa clips house neighborhood

You’ll Need:

R60160 Constructa Clips

• Card paper

• Scissors

• Pencil crayons/crayons/markers

• Stickers or collage embellishments

Line-20

constructa clips house neighborhood

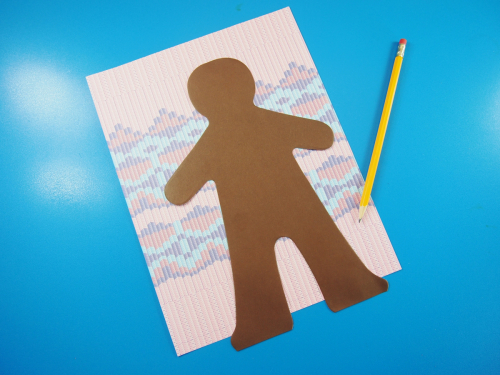
Cut out angular shapes such as rectangles, squares and triangles from the card paper. Students can design their own buildings or mix and match the shapes to create new and interesting sculptures.

constructa clips house neighborhood

Use crayons, markers or pencil crayons to decorate your card houses! Create a garden, or focus on showing the exterior brickwork of the house. Make cutouts for doors and windows. You may even illustrate the occupants of the house as if they are proudly standing right beside their living area. Don’t forget: you will need to make 2 large size card house shapes and two smaller ones on either side, depending on the type of structure you are designing. Since you are making a 3D model, you will need all 4 sides of your building structure to complete it.

constructa clips house neighborhood

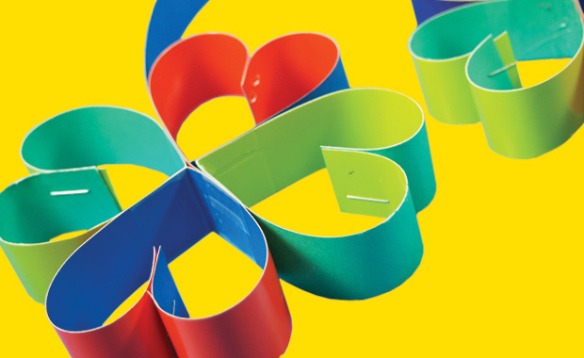
To attach the card sides together, slide an edge into a slot on either end of a Constructa Clip. The plastic “teeth” on the inside will grip the material as it slides in. Make sure you complete all four sides of the structure.

constructa clips house neighborhood

Ready, set… build! This activity can be expanded to children building an entire city using simple materials such as card paper and our Constructa Clips!

Line-17

Like us on FacebookShare this post with your friends, or Subscribe to this blog today to receive original craft project updates every Monday, Wednesday and Thursday!

Spotlight on… Postage Stamp!

postage stamp art

Mail something nice to a friend and make your own signature stamp piece! 

These large sized paper sheets are shaped like postage stamps, and cut with a special border to mimic the look and feel of the real thing. They are 9 x 12″ (23 x 30 cm), perfect for bringing out the fine details in your artwork!

Use crayons to draw a rectangle border on the inside of the stamp sheet. Take a moment to think about some kind of signature piece of artwork that you’d like to be drawn on the interior of the stamp. Remember that the stamps you may see at the post office feature an image of something important that relates to the country or signifies something that the people of that country are proud of.

Tell students to each make a list of things that they are proud of in their lives. Things such as “my dog,” “my cottage by the lake” or “my soccer goal” are good suggestions! When your students have made up their lists, ask them to describe why these things are important to them. Once they have come up with solid reasons, you can start to narrow down your choices as to what makes each student most proud in her or his life.

Try to think of ways that you would represent the picture. Will you simply put a picture of a dog on the stamp or will you embellish the illustration somehow to make it look more important and worthy of having its picture on a stamp? Perhaps you can add details that are important to the dog such as its bone, collar, playhouse, play-toy and so on. You can even go further by adding something like a superhero cape to the dog!

Flip the large postage stamp over and write a letter to someone important in your life such as a friend, parent or close relative. Practice writing your letter on a sheet of paper first so that you can revise your work before copying it onto the back of the stamp. Once you are finished, your students are ready to take their stamps home and “send” them to their favorite people!

You can also “send” cards with the stamps. Here are some of our card projects:

• Make a card any dad will love!

• Surprise someone with a pop-up bouquet, straight from a card!

• These underwater scenes are great to send to a friend!

Line-17

Like us on FacebookShare this post with your friends, or Subscribe to this blog today to receive original craft project updates every Monday, Wednesday and Thursday!

Groundhog Day: Will he see his shadow or not??

groundhog day craft

In anticipation of the upcoming Groundhog Day on February 2nd, predict with your students whether or not the groundhog Punxsutawney Phil will see his shadow or not with our R42006 Groundhog Day Craft!

groundhog day

The Groundhog Day craft has everything you need to make your own representation of the Punxsutawney scene when Phil sticks out his head. Will he make it outside to see his shadow or not with the impending blizzard? Time will tell!

The legend goes that when Phil comes out of his hibernation burrow in February, he may or may not see his shadow. If he sees his shadow, Phil will return back to his burrow and there will be 6 more weeks of winter! However, if the opposite happens, and no shadow is seen, then there will be an early spring.

Phil is known as a prognosticator or someone who predicts something. Let’s hope his prediction is right!

groundhog day

The kit comes with 24 printed card scenes. The print features a generic sky with a sun. Find your own groundhog in the kit and start decorating! You can glue the groundhog to the center pop-out tab, then add details around him, such as clouds, flowers or snowflakes.

Make your prediction then see what happens on February 2nd!

Line-15

Like us on FacebookShare this post with your friends, or Subscribe to this blog today to receive original craft project updates every Monday, Wednesday and Thursday!