 Learn the technique for making beautiful wax resist art–give your students something to work on as they return to their school routine after the holidays, and help them create an art piece that they can be proud of!
Age: 3+
Duration: 15 minutes
You’ll Need:
• R58622 Super Snowflake Stencils
• Paper towel
• White crayon
• Blue watercolor paint
• White paper (8.5 x 11″)
• Paint tray

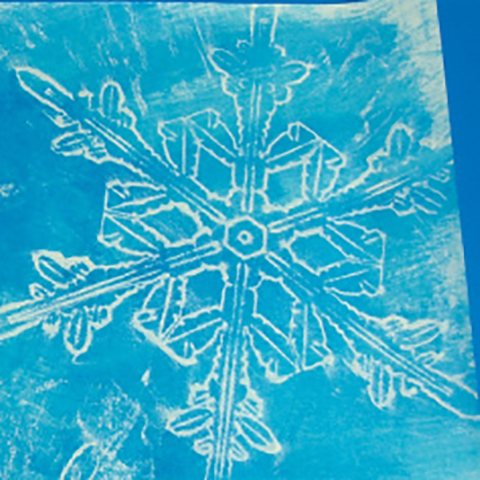
We’ve done it! Days of experimentation, combining a multitude of products and materials, testing this paint versus that crayon…. and here we are! Use our Snowflake Rubbing Plates to make simple but beautiful wax resist art. Decorate your classroom during the winter months with your students’ projects!
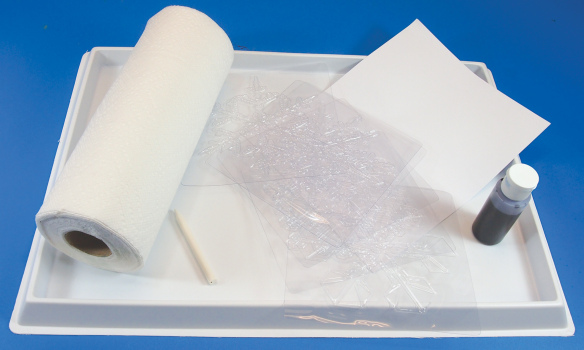 The paint tray is essential for keeping work-spaces clean while spreading paint onto the paper.
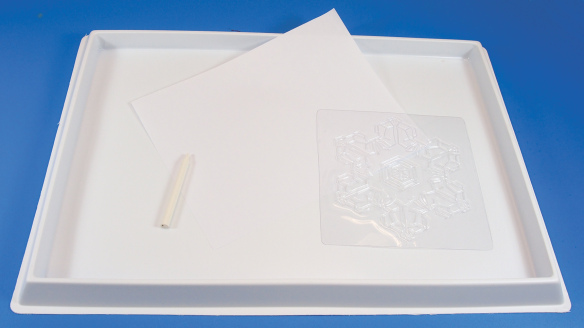 Place one of the Snowflake Rubbing Plates underneath the white paper. Tip: Tape the edges of the Snowflake Rubbing Plate to the paint tray to keep it from moving about. This will be important for the next step.
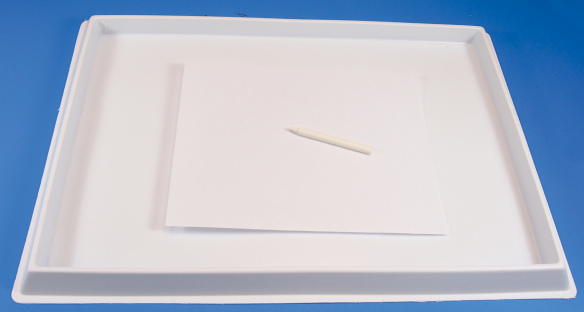 Rub the white crayon across the surface of the paper. Make sure the rubbing plate stays in one spot while you rub the page with the crayon.
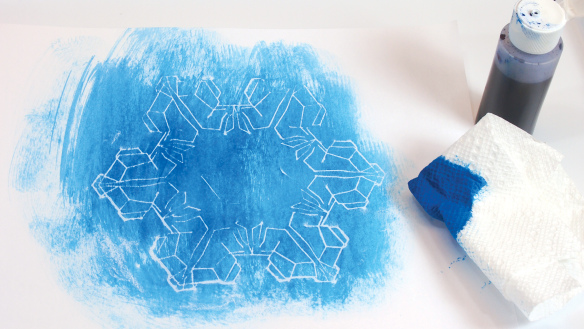
Tear one sheet of paper towel and fold it into a square. Dip a corner of the square into the blue watercolor paint. Next, dab the dipped corner onto the white crayon rubbing. Spread the paint outwards from the center. You will start to notice the crayon rubbing “pop” out from the paint color.
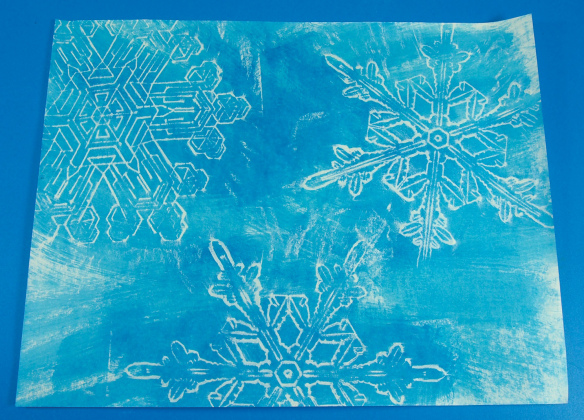
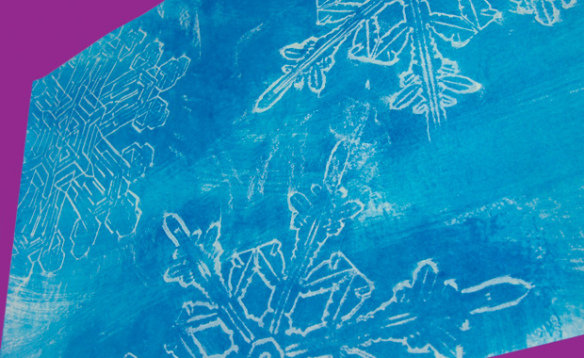
Make additional crayon rubbings at various angles on the white paper. Use different Snowflake Rubbing Plates or vary the position of the snowflakes.

Thanks for stopping by! If you liked this craft and would like to share your version with us, send us an email to subscriber@roylco.ca with photos! We’d love to hear from you!

![]()