Posts Tagged ‘arts and crafts’
5 Reasons Why Arts & Crafts Are Crucial For Early Development
Dinosaurs and unicorns are alive. Superheroes and insects work together to fight evil. Yep, you heard that right! Welcome to the world of arts and crafts – a magical world where children can put on their capes of creativity and curiosity, unlocking the secrets of their own potential. Arts and Crafts are the forefront of…
Read MoreTropical Art-a-Roni Bracelets
Today’s craft is pretty simple, but no less fun to try out! We’re making use of our extra-bright and colorful Tropical Art-A-Roni® Noodles to fashion exotic-looking bracelets. Age: 4+ Duration: 5-10 minutes Learning Objectives: Develop manual dexterity while threading pasta beads through pipe … Continue reading ![]()
Craft Spotlight: Nature Stencils
Use detailed Nature Stencils to draw beautiful pictures while developing fine motor skills and encouraging image association. Each shape has a coordinating border to add interest to students’ drawings. The stencils kit features many different types of flora and fauna … Continue reading ![]()
Paint Bellows Tree
Use process-based methods to create colorful tree artwork! The techniques used involve materials such as Paint Bellows, fingerpaint and Squiggle Pipettes, all combined to give your students an exercise in fine motor development while enjoying the result of the final image. … Continue reading ![]()
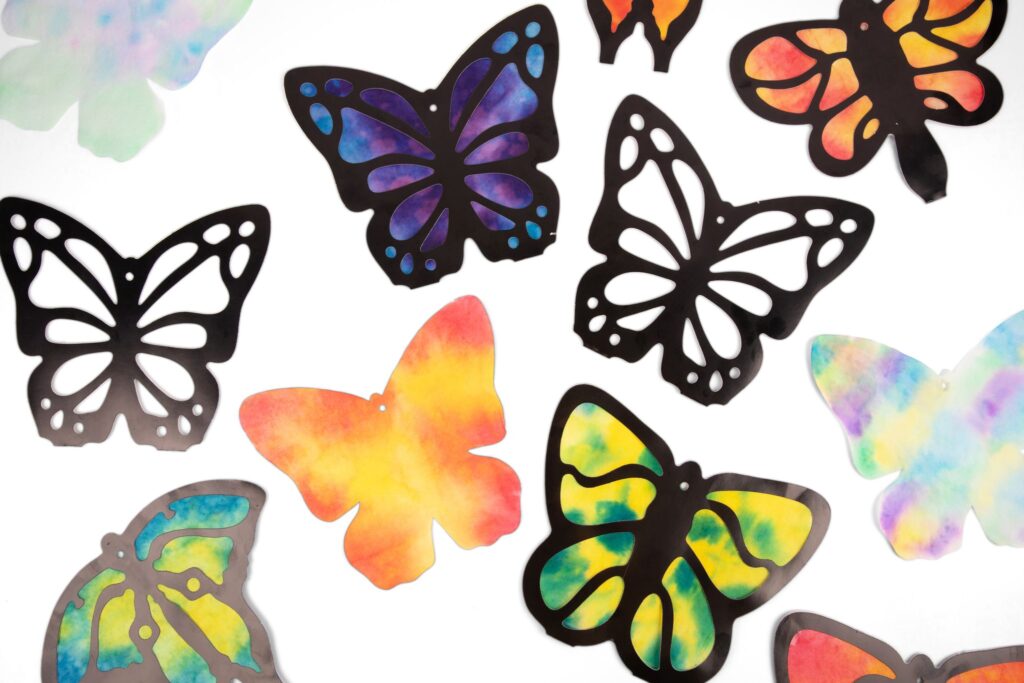
Bug Rubbing Plates
Find out how we used our Bug Rubbing Plates to make stunning suncatchers! The raised edges on our rubbing plates make it easy to develop impressions of the assorted designs. Create beautiful prints using simple materials! Age: 5+ Duration: 5-10 minutes Lesson … Continue reading ![]()
Chromatography Flowers
Find out what colors of ink are used in your markers! Chromatography is used to break a solution into its component parts. In other words, the colors of markers are often made by combining several other colors together. To split these … Continue reading ![]()
Craft Spotlight: Flower Forms
Flower Forms are plastic flower bases with slots for threading through your own petal designs! Make your own chain of flowers or use to decorate hair bands or bracelets! Flower Forms come in a variety of colors to match various … Continue reading ![]()
Craft Spotlight: Touch and Match Animal Cards
A good way to encourage sensory interplay is through games! Try our fun-tastic R76530 Touch and Match Animal Cards, which features colorful cartoon playing cards and animal-shaped buttons. Read on and learn how to play!!The Touch and Match Animal Cards are a great way to get groups of students together to play, especially if you…
Read MoreLoralee Lewis uses our Paper Doll Pads!
Loralee Lewis makes beautiful stationery for sale at her website here. Loralee’s experience with paper makes this Paper Doll Pad project an innovative craft for Thanksgiving! Celebrate diversity with fun paper doll characters for your Thanksgiving table! Loralee Lewis posted her craft on November 22, 2008, entitled: “Gathering Together Activity and Thanksgiving Kids’ Table.” She notes…
Read MoreThanksgiving Hat
Inspired by what our crafters at the Roylco Summer Art Camp made, here’s how to put together your unique Thanksgiving Hat! Use the R28421 Scissor Skills Paper for this craft. Age: 4+ Duration: 15-20 minutes You’ll Need: • R28421 Scissor Skills Paper • R5870 Linear Rubbing Plates • Sheet of paper, 8.5 x 11″ (20 x…
Read More