Use process-based methods to create colorful tree artwork! The techniques used involve materials such as Paint Bellows, fingerpaint and Squiggle Pipettes, all combined to give your students an exercise in fine motor development while enjoying the result of the final image.
Age: 3+
Duration: 10 minutes
Learning Objectives: Explore process artwork through fine motor activity. Use Paint Bellows and Squiggle Pipettes to exercise squeeze-and-release motions using various finger coordination. Achieve harmonious effects with 3 different art techniques. Enhance image association through fluidly and unidirectionally moving the pipette to make a tree trunk, spritzing paint to make the tree leaves and pressing fingerpaint onto the paper to make apples. Create results with process-based art!
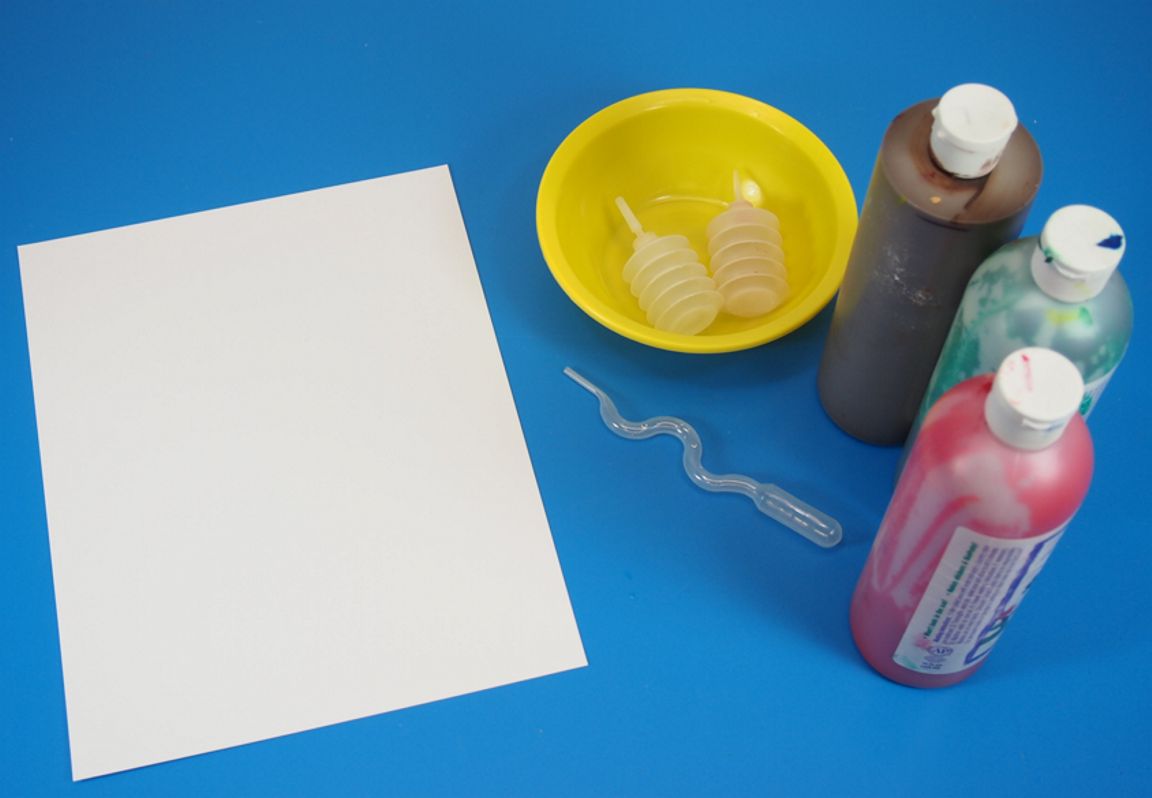
You’ll Need:
• Fingerpaint in tree colors (green, brown, red)
• Card paper sheet (8.5 x 11″)
• Paint tray

Educators are always looking for ways to add process steps to their students’ learning activities. Instead of merely focusing on the process, guide students to make beautiful artwork through step-by-step fine motor exercise using several different tools–Paint Bellows, Squiggle Pipettes and their own fingers!
 You won’t need many materials to make this artwork! Place the sheet of card paper inside a paint tray. I use card paper in this project to help withhold it shape under the paint.
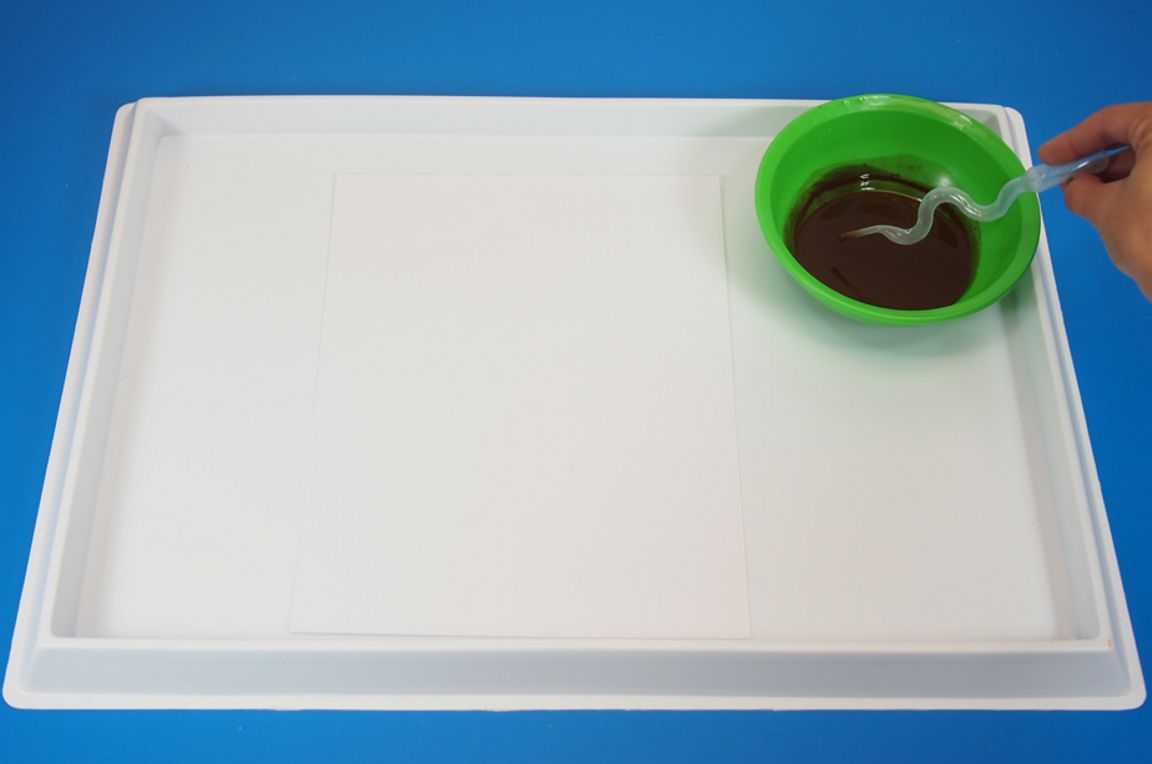 Mix one part brown paint with one part water to make the paint watery for the Squiggle Pipette. To use the Squiggle Pipette, dip the nozzle into the paint, and squeeze the bulb to release all the air. Release the bulb while holding the nozzle in the paint to draw in some of the paint.
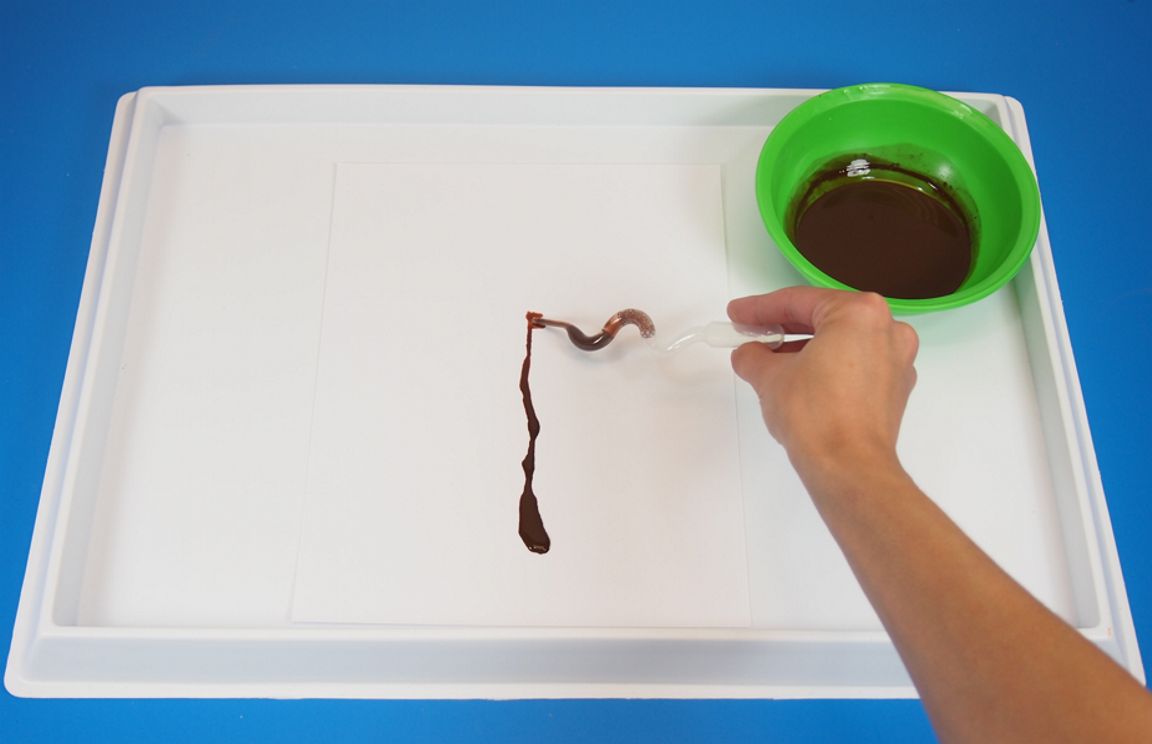 To paint with the Squiggle Pipette, release the paint onto a sheet of card paper. Start from the bottom of the sheet, squeeze out a bit of paint, then draw up the Squiggle Pipette while continuing to squeeze the paint out. This will produce a tree-trunk base for the tree artwork.
 Use the remaining brown paint in the Squiggle Pipette to make offshoots from the main tree trunk. These will form the boughs and branches of the tree. A good technique is to squeeze a bit of paint out from the center of the tree, then draw the pipette outwards from the center to make a wispy, crooked branch.
Add a few lines at the bottom of the tree trunk to form the tree’s roots.
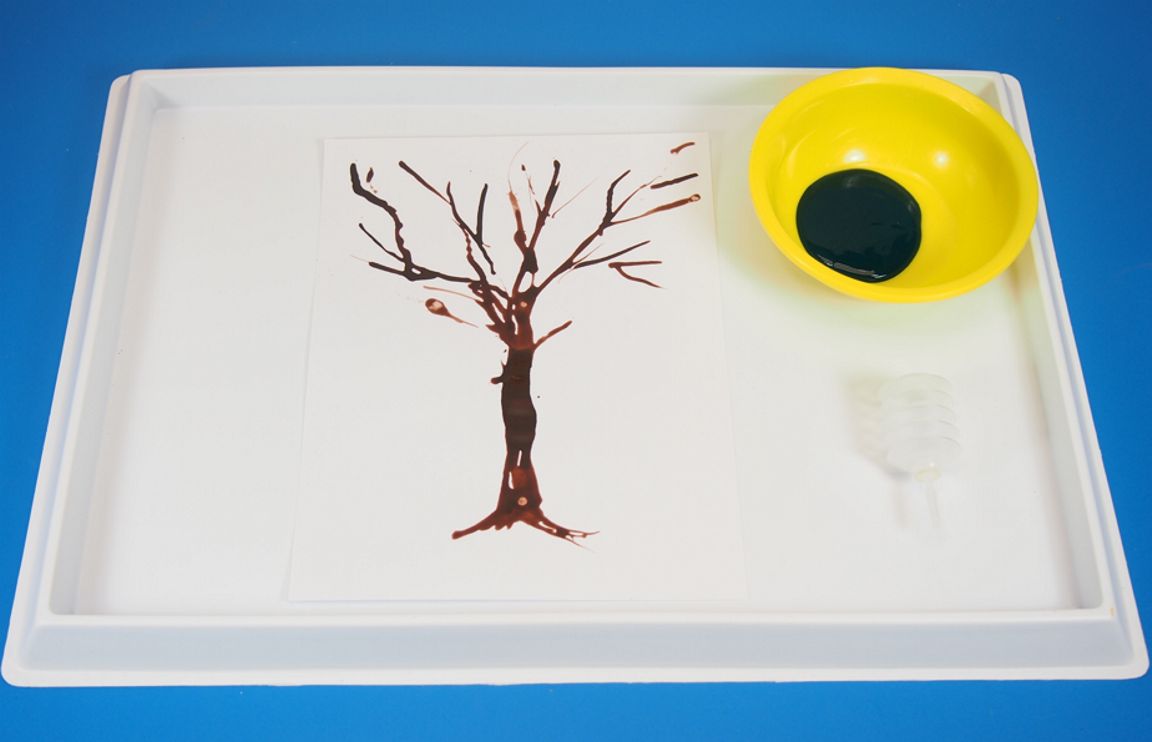
 Squeeze a bit of thick green paint into a bowl. NOTE: Do not water down this paint! In order to effectively use the Paint Bellows, you will need to use very thick paint. This helps to achieve the splatter effect better than using watered-down paint.
To use the Paint Bellows, first squeeze the top and bottom of the accordion chamber together. This will release all the air from the chamber.
 Hold the Paint Bellow taut as you dip the nozzle into the paint, then release the top and bottom to allow the chamber to draw in the paint. You can see that only a very small amount of paint has been drawn into the chamber.
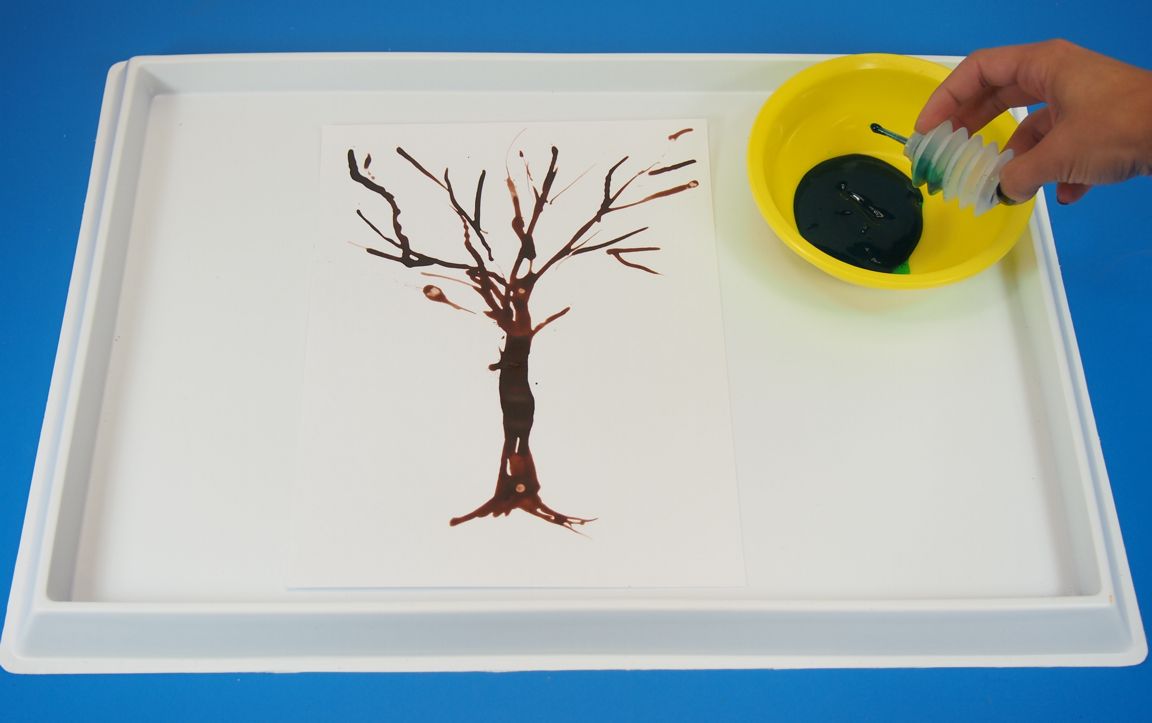
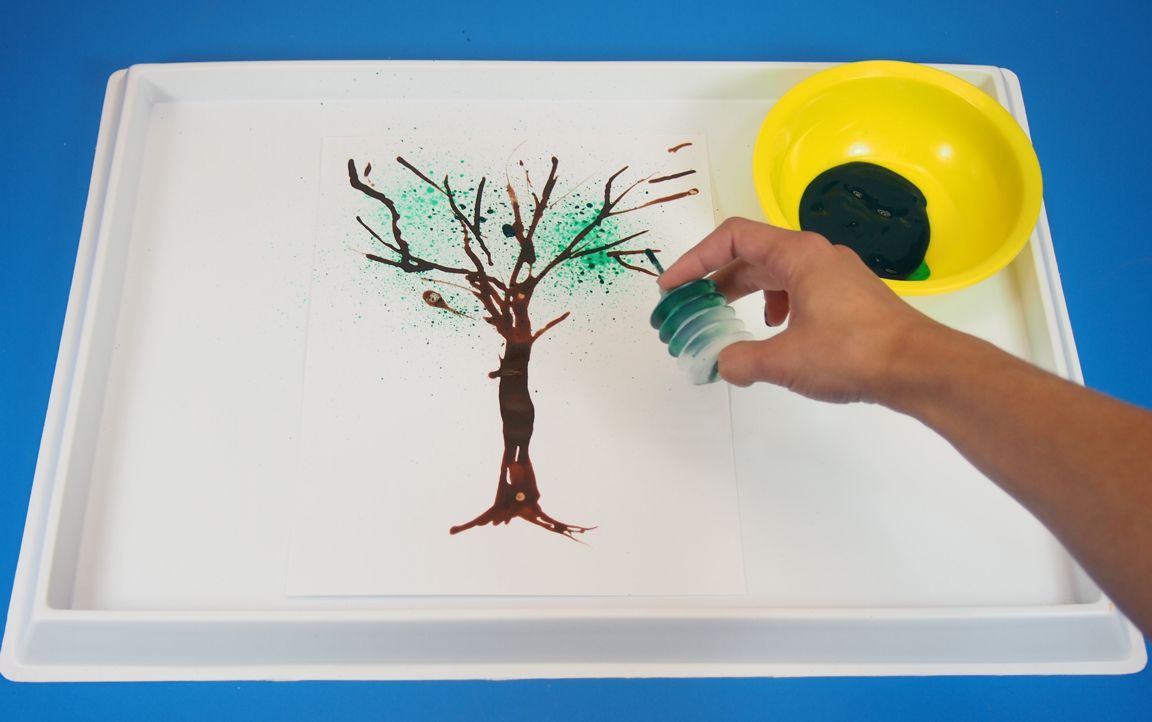 Squeeze the top and bottom of the Paint Bellows together to make the chamber spritz out the paint. The effect will produce multiple miniature dots on the canvas.
 Continue adding more spritzes of paint around the boughs of the tree. Focus on getting students to exercise their finger muscles while using the Paint Bellows.
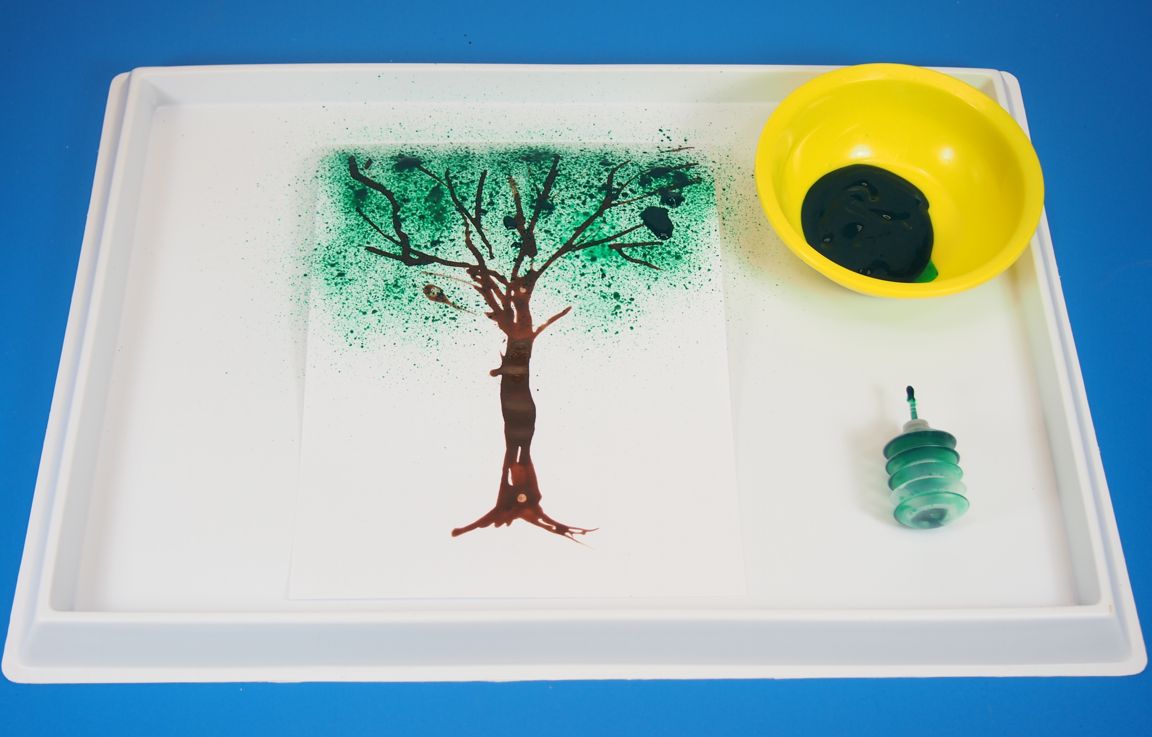 Continue filling up that tree space until you are happy with how it looks. Concentrate more green in the spaces near the boughs, so that your artwork mimics the appearance of leaves throughout the tree.
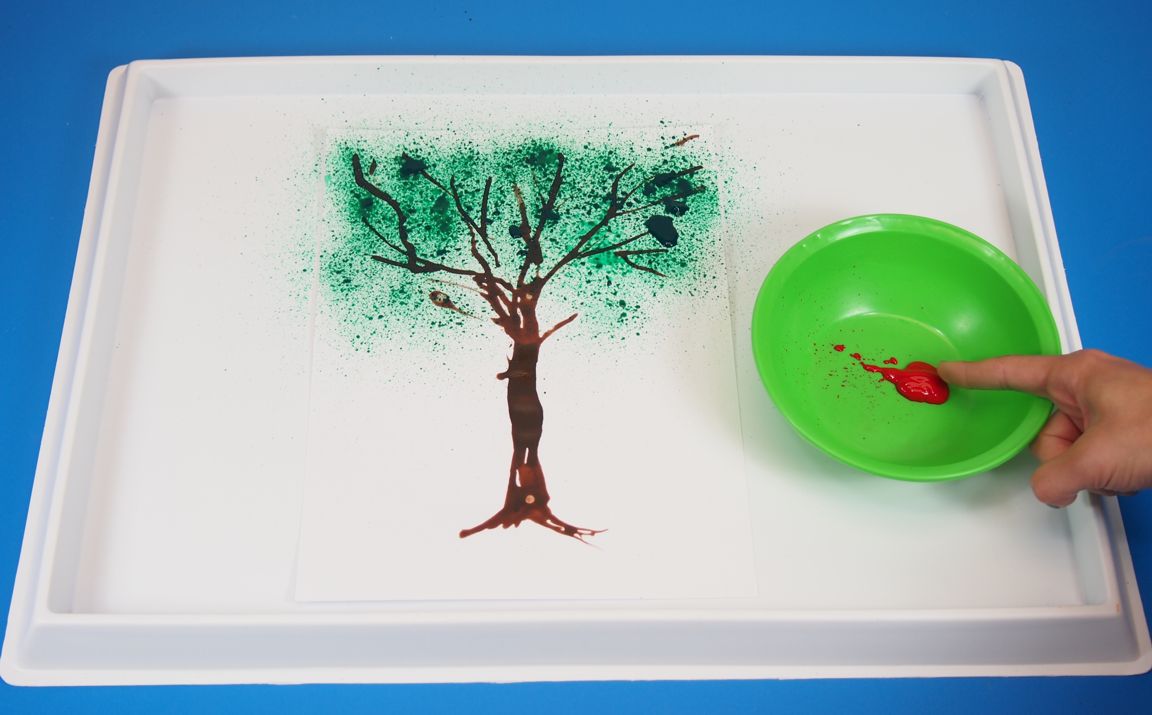 Now we are ready to decorate the tree. Squirt a bit of red finger paint into a bowl. Students can dip one finger into the red paint.
 Use the tip of your finger to make little dots representing apples (or any type of fruit) on the tree.
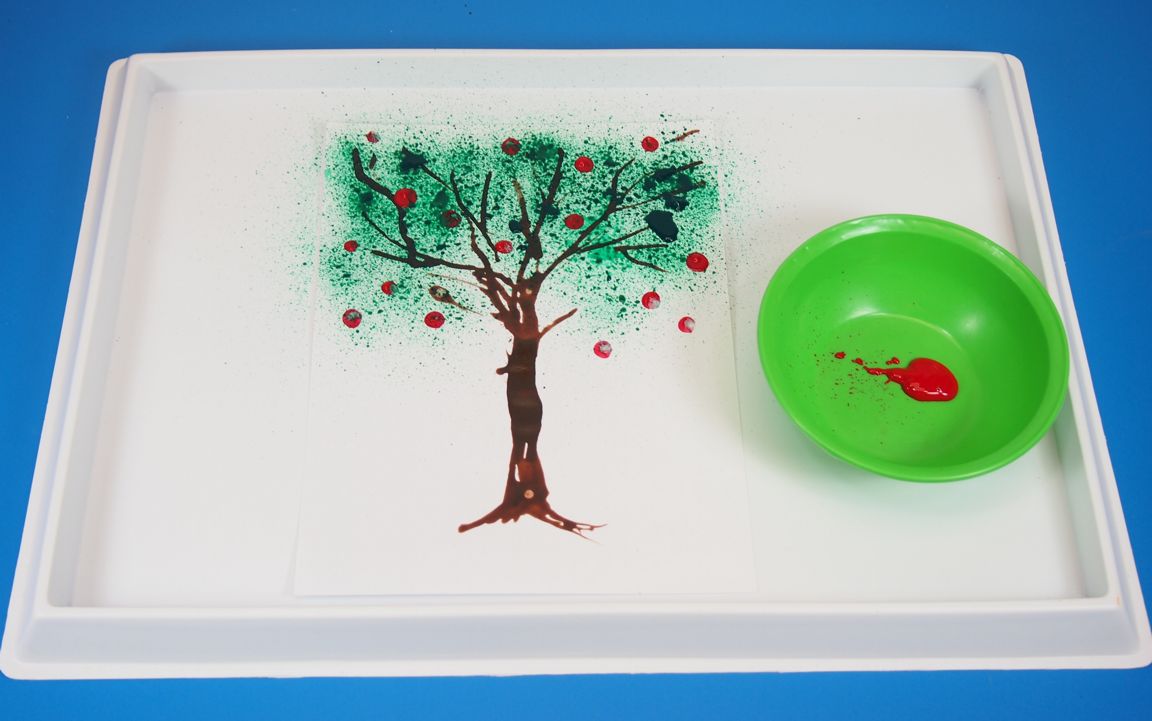 Continue adding dots to emphasize concentrated finger placement. Students should pay attention to the overall balance and composition of their tree artwork, and focus on where placing the dots will make the tree look fuller.
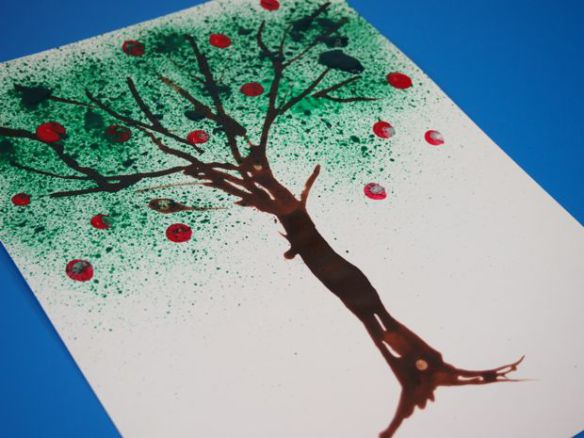
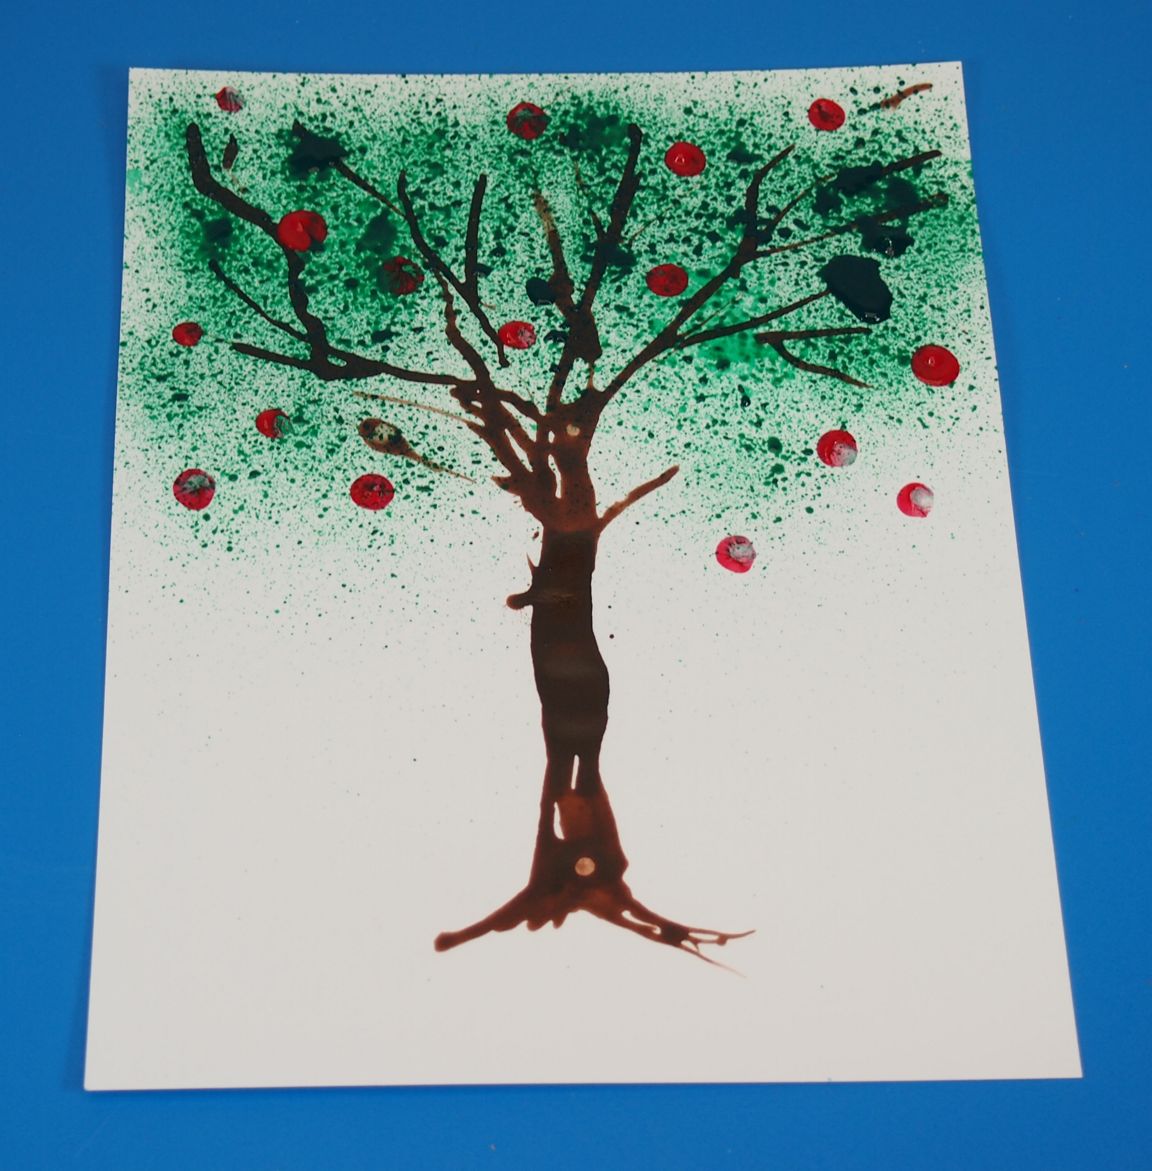 We’re all done!
You can experiment with different types of tree appearances or add more to your painting. However, the core purpose of the artwork is to engage fine motor skills and focus on process as well as result art.
Thanks for checking out this post! Like us on Facebook, Share this post with your friends, or Subscribe to this blog today to receive original craft project updates every Monday, Wednesday and Friday!

![]()