Posts Tagged ‘Valentine’s Day’
Valentine’s Day: Pop Up Pivot Cards

Make your Valentine feels Special. Create your own Super Cute Valentine Card by using our New Pop Up Pivot Card. Send a love note to all your friends and family members with this sweet Valentine’s Day cards. The clever design is easy to assemble and fun to decorate. The three-dimensional message card unfolds and pivots as the card opens.
Read MoreHow to Make an Origami Heart for Valentine’s Day
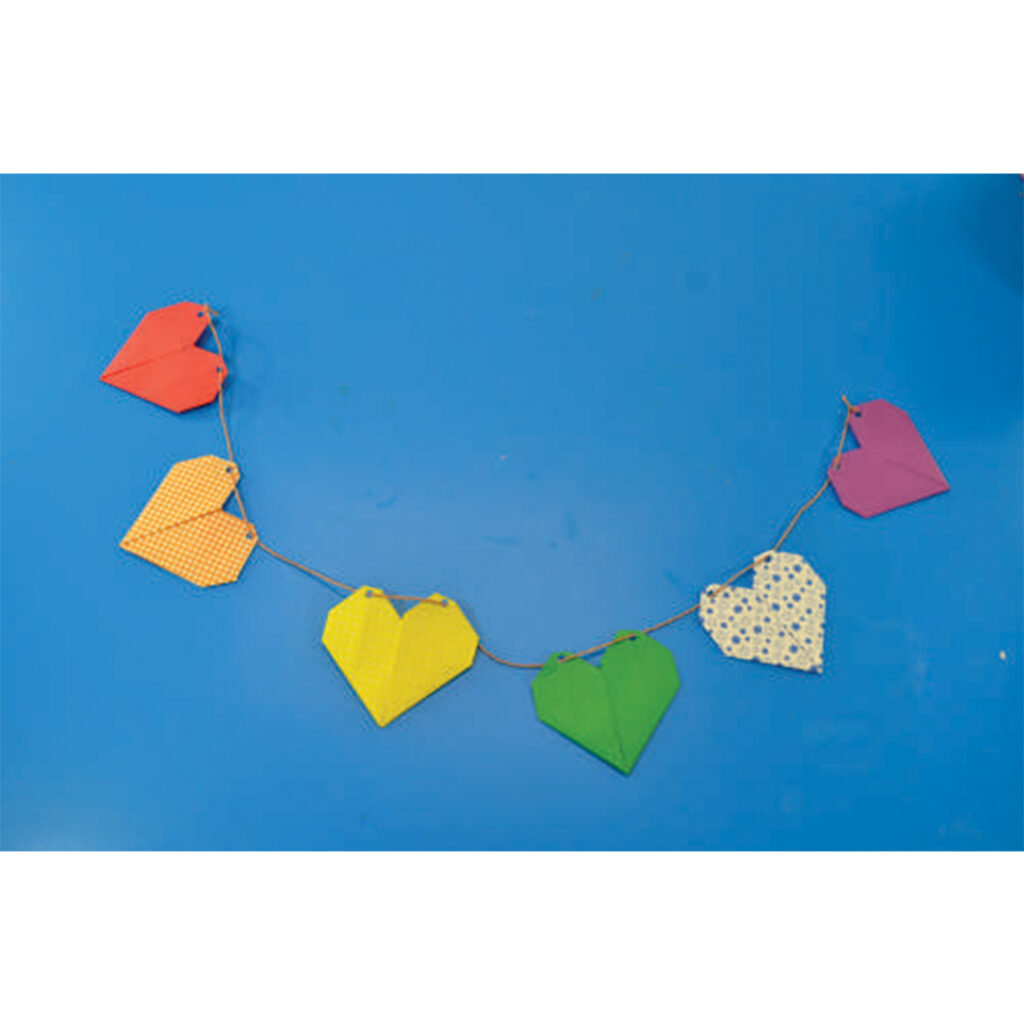
There’s something genuinely magical about folding a flat sheet of paper into a heart. No glue, no scissors, no mess — just a few intentional folds and something beautiful appears in your hands. Origami hearts make perfect valentines, bookmarks, cards, and classroom decorations, and they’re accessible enough for kids as young as five with a…
Read MorePop-Up Valentines Day Cards
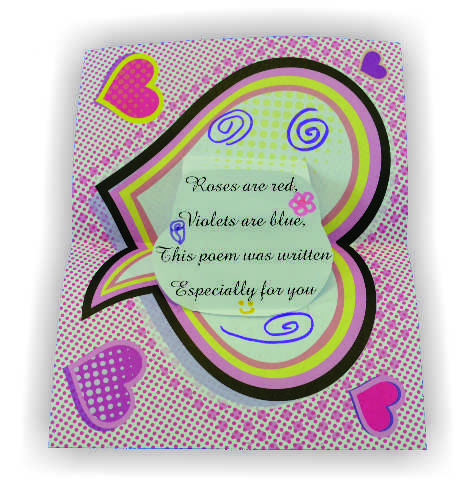
These hand-made cards make your feelings POP on Valentine’s day! Age: 5+ Duration: 15 minutes Learning Outcomes: Exercise fine motor skills. Encourage creativity. Integrate art, literacy, and holiday activities. Makes a perfect take-home craft. You’ll Need: R15412 Pop Culture Paper A short poem (typed or printed on white printer paper) Washable Markers Scissors Glue Stick Type a…
Read MoreValentine’s Day Pop Up Cards
Give your Valentine’s Day wishes a personal touch with R22052 Double Color Card Sheets! We’ll show you how to make your card pop out in a meaningful way! Age: 5+ Duration: 10-15 minutes You’ll Need: • R22052 Double Color Card Sheets • White paper 8.5 x 11″ • Staple • Pencil • Pencil Crayon •…
Read MoreValentine’s Day Tree
Create your own Valentine’s Day artwork with Heart Mosaics! Use a tracing of your hand to form the tree trunk and branches, then fill in the gaps with Heart Mosaic leaves. Follow the complete tutorial below! Age: 4+ Duration: 10-15 minutes You’ll Need: • R15367 Heart Mosaics • R15233 Skin Tone Craft Paper • Scissors…
Read MoreCraft Spotlight: Floppy Foam Brushes
Try something new with your painting projects using our versatile and easy-to-use Floppy Foam Brushes! Dip the brushes into paint and dab onto your paint paper for neat effects. Floppy Foam Brushes aren’t only good tools for paint use… See what our Art Campers used them for below in the post! Our Art Campers filled…
Read More