Make a simple, quick and cute Halloween costume from our R15256 Amazing Animal Paper! Our step-by-step photos will show you some easy tricks for cutting out and assembling the paper costume.
Age: 5+
Duration: 10 minutes
Learning Objectives: Gain fine motor development through tracing and scissor skills. Use simple concepts, such as hand tracing and folding, to make an effective paper costume. Incorporate recognizable animal patterns into costume creations.
You’ll Need:
• Tape
• Scissors
• Pencil

Make this a quick paper costume for your students who will be celebrating Halloween in your classroom this year. This will make it easier for you to get through your day on Halloween without worrying about managing all your students in costume. The best part is that the costume is made from accessorizing, so all your students can look like their favorite animal without the need to fully dress up.

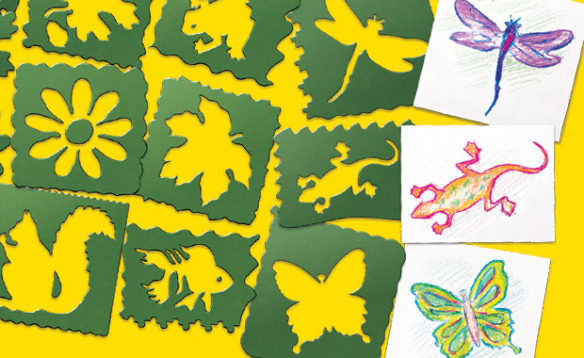
Our full range of Amazing Animal Paper features a variety of different animal skins and patterns.

Choose 2 sheets of your favorite animal skin paper. You will need only 1 sheet to make your animal hat, and another sheet to make your animal paws.

Select 1 sheet of paper and fold in half horizontally. Unfold, and cut along the fold line so that you separate the sheet of paper into two halves.

Take one of the paper sheet halves and fold it horizontally in half.

Unfold and cut along the fold line to separate the half sheet into another 2 halves. This will form 2 strips of paper.

Place the paper strips side by side. Tape the edges together.

Join the opposite edges together and wrap around your head to test the length. Once you are satisfied with the fit, tape the edges to secure. This will form the base of your headband.

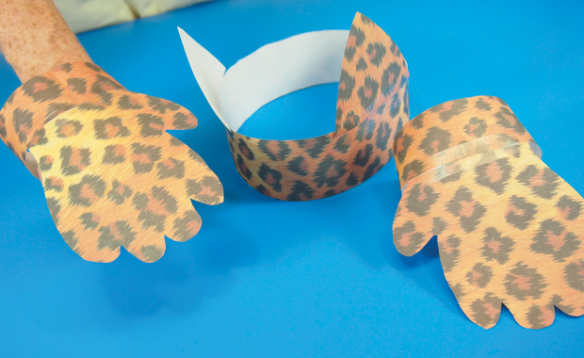
Take the discarded half of the paper sheet and fold vertically in half. Draw an animal ear shape. I’ve drawn two triangle-shaped ears to look like jungle cat ears.

Tape the ears to the sides of the headband. This will be your Amazing Animal hat!

Now to make the paws! Take your second sheet of paper and fold vertically in half.

Trace your hand from the edge of the paper. I suggest you try to make the hand look more like a paw by widening the shapes of the fingers.

Cut out the traced paws.

Use the remaining scrap piece to cut out two wristbands.

Tape the bottom of the paw to the wristband.

Wrap the wristband around and tape the edges together.

Now your costume is ready to be worn! Slip the paws onto each hand and wear your headband ears to transform into your favorite jungle animal! Tip: You can use face paint to add on a nose, whiskers and freckles on students’ faces to add another element to their animal costumes.
Like us on Facebook, Share this post with your friends, or Subscribe to this blog today to receive original craft project updates every Monday, Wednesday and Friday!


![]()