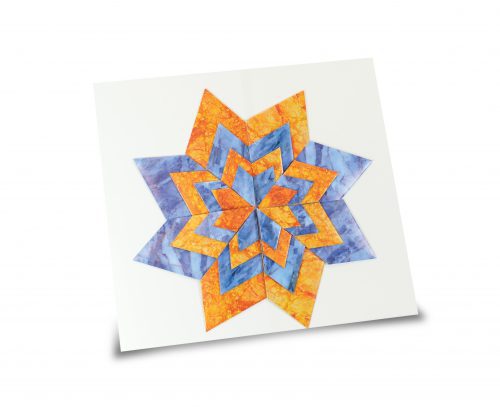
Marquetry is the art of using thin pieces of veneer to craft beautiful images and patterns. Now you can create your own beautiful marble marquetry!
Age: 5+
Duration: 15-30 minutes
Learning Outcomes: Practice fine motor skills while you cut and fold. Encourage early geometry by talking about different shapes, patterns, and types of symmetry.
You’ll Need:
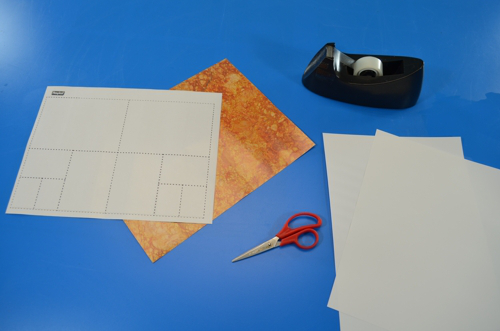
- Marble Paper Marquetry Template
- Shapegami Instructions
- R15410 Marble Sculpture Paper
- White paper or card stock
- Scissors
- Tape

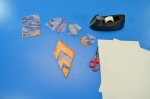
This craft looks like marquetry, but it actually combines a marquetry effect with a technique we call Shapegami. Start by downloading and printing the Shapegami Folding Instructions. This set of instructions includes step-by-step folding instructions for ten different shapes, basic geometric vocabulary, and design ideas. Start by taking the time to discuss different shapes and their attributes! Each of these shapes can be folded with an 8 1/2 x 11″ sheet of paper AND with the special sized rectangles in the marquetry template.
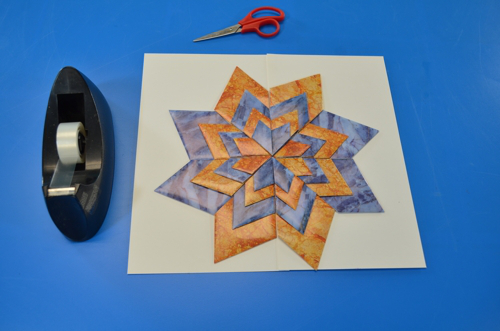
Once students are familiar with the different shapes, they can practice folding them with white printer paper and start thinking about the design they want to make with their shapes. Students can design their own marquetry designs, or choose from the Shapegami idea list. I decided to create a flower design using folded kite shapes.
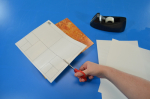
Once students feel confident, break out your Marble Paper and download the Marble Paper Marquetry Template. It may take some experimenting to see which way you need to put the craft paper into the printer so the lines print on the white side. I used the orange and blue sheets to create a strong color contrast, but you can choose any sheets you like!
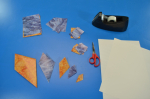
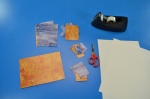
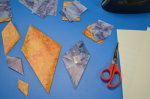
Start by carefully cutting out the variously sized rectangles. To make each size easier to find, I sorted my rectangles by size as I cut them. Once your rectangles are all cut out, it’s time to start folding! I folded all my rectangles into kite shapes, keeping them arranged by size. This makes it easier to compose your marquetry design.
To create your marquetry design, start with a piece of white paper. Beginning with the largest of my kite shapes, I used loops of tape to secure each shape to the paper in the design I wanted.
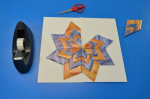
Simply repeat this process using progressively smaller folded shapes, and you will have created a beautiful piece of geometric marquetry art!
Like us on Facebook, Share this post with your friends, or Subscribe to this blog today to receive original craft project updates every week!


