Color Diffusing Easter Egg Artwork

Make beautiful color diffusing Easter Egg Artwork by using Roylco’s R15213 Color Diffusing Paper™!

Age: 3+

Duration: 5 minutes for painting and assembling, couple of hour for drying.

Learning Objectives: Use fine motor skills to squeeze paint from pipettes onto paper. Learn about the process of diffusion with beautiful Color Diffusing™ technology.

You’ll Need:

• R15213 Color Diffusing Paper™

• R54470 Junior Heart Paint Pipettes

• Watercolor paint

• Paint tray

• A Cup of water

• Cardstock

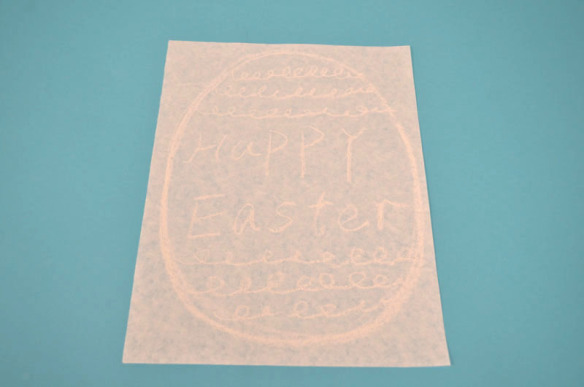
Use white chalk to draw an outline of an egg on to Roylco’s R15213 Color Diffusing Paper™ . Then create some patterns to design your egg. I also wrote ” Happy Easter” in the middle of the egg. Encourage children to use their imagination to create their own designs.  

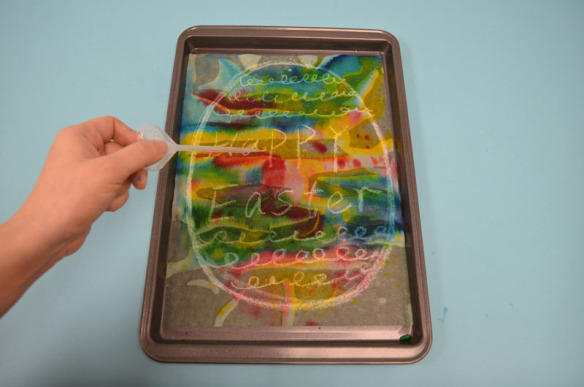
Next, place the paper in the paint tray. Wet the R15213 Color Diffusing Paper™, and use Roylco’s R54470 Junior Heart Paint Pipettes to drip liquid watercolor paint over top of the wet surface. Encourage children to experiment with different color palettes. It’s lots of fun for children to play with different colors and watch the colors flow and blend to create spectacular patterns and effects.. This is a great time for children to learn about color mixing, ask the children to discuss the effects of color mixing.

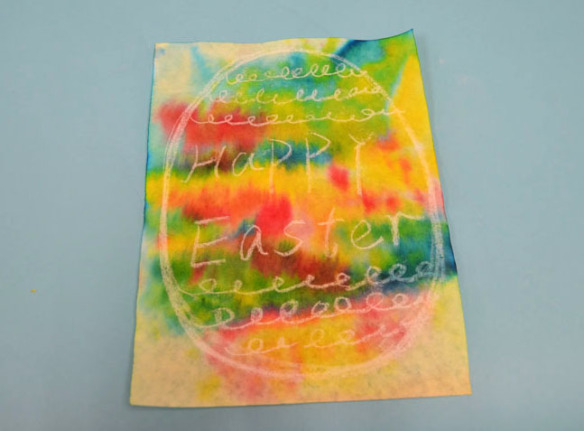
Let the artwork dry in the paint tray for couple of hours.  You can also use a blow dryer to dry the artwork. You can see the result is unexpected and beautiful.

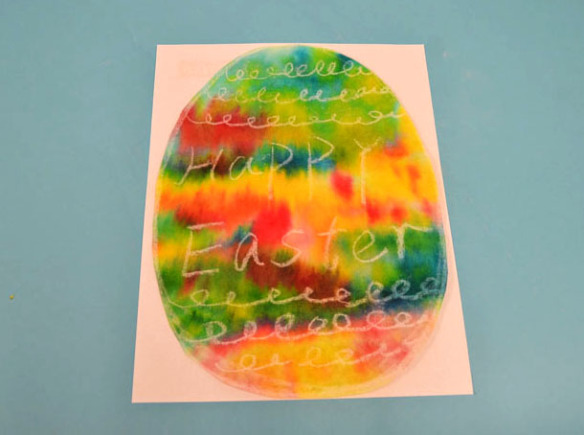
The color diffusing Easter egg artwork is almost ready. Once the paint is dry, you can cut the egg out and glue it on to the cardstock.

For more information please visit https://roylcostore.com/products/color-diffusing-paper-9×12

Bundle Savings

Get all the Roylco items used
in this project and save 15%!

$15.62 USD
bundled price
Add Bundle
to Cart
A Pot Of Gold for St. Patrick’s Day

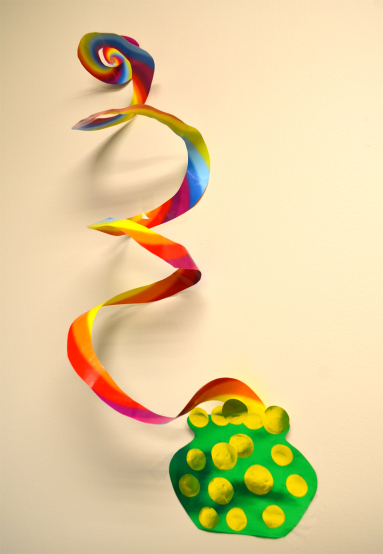
Are you looking for craft ideas for St. Patrick’s Day? Create some decorations to make the house and classroom more festive. Lets make a spiral rainbow and pot of gold.

Age: 4+

Duration: 5 minutes

Learning Outcomes: Exercise fine motor skills. holiday activities. Makes a perfect take-home craft.

You’ll Need:

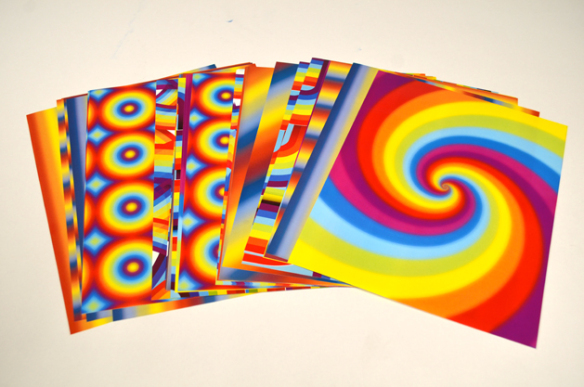
Choose your favorite pattern from Roylco’s R15295 Rainbow Paper Pack.

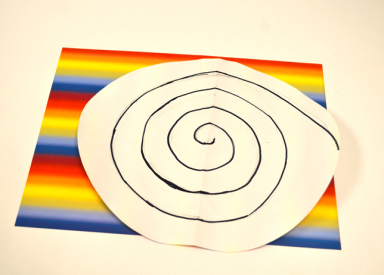
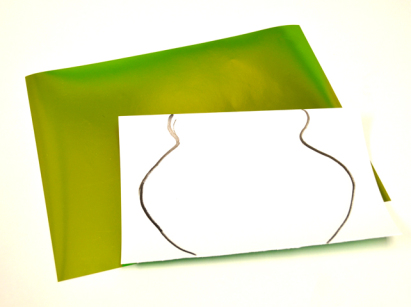
Draw a spiral at the back of the paper.

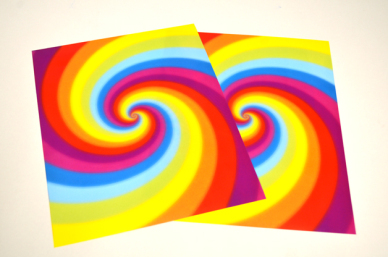
You can also glue two pieces of rainbow paper together to create a double-sided sprital.


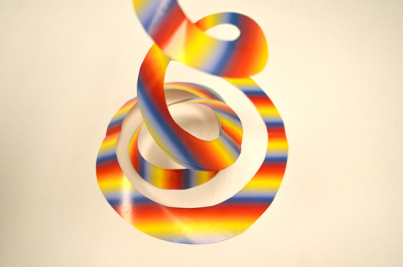
Use scissors to cut from the end of the outline toward the center to make a spiral.


Take two pieces of metallic paper from Roylco’s R15409 Economy Metallic Paper Pack.

I choose dark green paper to make the pot, and the gold colored paper for the golden coins. Draw the shape of a pot at the back of the green paper, and cut it out. Make the coins by cutting out some circle shapes from the gold paper. Then glue the golden coins on to the green pot.

After you finish making a pot of gold, you can glue it to the end of the rainbow.  Once complete, hang from ceilings, on bulletin boards or anywhere that could use some extra color.


You are the pot of gold at the end of my rainbow!

Bundle Savings

Get all the Roylco items used
in this project and save 15%!

$19.19 USD
bundled price
Add Bundle
to Cart
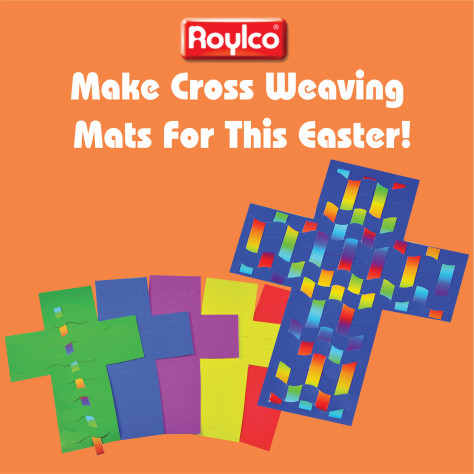
Make Cross Weaving Mats for this Easter !

Let’s make cross weaving mats for this Easter! With this simple project, the art of weaving colorful strips of paper through a bright Cross Weaving Mat promotes hand-eye coordination!

Age: 4+

Duration: 8-10 minutes

Learning Outcomes: Explore cultural traditions and symbols. Practice folding and taping. Exercise Fine motor skills. Create a take-home craft.

You’ll Need:

Weave a colorful Cross!
• Begin by gently separating the weaving strips from the panel and loosening the die-cut slats of the cross. Allow four strips per cross.

• Start by weaving the vertical area of the cross. Insert a strip through the slats of the
mat and weave in and out. When you have finished the first strip, start the second but
alternate the “in and out” pattern each time. A wavy, checkerboard pattern will appear.

• Trim off the excess weaving strip lengths and use to complete the cross bar of the cross.Carefully glue or tape the ends down on the backside of the weaving mat. Notice the different color combination you have created on the reverse side.

Tape your finished cross to a window for inspirational window art or decorate a Bible
classroom doorway. Use several Cross Weaving Mats to decorate a bulletin board for Easter!

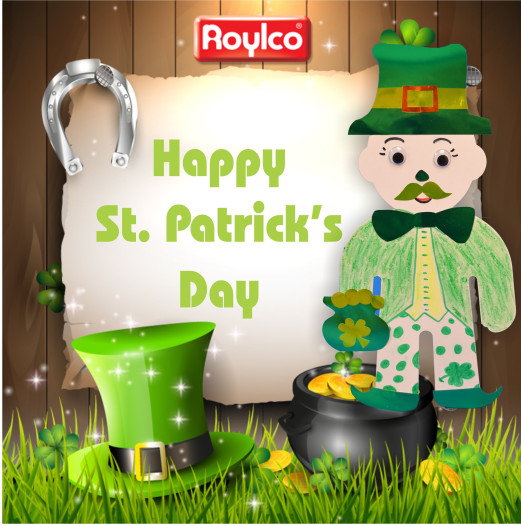
How to Make a St. Patrick’s Day Leprechaun

Today, people of all backgrounds celebrate St. Patrick’s Day. Some kids dress up in green and look for shamrocks, while others try to catch the elusive St. Patrick’s Day leprechaun.

The St. Patrick’s Day leprechaun is an Irish fairy. But he is quite different from other fairies, he looks like an old man and stands at around two feet tall. Dressed in green from head-to-toe, he carries a shillelagh, which he uses to scare anyone who tries to steal his gold.

We are going to show you how to create a leprechaun for St. Patrick’s Day.

Age: 4+

Duration: 15 minutes

Learning Outcomes:  Exercise fine motor skills.

You’ll Need:

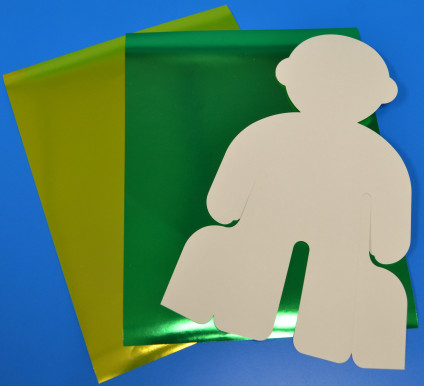
Let’s get started. Take one character from Roylco’s R53001 Stand Up People, and one sheet each of gold and the dark green paper from R15409 Econmoy Metallic Paper pack.

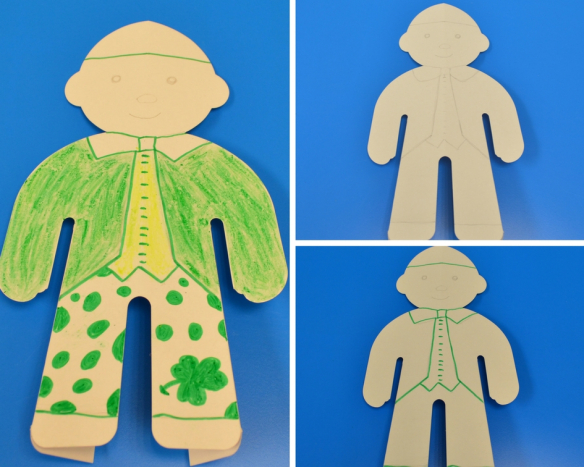
  1. Use the pencil to sketch out a leprechaun on the R53001 Stand Up People character.
  2. Use the marker to trace the outline of the leprechaun.
  3. You can use green crayon to color the suit, and use the light green crayon to color the vest. Use the marker to decorate the pants with different dots or patterns. As you can see we have a very basic look of a leprechaun.

Let’s add more features on the R53001 Stand Up People character.

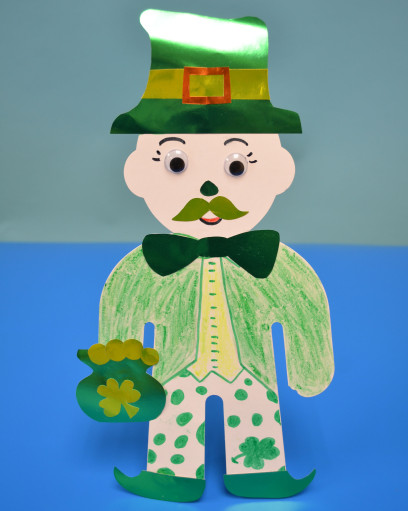
4. Put the green metallic paper on top of the head and draw the outline of the hat. Then use the scissors to cut out the hat and glue it on the character.

5. You can glue the Googly eyes on to the face or draw the eyes. Use the gold metallic paper to cut out the mustache. Draw the boots and the bow tie on the green paper and cut them out.

6. Use a glue stick to glue the mustache, bow tie and boots to the character. Draw the eyebrows, and mouth on to the face. Do not forget to decorate his green hat, by adding a buckle band or shamrock.

The St. Patrick’s Day leprechaun is almost done. Remember a leprechaun spends his time searching for gold. So we need a pot of gold for him to carry. Use the green paper to create the golden pot. Next cut out some golden coins and glue them on to the green pot. You can also add a shamrock if you want.

Now fold back the leg flaps and stand him up for display.

Bundle Savings

Get all the Roylco items used
in this project and save 15%!

$25.48 USD
bundled price
Add Bundle
to Cart
 

Elementary Origami Animals for 2nd Grade

15219 - Crafts Collection

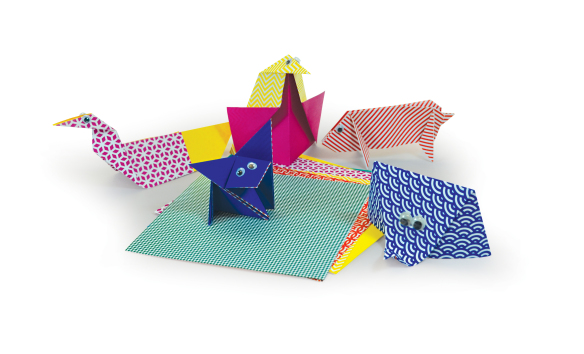
Welcome to our third set of Origami Animals! Today we will be focusing on two projects perfect for second graders: the Penguin and the Swan.

Age: 5+

Duration: 5-8 minutes

Learning Outcomes: Exercise fine motor skills. Practice following directions independently.

You’ll Need: 

Line-09

With second graders, this activity can be individual, done in small groups OR done as a class. If you are structuring this activity individually or in small groups, first download the instruction sheet (Click on the link under “You’ll Need”), and print off copies for each student or group of students. The fully illustrated and easy to follow instruction sheets allow students to problem-solve and work independently to create an adorable finished product. If students get stuck, direct them to the video tutorials.

Our first project today is the penguin.

Once students have successfully folded their penguins, there are some great options for books to pair their animals with! One of my favorite books was read to me by my teacher during our lunch break, and it has penguins galore. Mr. Popper’s Penguins by Richard Atwater is a fantastic book to pair with penguin pals. Other great books about penguins include:

Today’s second project is the swan.

Once everyone has their folded swans, pair them with a book! Hans Christian Anderson was a big fan of swans, and he wrote fairy tales that have been adapted into picture books including familiar titles like The Ugly Duckling and Wild Swans. Other excellent titles featuring swans include:

  • The Trumpet of the Swan by EB White
  • The Swan Princess by Rosie Dickins
  • Although it’s not a book, Swan Lake the ballet is a great addition to children’s cultural education. It’s also a great way to get kids interested in literature as well as dance and theater!

As always, challenge your students to read independently with a little help from their winged pals!

Line-22

Like us on FacebookShare this post with your friends, or Subscribe to this blog today to receive original craft project updates every week!


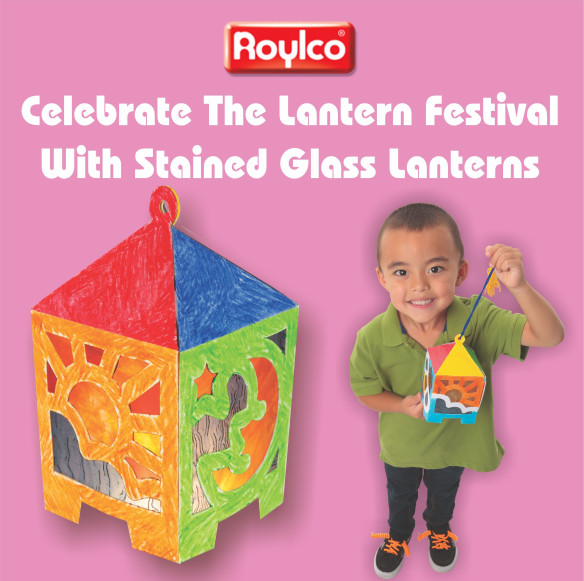
Celebrate The Lantern Festival with Stained Glass Lanterns

Create luminous lanterns to string up in your classroom or send home as great gifts! The 3D lanterns are cleverly designed to make assembly easy for little hands. Lanterns are a wonderful example of a cultural and historical artifact that you can discuss
in your next social studies class.

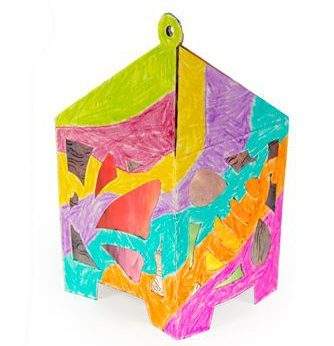
Our stained glass lanterns look a lot like the Andon and Crystal Magic lanterns used in Japan and China, respectively. Your students can be creative and can color in the lanterns any way they like. Adding stained glass to a lantern is a recent trend of turning a practical or useful lamp into a pretty and decorative piece of art.

Age: 4+

Duration: 10 -13 minutes

Learning Outcomes: • Develop fine motor skills • Explore creativity
• Discover lantern and stained glass history   • Use basic design techniques to develop ideas • Learn about Chinese and Japanese lanterns • Combine social studies with arts and crafts  • Use multiple media to create a multi-use craft

You’ll Need:

  1. Each of the lanterns features 4 sky-themed designs. Each design is made to look like a stained glass window. The illustrations include a sun, moon, butterfly and bee. Cut out sections of colored tissue paper or R15275 Stained Glass Paper to glue under the designs.
  2. You can use different colors for parts of one illustration. For instance, paste white tissue paper pieces over the bee’s wings. Alternate and paste yellow and black tissue paper pieces across the separate sections of the bee’s body.
  3. Fold in the lantern along the pre-scored creases to make the lantern three dimensional.
  4. You’ll notice that its side edges are slightly smaller than the rest of the tab. These side tabs will help hook the tab in place when you insert it into the slot. Gently open the slot to loosen it up. Insert the tab into the slot by edging in first one side of the tab then the other.
  5. Finally, fold in all four tabs on the sides of the triangular roof flaps.
  6. Pass a length of fishing line, yarn or string through the holes of all four
    roof tabs and tie a knot at the top to secure.

Now you can hang your lantern along a length of string with other lanterns in sequence or you can hang the lantern directly from the ceiling.

Celebrate Chinese New Year or the start of spring by stringing up the lanterns. You can also send the beautiful lanterns home as Mother’s Day gifts or for any other special event.

Please visit https://roylco.com/shop/r52093-stained-glass-lantern/ for more information.

Bundle Savings

Get all the Roylco items used
in this project and save 15%!

$16.64 USD
bundled price
Add Bundle
to Cart
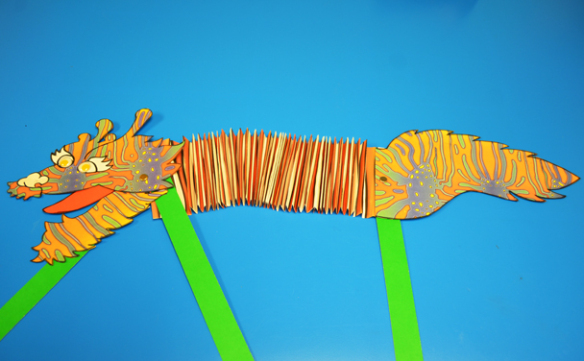
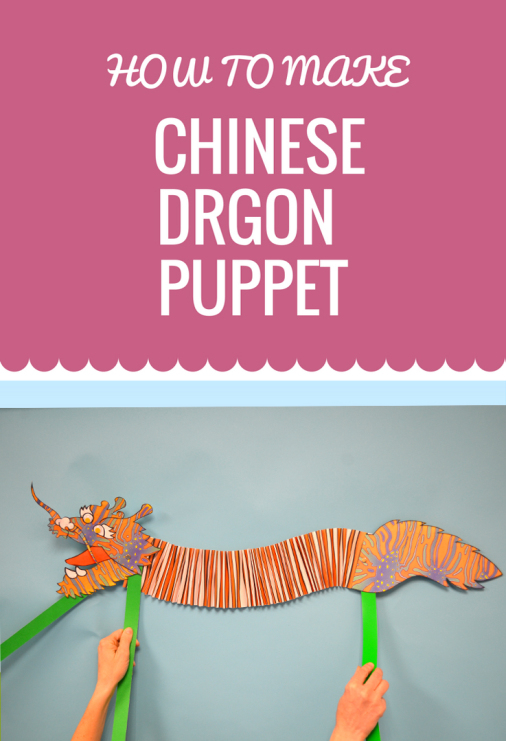
How to Make a Chinese Dragon Puppet

The Chinese New Year begins on February 16th this year, and to celebrate the Chinese New Year, we are going to show you how to make a Chinese Dragon Puppet. In the Chinese culture, the dragon symbolizes power and strength, and chases away evil spirits. It also brings good luck to people.  Make your own Chinese Dragon Puppet and welcome good fortune in the coming year!

Age: 5+

Duration: 15 minutes

Learning Outcomes: Exercise fine motor skills. Integrate art, and holiday activities. Makes a perfect take-home craft.

You’ll Need:

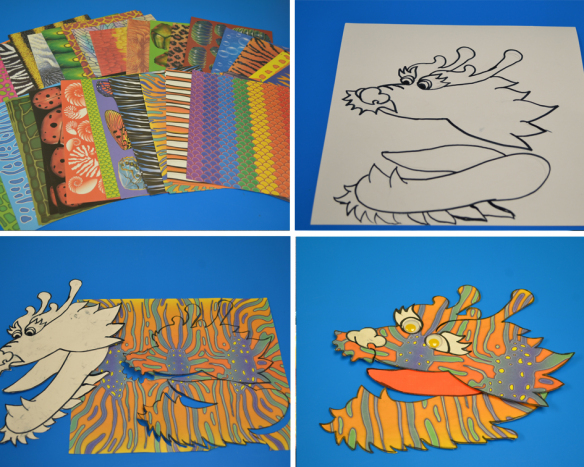
  1.  Open Roylco R15198 Creatures and Animals Value Pack and choose the paper you are going to work on. This pack includes diverse collection of nature themed craft papers.
  2. Draw the dragons head on the white craft cardstock. Note: We divide the dragons head into two parts. The upper and lower part of the head.
  3. Cut the two parts of the dragons head out. Trace them onto the craft paper, and cut them out.
  4. Glue the colorful pattern paper on the white craft paper dragon head. Take out one piece of  red paper from R15219 Elementary Origami Animals . Use the red paper to decorate the tongue of the dragon. Draw the dragon’s eyes and nose on the white craft paper, cut them out and glue them onto dragon’s face.

Let’s start to work on the dragon’s tail and body.

5.Draw the dragon’s tail on the white craft cardstock and the colorful craft paper.

6.Cut them out and glue them together. You will get a colorful dragon tail.

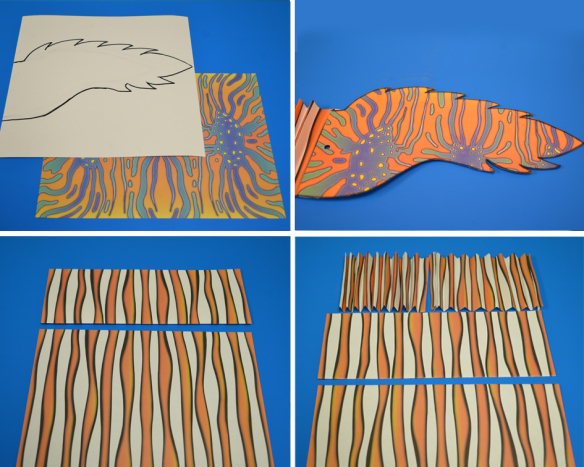
7.Let’s work on the dragon’s body. Take out two pieces of R15312 Sealife Print Papers.  You can also use other paper patterns from the R15198 Creatures and Animals Value Pack . Cut the paper in half, now you have four pieces of paper. Fold the strips of paper into an accordion pattern, and glue them together.

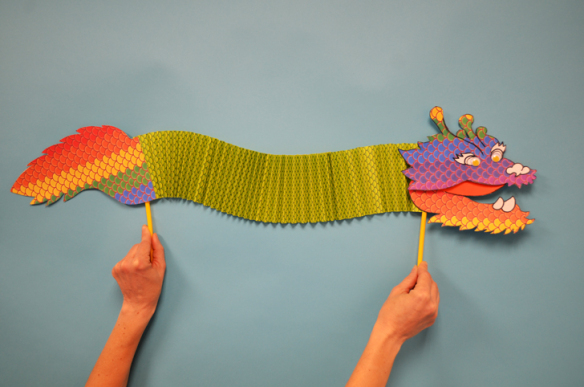
We have two ways to make the dragon puppet. You can glue the head, body and tail together and tape on the stick ( I used a straw from Roylco’s R6085 Straws & Connectors™) at the back of the head and tail. Please see the picture below. The dragon puppet is ready !

If you want to create a live action video with the dragon puppet. We have some more work to do.

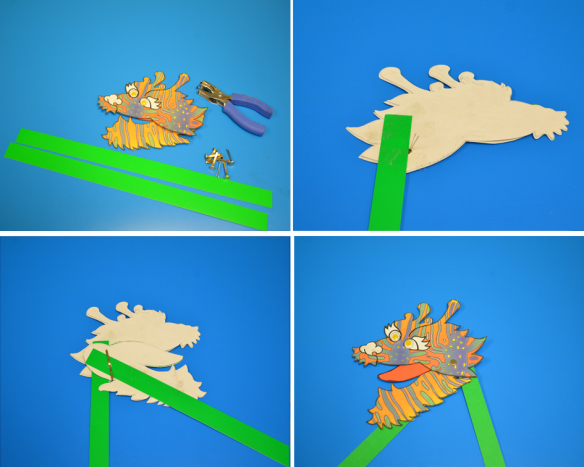
8. Let’s take two green strips out of the Roylco R72020 Green Screen Live Action Video Kit. Prepare some thumbtacks and a hole punch.

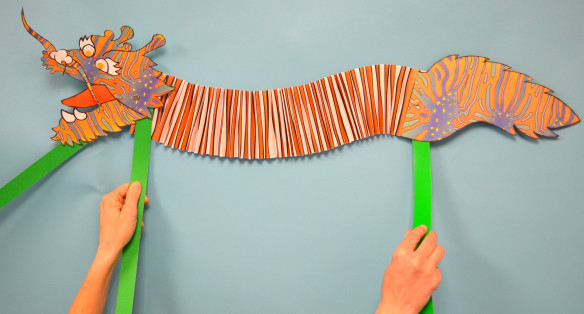
9. Lay the dragon’s upper head on top of the lower head.  Find a point where both parts of the head join and punch a hole. Flip the dragon’s upper head to the back and tape on a green strip.

10. Take another green strip and punch a hole through it. Put a thumbtack through the hole and connect the upper head, lower head and the green strip together.

11. When you move the strip on the left, the dragon’s mouth is will open and shut.

You can use the same method to add the green strip to the tail. Then we can glue the head, body and tail together. When you move the green strips, the dragon comes alive! The head, the body and the tail are moving.

Voila! The dragon puppet is ready for your digital storytelling!

Please visit https://roylcostore.com/products/green-screen-live-action-video-kit

Bundle Savings

Get all the Roylco items used
in this project and save 15%!

$43.32 USD
bundled price
Add Bundle
to Cart
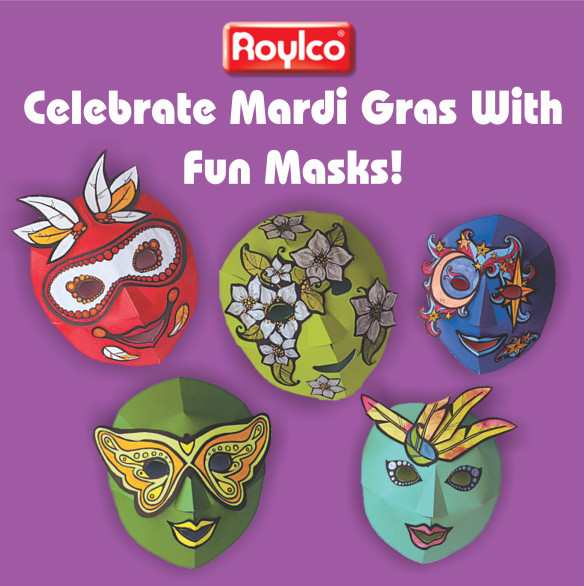
Celebrate Mardi Gras with Gorgeous Color Diffusing Masks

Mardi Gras is French for “Fat Tuesday”, reflecting the practice of the last night of eating rich, fatty foods before the ritual fasting of the Lenten season. It always falls the day before Ash Wednesday, the first day of Lent.   It is a time of great celebration where people throw parades and parties. Today we are going to teach you how to use Roylco R52081 Maridi Gras Color Diffusing Masks to make gorgeous masks. Let’s get ready for the parades and parties!

Age: 4+

Duration: 12 minutes

Learning Outcomes: Exercise fine motor skills. Integrate art,  and holiday activities. Makes a perfect take-home craft.

You’ll Need:

  1. Use liquid watercolor paint or water-based markers. The colors will mix and flow
    to produce interesting effects.
  2. To paint the paper, roughly cut out the images you will use for your mask. Note: you can mix and match components.
  3. It is important to plan your mask because there may be more than one mask image per sheet of color diffusing paper.
  4. Lay the pieces onto a paint tray or several sheets of newspaper to protect your work surface.
  5. Drip some liquid watercolor paint on and watch the colors flow. Tip: because the colors will mix, it is a good idea to work with only two or three colors—too many colors will result in brown masks!
  6. If you are using markers, color in the areas using as many different colored markers as you like. Once complete, spritz the sheet with a little water from a spray bottle, The water will help the marker to blend and “bleed” to produce a beautiful effect.
  7. Once completely dry, cut out the painted images. Add extra details with gel pen, markers or glitter glue before gluing onto the masks.

Ideas: To add even more interest to your mask, sprinkle a little salt over the mask before dripping on the paint. The salt will dissolve and add subtle star-burst highlights. You can add details with crayon before painting. The crayon will resist the paint and the detail will appear on the finished artwork.

Please visit https://roylco.com/shop/r52081-mardi-gras-color-diffusing-masks/ for more information.

Elementary Animals: Fold a Pig!


15219 - Pig Craft (eyeballls)

Welcome to our fourth origami animal project! Today we’ll be focusing on a project ideal for third graders: folding a pig! 

Age: 7+

Duration: 10 Minutes

Learning Outcomes: Practice following step-by-step directions while exercising fine motor and spatial skills.

You’ll Need: 

Line-10

If you structure this activity as a small group or individual project, start by downloading and printing the fully illustrated instruction sheet for your students. The easy to follow instruction sheets allow students to independently work to create an adorable pig pal. If they get stumped, however, direct them to the video:
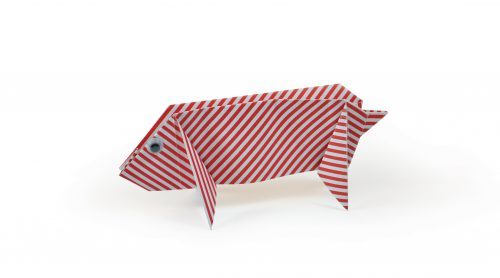
The completed pig pals can serve as a take-home project in and of themselves, but if you want to extend the activity, challenge your students to use diorama boxes to recreate their favorite scene from their favorite pig-themed book! Some of those books might include:

Line-22

Like us on FacebookShare this post with your friends, or Subscribe to this blog today to receive original craft project updates every week!