Make your own Origami Rabbit

Are you looking for more Easter ideas this week? Making origami rabbit is fun and easy. Today we are going to show you how to make these cute origami rabbits.

Age: 4+

Duration: 6 Minutes

Learning Outcomes: Practice following step-by-step instructions while exercising fine motor and spatial skills.

You’ll Need: 

Step-by-step Instructions ( Please see the graphic above ):

  1. Fold your paper in half to make a triangle.
  2. Fold the creased side of the triangle up about 3/4″.
  3. Fold one side toward the center, line up the points and crease.
  4. Fold another side toward the center. Line up the points and crease.
  5. Fold the bottom up.
  6. Flip it over. Fold the top point inside to create the top of the rabbit’s head. You can see the rabbit’s head is ready now.
  7. Let’s work on the rabbit’s body. Take another piece of paper. Please check the graphic, fold one side of the paper to make a triangle. Then line up the points and fold another side into a triangle.
  8. Flip it over. Align with the point at the bottom, fold the paper to make a triangle. Then line up the points and fold another side into a triangle.
  9. Align with the points in the middle, then fold the shape into half to create a rabbit’s body. Put the rabbit’s head on the top of the body. The basic shape of rabbit is ready.

Ideas:

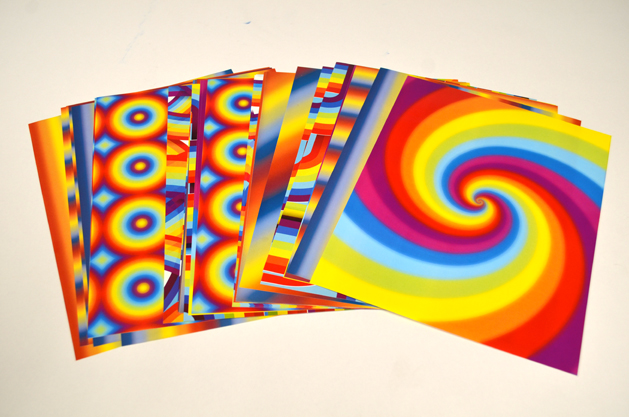
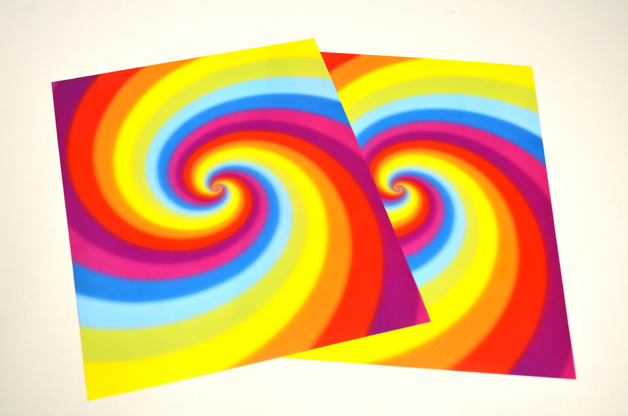
  • Roylco’s R15219 Elemetary Origami Animals pack provides different patterns and bright colors of origami paper. Contrasting colors are printed on the reverse side. Use the fun bright paper to create your own designs.
  • You can draw different cute facial features on the rabbit. Or you can use other craft paper to cut out the features and glue them on the rabbit.
  • Check out our blog post on “How to make origami carrots” and make a couple of carrots for your rabbits.
  • Display the rabbits somewhere festive, hide them around the house, or around the neighborhood where friends might find them.
  • Punch a hole at the back of the rabbit. Thread a piece of yarn with all the rabbits you make. Hang the rabbits from the ceiling or use them to decorate bulletin boards, doors and hallways!

Please visit https://roylcostore.com/products/elementary-origami-animals for more information.

Color Diffusing Easter Egg Artwork

Make beautiful color diffusing Easter Egg Artwork by using Roylco’s R15213 Color Diffusing Paper™!

Age: 3+

Duration: 5 minutes for painting and assembling, couple of hour for drying.

Learning Objectives: Use fine motor skills to squeeze paint from pipettes onto paper. Learn about the process of diffusion with beautiful Color Diffusing™ technology.

You’ll Need:

• R15213 Color Diffusing Paper™

• R54470 Junior Heart Paint Pipettes

• Watercolor paint

• Paint tray

• A Cup of water

• Cardstock

Use white chalk to draw an outline of an egg on to Roylco’s R15213 Color Diffusing Paper™ . Then create some patterns to design your egg. I also wrote ” Happy Easter” in the middle of the egg. Encourage children to use their imagination to create their own designs.  

Next, place the paper in the paint tray. Wet the R15213 Color Diffusing Paper™, and use Roylco’s R54470 Junior Heart Paint Pipettes to drip liquid watercolor paint over top of the wet surface. Encourage children to experiment with different color palettes. It’s lots of fun for children to play with different colors and watch the colors flow and blend to create spectacular patterns and effects.. This is a great time for children to learn about color mixing, ask the children to discuss the effects of color mixing.

Let the artwork dry in the paint tray for couple of hours.  You can also use a blow dryer to dry the artwork. You can see the result is unexpected and beautiful.

The color diffusing Easter egg artwork is almost ready. Once the paint is dry, you can cut the egg out and glue it on to the cardstock.

For more information please visit https://roylcostore.com/products/color-diffusing-paper-9×12

Bundle Savings

Get all the Roylco items used
in this project and save 15%!

$15.62 USD
bundled price
Add Bundle
to Cart

A Pot Of Gold for St. Patrick’s Day

Are you looking for craft ideas for St. Patrick’s Day? Create some decorations to make the house and classroom more festive. Lets make a spiral rainbow and pot of gold.

Age: 4+

Duration: 5 minutes

Learning Outcomes: Exercise fine motor skills. holiday activities. Makes a perfect take-home craft.

You’ll Need:

Choose your favorite pattern from Roylco’s R15295 Rainbow Paper Pack.

Draw a spiral at the back of the paper.

You can also glue two pieces of rainbow paper together to create a double-sided sprital.


Use scissors to cut from the end of the outline toward the center to make a spiral.


Take two pieces of metallic paper from Roylco’s R15409 Economy Metallic Paper Pack.

I choose dark green paper to make the pot, and the gold colored paper for the golden coins. Draw the shape of a pot at the back of the green paper, and cut it out. Make the coins by cutting out some circle shapes from the gold paper. Then glue the golden coins on to the green pot.

After you finish making a pot of gold, you can glue it to the end of the rainbow.  Once complete, hang from ceilings, on bulletin boards or anywhere that could use some extra color.


You are the pot of gold at the end of my rainbow!

Bundle Savings

Get all the Roylco items used
in this project and save 15%!

$19.19 USD
bundled price
Add Bundle
to Cart

Make Cross Weaving Mats for this Easter !

Let’s make cross weaving mats for this Easter! With this simple project, the art of weaving colorful strips of paper through a bright Cross Weaving Mat promotes hand-eye coordination!

Age: 4+

Duration: 8-10 minutes

Learning Outcomes: Explore cultural traditions and symbols. Practice folding and taping. Exercise Fine motor skills. Create a take-home craft.

You’ll Need:

Weave a colorful Cross!
• Begin by gently separating the weaving strips from the panel and loosening the die-cut slats of the cross. Allow four strips per cross.

• Start by weaving the vertical area of the cross. Insert a strip through the slats of the
mat and weave in and out. When you have finished the first strip, start the second but
alternate the “in and out” pattern each time. A wavy, checkerboard pattern will appear.

• Trim off the excess weaving strip lengths and use to complete the cross bar of the cross.Carefully glue or tape the ends down on the backside of the weaving mat. Notice the different color combination you have created on the reverse side.

Tape your finished cross to a window for inspirational window art or decorate a Bible
classroom doorway. Use several Cross Weaving Mats to decorate a bulletin board for Easter!

How to Make a St. Patrick’s Day Leprechaun

Today, people of all backgrounds celebrate St. Patrick’s Day. Some kids dress up in green and look for shamrocks, while others try to catch the elusive St. Patrick’s Day leprechaun.

The St. Patrick’s Day leprechaun is an Irish fairy. But he is quite different from other fairies, he looks like an old man and stands at around two feet tall. Dressed in green from head-to-toe, he carries a shillelagh, which he uses to scare anyone who tries to steal his gold.

We are going to show you how to create a leprechaun for St. Patrick’s Day.

Age: 4+

Duration: 15 minutes

Learning Outcomes:  Exercise fine motor skills.

You’ll Need:

Let’s get started. Take one character from Roylco’s R53001 Stand Up People, and one sheet each of gold and the dark green paper from R15409 Econmoy Metallic Paper pack.

  1. Use the pencil to sketch out a leprechaun on the R53001 Stand Up People character.
  2. Use the marker to trace the outline of the leprechaun.
  3. You can use green crayon to color the suit, and use the light green crayon to color the vest. Use the marker to decorate the pants with different dots or patterns. As you can see we have a very basic look of a leprechaun.

Let’s add more features on the R53001 Stand Up People character.

4. Put the green metallic paper on top of the head and draw the outline of the hat. Then use the scissors to cut out the hat and glue it on the character.

5. You can glue the Googly eyes on to the face or draw the eyes. Use the gold metallic paper to cut out the mustache. Draw the boots and the bow tie on the green paper and cut them out.

6. Use a glue stick to glue the mustache, bow tie and boots to the character. Draw the eyebrows, and mouth on to the face. Do not forget to decorate his green hat, by adding a buckle band or shamrock.

The St. Patrick’s Day leprechaun is almost done. Remember a leprechaun spends his time searching for gold. So we need a pot of gold for him to carry. Use the green paper to create the golden pot. Next cut out some golden coins and glue them on to the green pot. You can also add a shamrock if you want.

Now fold back the leg flaps and stand him up for display.

Bundle Savings

Get all the Roylco items used
in this project and save 15%!

$25.48 USD
bundled price
Add Bundle
to Cart


Craft Spotlight: Color-In Chinese Lanterns

2014-02-10-FeatureImageWe combined two of our products into one project with the Chinese Lantern craft posted on Wednesday. Learn more about this colorful craft using our video and description below!

The Color-In Lanterns can be used with our rubbing plates to decorate the various pieces. Simply slide any of our available patterned rubbing plates underneath the lantern pieces. Rub the side of a crayon onto the top of the lantern piece and watch as the patterns pop through! Combining colors together is half the fun with this project. While rubbing the pattern onto the lantern pieces with one crayon color, switch into a different color to create new effects!

The interior lantern tube can be embellished with stickers or other rubbing plate designs.

Hang your students’ lanterns together on a length of string. Tie the string across a classroom wall.

To see some of these ideas in action, view the video below!

Line-17Thanks for stopping by! We’d love to hear your input or receive photos of your work! Drop us a line at subscriber@roylco.ca.

Crafty Leaves Wreath

Image of Roylco Crafty Leaves Wreath

Feature-Image-craftyleaveswreath

Just in time for fall! Send students home with gorgeous wreaths for decoration, made from our R15334 Crafty Leaves and a wreath template! A great way to start off the school year. Read more for our weekly craft challenge (send us photos of your projects)! 

Age: 5+

Duration: 10 minutes

You’ll Need:

• R15334 Crafty Leaves

• Wreath Template

• Scissors

• Glue

• Pencil

This is a pretty simple craft and can be done in less time than recess! Wreaths are great to make for decoration, or as a gift.

P8123064

Print out your template onto 8½ x 11″ (21.5 x 28) paper and cut around bold lines. Cut across the dotted line as well.

P8123070

Fold an 8.5 x 11″ sheet of card paper. Place your template along the fold line. Trace the outline of the template (along the bold lines) onto the card paper and cut out.

P8123072 

Unfold the card paper to reveal your wreath base!

P8123073

Next, pop out the leaves from the backing. Pick out leaves that you feel will arrange nicely on the wreath.

P8123076

Curl up the ends of the leaves using the blunt edge of a pair of scissors.

OLYMPUS DIGITAL CAMERA

Looking like realistic leaves now!

P8123078

Arrange the leaves onto the wreath template and glue them down. Tip: Pop out the acorns and chestnuts and place at three or four points around the wreath.

P8123080

Ready to hang!

CRAFT CHALLENGE:

Go outside and find some natural objects to add to the wreath: acorns or acorn caps, feathers or twigs! Use a hot glue gun to adhere the found objects to the wreath.

Line-04Show us your wreath ideas! Send photos of your work to subscriber@roylco.ca for publication in our next post. We’d love to hear from you!