The Chinese New Year begins on February 16th this year, and to celebrate the Chinese New Year, we are going to show you how to make a Chinese Dragon Puppet. In the Chinese culture, the dragon symbolizes power and strength, and chases away evil spirits. It also brings good luck to people. Make your own Chinese Dragon Puppet and welcome good fortune in the coming year!
Age: 5+
Duration: 15 minutes
Learning Outcomes: Exercise fine motor skills. Integrate art, and holiday activities. Makes a perfect take-home craft.
You’ll Need:
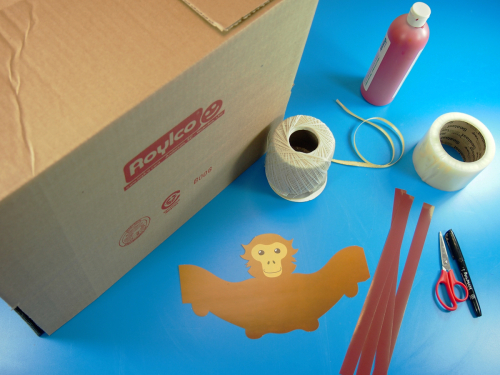
- R15198 Creatures and Animals Value Pack
- R15219 Elementary Origami Animals
- R72020 Green Screen Live Action Video Kit
- Markers, pencils,
- Tape
- White craft paper, white cardstock
- Scissors
- Glue Stick
- A hole punch


- Open Roylco R15198 Creatures and Animals Value Pack and choose the paper you are going to work on. This pack includes diverse collection of nature themed craft papers.
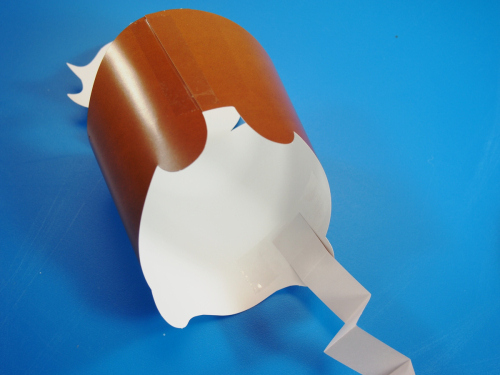
- Draw the dragons head on the white craft cardstock. Note: We divide the dragons head into two parts. The upper and lower part of the head.
- Cut the two parts of the dragons head out. Trace them onto the craft paper, and cut them out.
- Glue the colorful pattern paper on the white craft paper dragon head. Take out one piece of red paper from R15219 Elementary Origami Animals . Use the red paper to decorate the tongue of the dragon. Draw the dragon’s eyes and nose on the white craft paper, cut them out and glue them onto dragon’s face.
Let’s start to work on the dragon’s tail and body.

5.Draw the dragon’s tail on the white craft cardstock and the colorful craft paper.
6.Cut them out and glue them together. You will get a colorful dragon tail.
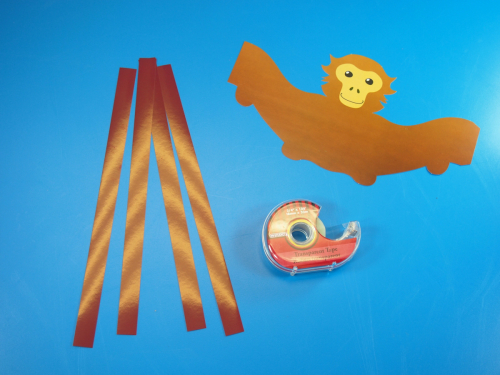
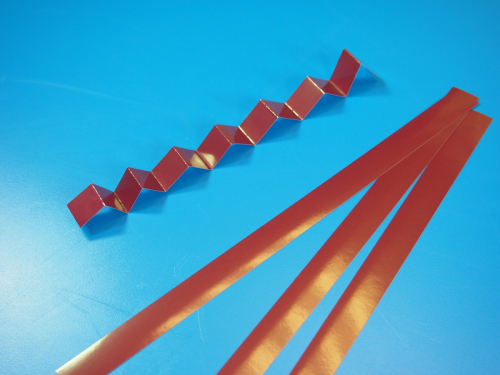
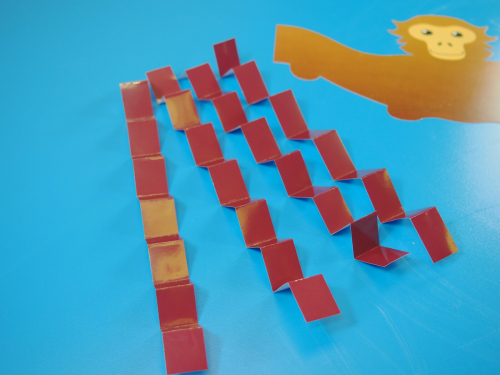
7.Let’s work on the dragon’s body. Take out two pieces of R15312 Sealife Print Papers. You can also use other paper patterns from the R15198 Creatures and Animals Value Pack . Cut the paper in half, now you have four pieces of paper. Fold the strips of paper into an accordion pattern, and glue them together.
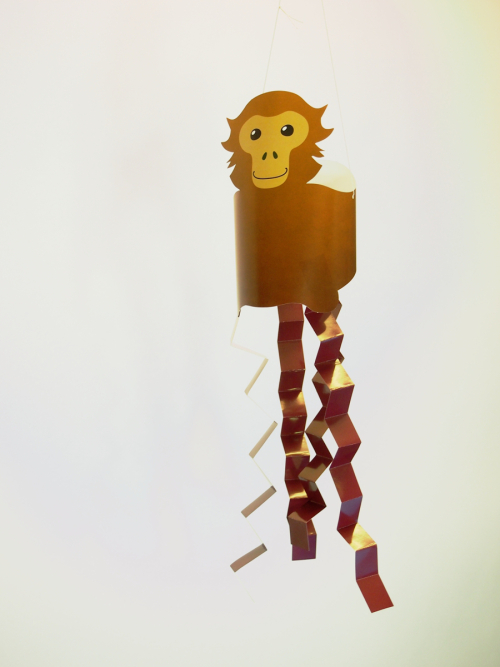
We have two ways to make the dragon puppet. You can glue the head, body and tail together and tape on the stick ( I used a straw from Roylco’s R6085 Straws & Connectors ) at the back of the head and tail. Please see the picture below. The dragon puppet is ready !

If you want to create a live action video with the dragon puppet. We have some more work to do.

8. Let’s take two green strips out of the Roylco R72020 Green Screen Live Action Video Kit. Prepare some thumbtacks and a hole punch.
9. Lay the dragon’s upper head on top of the lower head. Find a point where both parts of the head join and punch a hole. Flip the dragon’s upper head to the back and tape on a green strip.
10. Take another green strip and punch a hole through it. Put a thumbtack through the hole and connect the upper head, lower head and the green strip together.
11. When you move the strip on the left, the dragon’s mouth is will open and shut.

You can use the same method to add the green strip to the tail. Then we can glue the head, body and tail together. When you move the green strips, the dragon comes alive! The head, the body and the tail are moving.

Voila! The dragon puppet is ready for your digital storytelling!
Please visit https://roylcostore.com/products/green-screen-live-action-video-kit
bundled price
to Cart