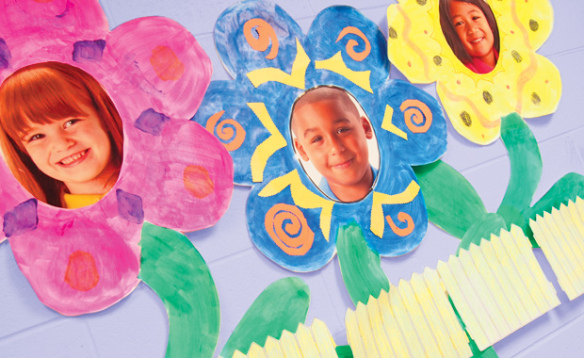
Paste up personalized Fingerpaint Flowers along a school hallway and celebrate all the great things your students have accomplished so far in the school year! Like our post and subscribe today to our blog to see more craft projects like this!
Age: 5+
Duration: 15-20 minutes
You’ll Need:
• R75422 Big! Huge! Fingerpaint Flower
• Fingerpaint / Tempera paint
• Scrap newspapers
• Pencil / Marker
• Students’ portraits printout, 8.5 x 11″ (21.5 x 28 cm)
• Tape
• Scissors
• Flower Faces Fence template PDF
• Crayons
(Optional):
• Collage materials
• Glue
• Construction paper in assorted colors
• Paint brushes

Big! Huge! Fingerpaint Flowers are perfect full-sized projects for each student in your class! The vast canvas space will inspire students to unleash their creative streak while developing fine motor skills. For students who are less inclined to fingerpaint, provide them with paint brushes! They will still get an exercise in fine motor movement while stimulating their visual senses with bright big colors on the white canvas.
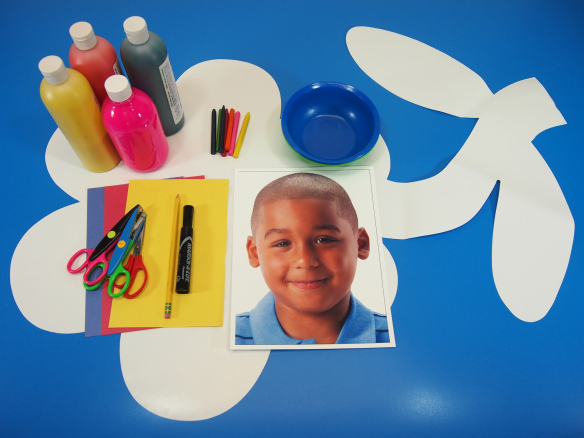
Here’s a good look at some of the materials we’ll be using. You can see the relative size of the Fingerpaint Flower to the 8.5 x 11″ printout of our student’s portrait. It’s huge! The great thing is that it’s perfect for a standard size of portrait.
My suggestion is to take informal class photographs of your students (get parents’ consent first)! Next, upload the photos and print full size to 8.5 x 11″ paper. You don’t have to do full color like we’ve done, but black and white printouts work well too! Use simple editing techniques on your photograph software to lighten or darken your students’ portraits. If it’s more efficient to make smaller photos, experiment with the size of the printout and see what works best!
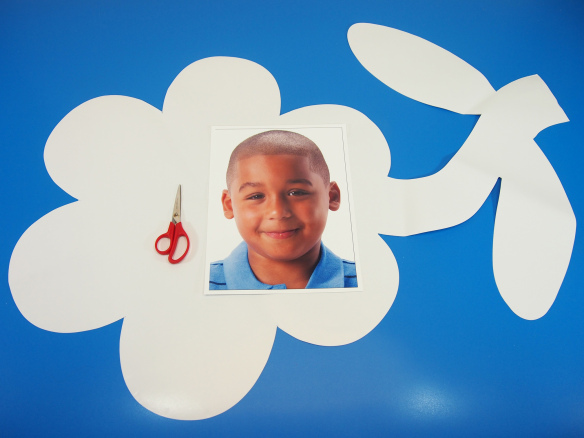 Let’s get ready to make room in the Fingerpaint Flower for our students’ portraits!
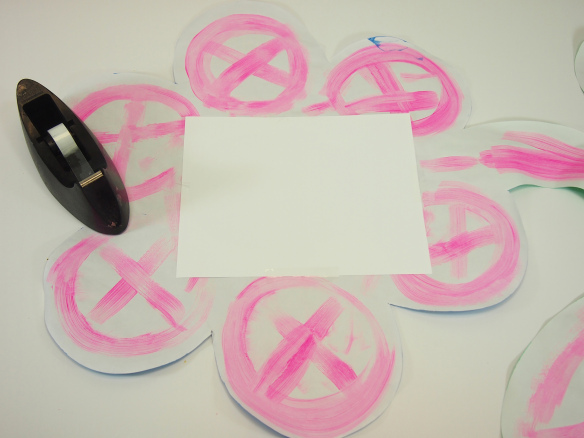
 Cut out a test photo of the appropriate size for the portraits. Basically, you will need to trace and cut out a large oval that will fit your students’ portraits. Note: You won’t be able to use this test photo afterwards, so be sure to print out an image that can be discarded.
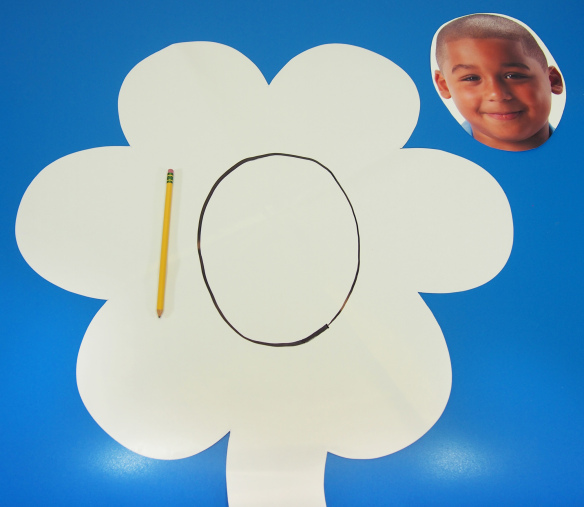
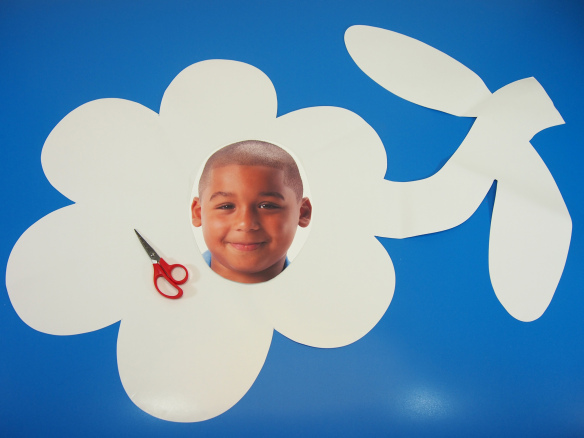
Trace the outline of the test photo onto the center of the Fingerpaint Flower. Outline in black marker. Now you can pass the Fingerpaint Flower to your students!
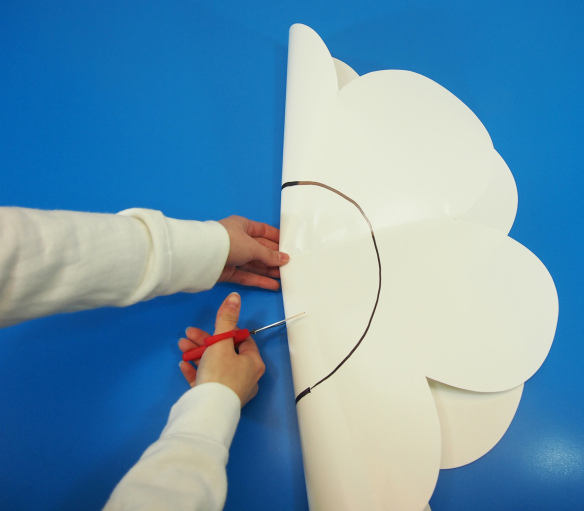
Loosely fold the Fingerpaint Flower in half. Cut across the center of the drawn circle to make a slit. This will help your students cut out the center circle with ease.
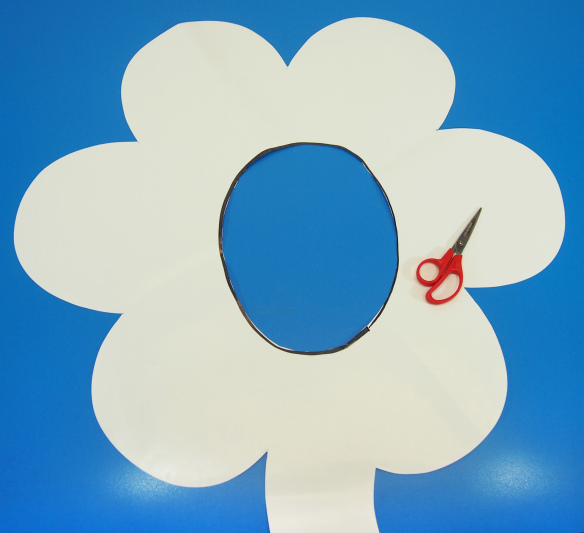
Cut out the center along the black marker line.
Make sure that the test photo fits snugly. Note: Discard the test photo after this step!
Lay down the newspaper sheets to protect your work surface before painting!
To ensure that the Fingerpaint Flowers don’t curl up when your students paint them, flip the flowers over to the back. Make quick brushstrokes with some spare paint all around the petals, the stem and leaves. Since you are using a light coat, the paint will dry fairly fast so your students can get started on painting!
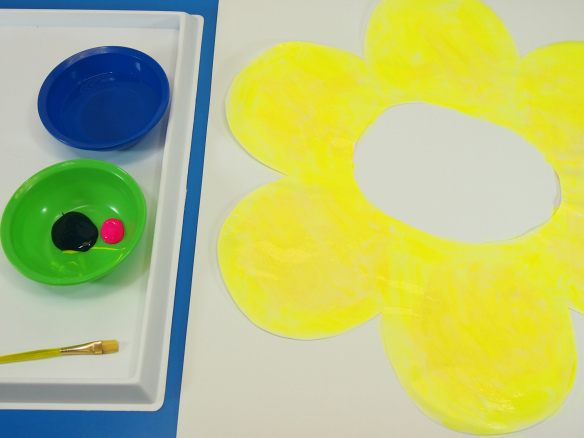
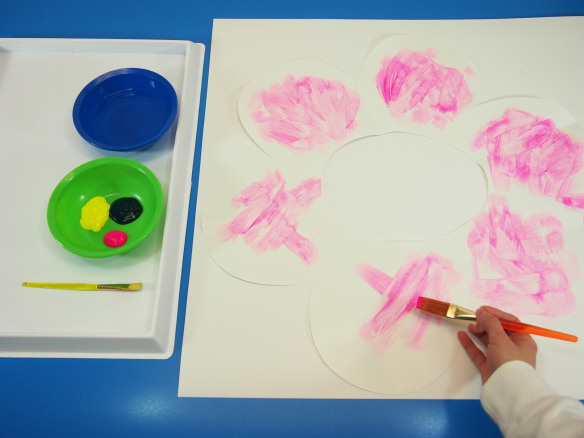
Use fingerpaint to color all the flower petals. You can also use paintbrushes to help spread the paint faster. I chose a bright yellow color here. Ask your students to visualize what their final flowers will look like. If they’d like to decorate it with crayon or more fingerpaint designs, choose light colors for the flower background. If students would like to make cutouts and paste the cutouts on, use darker colors.
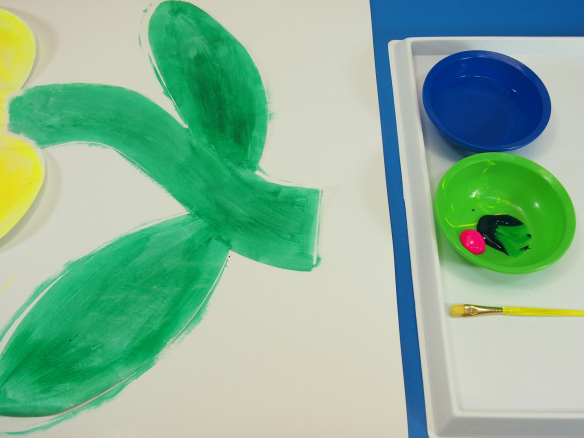 While you are waiting for the petals to dry, paint the stem and leaves green.
Flowers should take only about 10 minutes to dry and even faster in sunlight! Once the flowers are dry, choose one of three ways to decorate the Fingerpaint Flower, or come up with your own ideas! To see each of the following options, scroll further down, or click on the links below to jump directly to the various techniques.
Construction Paper Cutouts
Crayon Illustrations
Fingerpaint Designs
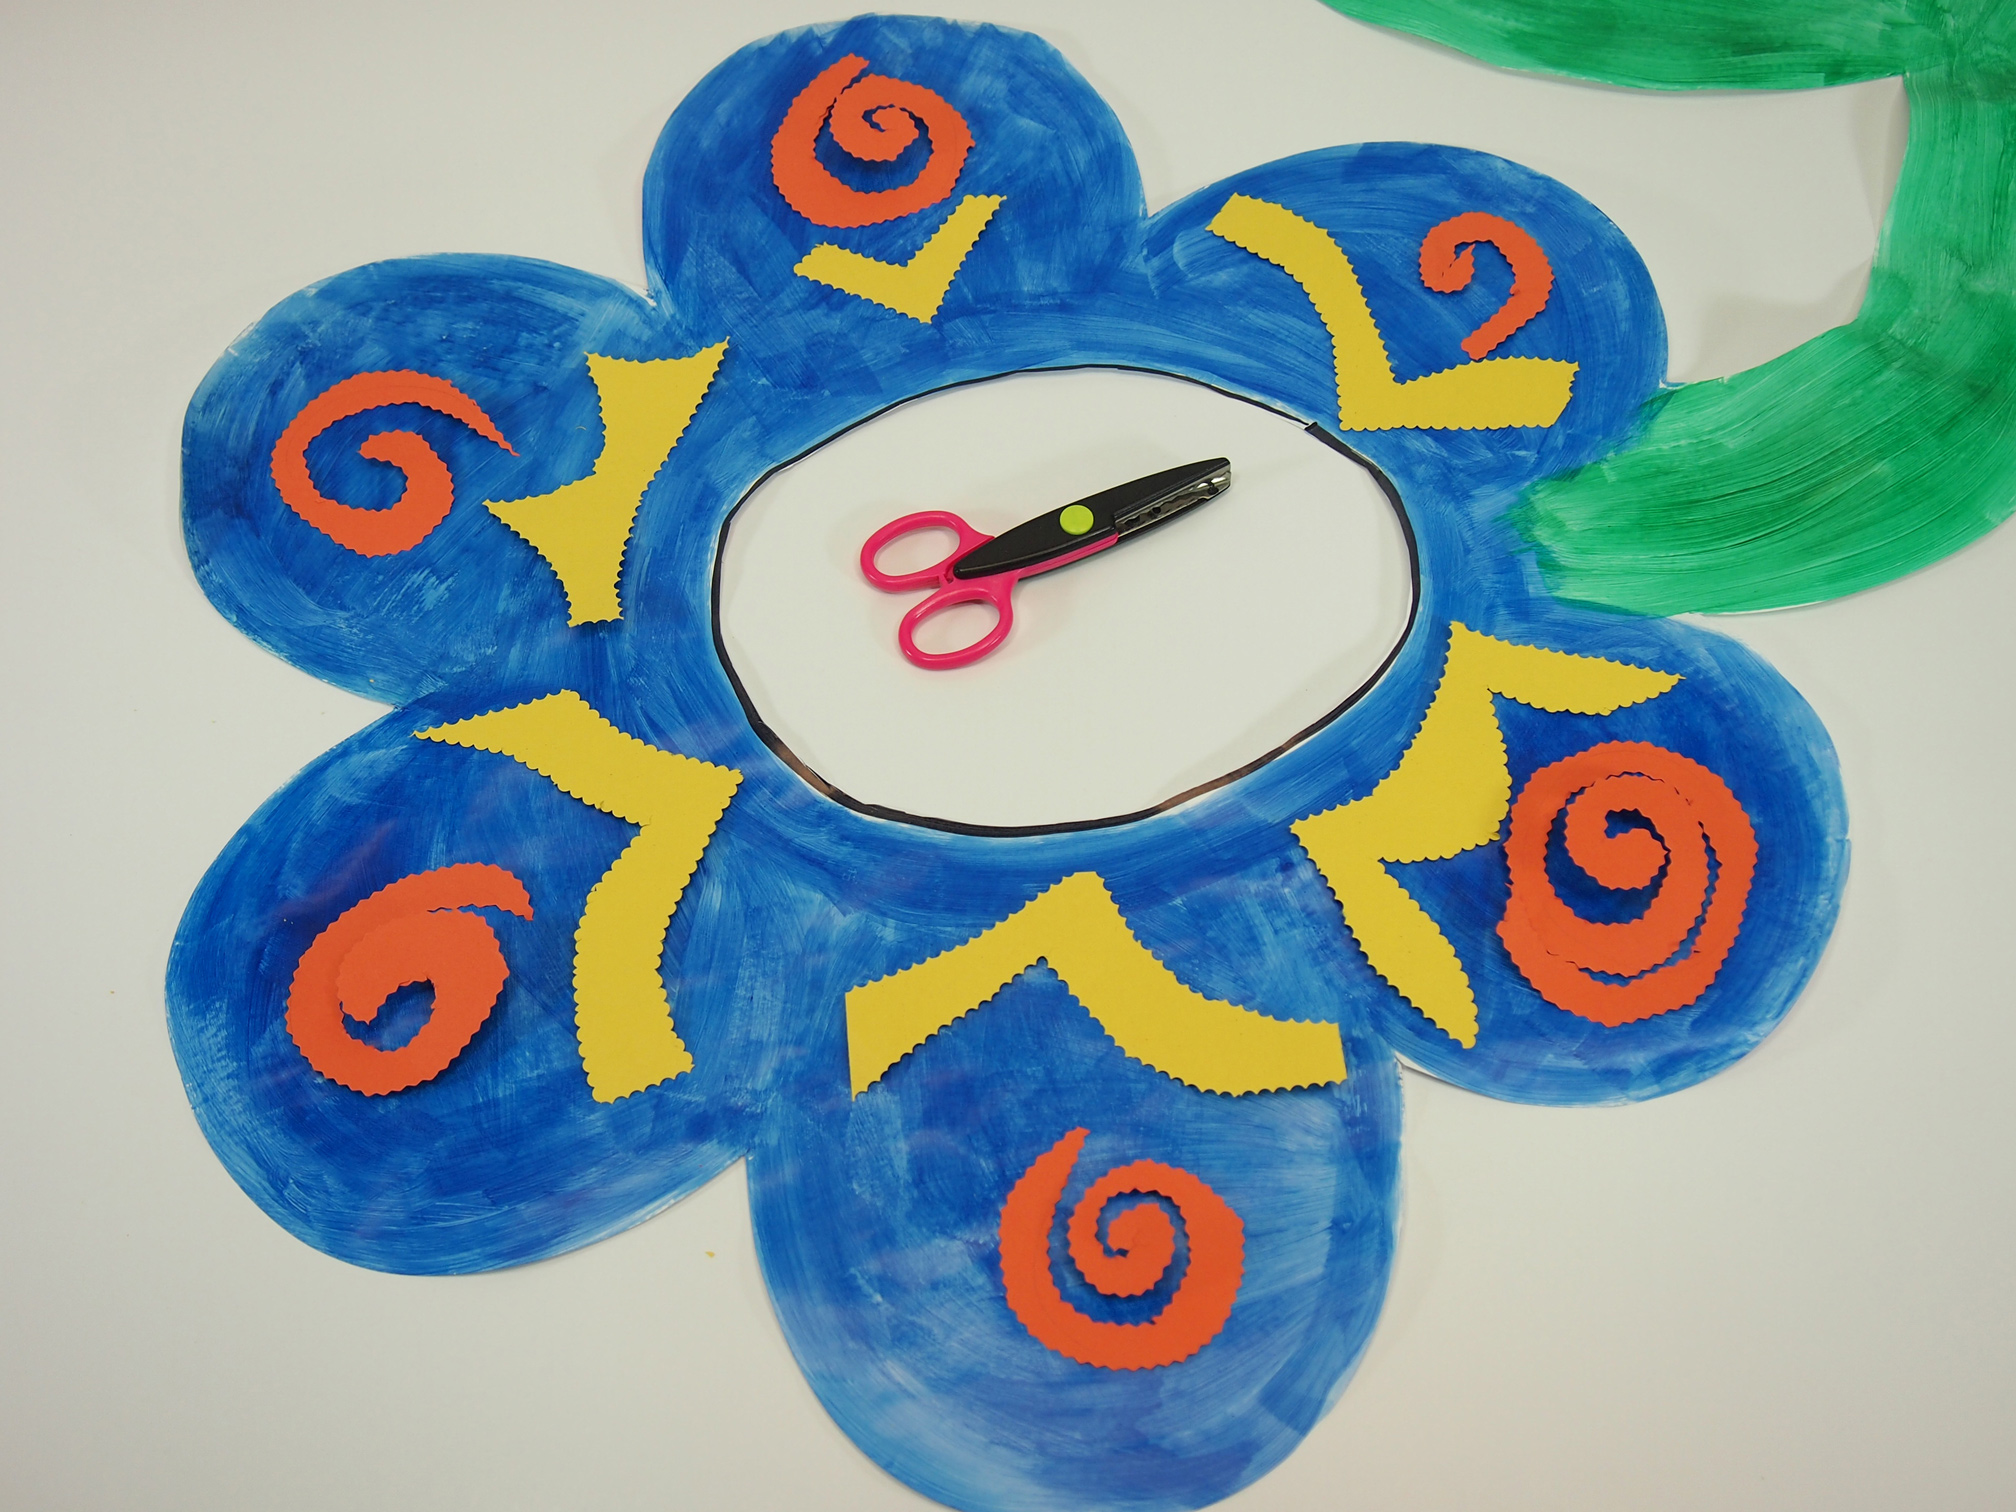
Construction Paper Cutouts
Design paper cutouts to decorate your Fingerpaint Flower. Works well with most paint colors.
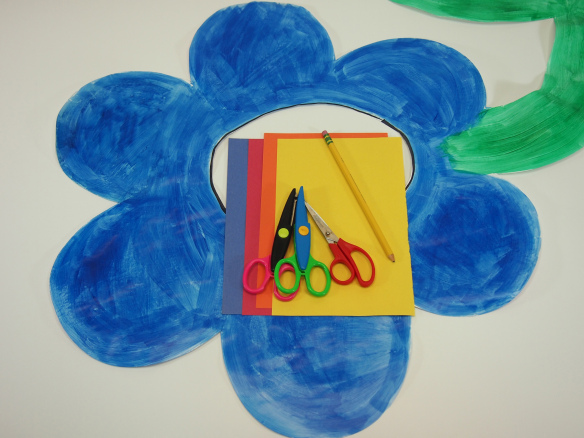 You will need a variety of decorative scissors, colorful construction paper and a pencil, if required.
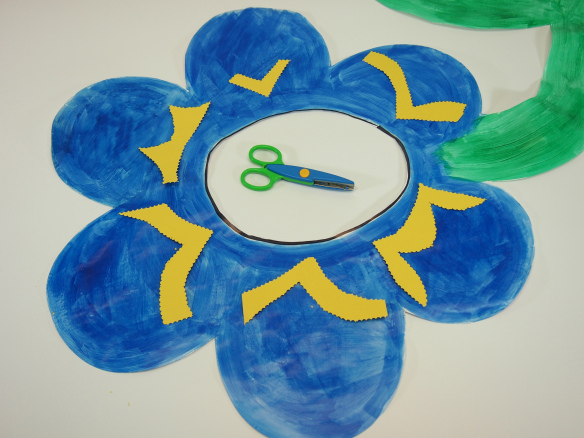 Cut out very basic V shapes from the construction paper (you can use scrap paper to fill up the flower design too)! I changed it up every so often and did a loose M shape. To help your students cut the shapes out, use the pencil to write various M’s or V’s on the sheet.
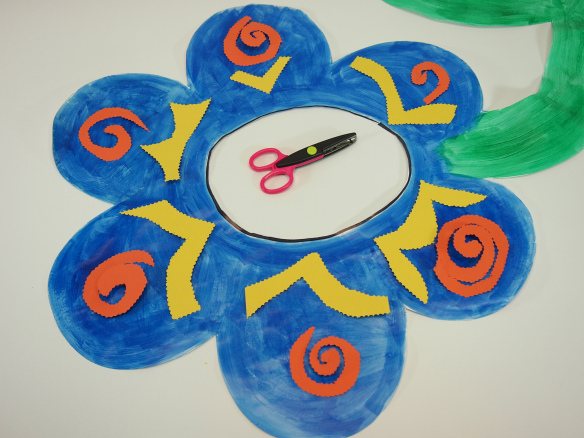
Change up your scissors for another type. Cut out swirls from the paper. The best way to do this is to keep cutting as you go around in a circle. Gradually make the curve smaller and smaller until it reaches the center. You have to distinguish the swirls, however, so to do this, you will need to go back over the cut you made and cut a bit closer to the edge until you hit the center again. Remove the scrap piece and lay flat. See how the swirls show through?
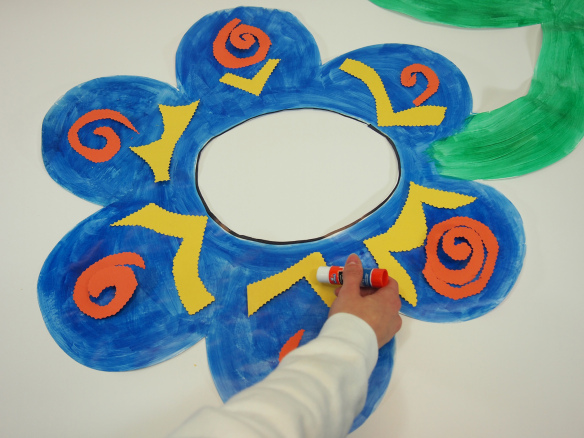
Glue all the cutouts down onto the flower.
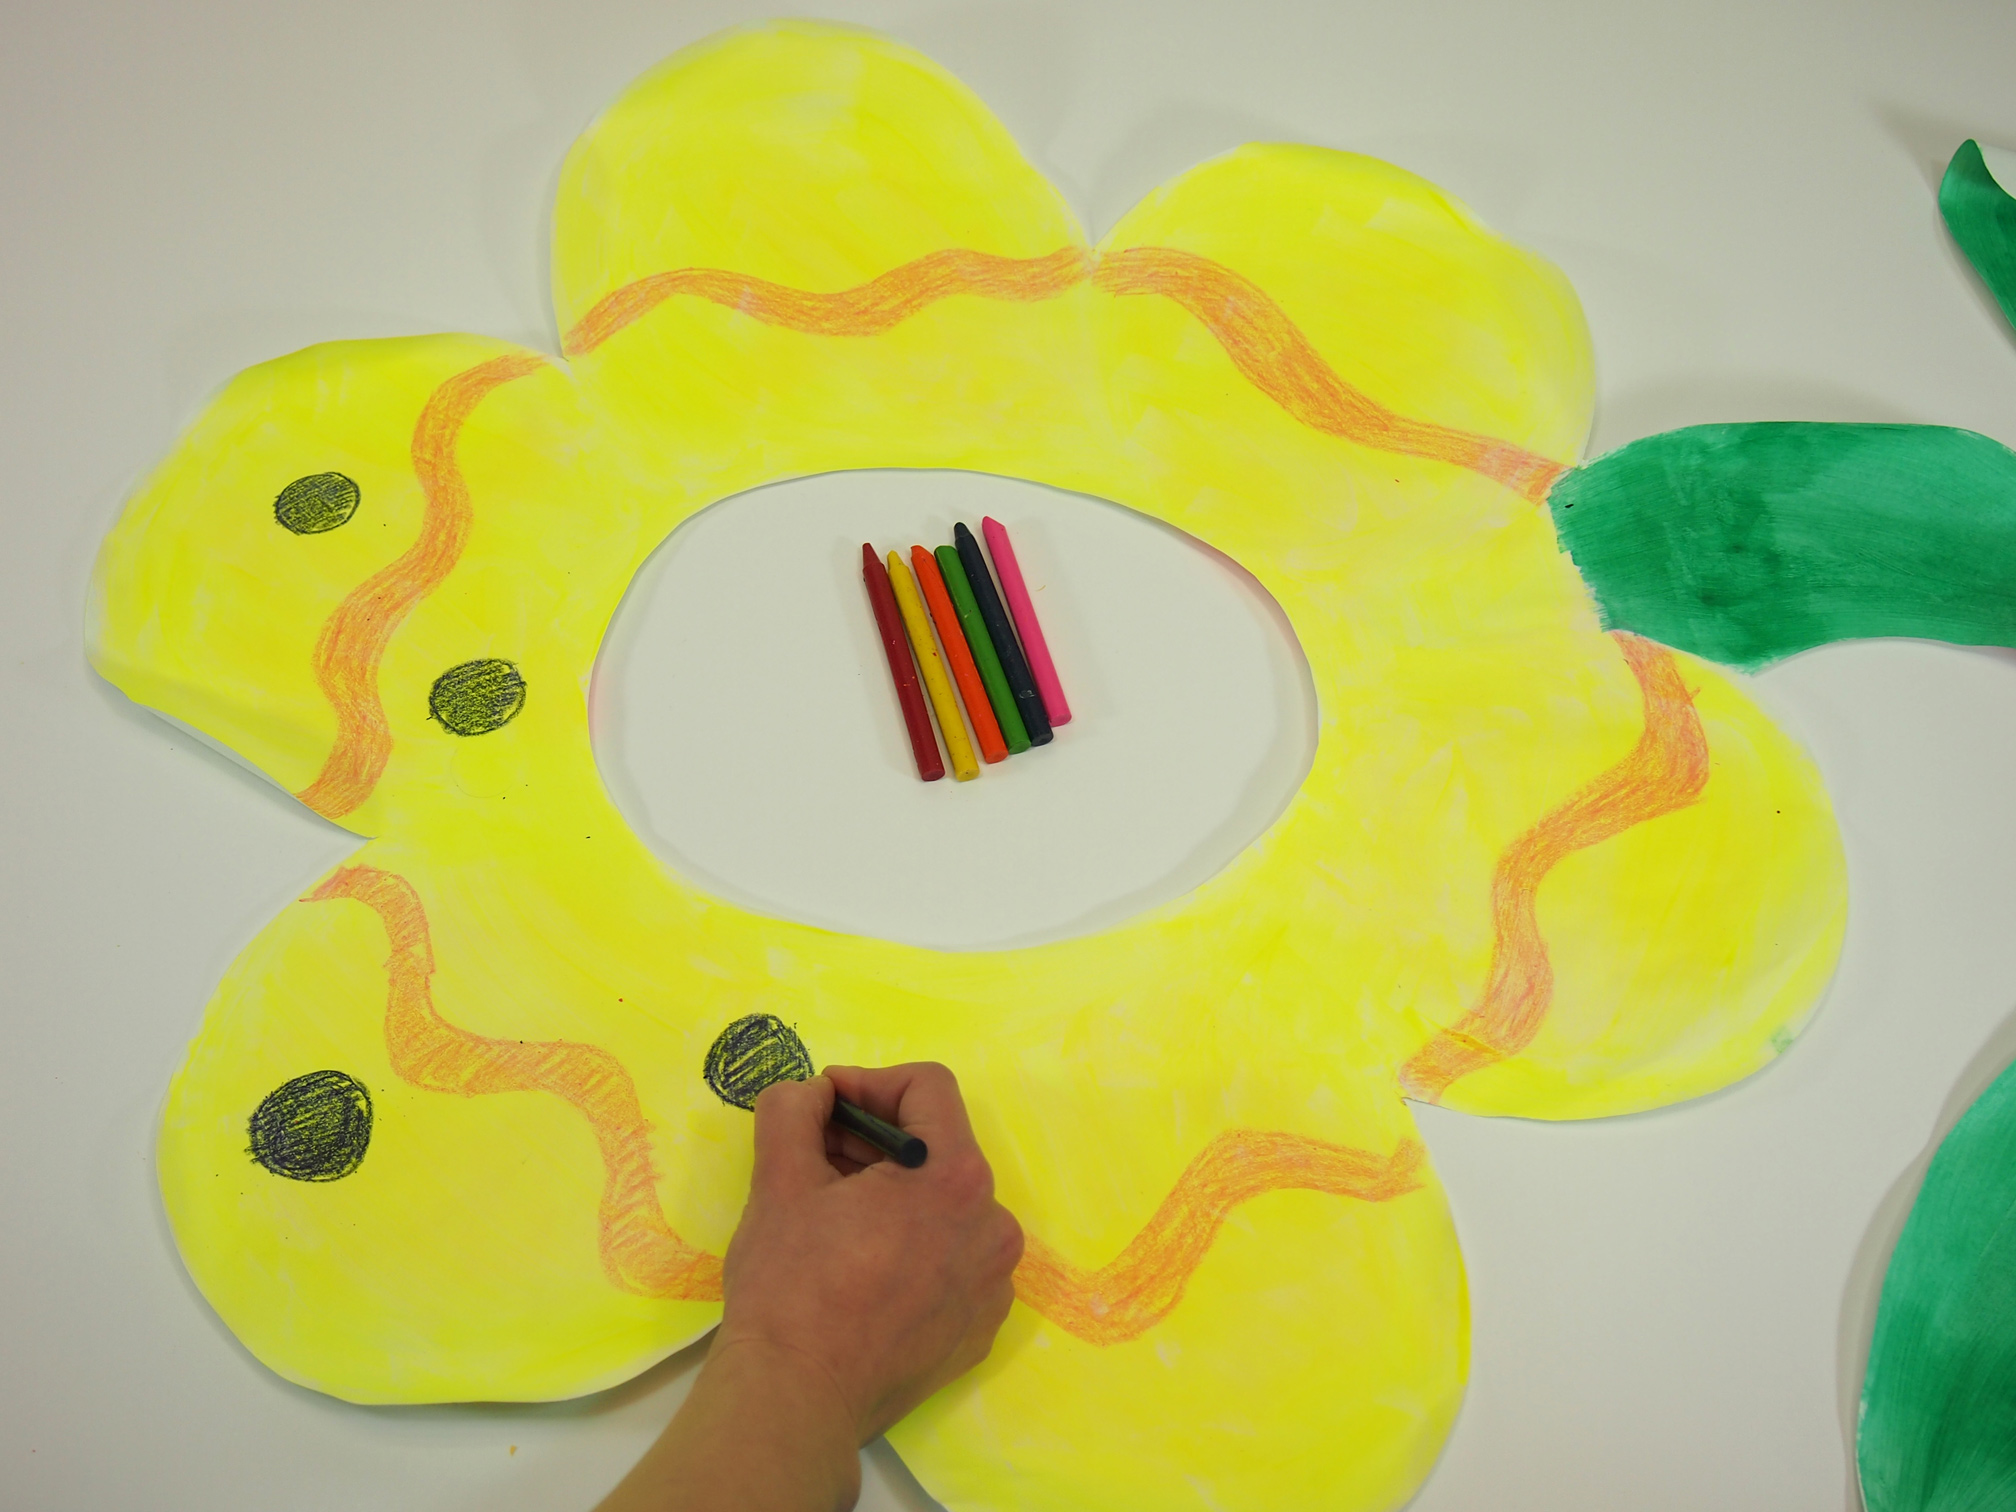
Crayon Illustration
Now for the second technique, using crayons!
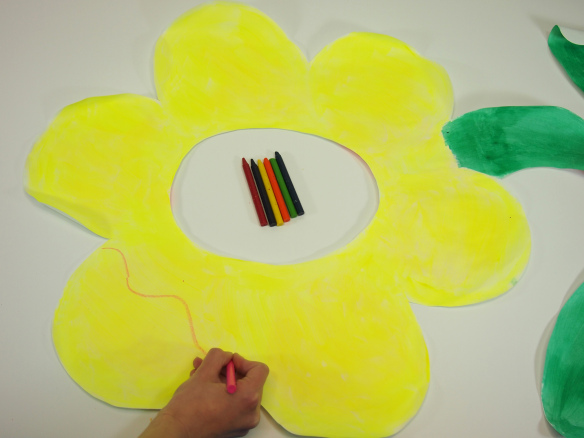
Choose an assortment of bright bold crayons. You really want the colors to pop out! Start by drawing a wavy line at the base of each flower petal. Draw a second line right below the first.
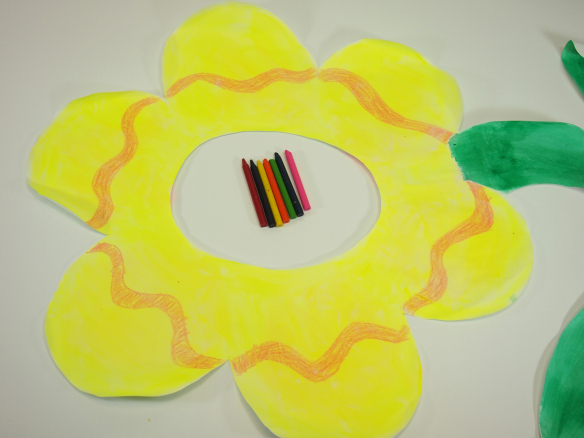
Color the resulting bands of wavy lines in with crayon.
 Add in alternating dots and color in.
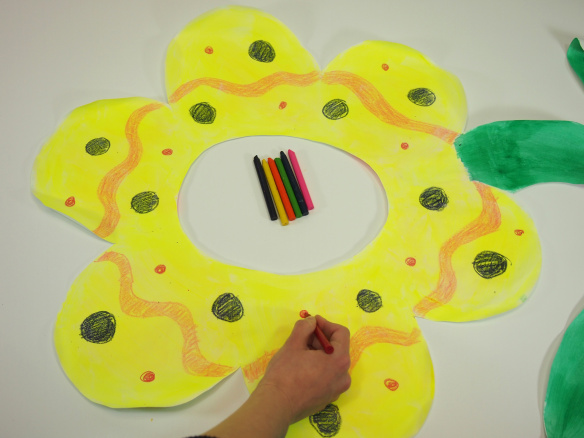 Add another set of alternating dots in another color.
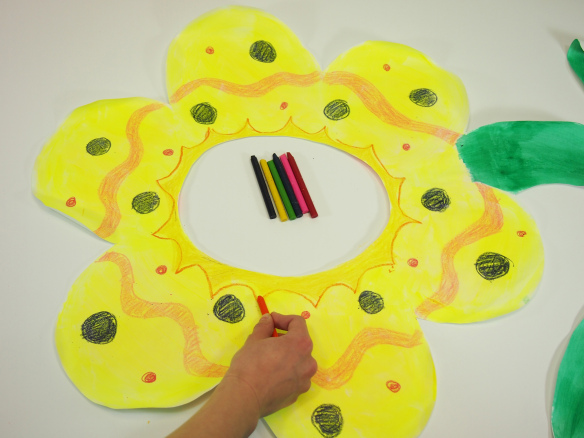 Draw a sunburst around the center of the flower.
Fingerpaint Designs
For our final technique, use fingerpaints to add designs to the flowers! Keep paper towel and a paint tray handy for any spills or messes that may occur.
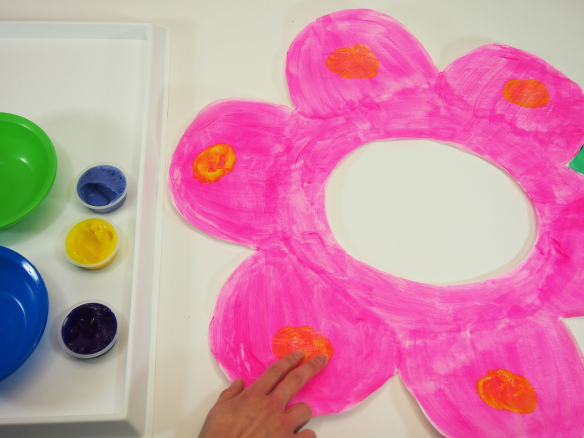
Use a bright color to paint circles in the center of each petal.
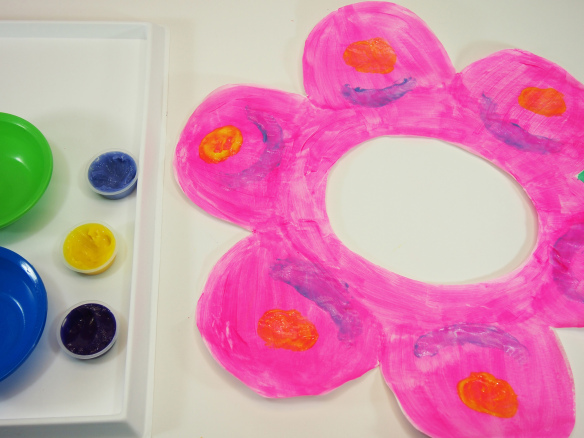 Fingerpaint a curved line beneath each dot.
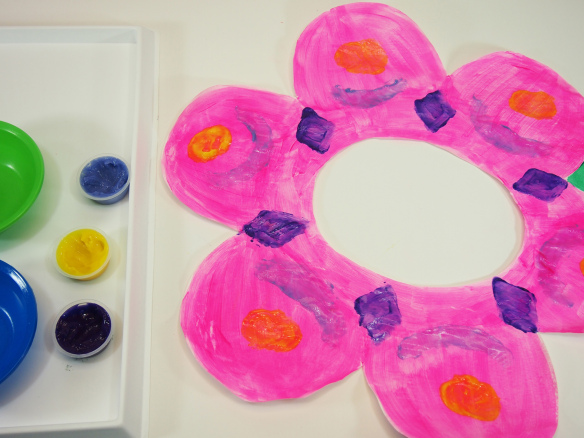 Take a darker fingerpaint color and paint diamond shapes in between each petal. Dab on more fingerpaint where needed to fill in the design.
Now to assemble the Fingerpaint Flower!
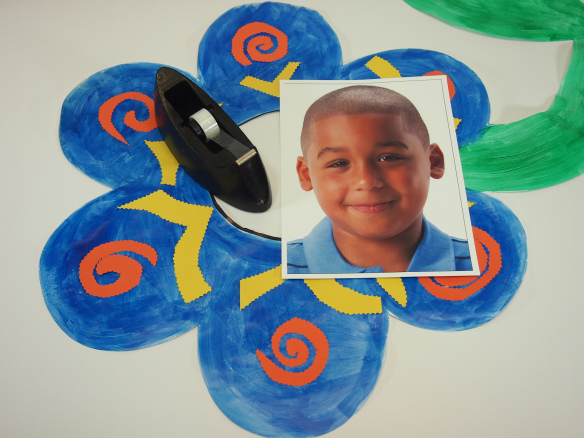 You will need tape and the printout of your students’ portrait.
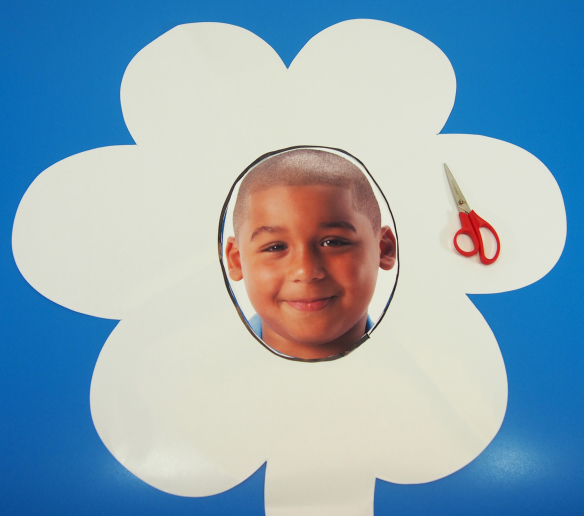
Flip the Fingerpaint Flower over to the back. Place the printout portrait-side down onto the flower. Tape the sides down.
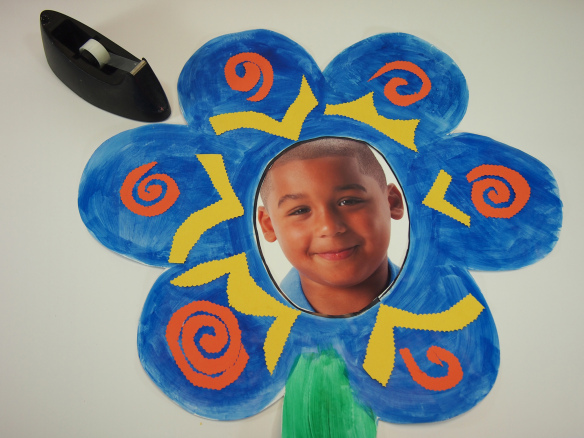
Flip over and check to make sure the portrait is in the center of the flower. Lookin’ good!
To turn your students’ Fingerpaint Flowers into a classroom garden, you’ll need to make a decorative garden fence. Luckily enough, we’ve got just the one you need!
Download the Flower Faces Fence template PDF here!
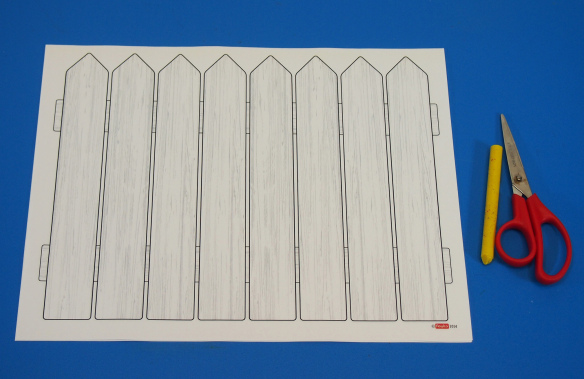
While everyone is waiting for the Fingerpaint Flowers to dry, print out and distribute this template to your students. The template prints out onto regular 8.5 x 11″ paper. Each Fingerpaint Flower will need to be covered by one or two of these fences.
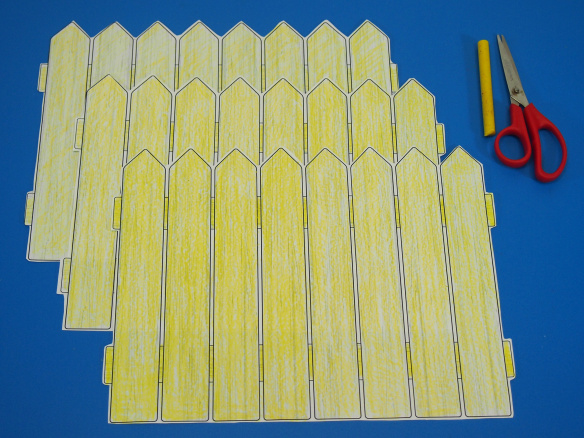
Color in the fence with crayon. Get creative with your fence colors! Cut out the fence graphic once it is colored in.
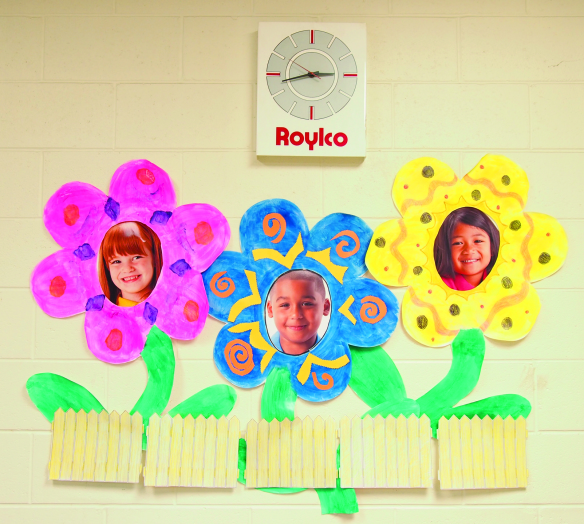
Use sticky tack or tape to paste your flowers up on a school wall. The fence goes in a straight line right across the stem and leaves.
If you make an entire classroom garden, we’d love to see it! Send us photos or contact us through the contact form so we can share your project with the rest of the blog world.
Subscribe to our blog for craft projects and product updates every Monday, Wednesday and Friday! If you would like to be featured in one of our posts, drop us a line through the contact form.


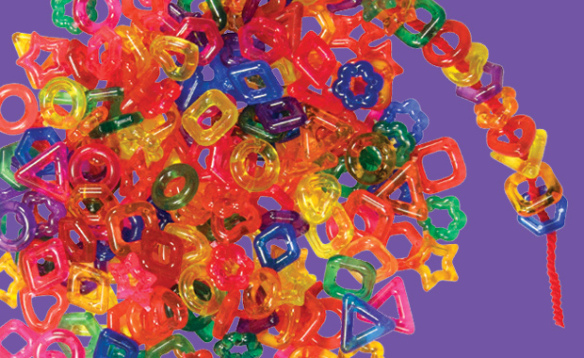
 These mosaics were used to decorate the bug cutouts with a bit of glue. The colors are bright enough that kids can separate them or sort them into groups.