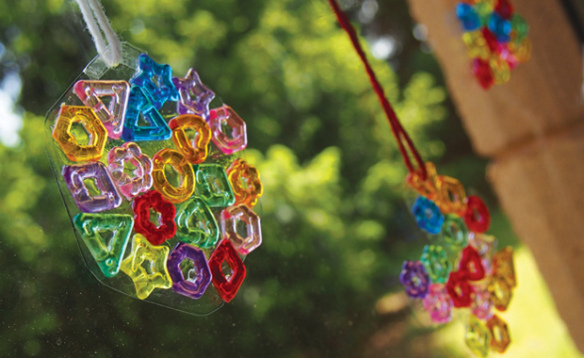
Most beaded suncatcher projects require one of the following: spending a lengthy amount of time to thread the beads into an intricate design, or melting down the beads together in the oven (say NO to plastic fumes)! This suncatcher uses simple materials that are readily available in your classroom!
Use fine motor skills to trace the shape onto the transparent sheet. Carefully spread a thick layer of glue with one hand while holding the shape with the other. Use two fingers to hold bead precisely in place while pressing it into the layer of glue.
Age: 3+
Duration: 10 minutes
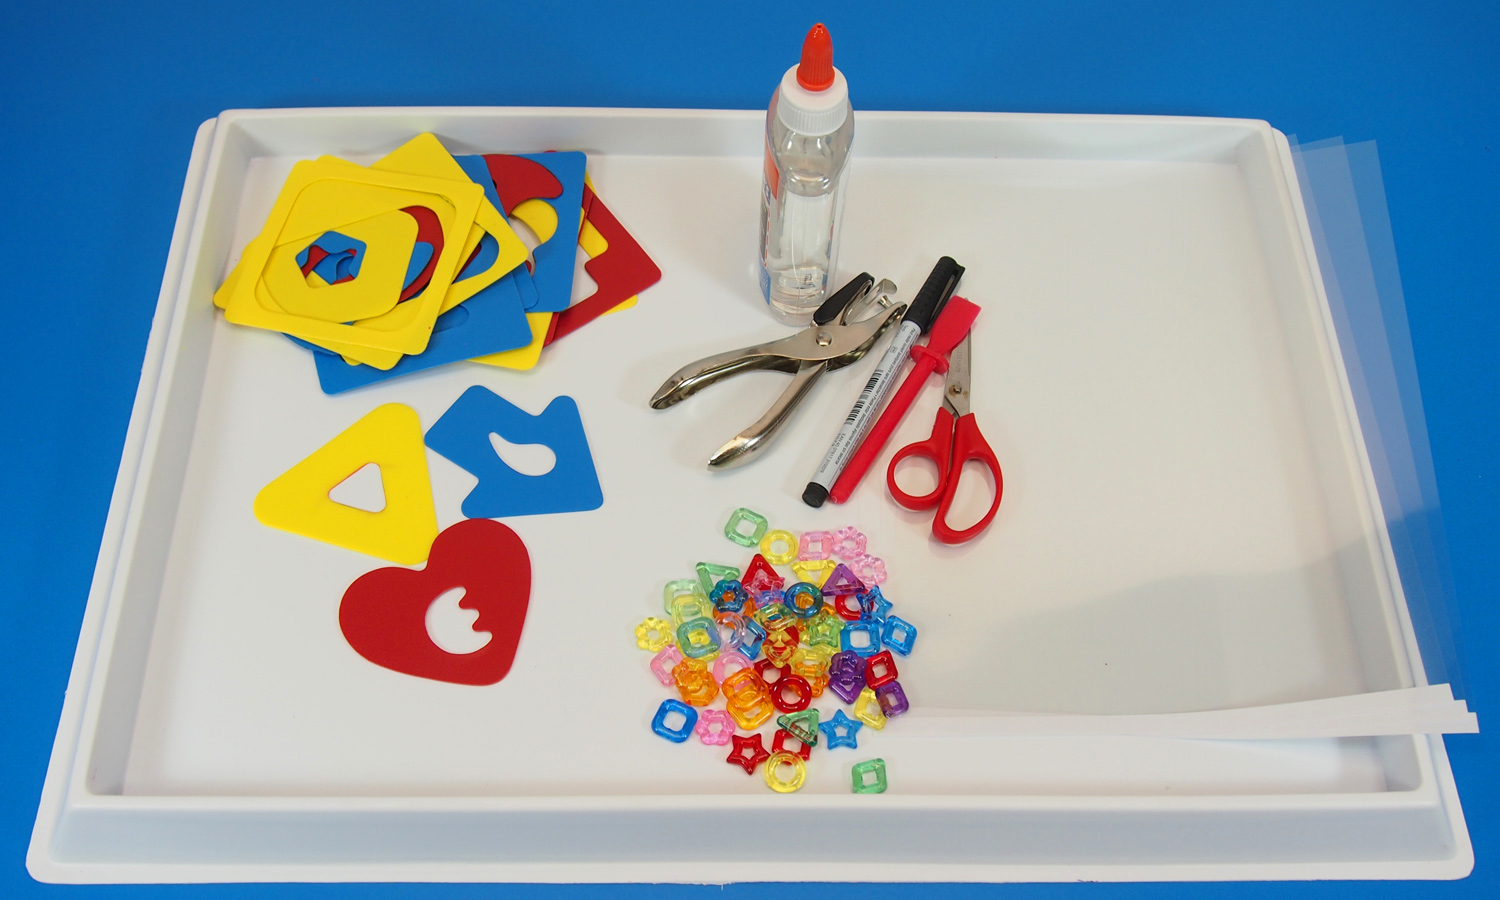
You’ll Need:
• R58620 Fine Motor Skills Silly Stencils
• Transparency sheets
• Scissors
• Clear glue
• Fine point marker or pen
• String
• Tape

Although melting beads together produces a beautiful stained glass effect, it is hazardous to attempt as the plastic will emit fumes that aren’t good for you and your kids’ health or the smell in your house! Try an alternative option that still produces a neat suncatcher effect without the smell or the hassle!
Transparency sheets can be picked up at any office supply store nearby you. The type I use in this project has a textured side, so that can be used to help the glue stick to the material. Any type of transparency sheet should work, however. Give it a try!
 In order to make your suncatcher shape, you will need a basic shape stencil like some of those available in our stencil set. The stencils pop out of a backing, so you get two stencils from one.
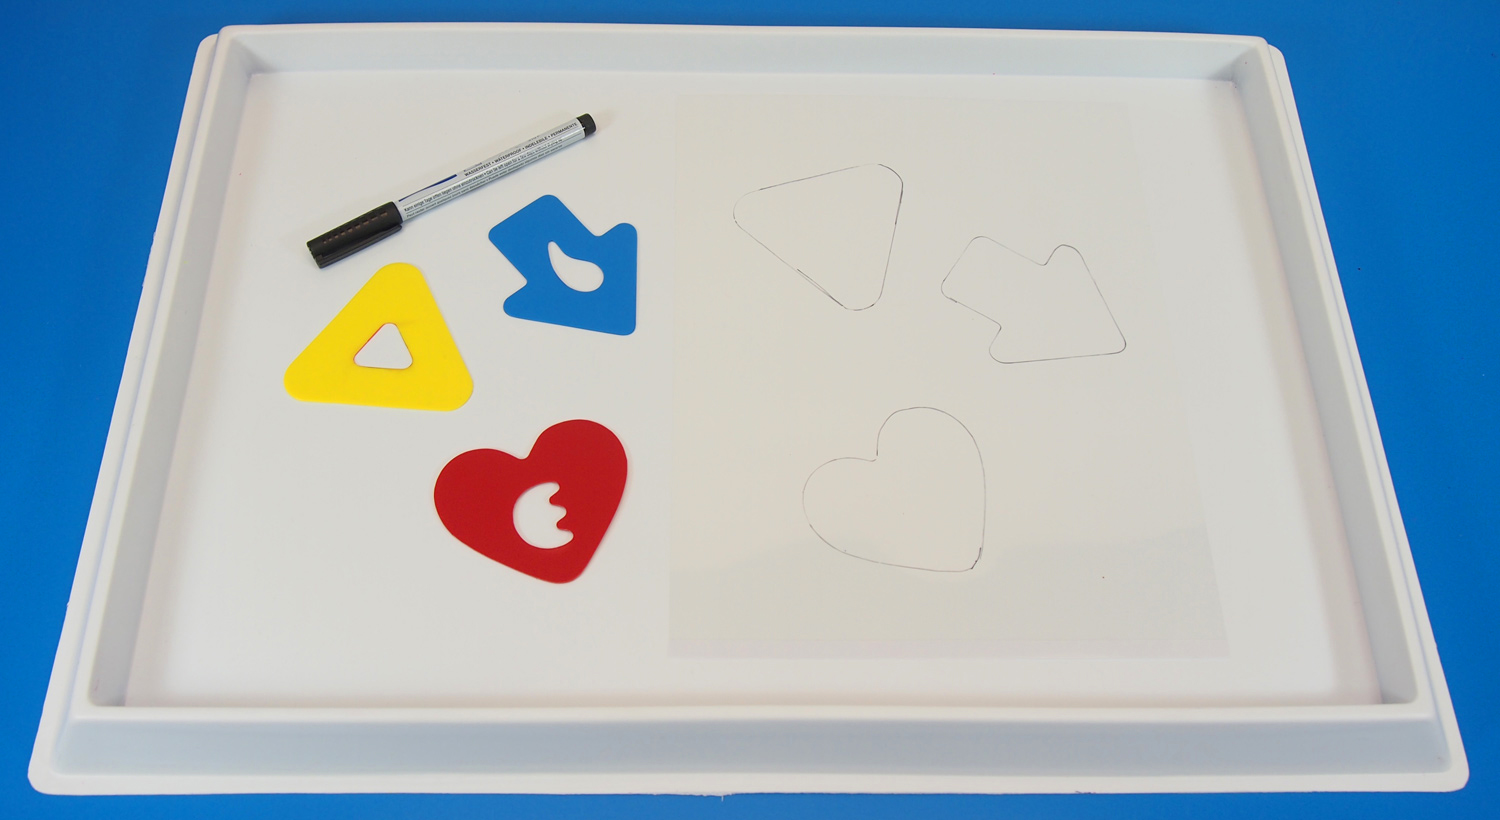 Trace the stencil shape onto the transparency sheet. Use a fine point marker or pen to keep the lines light, but just noticeable enough that children are able to cut around it.
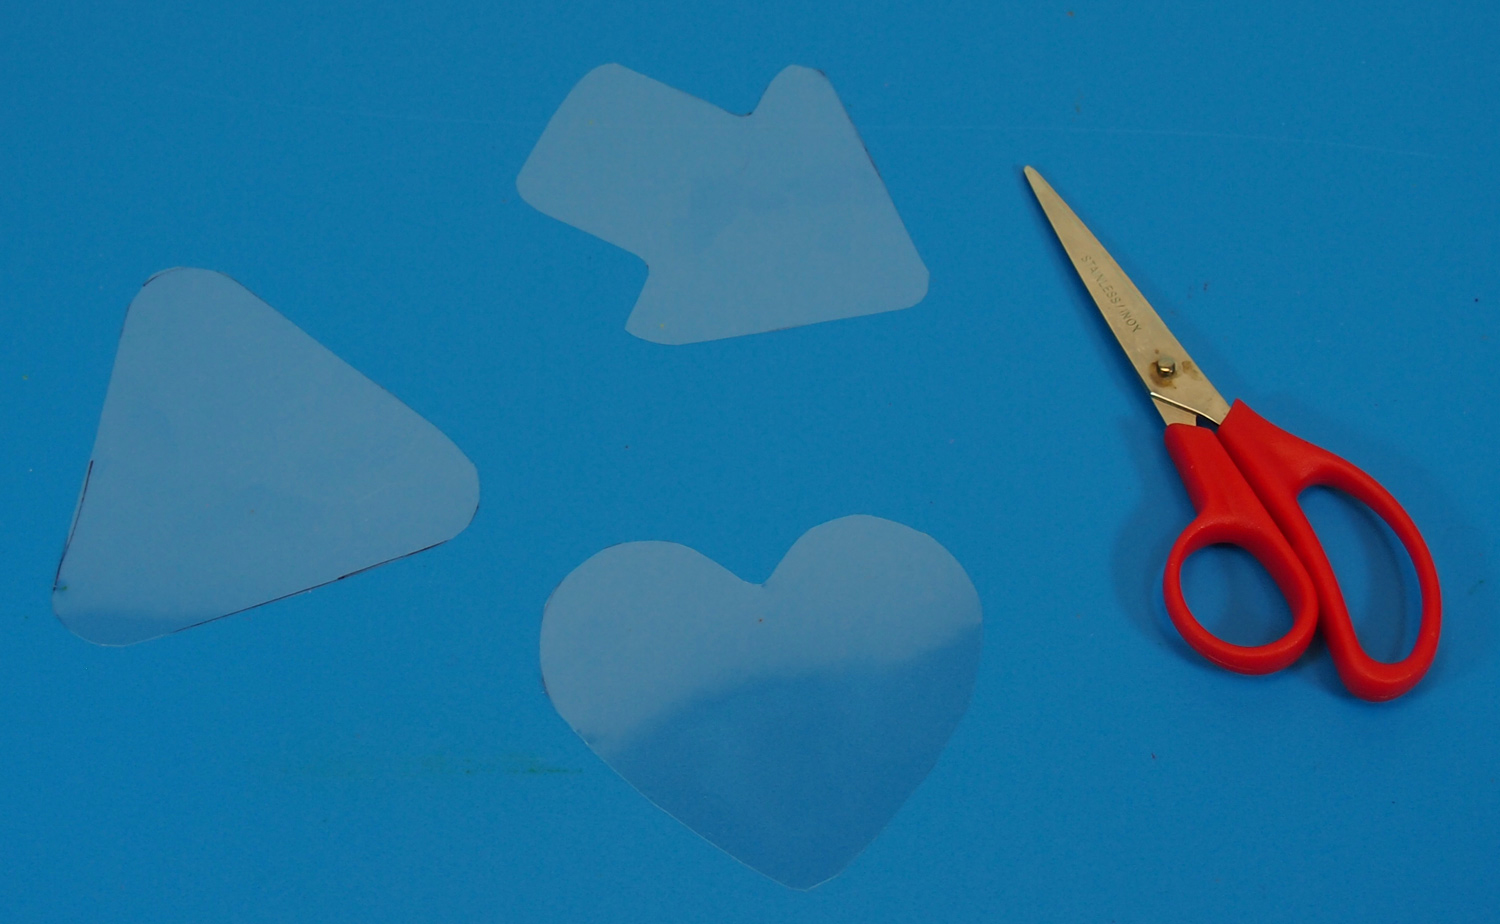
Cut out the shapes.

I’ve put a backing behind the shapes so you are able to see them (a bit?) better! Use a hole punch to make a hole at the top of each shape.

Dab on a generous amount of clear glue.
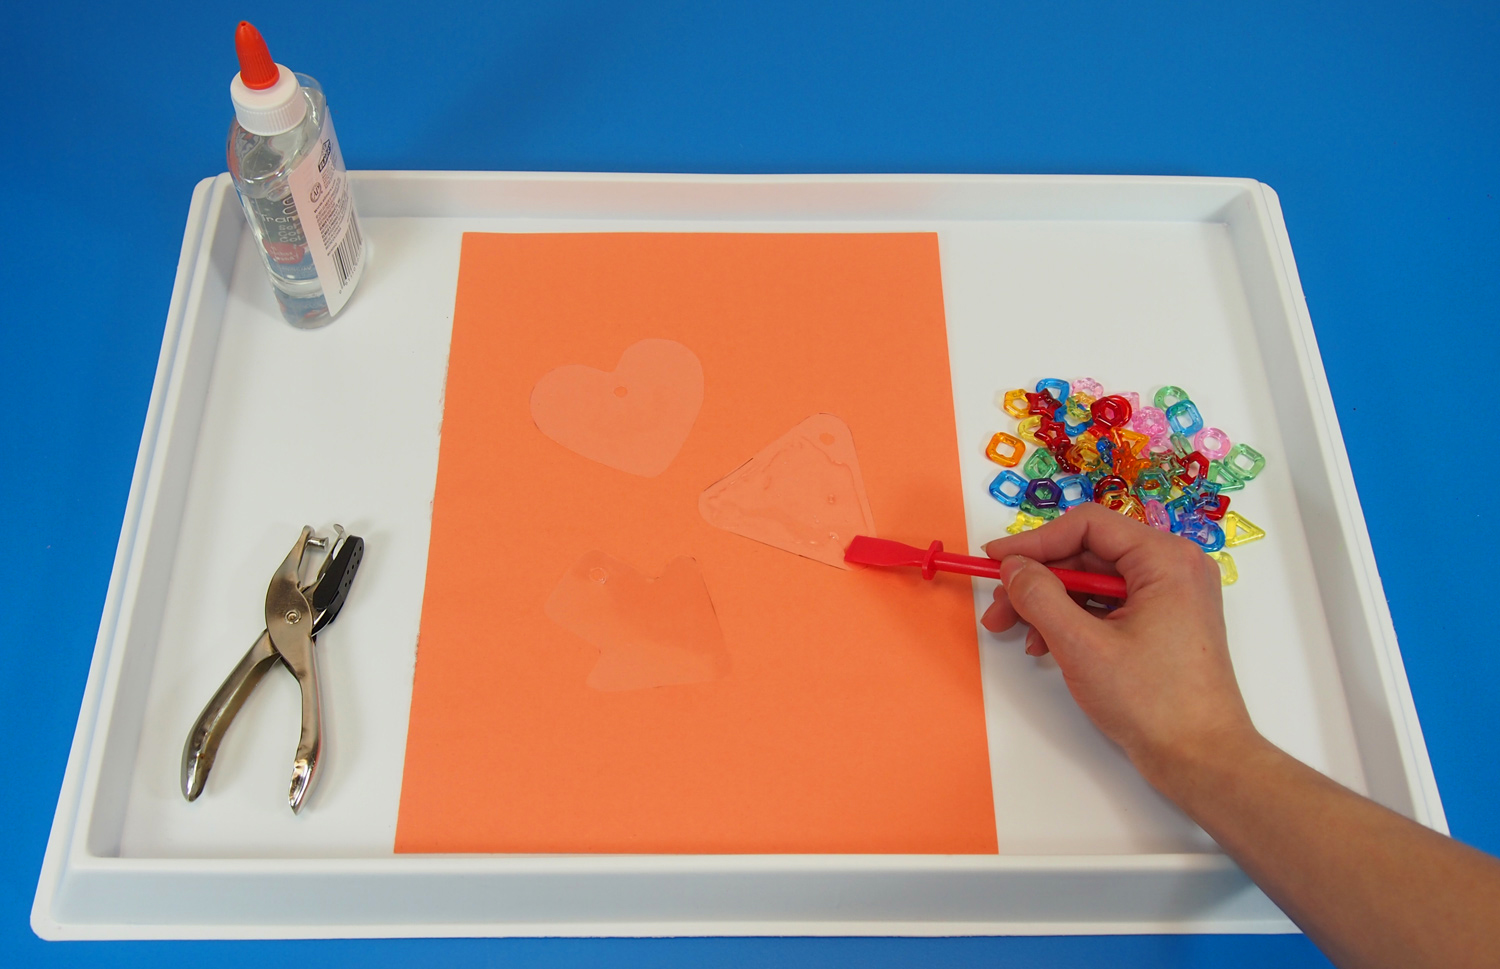
You can spread the glue across the surface of the transparent shape with a Goo Spreader available here or dab on extra glue.

Drop a handful of beads onto the glue layer and spread evenly across. Make sure none of the beads sit on top of each other, but rather, side by side. Fit as many beads as you can on the transparent sheet shape and try not to go over the edge.

Ta-Da! Now, let’s prep them up for the window.
 Thread a small amount of yarn or string through the hole and tie the end into a knot.
 Use clear tape or a suction cap to hang the suncatchers onto a window. Watch how bright the colors appear when the sun rays hit them!
Thanks for checking out this post! Like us on Facebook, Share this post with your friends, or Subscribe to this blog today to receive original craft project updates every Monday, Wednesday and Friday!

![]()