Library Arts uses our Animal Print Paper!

On Safari final

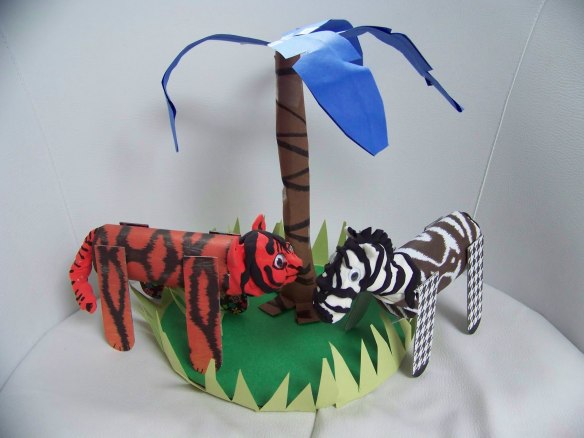
Doris of Library Arts once again uses our printed papers to make fun 3D safari animals! In this tutorial, Doris features our R15256 Amazing Animal Paper! Check out her detailed instructional post. 

Doris posted her tutorial on August 13, 2010 as “On Safari!” Check it out!

100_4987

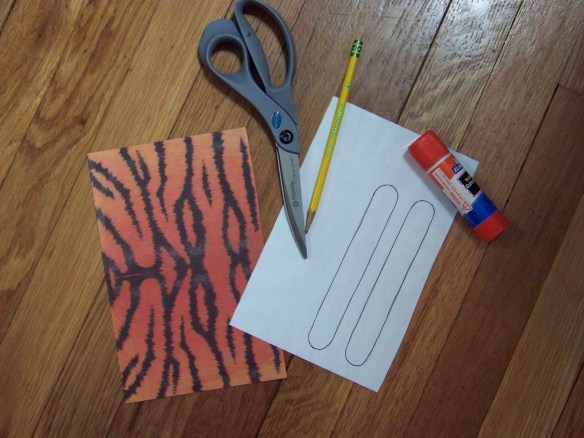
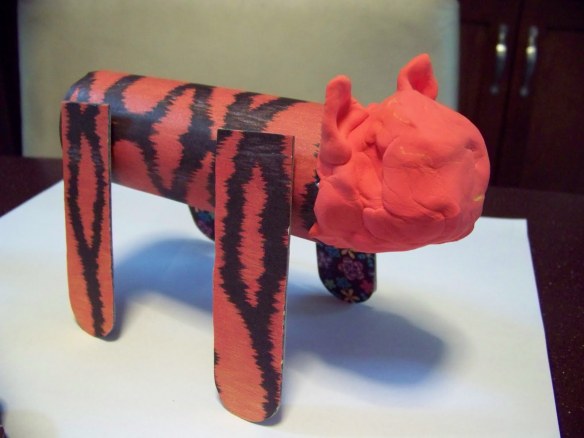
The post features templates to use for making the 3D animals. You will need tongue depressor sticks, a toilet paper cardboard roll and some tin foil.

100_4996

Use our papers to make a tiger, zebra, leopard, giraffe and many more! I adore the creativity of this craft!

Thanks to Doris for this adorable post!

Images and original post © Library Arts.

This post was not sponsored for a review. At LittleFingersBigArt, our mission is to present to our readers and viewers the newest and most creative craft ideas that fans of Roylco have made on their own. Our goal is to allow you and other educators and parents to reuse our products in fun ways so that children always get the best educational experience from them!

We’d love to see more ideas like this one! If you’ve got a brilliant craft idea or have made a version of one of our crafts that you would like to share with us, send an email to subscriber@roylco.ca with photos, descriptions or a link to your work. We will create a feature post and link back to you with full credit. We’d love to hear from you!

Line-09

Crafty Leaves Wreath

Image of Roylco Crafty Leaves Wreath

Feature-Image-craftyleaveswreath

Just in time for fall! Send students home with gorgeous wreaths for decoration, made from our R15334 Crafty Leaves and a wreath template! A great way to start off the school year. Read more for our weekly craft challenge (send us photos of your projects)! 

Age: 5+

Duration: 10 minutes

You’ll Need:

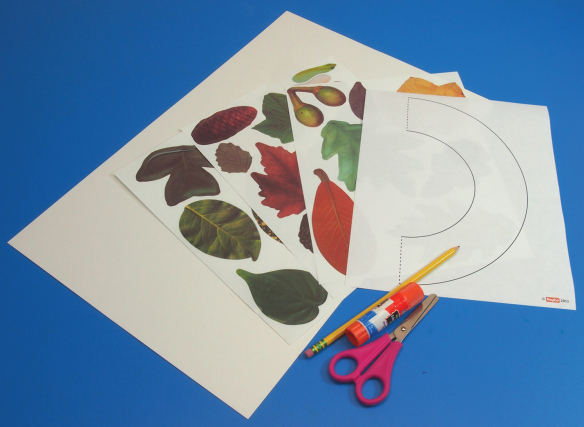
• R15334 Crafty Leaves

• Wreath Template

• Scissors

• Glue

• Pencil

This is a pretty simple craft and can be done in less time than recess! Wreaths are great to make for decoration, or as a gift.

P8123064

Print out your template onto 8½ x 11″ (21.5 x 28) paper and cut around bold lines. Cut across the dotted line as well.

P8123070

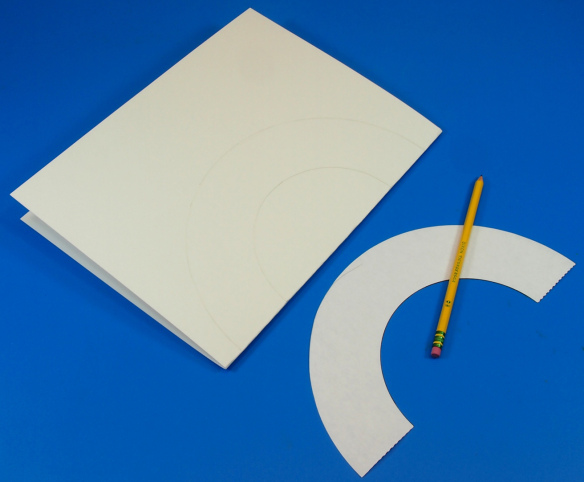
Fold an 8.5 x 11″ sheet of card paper. Place your template along the fold line. Trace the outline of the template (along the bold lines) onto the card paper and cut out.

P8123072 

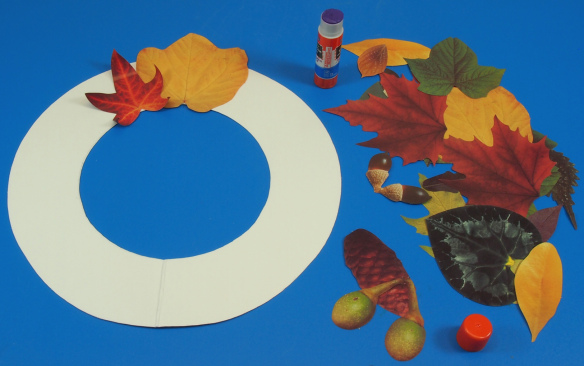
Unfold the card paper to reveal your wreath base!

P8123073

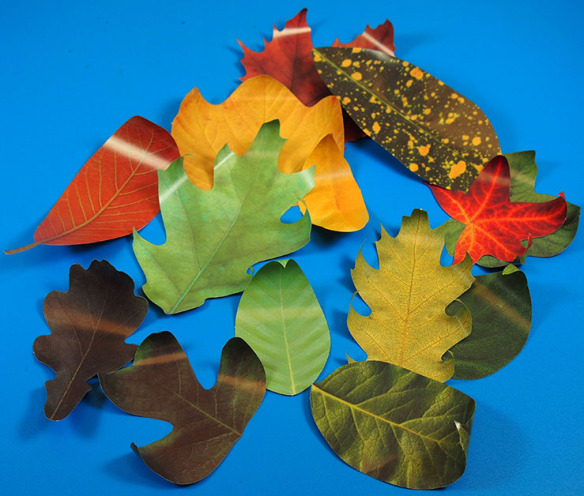
Next, pop out the leaves from the backing. Pick out leaves that you feel will arrange nicely on the wreath.

P8123076

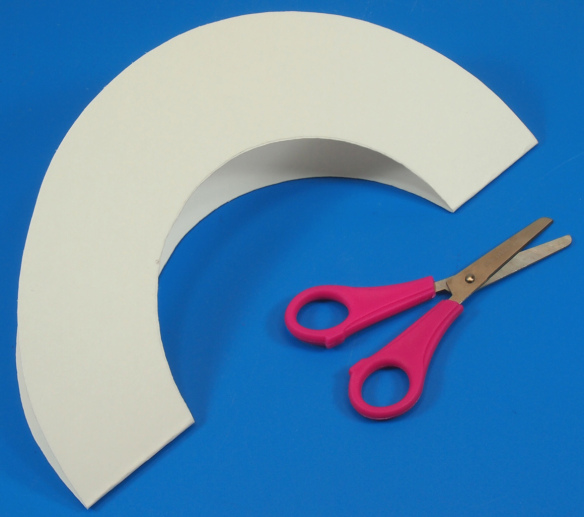
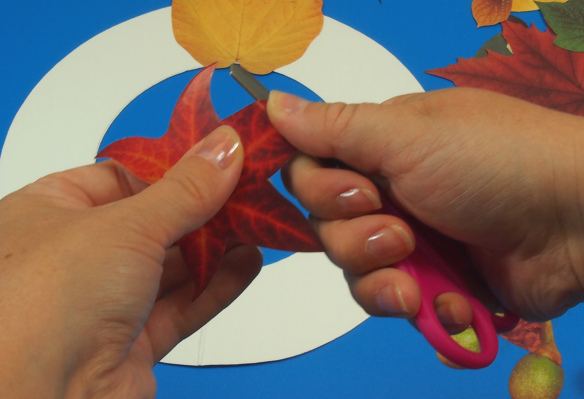
Curl up the ends of the leaves using the blunt edge of a pair of scissors.

OLYMPUS DIGITAL CAMERA

Looking like realistic leaves now!

P8123078

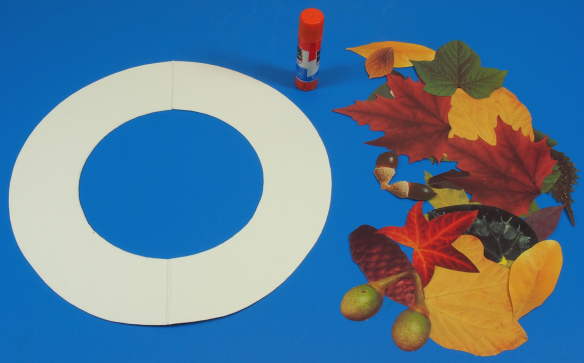
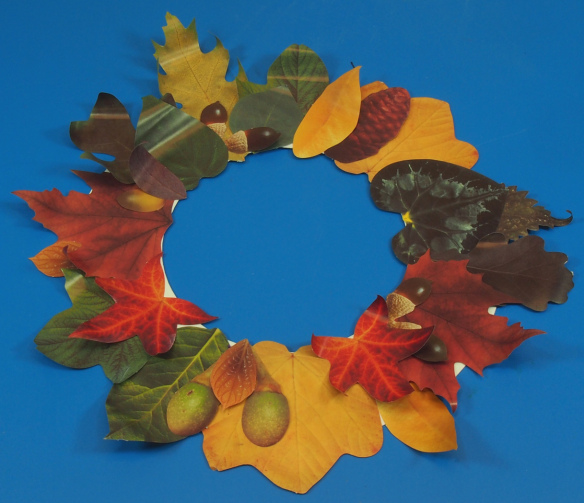
Arrange the leaves onto the wreath template and glue them down. Tip: Pop out the acorns and chestnuts and place at three or four points around the wreath.

P8123080

Ready to hang!

CRAFT CHALLENGE:

Go outside and find some natural objects to add to the wreath: acorns or acorn caps, feathers or twigs! Use a hot glue gun to adhere the found objects to the wreath.

Line-04Show us your wreath ideas! Send photos of your work to subscriber@roylco.ca for publication in our next post. We’d love to hear from you!

Craft Spotlight: Stand Up Self Portraits!

Feature-Image-standupselfportrait

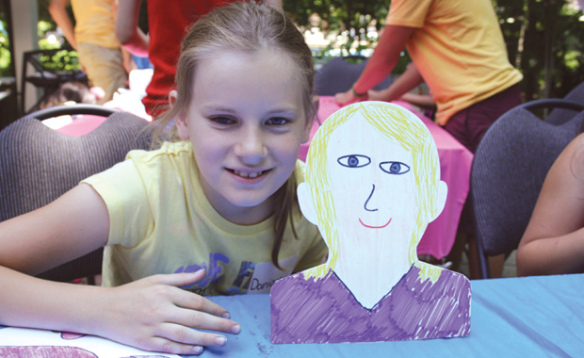
This week’s Craft Spotlight features our Stand Up Self Portraits! Are you gearing up for Parent-Teacher night? Or are you in need of a project that children can use to introduce themselves to each other? Perfect for “All About Me” crafts, Stand Up Self Portraits encourage children to explore self-expression and self-representation!

Stand Up Self Portraits give students the freedom to experiment with their artwork–use crayons, markers, pencil crayons or a variety of collage materials to decorate the appearance of your portrait!

IMG_7431

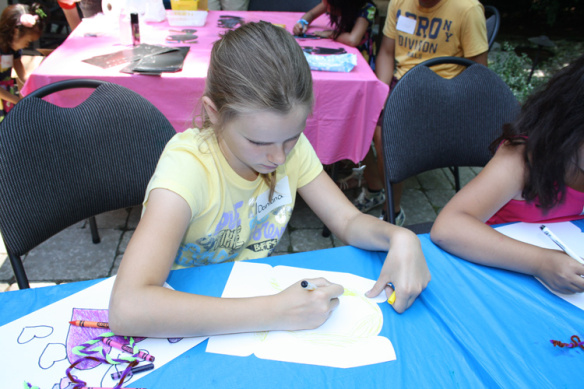
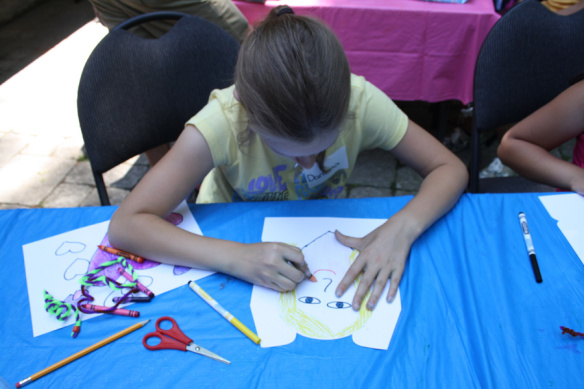
Our crafters used markers and crayons to decorate their Stand Up Self Portraits. They used the indicators on the Stand Up Self Portrait help students locate where various facial features belong. There are six little pinprick indicators in total.

IMG_7432

The two topmost indicators represent the points at which to place the eyes. Draw small circles around the indicators to represent pupils. Enclose the pupils in an almond shape to form the eyes. Add details such as eyelashes and eyebrows.

Use the middle two indicators to draw the nose. Finally, the space between the last two indicators can be used to draw the mouth.

_DSC0063

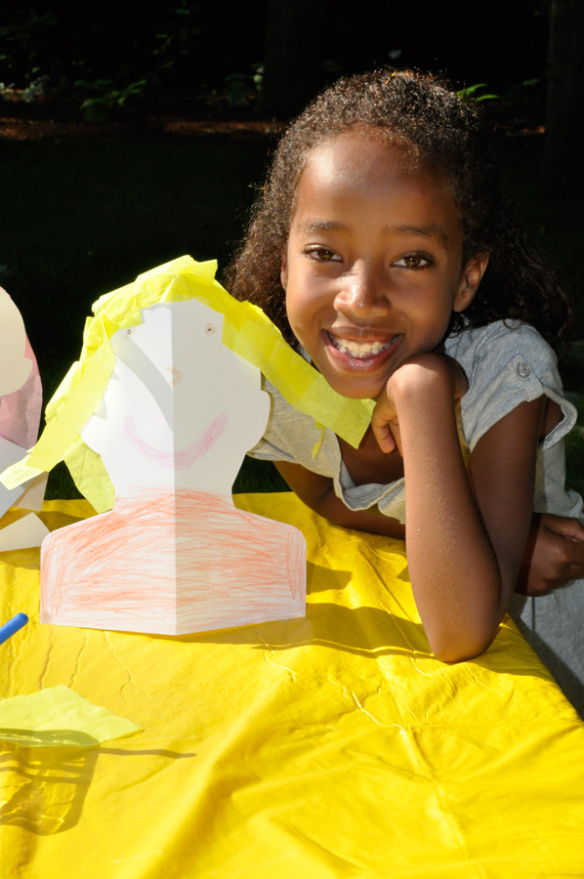
Paste the sides of the Stand Up Self Portrait with yarn, tissue paper or cut construction paper to make the hair!

A great way to introduce students to each other, or prepare the classroom for Parent-Teacher night!

Line-11Let us know how your students’ portraits turned out by sending photos to subscriber@roylco.ca! We’d love to see your classroom artwork!

Caution! Twins at Play! uses our Color Diffusing Paper Leaves!

IMG_0087

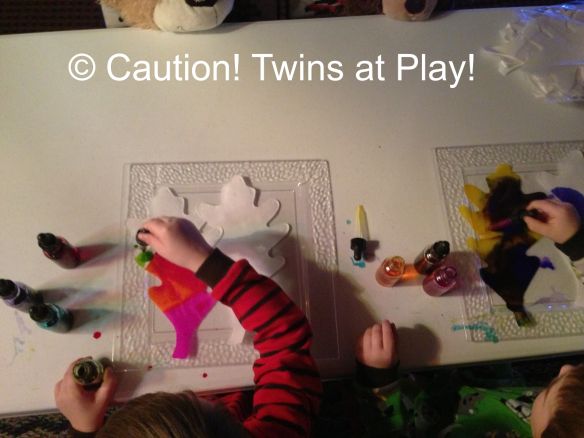
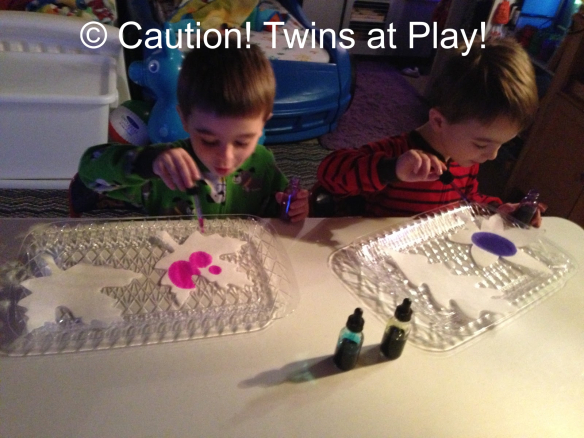
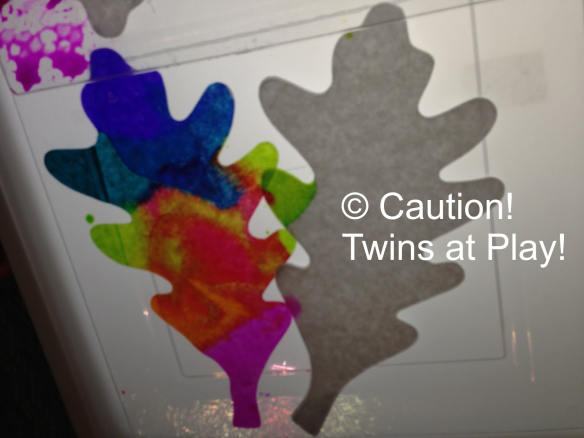
Kristen from Caution! Twins at Play! posted photos of her twins Graham and Parker painting our R2442 Color Diffusing Paper Leaves! They used liquid watercolor to color the leaves and painted onto clear plates to keep the table surface clean.  

This post, called “water color” was published on December 30, 2012. Kristen took many beautiful photos of her sons’ artworks. Check out the blog post for more images!

IMG_0076

Here you can see twins Graham and Parker having a blast as the liquid watercolor seeps throughout the leaf cutouts.

IMG_0091

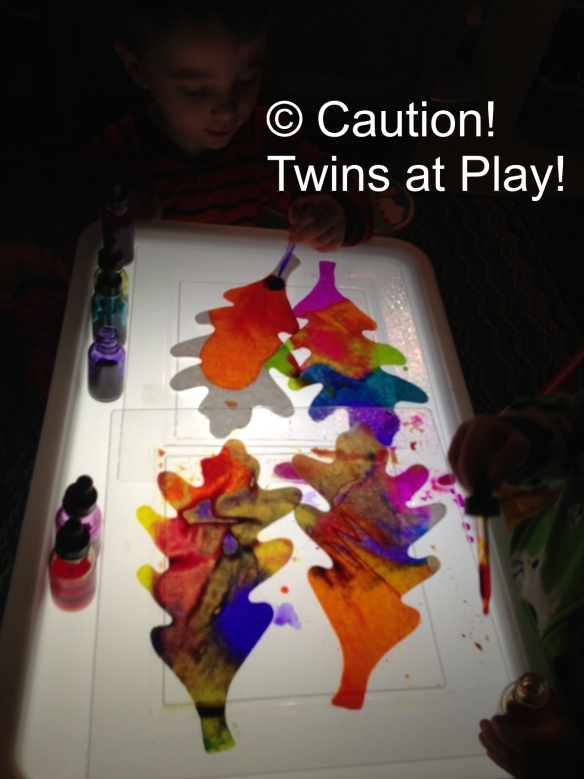
It’s a good idea to make sure your work surfaces are covered before you start painting the leaves as the paint will inevitably seep through the bottom. Kristen mentioned that she would have liked to use this on her light panels but didn’t have the proper cover to protect it.

Look forward to our handy Light Table kits that we’re producing next year! We feature a variety of materials and resources that can assist with educational light table sessions.  

IMG_0094

Kristen is an advocate for using the light table for many educational subjects and she believes wholly in the value of presenting children with alternative learning ways. Light tables illuminate the objects that are placed on them and present a whole new perspective on objects’ appearances.

Thanks to Kristen for her post!

Images and original post © Caution! Twins at Play!.

This post was not sponsored for a review. At LittleFingersBigArt, our mission is to present to our readers and viewers the newest and most creative craft ideas that fans of Roylco have made on their own. Our goal is to allow you and other educators and parents to reuse our products in fun ways so that children always get the best educational experience from them!

We’d love to see more ideas like this one! If you’ve got a brilliant craft idea or have made a version of one of our crafts that you would like to share with us, send an email to subscriber@roylco.ca with photos, descriptions or a link to your work. We will create a feature post and link back to you with full credit. We’d love to hear from you!

Line-02

Take a tour through our virtual Art Gallery!!

feature image- clipboardgallery

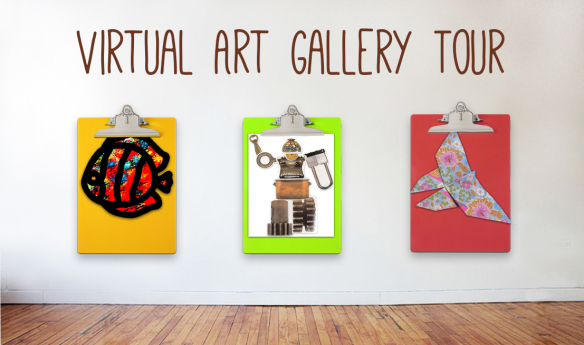
Welcome to the Little Fingers Big Art gallery wrap-up! Today, we’re going to take a trip down memory lane and revisit some of our favorite crafts of the past year. PLUS: I’ll show you a unique way to display your students’ artwork in the classroom! 

I’ve taken our favorite top ten crafts and compiled them below in honor of Little Finger Big Art blog’s first year on the blogosphere! Just click on any of the images below to get linked directly to the craft post.

TIP: To display your students’ artwork, purchase colorful clipboards from any Dollar store! Use one clipboard per student. Hang the clipboards from a wall. If you are unable to drill nails into walls, consider placing adhesive hooks to the walls and hanging the clipboards off those. You can buy adhesive hooks at any department store nearby you!

When children have finished a piece of art, they can clip their art up to their individual clipboard. Send old artwork home with students to add newer artwork to the clipboard art gallery! Children can update their clipboard galleries anytime they finish a 2D illustration.

View our top-ten favorites below!
clip10 copy

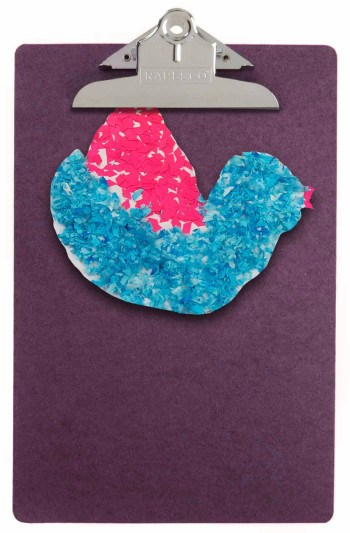
1. CLASSROOM BIRDS

Colorful collage materials add texture and brightness to the beautiful bird designs. Find templates for the bird designs here: Bird Template 1 and Bird Template 2. Each student can make their own unique bird and add it to the overall classroom display of birds! Find out here!
clip9 copy

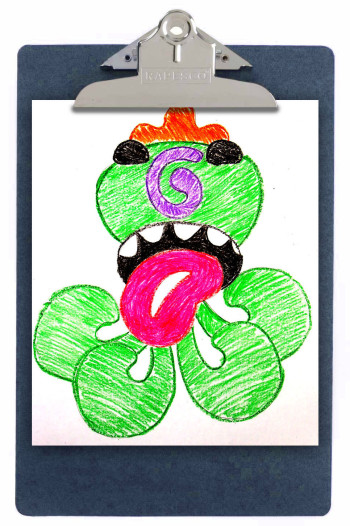
2. SILLY STENCILS FRIENDLY MONSTERS

Grab a handful of Silly Stencils and arrange them to make your very own friendly monster! Any of the stencils can be used as eyes, noses, mouths, legs, bodies and more. Great for exercising dexterity and building image association skills: find out more here!
clip8 copy

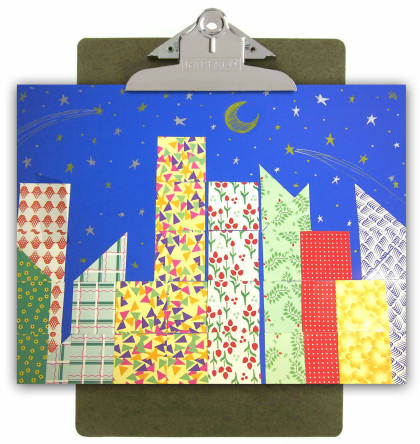
3. QUILT MOSAIC BUILDINGS

Arrange beautiful patterned mosaics to make a gorgeous night scene! Use metallic gold and silver gel pens to add detail to the night sky. Learn more about this project here!
clip7 copy

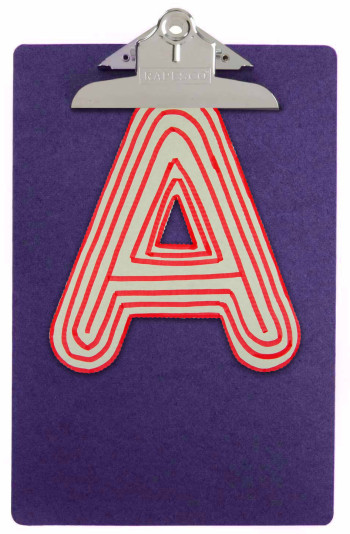
4. ALPHABET TRACING SKILLS

Use our Chipboard Letters to learn about uppercase letters. A great tracing activity that helps encourage image retention through repetition. Try it out!
clip4 copy

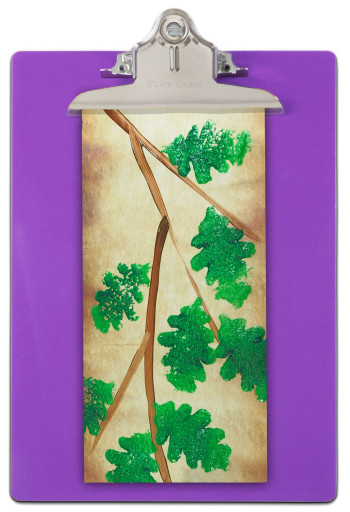
5. ROLLY SCROLLY JAPANESE CALLIGRAPHY ART

Use simple brushstrokes to illustrate branches. Add detail with our Leaf Sponges! See the full tutorial here!
clip2 copy

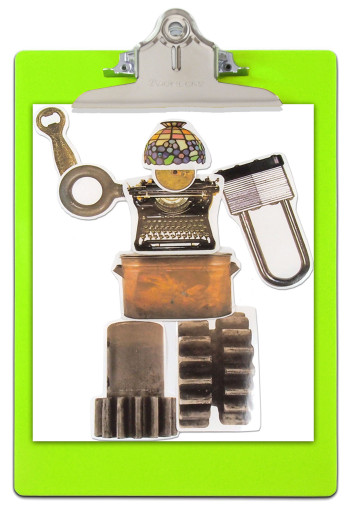
6. JUNK ART ROBOTS

Learn how to put together our Elements Collage pieces to make jivin’ robots! Get inspired to make your own using our instructions. Check it out here!
clip1 copy

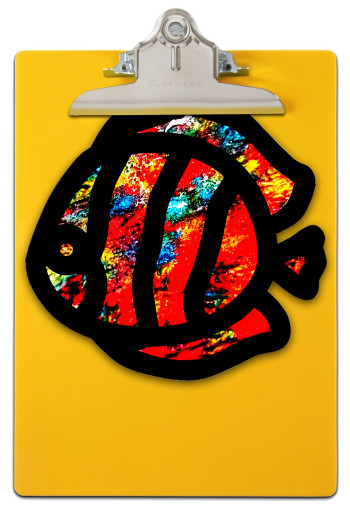
7. CRAYON SHAVING STAINED GLASS

Use crayon melts to create a beautiful stained glass material for our Stained Glass Frames. A great way to recycle old crayon stubs! View the full tutorial!
clip5 copy

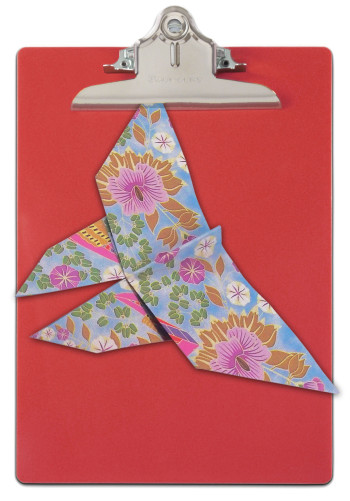
8. ORIGAMI FIGURES

Stuck trying to make sense of valley folds or inside reverse folds? Don’t stress another minute! Check out our detailed YouTube videos that show you precisely how to make a bird, frog, butterfly, boat, crane and fish! We use our R15208 Really Big Origami Paper so you can see every step along the way.
clip3 copy

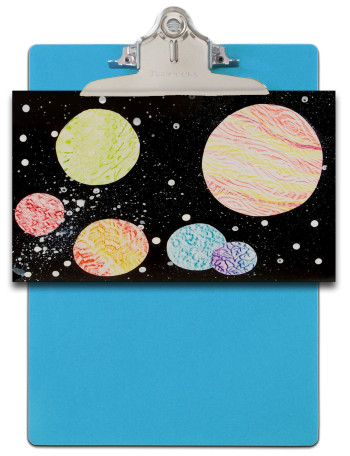
9. RUBBING PLATE PLANETS

Our R5841 Optical Illusion Rubbing Plates were used to add interesting effects to planet cutouts. Paired with a cotton swab-brushed background, these planets look stellar! Take a trip to this space-inspired post!
clip6 copy

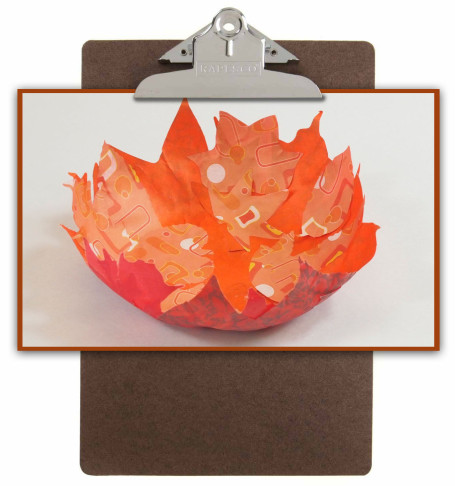
10. PAPER MACHE BOWL

A happy accident this was! I used a bit of glue with our R15335 Spring and Autumn Leaves and draped them over a plastic bowl to make this colorful creation. Learn more about this project here!

Line-08

Thanks for checking out our gallery! We’d love to see some of your artwork! Send us your ideas or photos of projects inspired by our crafts! Send all emails to subscriber@roylco.ca for a chance to be featured in an upcoming blog post. 

Craft Spotlight: Color Diffusing Paper Projects

Feature-Image-colordiffpapercollage

This week’s Craft Spotlight showcases our lovely Color Diffusing Paper products! Check out an amazing selection of our fabric-like paper in a variety of different projects. The Color Diffusing Paper is perfect for exploring concepts like diffusion and color mixing!

This post will introduce you to our Color Diffusing products through specially-made videos! The videos feature detailed methods of incorporating the Color Diffusing projects into your educational art program!

To start, we have our R2442 Color Diffusing Leaves! These leaves are specially die-cut in the shapes of leaves to encourage thinking outside the box with your nature art.

Color the leaves with all the colors of the rainbow! Use liquid watercolor on the leaves then spritz the paper with warm water to diffuse the colors throughout. Tip: Don’t use more than three colors on a single Color Diffusing Paper project. Mixing more colors will run the risk of turning the project muddy!

Next up is our R2440 Color Diffusing Paper Flowers! The flowers inspire the same level of creativity as our leaves, but can serve as an optional classroom decoration.

Explore new color combinations! Try a different color on each petal of the flower.

Finally, check out our R2445 Color Diffusing Butterflies!

In this video, we used markers to color in our butterflies. When you spray water onto the butterflies, the marker ink will spread throughout the butterfly cutout.

If you’ve used one of our products, send us photos of how you’ve incorporated it into your arts/crafts routine to subscriber@roylco.ca! We’d love to hear from you! 

Line-12

Doris of Library Arts makes fireflies with our Tie Dye Paper!

Firefly finished title

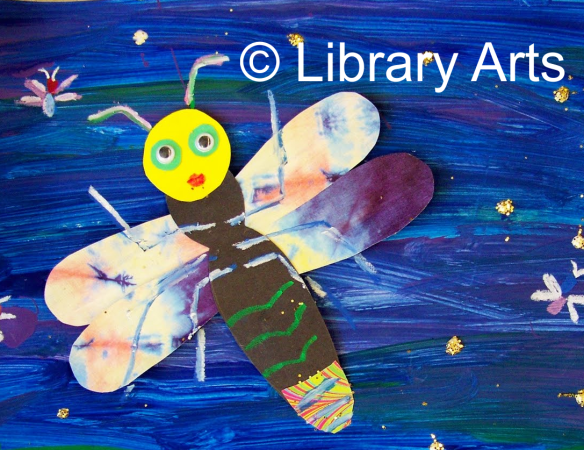
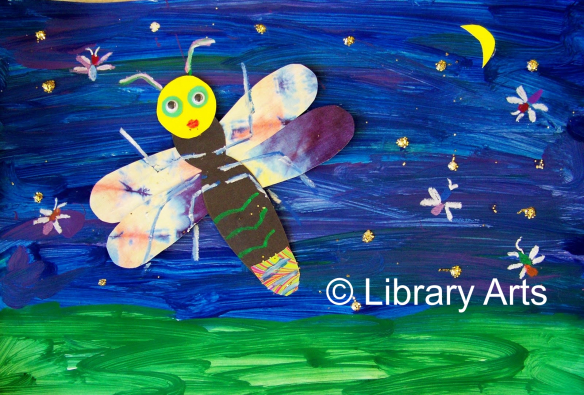
These cute fireflies are made with our R15263 Tie Dye Paper. Doris from Library Arts shows you how to put together these beauties, inspired by Eric Carle’s classic children’s book, “The Lonely Firefly.”

Doris posted this craft on the Library Arts website on May 21st, 2010 and can be viewed here.

The fireflies are made with tongue depressor sticks, craft paper and some paint. Doris shows you her step-by-step with accompanying instructions. The first step is easy to do; make a wash of deep blue across a paper canvas.

firefly front2

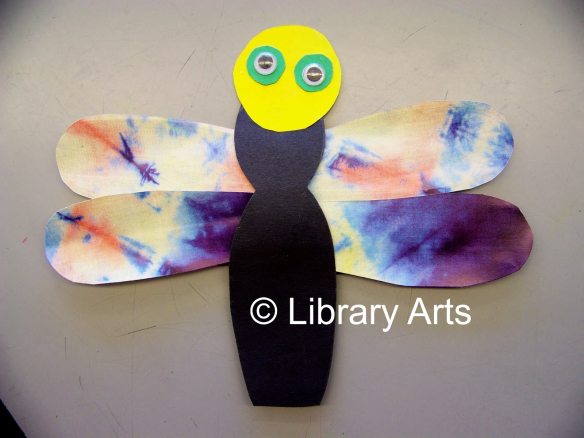
You will need 3 tongue depressors per firefly. Cut out the wings from the R15263 Tie Dye Paper and glue onto the tongue depressors. Make the details with paint.

Check out the full instructions at the Library Arts website!

Firefly finished

How beautiful!!

Thanks to Doris for this lovely post!

Images and original post © Doris Benter.

This is the last day to VOTE FOR US at the Martha Stewart American Made contest!!

This post was not sponsored for a review. At LittleFingersBigArt, our mission is to present to our readers and viewers the newest and most creative craft ideas that fans of Roylco have made on their own. Our goal is to allow you and other educators and parents to reuse our products in fun ways so that children always get the best educational experience from them!

We’d love to see more ideas like this one! If you’ve got a brilliant craft idea or have made a version of one of our crafts that you would like to share with us, send an email to subscriber@roylco.ca with photos, descriptions or a link to your work. We will create a feature post and link back to you with full credit. We’d love to hear from you!

Line-15

Little Fingers Big Art just received the Versatile Blogger Award!!

versatile-blogger-award

Thank you so much to our huge fan, OntheUpCycle, who just recently bestowed us with the Versatile Blogger Award! Learn more about the award HERE. You can check out her amazing projects at ontheupcycle.wordpress.com!

In order to receive the reward, LittleFingersBigArt must participate in the rules required by the status of this award. They are as follows:

1. Display the Award Certificate on your blog. CHECK!

2. Announce your win with a post and thank the blogger who nominated you. CHECK!

3. Present 15 deserving bloggers with the award. SEE BELOW!

4. Link your nominees in the post and let them know of their nomination with a comment. CHECK!

5. Post 7 interesting things about yourself. CHECK!

I want to first honour several of our favorite bloggers with the Versatile Blogger Award. Please check out some of these incredible websites as they strive to give the best content and interact with their fellow bloggers with caring dedication.

Drumroll, please….

1. Squarehead Teachers

2. ArtwithMsK

3. CraftyStaci

4. PeaBea

5. Crafty Madre

6. Crafted in Carhartt

7. Franciful Arts

8. Make Something Mondays

9. Nerd in the Brain

10. Florence and Freddie

11. DaniellaJoe

12. Mummy of Many Talents

13. Craft and Repeat

14. 2 Craft and 2 Create

15. Crayon Box Chronicles

Now onto 7 interesting things about Little Fingers Big Art:

1. The creative folks at Roylco began this website exactly ONE YEAR ago! We’ve made it so far with the help of our favorite crafty fans who always make us feel like our work is worthwhile. Look forward to this week’s Birthday Post!! Check back for more details!

2. The content for Little Fingers Big Art is written in our Canadian office in Waterloo, Ontario. If you would like to get in touch with us about sponsoring for upcoming arts and crafts events, please drop us a line!

3. Here at Roylco, we have a huge manufacturing plant that assists us in keeping our products domestic, affordable and, above all, high quality.

4. This past year, Roylco hosted a 3 day Summer Art Camp for children ages 3-10. We had a blast with our little crafters who let their creativity shine with our versatile products. Stay tuned every Monday for our special Craft Spotlight posts, where we highlight the best products with detailed videos and high resolution photos of our Art Camp exploits! We’ll be updating with more information about Summer Art Camp 2014!

5. Roylco works closely with local organizations such as art galleries, museums and libraries, AND hosts workshops at Early Learning Centers across the province! To learn more about our support or to book a workshop with us, please send an email to subscriber@roylco.ca. You can also visit THIS PAGE for more information!

6. Our ideas are usually produced in our art room, where bundles of materials and supplies are kept for inspiring new products and crafty creations!

7. Finally, Little Fingers Big Art is climbing the ranks in the Martha Stewart American Made contest–please visit THIS page for more information on how to vote for us! We appreciate any votes we get.

Thanks again to On the Upcycle for her award. Happy blogging!

Line-19

Craft Spotlight: Bunting Flags

Feature-Image-buntingflag

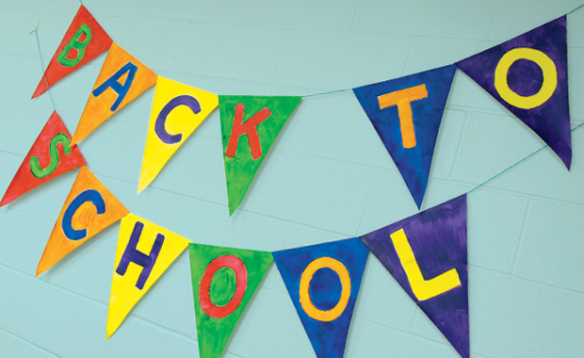
Welcome to our first Craft Spotlight post! These posts will be published every Monday to showcase our favorite craft projects developed and manufactured domestically by Roylco! This week’s feature craft is R22046 Bunting Flags! 

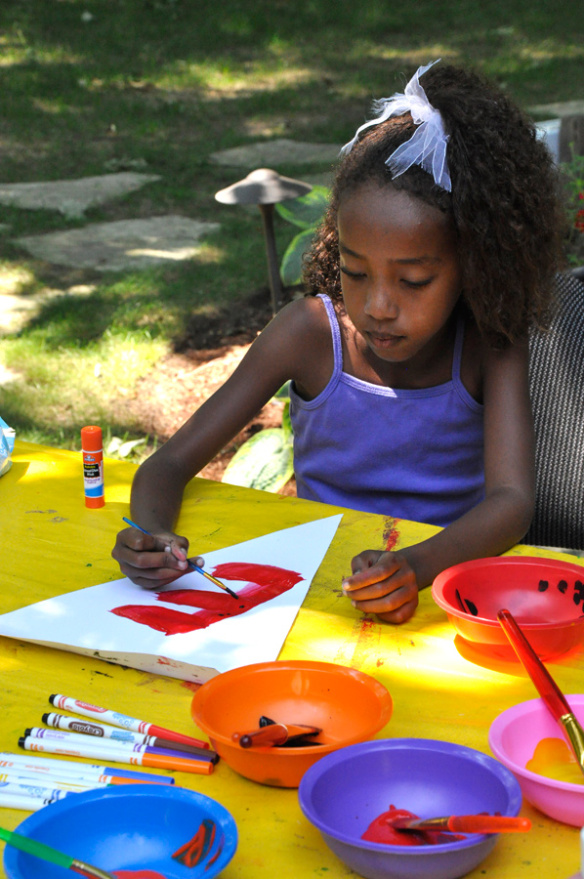
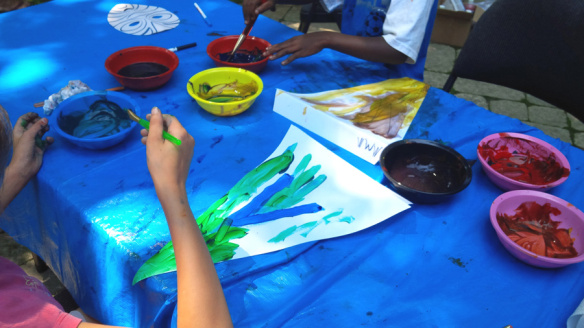
Bunting Flags are cut from heavier paper and are great for painting on! Use regular tempera paint for coloring the flags. Welcome back your class with a fun decoration or get the entire class to work on one together!

_DSC0242

We wrote the words “2013 Summer Art Camp” across our Bunting Flags during the Roylco Art Camp, and got some of our young crafters to paint all the letters of the alphabet.

IMG_00000566

Use the flags for making classroom decorations! Write one letter/number per Bunting Flag.

DSC05433

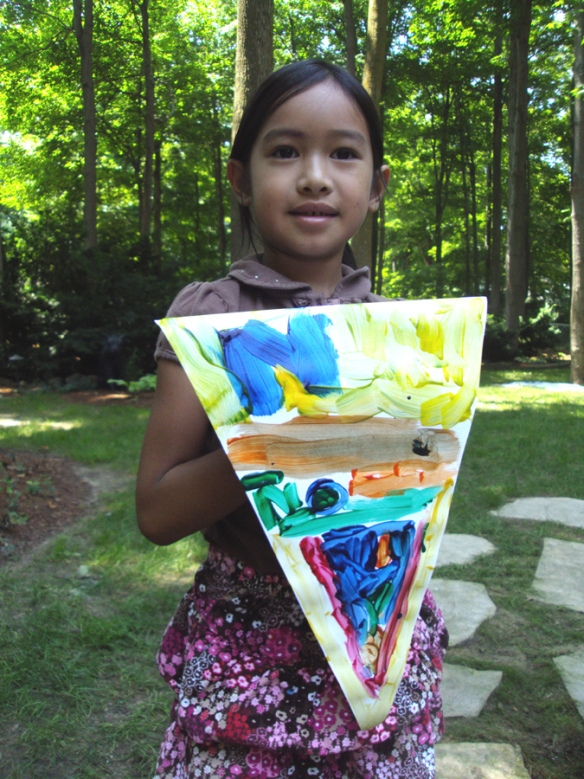
Some of our crafters even drew scenes and combined several colors together. This is a great way to explore new ways of displaying students’ artwork! All of your students’ art can be hung up along a single wall like a bunting flag line!

Line-10

Show us your students’ artwork! Hang up your students’ painted Bunting Flag artwork and send us a photo of what it looks like in your classroom. We will publish a post on your work and show the rest of the arts and crafts education world! Send us an email to subscriber@roylco.ca!