Take a tour through our virtual Art Gallery!!

feature image- clipboardgallery

Welcome to the Little Fingers Big Art gallery wrap-up! Today, we’re going to take a trip down memory lane and revisit some of our favorite crafts of the past year. PLUS: I’ll show you a unique way to display your students’ artwork in the classroom! 

I’ve taken our favorite top ten crafts and compiled them below in honor of Little Finger Big Art blog’s first year on the blogosphere! Just click on any of the images below to get linked directly to the craft post.

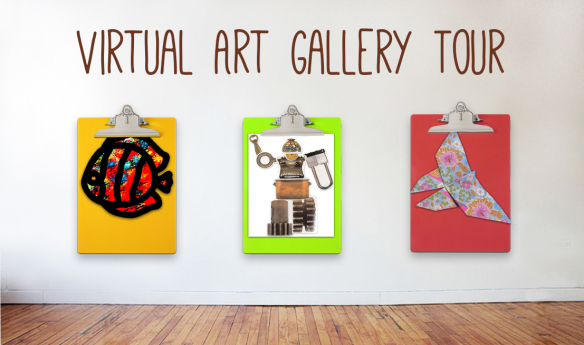
TIP: To display your students’ artwork, purchase colorful clipboards from any Dollar store! Use one clipboard per student. Hang the clipboards from a wall. If you are unable to drill nails into walls, consider placing adhesive hooks to the walls and hanging the clipboards off those. You can buy adhesive hooks at any department store nearby you!

When children have finished a piece of art, they can clip their art up to their individual clipboard. Send old artwork home with students to add newer artwork to the clipboard art gallery! Children can update their clipboard galleries anytime they finish a 2D illustration.

View our top-ten favorites below!

clip10 copy

1. CLASSROOM BIRDS

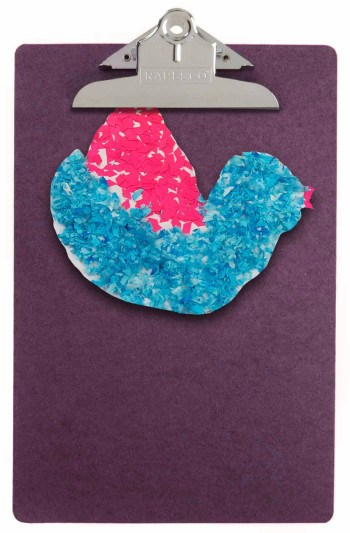
Colorful collage materials add texture and brightness to the beautiful bird designs. Find templates for the bird designs here: Bird Template 1 and Bird Template 2. Each student can make their own unique bird and add it to the overall classroom display of birds! Find out here!

clip9 copy

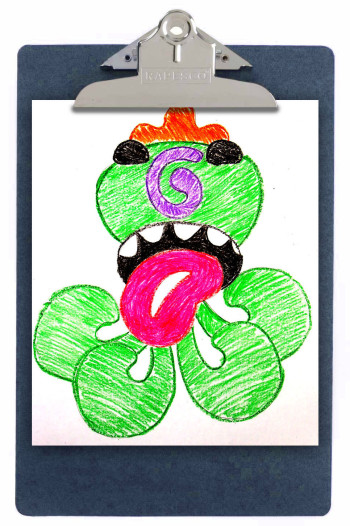
2. SILLY STENCILS FRIENDLY MONSTERS

Grab a handful of Silly Stencils and arrange them to make your very own friendly monster! Any of the stencils can be used as eyes, noses, mouths, legs, bodies and more. Great for exercising dexterity and building image association skills: find out more here!

clip8 copy

3. QUILT MOSAIC BUILDINGS

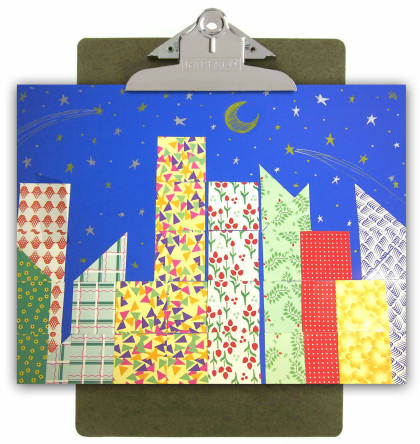
Arrange beautiful patterned mosaics to make a gorgeous night scene! Use metallic gold and silver gel pens to add detail to the night sky. Learn more about this project here!

clip7 copy

4. ALPHABET TRACING SKILLS

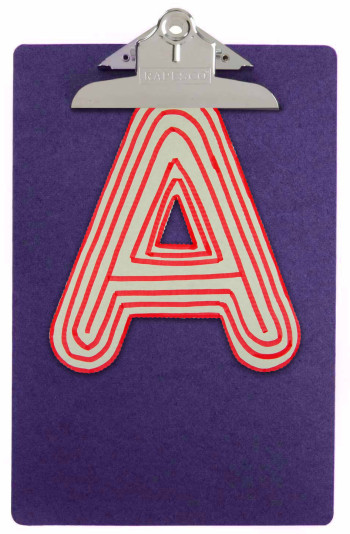
Use our Chipboard Letters to learn about uppercase letters. A great tracing activity that helps encourage image retention through repetition. Try it out!

clip4 copy

5. ROLLY SCROLLY JAPANESE CALLIGRAPHY ART

Use simple brushstrokes to illustrate branches. Add detail with our Leaf Sponges! See the full tutorial here!

clip2 copy

6. JUNK ART ROBOTS

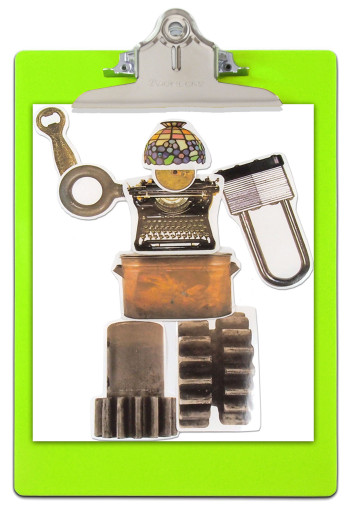
Learn how to put together our Elements Collage pieces to make jivin’ robots! Get inspired to make your own using our instructions. Check it out here!

clip1 copy

7. CRAYON SHAVING STAINED GLASS

Use crayon melts to create a beautiful stained glass material for our Stained Glass Frames. A great way to recycle old crayon stubs! View the full tutorial!

clip5 copy

8. ORIGAMI FIGURES

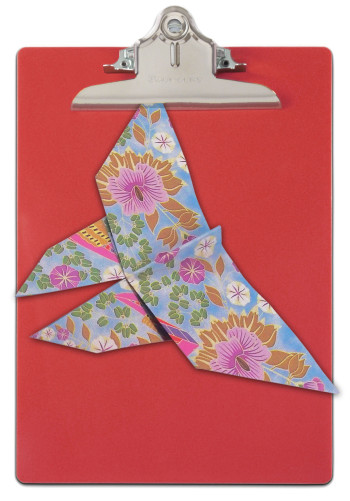
Stuck trying to make sense of valley folds or inside reverse folds? Don’t stress another minute! Check out our detailed YouTube videos that show you precisely how to make a bird, frog, butterfly, boat, crane and fish! We use our R15208 Really Big Origami Paper so you can see every step along the way.

clip3 copy

9. RUBBING PLATE PLANETS

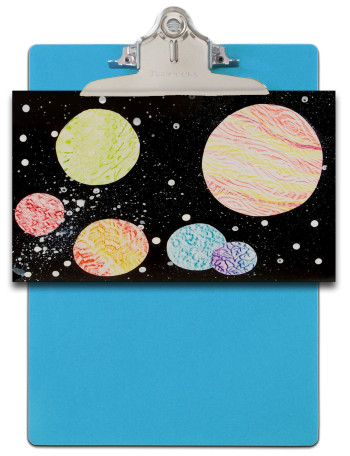
Our R5841 Optical Illusion Rubbing Plates were used to add interesting effects to planet cutouts. Paired with a cotton swab-brushed background, these planets look stellar! Take a trip to this space-inspired post!

clip6 copy

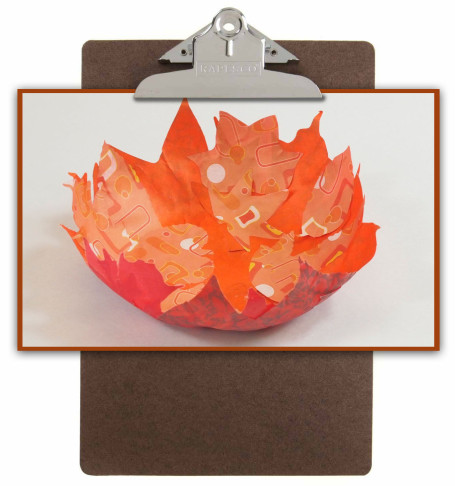
10. PAPER MACHE BOWL

A happy accident this was! I used a bit of glue with our R15335 Spring and Autumn Leaves and draped them over a plastic bowl to make this colorful creation. Learn more about this project here!

Line-08

Thanks for checking out our gallery! We’d love to see some of your artwork! Send us your ideas or photos of projects inspired by our crafts! Send all emails to subscriber@roylco.ca for a chance to be featured in an upcoming blog post. 

Little Fingers Big Art Celebrates 1st Birthday!!

Feature-Image-BirthdayHats

What better way to celebrate the 1st birthday of Little Fingers Big Art than to feature a craft post on how to make gorgeous birthday hats!? Complete with templates for the hats and accessories, this post marks our first year on the blogosphere and provides teachers and educators with a fun way to celebrate each students’ birthday in the upcoming school year. For this craft, I used our R15263 Tie Dye Paper to add a pop of color and style to the traditional birthday hat designs.

P.S. Don’t forget to VOTE FOR US at the Martha Stewart American Made contest!

Age: 5+

Duration: 15-20 minutes

You’ll Need:

• R15263 Tie Dye Paper

• Party Hat Template

• Party Hat Decoration Template

• Scissors

• Tape

• Scrapbooking Scissors

• Pencil

Line-21

Happy Birthday to our blog! I can’t believe how fast the time has flown by, but it’s just in time for the start of the next school year.

This year, we are striving to give you only the very best aspects of our online content–originality, quality, educational and social relevance, and inspiration for better and more exciting projects!

Today’s craft challenge is featured below the project instructions!

OLYMPUS DIGITAL CAMERA

First, assemble all your materials. You will need to grab the templates from the materials listed above. Print out your templates on 8½ x 11″ (21.5 x 28 cm) sheet of paper. Students will exercise plenty of fine motor skills as they cut out the various pieces for this craft!

OLYMPUS DIGITAL CAMERA

Start with your hat template. Place it onto a sheet of R15263 Tie Dye Paper and trace the template outline onto the sheet.

OLYMPUS DIGITAL CAMERA

Cut out the hat outline from the R15263 Tie Dye Paper.

OLYMPUS DIGITAL CAMERA

Roll the hat cutout into a cone shape. The two flat sides of the cutout should slightly overlap as you roll it. Tape the edges together.

OLYMPUS DIGITAL CAMERA

Next you will need to make the decorative edge for the hat. Use scalloped scrapbooking scissors to cut about ¾” (2 cm) up into the brim of the hat at intervals. Make the tabs wide or thin depending on your preference. Fold out each tab as you cut.

OLYMPUS DIGITAL CAMERA

This is what the brim of the hat should look like. It’s almost ready for celebrating!

OLYMPUS DIGITAL CAMERA

To make the decorative tassel at the top of the hat, cut out a strip of R15263 Tie Dye Paper, about 2 x 4″ (5 x 10 cm) wide.

OLYMPUS DIGITAL CAMERA

Roll the paper strip into a tight cylinder. Tape the bottom edge of the tassel to hold it in place.

OLYMPUS DIGITAL CAMERA

Slip the taped end of the tassel into the hat. You can secure it to the hat with an additional strip of tape. Cut several times straight into the top edge to about halfway down.

OLYMPUS DIGITAL CAMERA

Spread the cut portions apart and curl outwards using the blunt side of a scissor blade. The tassel adds a bit of a festive edge to the birthday hat. What other kinds of tassel ideas can you come up with?

OLYMPUS DIGITAL CAMERA

Print out the separate template for the birthday hat accessories. You can make butterflies, stars, hearts and more to decorate the hat! Each template comes in two different sizes to give your students the best customizing options available. Download it here: Party Hat Decoration Template!

Cut out the templates for the accessories. You’ll notice that the templates only come in halves. The dotted line indicates the exact middle of the whole shape. This makes it easier for students to cut the shapes out from the R15263 Tie Dye Paper.

OLYMPUS DIGITAL CAMERA

Fold a sheet of R15263 Tie Dye Paper in half. Place your templates’ dotted lines along the fold line. Trace the outlines onto the R15263 Tie Dye Paper.

OLYMPUS DIGITAL CAMERA

Cut the shapes out along the traced line. When you are finished, unfold the shapes to reveal your assortment of decorations for the birthday hat!

OLYMPUS DIGITAL CAMERA

Tape the back of each accessory onto the hat. Vary the angles that you place the accessories, or use a different sheet of the R15263 Tie Dye Paper to add different colors to the hat.

OLYMPUS DIGITAL CAMERA

Hole punch through opposite sides of the hat. Attach pipe cleaner to either end. When the hat is ready to be worn, secure the opposite ends of the pipe cleaners together to hold in place.

OLYMPUS DIGITAL CAMERA

CRAFT CHALLENGE:

Come up with your own accessories to add to your birthday hats! What are some interesting and unique ways to design your accessories? Replace the tassel at the top of the hat with materials such as streamers or beaded string! Send us photos of your work!

Don’t forget to VOTE FOR US at Martha Stewart’s American Made Contest!

Line-21

I recommend that every student make one birthday hat for her or himself at the beginning of the year. Keep the hats somewhere safe where they won’t get ruined. On the day that particular students are celebrating their birthdays, get them to wear their own hat throughout the day! Send us photos of your work to subscriber@roylco.ca for a chance to be featured in one of our upcoming posts! We’d love to hear your comments, questions or suggestions!