Spotlight On: Curlicue Rods!

coiled pile.jpg

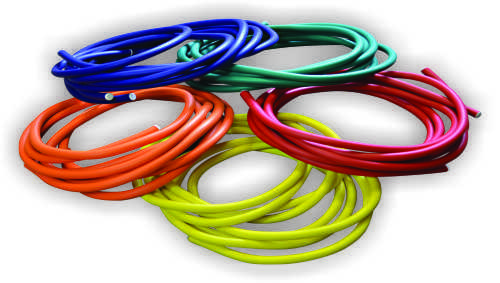
Weave, build and make shapes with these squishy, brightly colored sculpting rods!

The strands come in five vibrant colors that are perfect for color-coordinating activities.  Use indoors to make giant grids for rainy day math and sorting activities. Take them outside and make mazes, grids and play environments. Use inside to create play spaces! Each squishy strand is 3 meters (almost 10’) long to encourage gross motor development.

bridge with girl.jpg

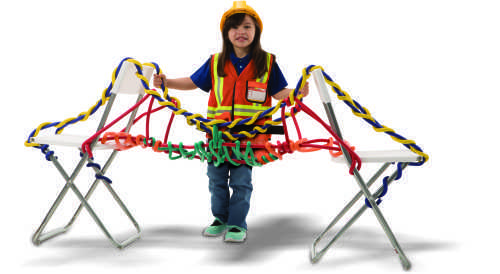
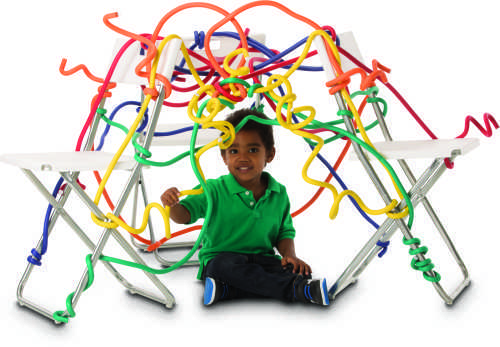
The best part of rainy afternoons is making a fort! The length of these jumbo rods and their flexible cores make them the perfect material to string across chairs or book shelves to make forts. Each strand stays bent in place but pulls off easily. Curl the loose ends around something cylindrical to create adorable curlicue decorations for your fort!

fort with boy.jpg

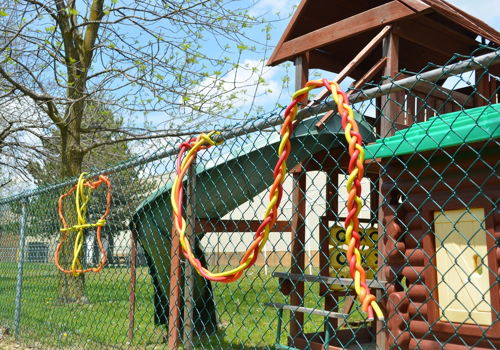
The bright colors of the strands are clearly visible inside and outside! Combine both fine and gross motor skills by challenging kids to weave the strands through a chain-link fence. This activity captivates kids and the results are beautiful!

60551 Curlicue Rods - Outdoors On Fence.jpg

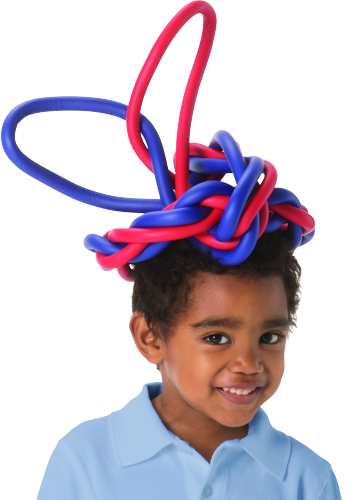
Twist one or two rods around themselves to create a colorful, funky hat!

boy with hat.jpg

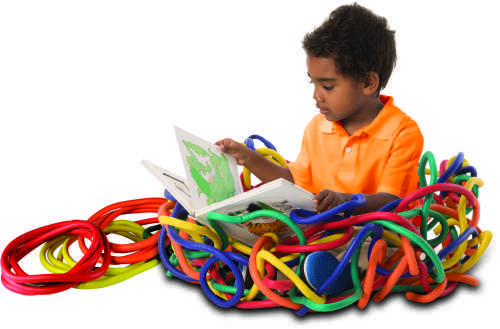
Need a brand-new kind of reading nook in your classroom? Simply twist and weave the long rods together to create a reading nest! Add a blanket or a pillow for comfort, and encourage early literacy.

nest with boy and book 1.jpg

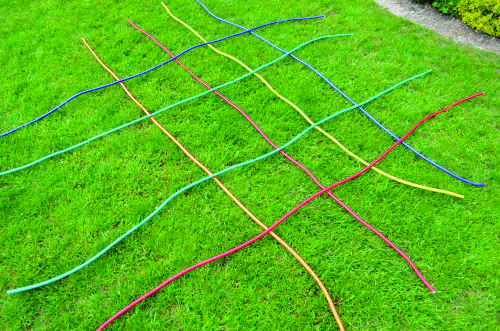
Whether indoor or outdoor these strands make the perfect foundation for big floor grids. Use for games, sorting, patterning and active learning!

grid on grass.jpg

Line-01

Like us on FacebookShare this post with your friends, or Subscribe to this blog today to receive original craft project updates every week!

Spotlight On: Number Dolls

Alldolls and signs

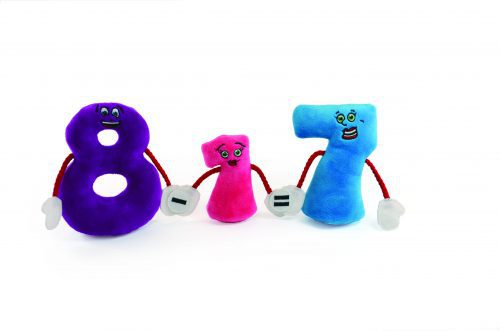
Make math cuddly and explore early numeracy with these brightly colored, size-scaled dolls!

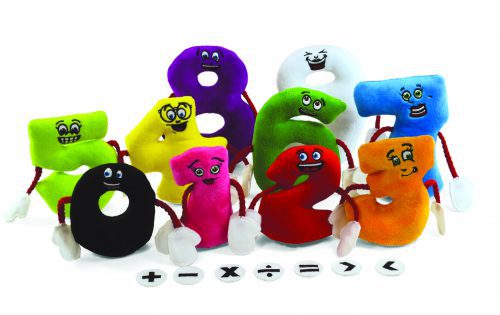
Even the most reluctant learner will want to engage with these plush, smiling dolls. Ranging in size from a 3 1/2″ doll in the shape of a 1 to a 6 1/4″ doll shaped like a 9, the numeric value of each number is clearly visible in relation to the other numbers. Line all ten numbers up in order and they create a mathematical rainbow!

The firm base of each number allows the dolls to stand on their own. Each doll loves to hold hands with their friends and Velcro™ lets them do just that! We have also included Velcro™ math signs that let students create their favorite math facts in 3D. Early numeracy students can use the < and > signs to demonstrate an understanding of relative value. Math facts can seem abstract and difficult to comprehend. These dolls make math facts concrete!

8-1 image

Put students on the path to STEAM (Science, Technology, Engineering, Art and Math) excellence with plush equations and smiling number pals!


Line-03

Like us on FacebookShare this post with your friends, or Subscribe to this blog today to receive original craft project updates every week!


Junior Heart Paint Pipettes

R54470-A

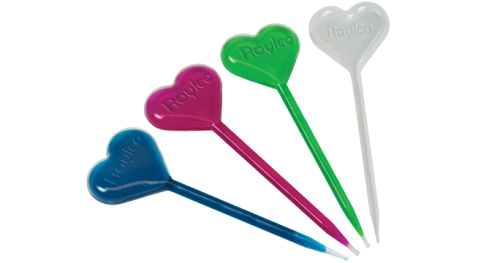
Use our Junior Heart Paint Pipettes and love your art! The pipettes have heart-shaped bulbs at the top that will encourage children to practice flexing and squeezing their fingers.

Mix a few drops of concentrated watercolor paint or food coloring with about 2 cups of warm water. Squeeze the bulb to expel all the air from the inside and then dip the nozzle into a bowl of watercolor paint. Release the bulb. The inner chamber will fill with paint.

Squeeze the bulb to press out the paint.

R54470-B

Here are some ideas on how to use the Paint Pipettes!

  • Make interesting splatter art.
  • Mix up watercolor paint with a dash of glitter. Pipette the mixture onto a sheet of Color Diffusing Paper. Let dry overnight, then in the morning, get a look at your fantastic glitter painting!
  • Make a gel heart! Mix up ¼ cup cold water to 1 packet of Knox® Gelatine. Add ¼ cup boiling water and stir until dissolved. Use the pipette to draw in some of the mixture. Let set at room temperature or place in the fridge for faster setting times. Once the gel is set, use a pair of scissors to cut the pipette open. Peel away the sides to reveal your gel heart! Tip: Add in a bit of food coloring to the mixture before you let it set.

Looking for more ideas? Check out our YouTube page for more Roylco videos!

Line-09

Like us on FacebookShare this post with your friends, or Subscribe to this blog today to receive original craft project updates every week!

Learn to Tie Your Shoes

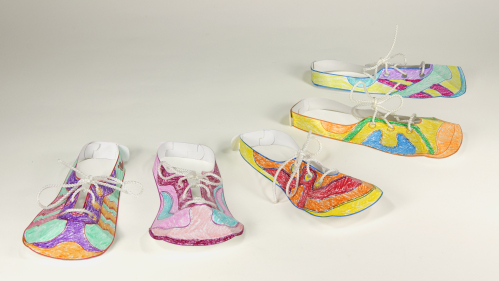
43005 Learn to Tie Shoe Group

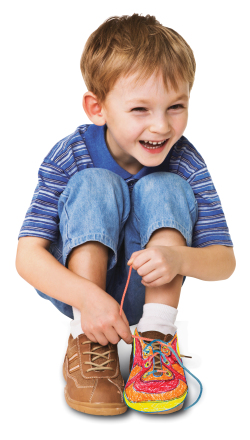
Teach an essential skill while developing children’s dexterity in no time with our fun
craft! Give one pair of card shoes to each student. Students can color in the card shoes with crayons or pencil crayons. Gently press the card on both of the score lines around the toe area to give the shoe dimension. To secure the shoe to a student’s foot, connect the two
straps at the heel of the card shoe. Align both sets of slots so that they are parallel. Tuck the slots into each other then tug the slots outward to secure.

Tie up the card shoes with laces! If you wish to help students who may still be learning their right from left, dip one end of the laces into fabric paint or color each lace end with a different color of permanent marker. Perfect for practicing shoelace tying skills! Use this technique to make the laces easy to differentiate.

To lace up the shoes, fold the lace in half. String the lace ends through the pair of holes near the toe. Pull the laces until you have an equal amount on either end.

Cross the laces and insert each lace end into the opposite hole. Continue through each pair of holes by crossing and alternating.

Child try to tie shoelaces

Start with a rhyme or a story to put a visual image in your students’ minds. This will allow them to connect each step of tying their own shoelaces while progressing through each new part in the lyric. When they memorize the rhyme or story, students will find it easier to remember each step. Then, begin by saying the following lines aloud. Each verse indicates an action for tying the shoelaces.

[For the base knot]
Cross your laces, 1-2-3
Put one end underneath
Wrap it round and pull it tight
Great! You got that knot all right!
[For the loops]
Hold them up then fold them down
Cross those loops then twist one ‘round
Push through the loop then pull them tight,
Hooray! Now your laces are tied!

Alternatively, read out a simple story to your students. This will help them connect events in the story to the actions they make while tying their shoes.

Start with the tree’s roots. They grow in many different ways.
Sometimes they cross [cross laces].
Sometimes they twist around [twist the right lace around the left lace].
The tree roots are in a knot [pull knot to tighten].
Now make one loop. The loop is a tree. The other lace is a squirrel.
The squirrel runs fast around the tree and jumps through the hole! [twist the lace around the loop then pull the middle of the lace through the loop].
Now pull the two loops to make the tree bigger!
Hooray! You’ve tied your shoelaces!

Repeat the rhyme or the story several times to help children get a feel for correctly tying their shoelaces. Once they have memorized each lyric they can try tying their shoes on their own. Be supportive as you go along. Repeat the steps as many times as needed to help children understand shoe tying.Line-20

Like us on FacebookShare this post with your friends, or Subscribe to this blog today to receive original craft project updates every week!

Accordion Critters

R10300-A

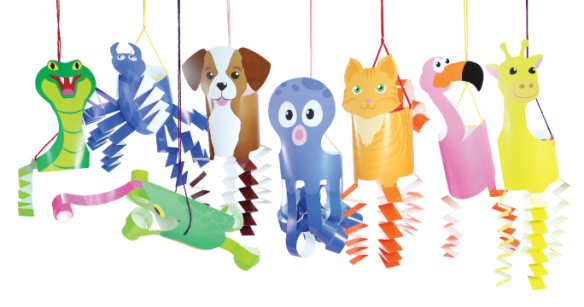
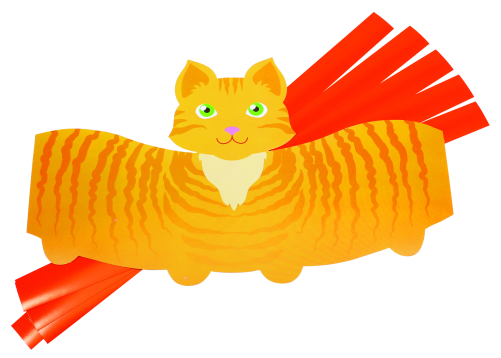
Bounce around with R10300 Accordion Critters! Use the full color animal projects to teach children how to fold paper accordion style—an essential exercise for developing fine motor skills.

Paste the finished accordion-folded legs onto the cute animal characters and string them up to use as puppets! Encourage creative thinking with dramatic play, literacy, basic lessons in biology and physical education.
10300-Illustration-01

The Accordion Critters are printed in full color and simply need to be popped out of the paper backing. There are 12 different kinds of animals. Pick a cat, dog, snake, frog, elephant, pig, spider, octopus, monkey, sheep, flamingo or giraffe. Each animal has different indications for where the paper strips go.

Before assembling the animals, exercise your students’ understanding by asking how many legs each animal has. They can use the markers on the animal bodies to determine how many legs are required, or they can guess. Not all of the animals in the pack have the same number of legs. In fact, the animals with the most legs are the octopus and spider! Give the octopus and spider to older students, or partner two students together to complete these animals.
10300-Illustration-02

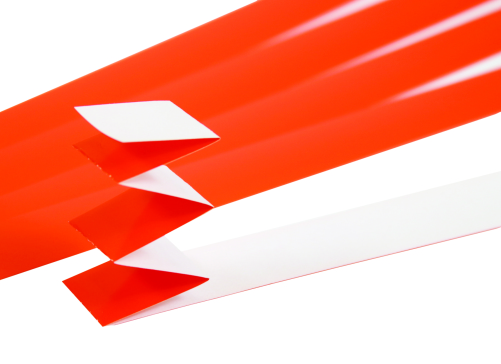
Start with the separate pile of paper strips. The paper strip colors coordinate with the color of the critters’ body. Accordion fold the strips or combine with other colors to make interesting braid patterns. Note: We suggest that younger students use the basic accordion
folding technique to make their Accordion Critter legs. Older students can exercise fine motor skills while adding a new paper folding technique to their repertoire!
To accordion fold the legs, start at the top. Fold the edge of the paper strip down about 1” (2 cm) then flip the strip to the opposite side and fold down 1” (2 cm) again. Continue doing this all the way down the length of the paper strip.
10300-Illustration-03

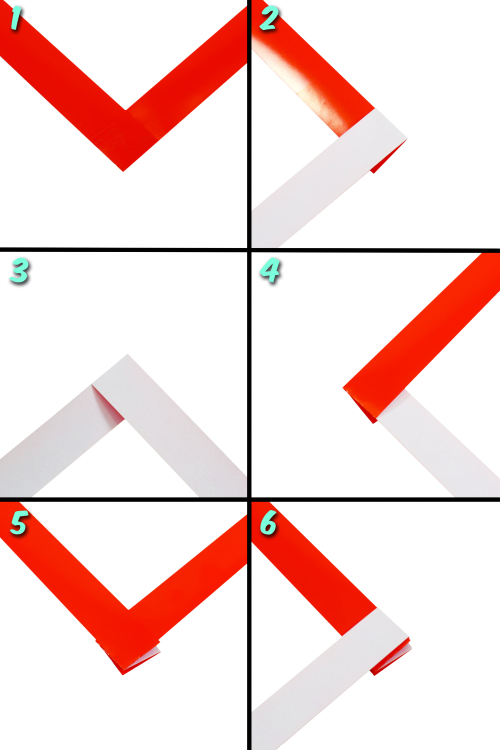
To braid the strips, place one paper strip face down on a flat surface. Place a second paper strip on top of the previous strip, of a 90° angle to the top edge. Flip the second paper strip so that it faces upwards. Tape the two strips together. Fold the bottom paper strip up and over the top strip so that it goes in the opposite direction. Repeat for the second paper strip. Continue folding the paper strips up and over each other all the way to the end. At the very end of the braid, tape the ends together to secure the entire braid. If you braid two different colors, you’ll notice that the colors alternate throughout
the braid.
10300-Illustration-04

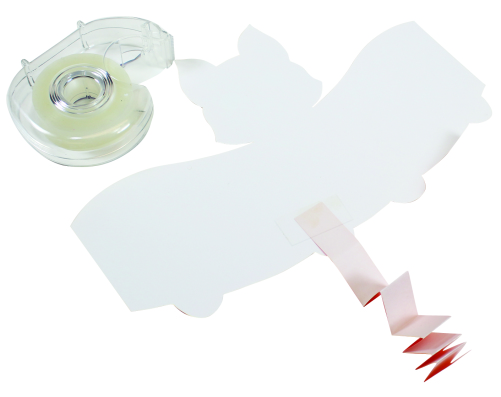
Lay the Accordion Critter on a flat surface and attach the legs onto the leg base with tape. Hold the Accordion Critter up at its sides. Notice the two side edges are flat and line up when you curve the body. Join the two sides together to make the Accordion Critter body curl into a cylinder. Secure with tape. Add tongues to the frog and snake. You can curl or accordion-fold the tongue.
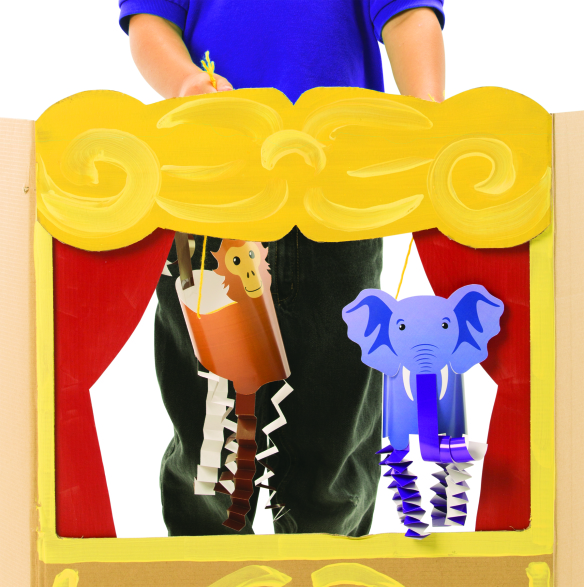
10300-Illustration-05

To finish the Accordion Critter, cut a length of string to hang the Critter. Tie the ends of the string onto the pre-punched holes at the sides of the Accordion Critter. Children can grasp the middle of the string to hold the Accordion Critter up like a puppet. You can additionally hang the Critter off a ledge or from the ceiling using a hook or piece of tape. Accordion Critters are fun to play with! Exercise both fine and gross motor skills with paper folding and with puppetry!

Line-07

Like us on FacebookShare this post with your friends, or Subscribe to this blog today to receive original craft project updates every week!

R10210 Action Shapes

R10210-B

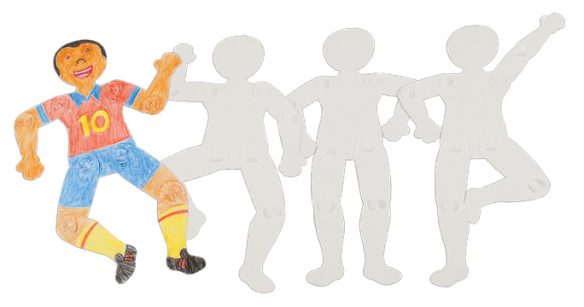
Lights! Camera! Action! These moving people shapes are wonderful resources to use for art projects, and amateur stop-motion videos. Action Shapes are made from sturdy card so that they will hold their shape while you position the characters’ arms and legs. A super-simple design for the pivoting joints helps make the characters easy to assemble and easy to move, too!

R10210-C

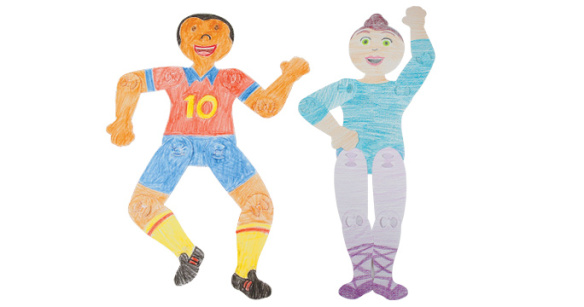
Color in and draw details on the character to make self-portraits or develop a unique character. Students may find that having a blank project in front of them seems a little daunting. There are so many ways to decorate the project, but which way is the best way? The Action Shape is made of sturdy card, so you can trace the shape on paper and plan your project.

10210-Illustration-02

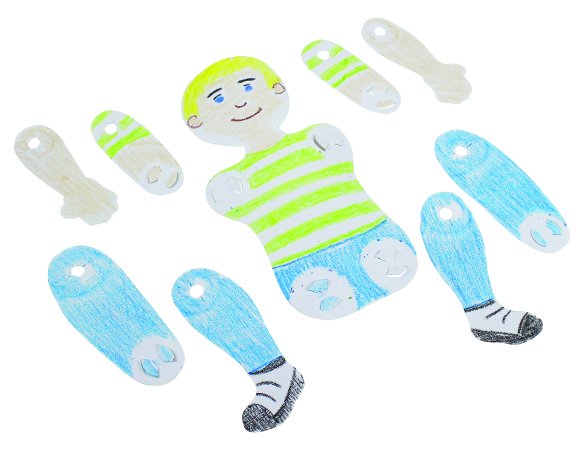
The Action Shapes characters feature 9 parts: the head, neck and torso, two upper arms, two forearms, two thighs and two lower legs. All of the paired parts connect to each other using pivot points. These pivot points are formed by special fins on certain pieces that go through pivot holes in corresponding pieces. In order to make decorating the Action Shapes easier, assemble the pieces together after you finished coloring them.

Note: Keep track of all your pieces! There are two larger thigh pieces that can easily be confused with the upper arm pieces. If needed, write the location of each piece on the back. You can even specify “left” or “right” depending on how you wish to organize them.

To trace, lay the main body piece of the character onto a sheet of drawing paper. Hold the character steady with one hand while using the other hand to trace around the outline of the character. Use the traced outline as a guide for experimenting with different “looks” for your character. Illustrate different clothes on the character with a pencil; add in a happy face or a surprised face; or, try on different hairstyles. Then, color it in! If you need to re-trace your Action Shapes design, use another sheet of paper and draw a different appearance. Find out which look is best for your character. Once you have chosen your favorite “look,” use the illustration as a reference to draw on the details.

First, use pencil to lightly draw in the details on your Action Shapes character. Use crayons or pencil crayons to add color. The Action Shapes characters are designed on special blank card that accentuate crayon and pencil crayon colors. Tip: Some students find it easier to outline the different parts of the character with a crayon before coloring in the entire area. Use this technique to guide students towards coloring the whole surface area of the Action Shapes before moving on.

10210-Illustration-03

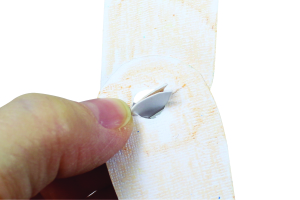
Assemble your Action Shape by locating all the “fins” at each of the joints. The fins are designed to slip through special pivot holes in select pieces that go on top. Bend the fins up from the backing and fold in towards the middle. Do not tear or remove the fins.

10210-Illustration-03B

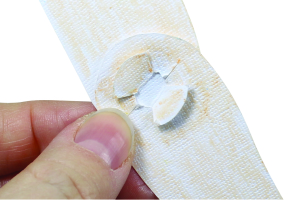
Next, pop out the pivot hole. Place the piece with the fins underneath the piece with the pivot hole. Pinch the fins together and slide through the notches on either side of the pivot hole. Once the fins are through, fan them out flat over the pivot hole.

Animation

Now you can rotate the pieces! This will create movement with your Action Shape character. Look out for our next blog post that will show you how to create your very own stop-motion animation video!

Curriculum Connections

  • Encourage self-awareness through “All About Me” crafts
  • Build moviemaking vocabulary
  • Create storyboards and scripts
  • Develop fine motor skills
  • Integrate digital learning with multimedia art
  • Generate understanding about character poses
  • Exercise gross motor skills through fun posing activities
  • Discover the early history of film and stop-motion animation
  • Brainstorm activities for characters to perform
  • Encourage critical thinking
  • List action verbs for literacy

Line-09

Like us on FacebookShare this post with your friends, or Subscribe to this blog today to receive original craft project updates every week!

NAEYC 2015 – A Great Turnout!

naeyc 2015

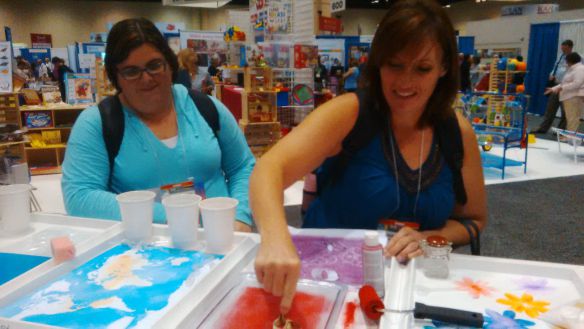
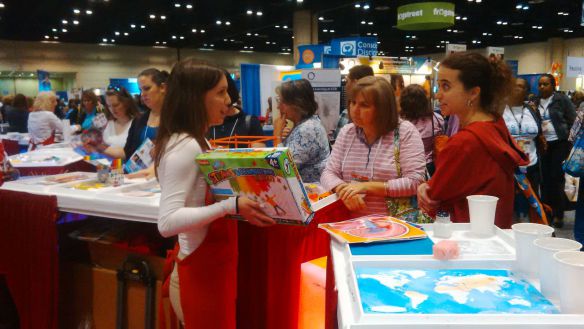
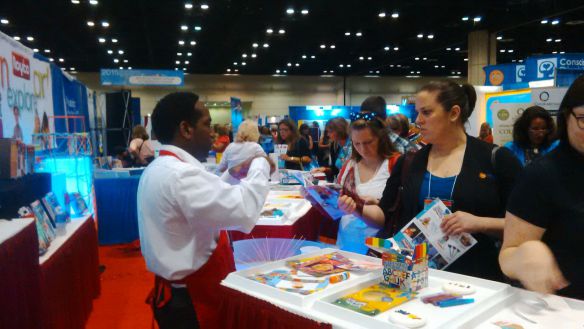
This year, the creative folks at Roylco returned to the Annual NAEYC Conference, which was being held in sunny Orlando, Florida! Check out some of our favorite moments captured on our cameras!

Every year, the National Association for the Education of Young Children hosts a large space for companies who specialize in art education (like us!) to showcase their materials and talk one-on-one with the teachers. We had a prime location nearby the entrance to the hall, and welcomed hundreds of visitors!

naeyc2015

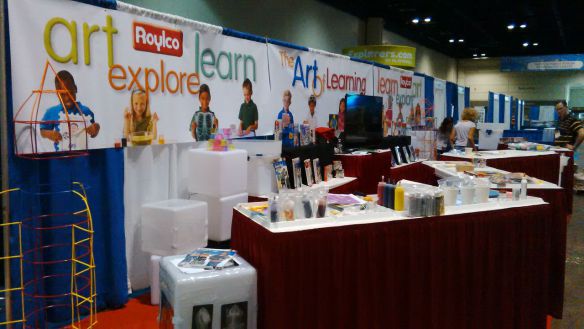
Our booth featured a fantastic array of our products, with 4 tables zig-zagging across the front. This allowed us to demo some of the products to our teacher friends while encouraging a flow of traffic through our booth.

naeyc 2015

We showed off some of our new products too! Look out for some of the following great products coming out next year at your local educational retailers:

R60705 Neon Straws and Connectors

R54490 Chromatography Kit

R48236 Junior Fun Faces Mix and Match Rubbing Plates

R59270 My Body in Action Cards

R49143 All About Me Book

naeyc 2015

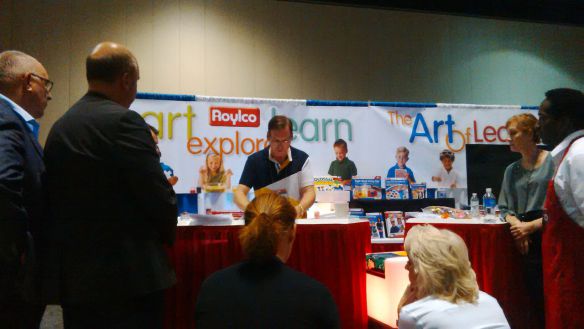
We had great fun talking about our published ebooks as well (soon to be available on our website!), including The Art of LearningThe Art of EngineeringThe Human Body: Inside & OutLight Table Magic and Learn Math… Without Knowing It! Each e-book is a gigantic resource for teachers, featuring over 50 ideas for implementing art-based learning through various subjects. The focus is on FUN learning, meaning that we don’t provide any worksheets or practice lessons that students need to learn. Instead, we focus on building quality experiences within the classroom, using those experiences as a strong foundation, and strengthening those experiences with further tie-ins.

naeyc 2015

We love our teachers and strive to make the difference with all our products! Email us at info [at] roylco [dot] com for more information about our 2016 products and e-books!

Line-05

Like us on FacebookShare this post with your friends, or Subscribe to this blog today to receive original craft project updates every week!

Crystal Color Stacking Blocks

crystal color stacking blocks

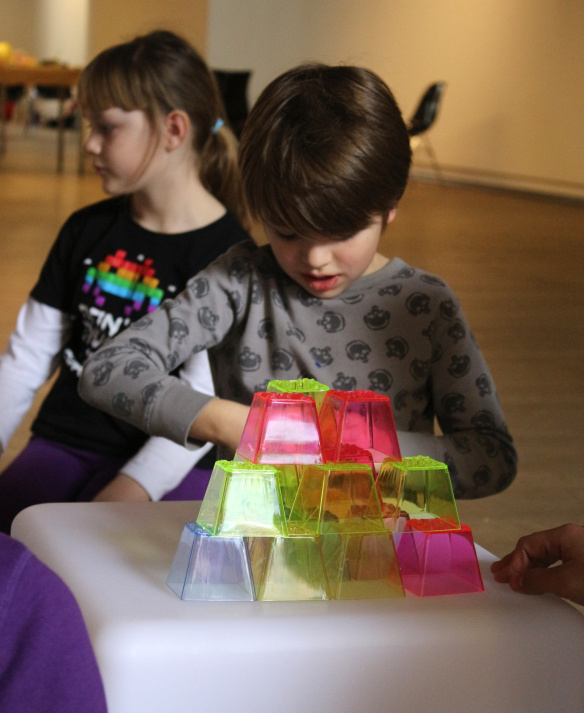
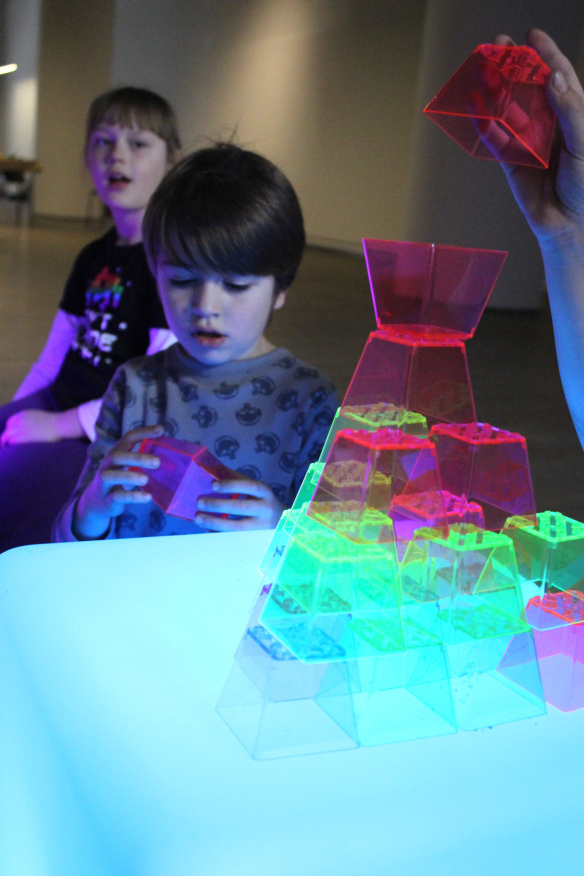
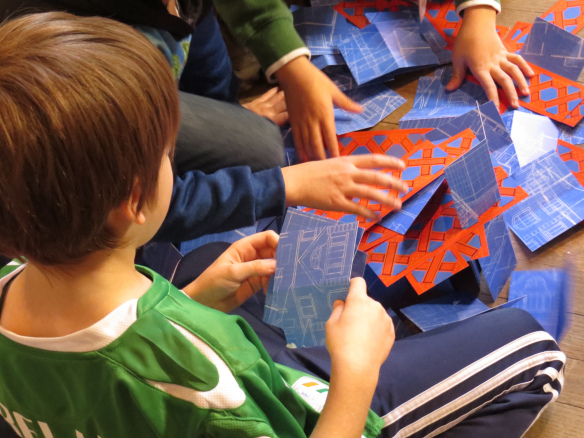
Discover the beauty of our wonderful R60310 Crystal Color Stacking Blocks! Stack up the clear color blocks to form new colors. Place on top of Roylco’s R59601 Educational Light Cube for even greater light effects!
crystal color stacking blocks

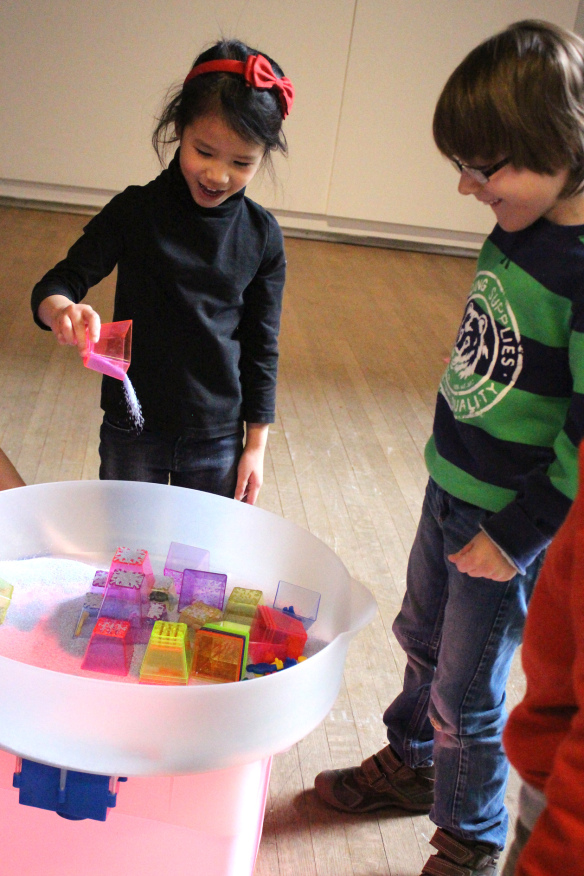
To start, we began by placing the blocks directly onto the R59630 Light Cube with the light turned off. We let the campers explore the blocks on their own first. This was a great exercise for kids as they described the block colors and stacked the blocks according to the grooves on the back.

crystal color stacking blocks

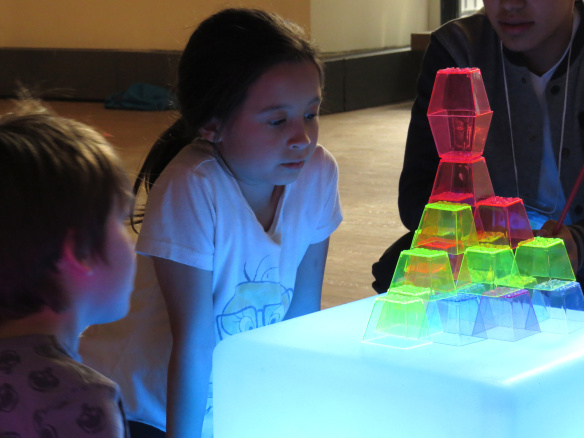
As soon as we turned the Cube on, all eyes were on it!

crystal color stacking blocks

It was absolutely mesmerizing, even for the most active kids.

crystal color stacking blocks

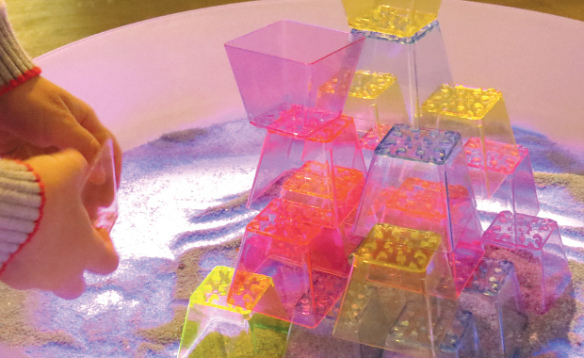
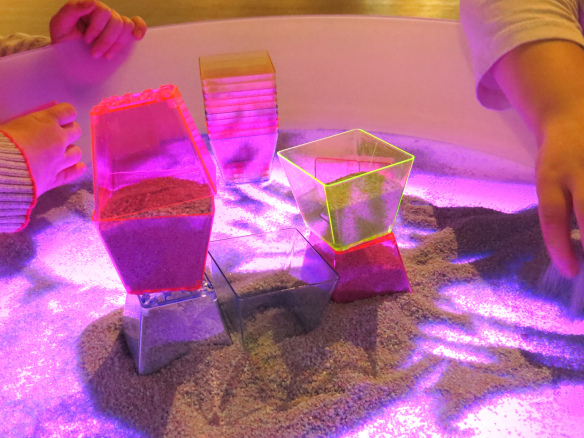
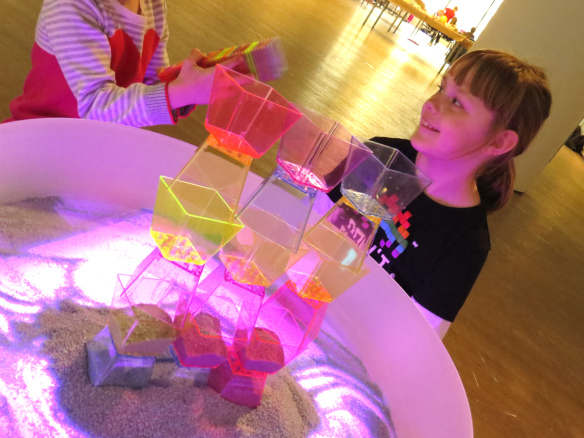
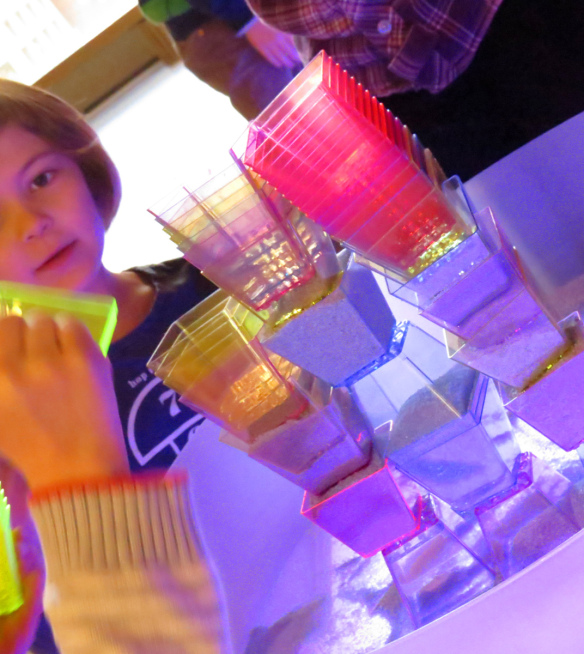
Next we placed the R59630 Sensory Tray onto the Light Cube. As you can see from the photo above, the clear tray allows the bright colorful light of the Light Cube to shine through. We also added a bit of sand to the inside and challenged the young architects to build the strongest tower they could make. The tower had to withstand the vibrations of the Sensory Tray once we turned it on.

crystal color stacking blocks

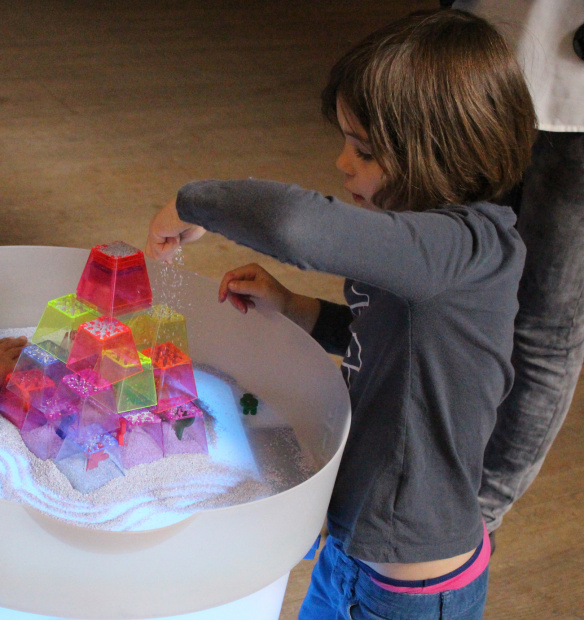
Accepting their challenges, the campers filled the bottom blocks with sand to secure the structure in place.

crystal color stacking blocks

They continued to fill the blocks with sand until they realized it might be too top heavy to withstand the force of the vibrations. We tested it out and sure enough, the whole thing toppled from the top down!

crystal color stacking blocks

Next, they tried a different formation. They flipped the blocks the correct way and buried the edges into a pile of sand, thinking that this might be the trick to getting the tower to stay upright.

crystal color stacking blocks

The base held together after we turned the Sensory Tray on, but not the top! Since they stacked multiples of the same block together, those parts fell first. It was a great learning experience, and every time we tried to pack up the activity, the kids begged us, “Just give us 5 more minutes! We need to build a stronger tower!”

Line-19

Like us on FacebookShare this post with your friends, or Subscribe to this blog today to receive original craft project updates every Monday, Wednesday and Thursday!

Skyscraper Building Cards

skyscraper building cards

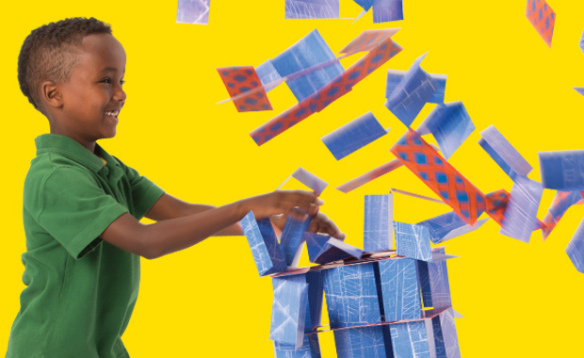
Build ’em up and knock ’em down! Skyscraper Building Cards are a perfect addition to your building play center for kids who love to play architect and Godzilla all in one!

IMG_8370

We decided to test how our R60450 Skyscraper Building Cards could be used in a variety of different projects. One of these projects was designed to introduce students to city planning. This project enabled students to work together as a team to create little cities with the basic structural design of the Skyscraper Building Cards. It was up to students to plan where all the buildings went, how high they were built and what types of buildings they were making.

IMG_1813

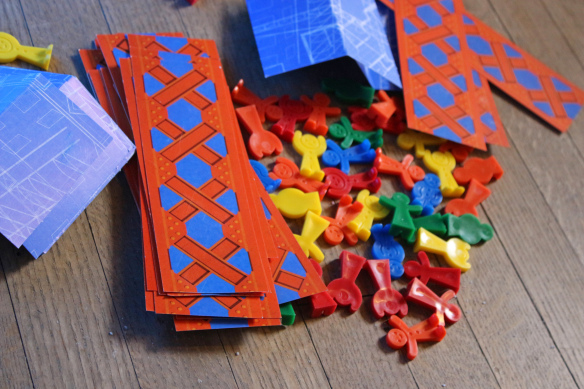
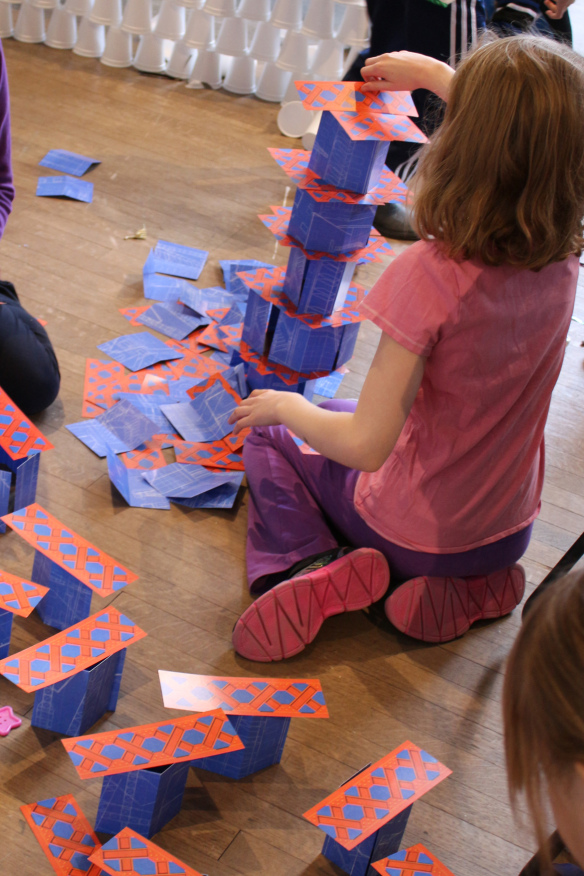
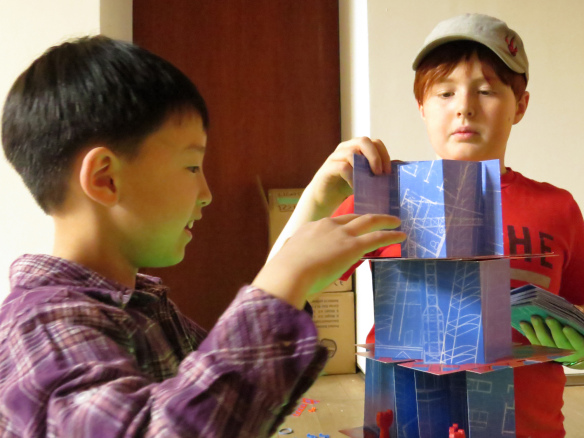
We went to the Design Exchange Museum in Toronto for their March Break camp and set out the materials for the campers. The Skyscraper Building Cards were fairly easy to pick up: the blue cards are made to stand upright while the red scaffolding cards were placed flat on top of the blue cards.

IMG_8072

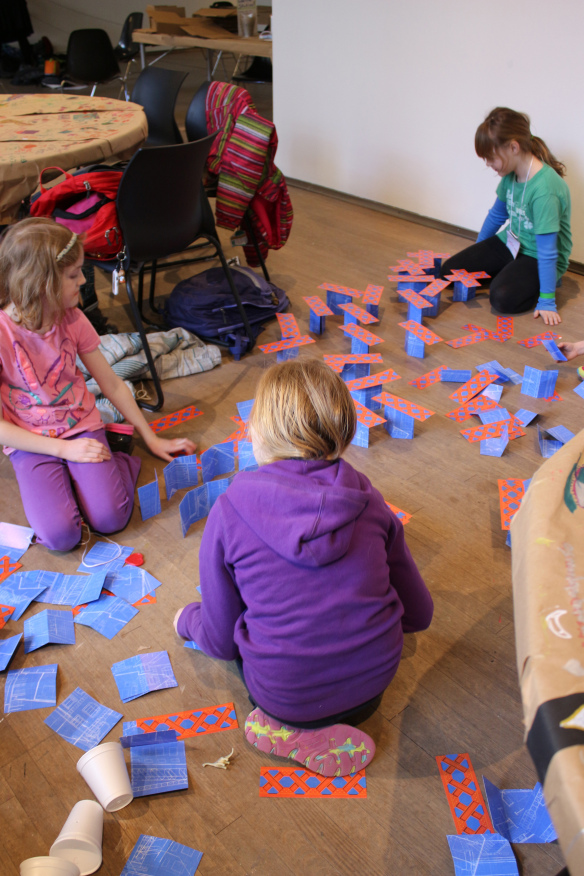
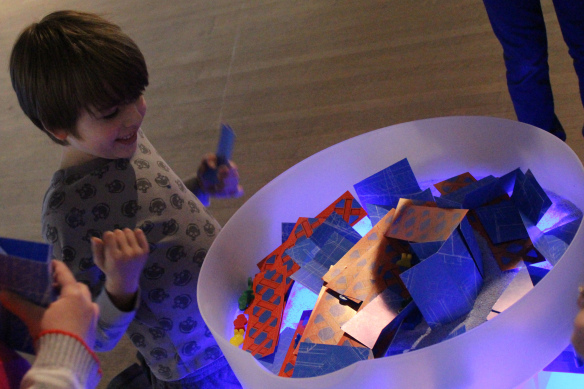
Once campers got the basic idea how to build with the cards, they decided to immediately start building a city. They made many little structures to fill up a large amount of space.

IMG_8078

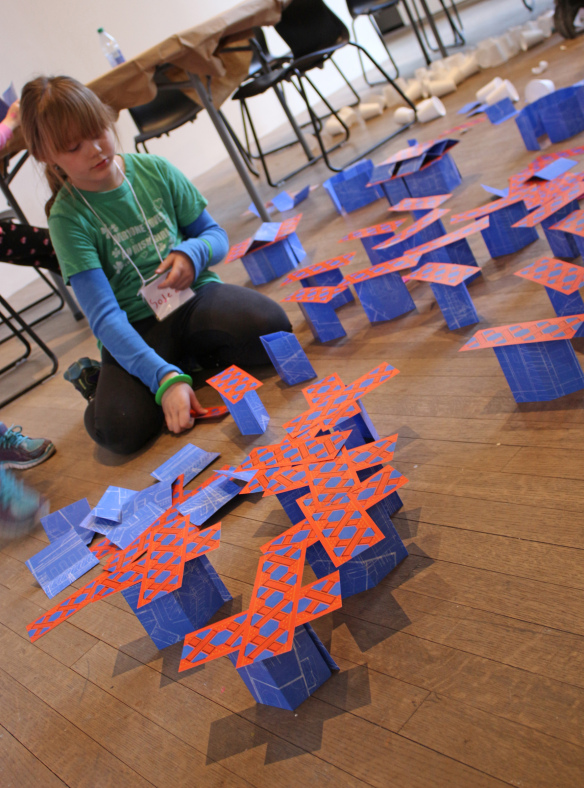
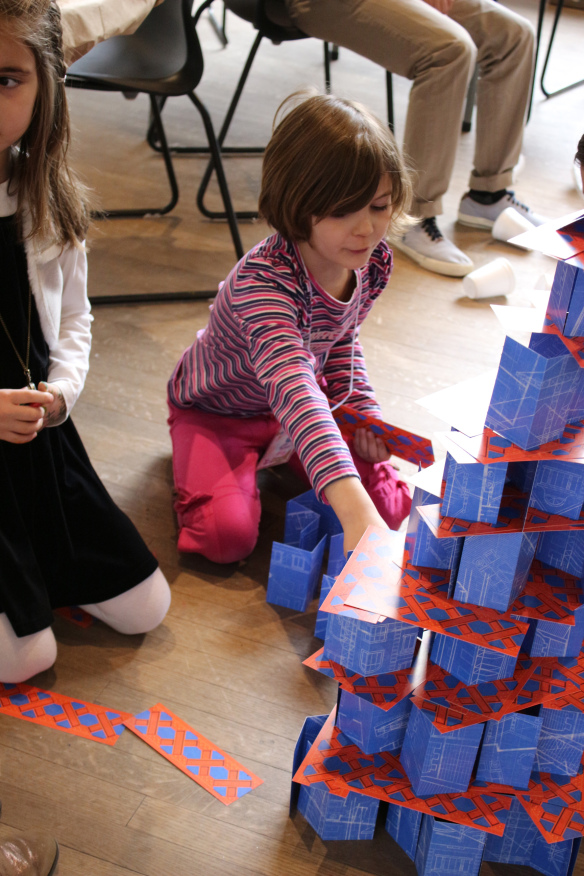
We loved the way the campers decided to criss-cross the scaffolding cards. This added a bit of interest to their building designs.

IMG_8052

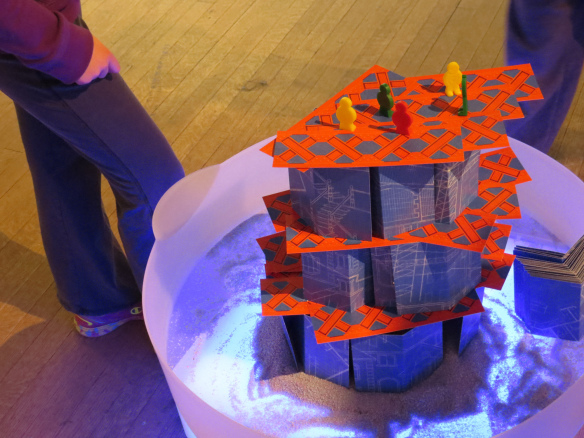
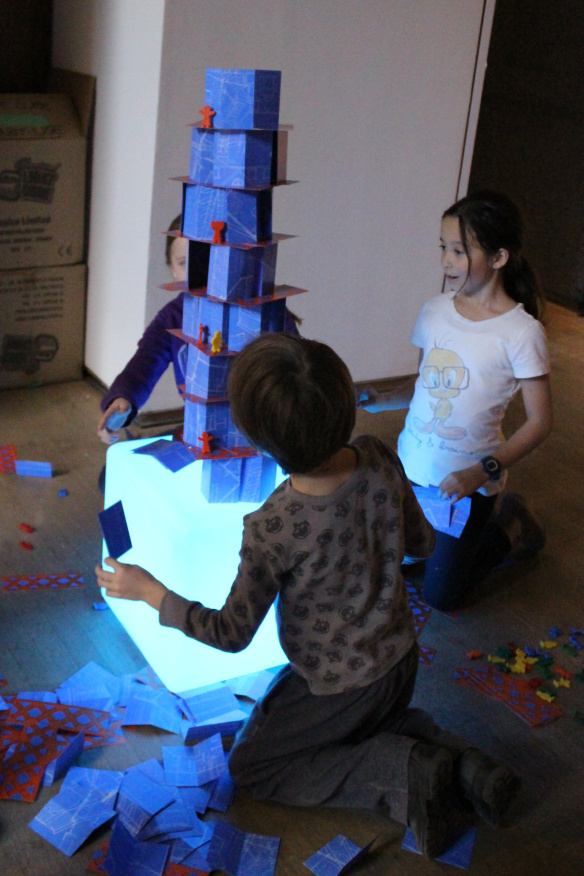
In the same group, one of the campers decided to build upwards instead of outwards. She stacked multiple little buildings together to make a base, then repeated the same design on the next level. This continued until she reached a reasonable height, which prompted the other campers to claim that the surrounding buildings were actually little “houses” and the big building represented the city center.

IMG_2459

Other campers got right into the fun. They constructed buildings with floors for people to work in. The people toys are our R75304 Super Topplers!

IMG_7993

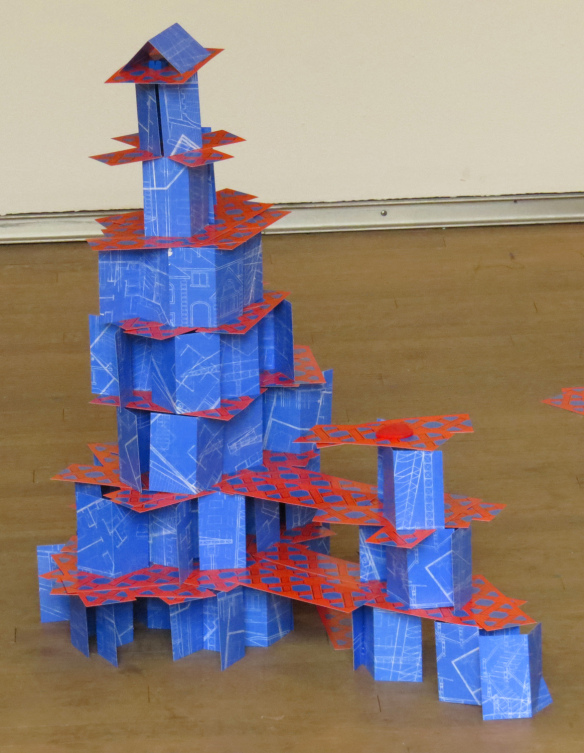
The designs began to get more and more complex…

IMG_1964

This design, for instance, included a 3-level parking garage which was attached to the building by ramps and walkways.

IMG_2445

Finally, we took our structures to the next level by introducing our newest R59630 Sensory Tray! The Sensory Tray is a sand and water table all-in-one, featuring a vibrating mechanism to engage students’ senses even further. We placed a bit of sand at the bottom of the tray to give the structures some stability.

IMG_8386

But once the unit was turned on, it toppled the building right over! It was a great challenge and the campers were eager to rebuild their structures with more stability.

IMG_8363

We had great fun testing out new building designs and challenging ourselves with new ideas and materials!

Line-20

Like us on FacebookShare this post with your friends, or Subscribe to this blog today to receive original craft project updates every Monday, Wednesday and Thursday!