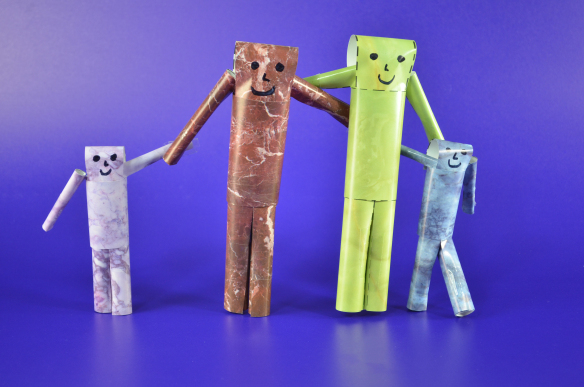
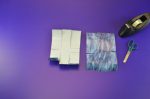
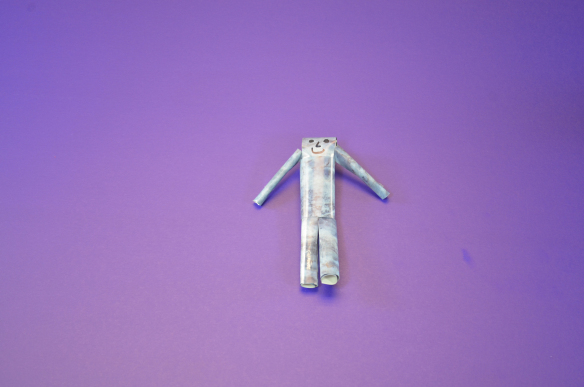
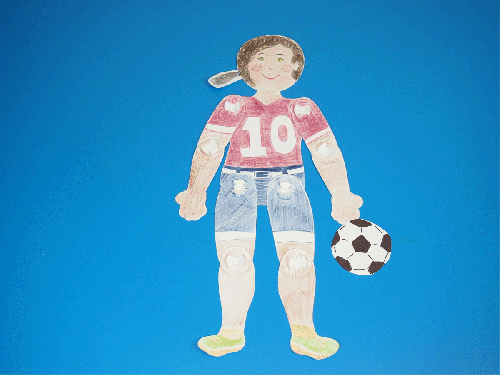
Lights! Camera! Action! These moving people shapes are wonderful resources to use for art projects, and amateur stop-motion videos. Action Shapes are made from sturdy card so that they will hold their shape while you position the characters’ arms and legs. A super-simple design for the pivoting joints helps make the characters easy to assemble and easy to move, too!
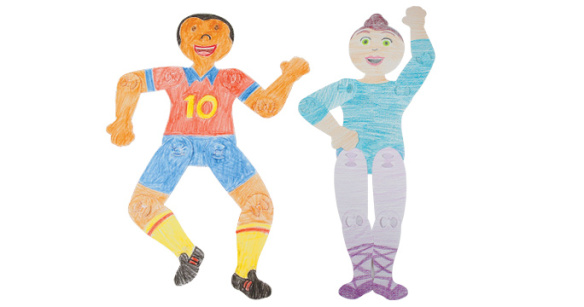
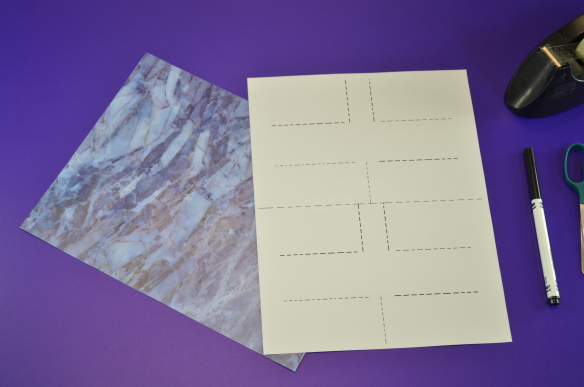
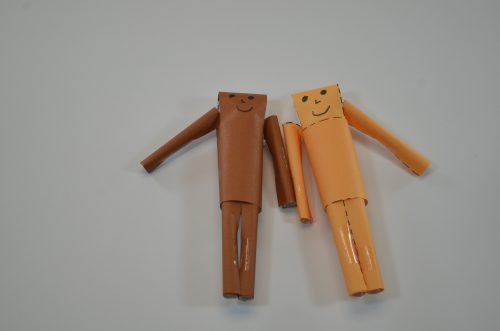
Color in and draw details on the character to make self-portraits or develop a unique character. Students may find that having a blank project in front of them seems a little daunting. There are so many ways to decorate the project, but which way is the best way? The Action Shape is made of sturdy card, so you can trace the shape on paper and plan your project.
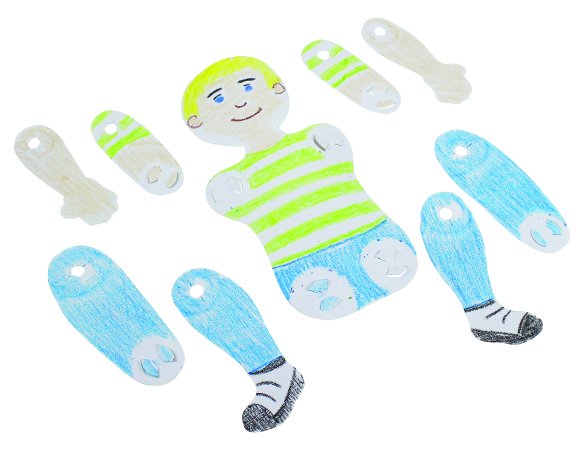
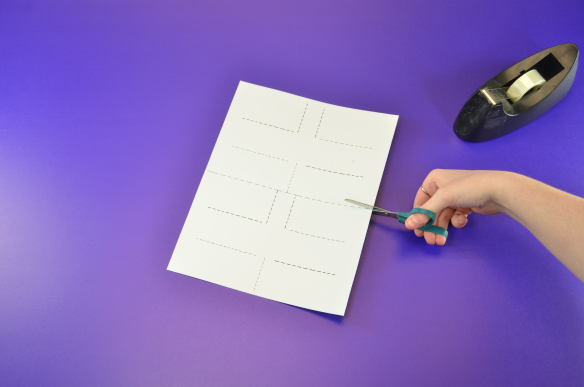
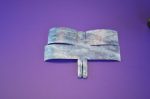
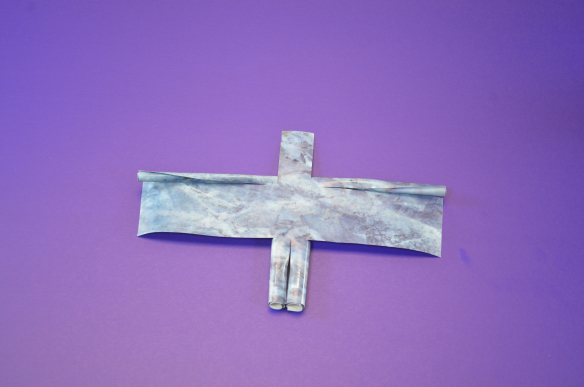
The Action Shapes characters feature 9 parts: the head, neck and torso, two upper arms, two forearms, two thighs and two lower legs. All of the paired parts connect to each other using pivot points. These pivot points are formed by special fins on certain pieces that go through pivot holes in corresponding pieces. In order to make decorating the Action Shapes easier, assemble the pieces together after you finished coloring them.
Note: Keep track of all your pieces! There are two larger thigh pieces that can easily be confused with the upper arm pieces. If needed, write the location of each piece on the back. You can even specify “left” or “right” depending on how you wish to organize them.
To trace, lay the main body piece of the character onto a sheet of drawing paper. Hold the character steady with one hand while using the other hand to trace around the outline of the character. Use the traced outline as a guide for experimenting with different “looks” for your character. Illustrate different clothes on the character with a pencil; add in a happy face or a surprised face; or, try on different hairstyles. Then, color it in! If you need to re-trace your Action Shapes design, use another sheet of paper and draw a different appearance. Find out which look is best for your character. Once you have chosen your favorite “look,” use the illustration as a reference to draw on the details.
First, use pencil to lightly draw in the details on your Action Shapes character. Use crayons or pencil crayons to add color. The Action Shapes characters are designed on special blank card that accentuate crayon and pencil crayon colors. Tip: Some students find it easier to outline the different parts of the character with a crayon before coloring in the entire area. Use this technique to guide students towards coloring the whole surface area of the Action Shapes before moving on.
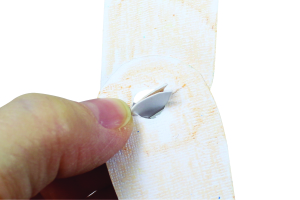
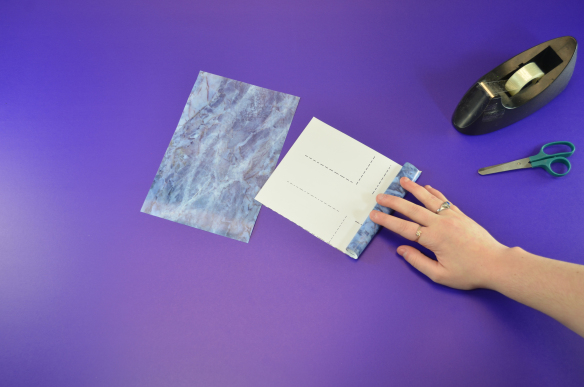
Assemble your Action Shape by locating all the “fins” at each of the joints. The fins are designed to slip through special pivot holes in select pieces that go on top. Bend the fins up from the backing and fold in towards the middle. Do not tear or remove the fins.
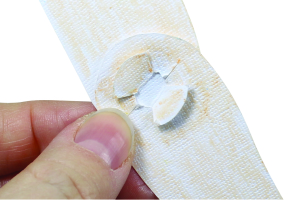
Next, pop out the pivot hole. Place the piece with the fins underneath the piece with the pivot hole. Pinch the fins together and slide through the notches on either side of the pivot hole. Once the fins are through, fan them out flat over the pivot hole.
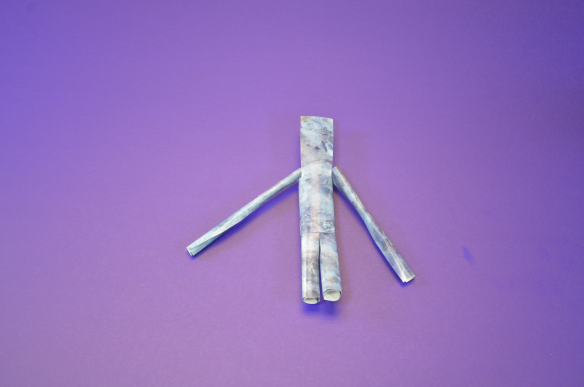
Now you can rotate the pieces! This will create movement with your Action Shape character. Look out for our next blog post that will show you how to create your very own stop-motion animation video!
Curriculum Connections
- Encourage self-awareness through “All About Me” crafts
- Build moviemaking vocabulary
- Create storyboards and scripts
- Develop fine motor skills
- Integrate digital learning with multimedia art
- Generate understanding about character poses
- Exercise gross motor skills through fun posing activities
- Discover the early history of film and stop-motion animation
- Brainstorm activities for characters to perform
- Encourage critical thinking
- List action verbs for literacy

Like us on Facebook, Share this post with your friends, or Subscribe to this blog today to receive original craft project updates every week!