3D Craft Circle Flower

3D flower finisged craft.jpg

These beautiful flowers will flutter in the breeze!

Age: 3+

Duration: 7-10 Minutes

Learning Outcomes: Exercise fine motor skills. Explore early paper sculpting. Create beautiful take-home artwork.

You’ll Need:

Line-14

  1. Choose six of your favorite craft circles and fold them in half. The colored side should be on the outside.
  2. Arrange the half circles in a full circle on your sheet of paper.
  3. Using a glue stick, apply glue to ONE HALF of the folded circles.
  4. Glue the folded circles to the sheet of paper in a circle configuration. You want the top halves to be loose and fluttery, so make sure you don’t overlap the circles.
  5. Add a stem and leaves with a washable marker.

The results are beautiful artwork that is perfectly fridge-worthy!

Ideas

  • Tape our tissue circles to the inside of your folded circles to add a pop of color!
  • Add an emotional component to the activity. Challenge students to draw six different emotions on the white side of the craft circles before you fold and glue them. Your flower will show a range of different feelings!

Line-03

Like us on FacebookShare this post with your friends, or Subscribe to this blog today to receive original craft project updates every week!

Beautiful Birch Bark Baskets

Birch bark Basket Style 1.jpgThis quick and easy cultural craft is also useful both inside and outside the classroom!

This kid-friendly take on a traditional craft is a beautiful take-home piece, but if they stay in the classroom, they’re great for holding pens, pencils, manipulatives and other small personal items.

Age: 4+

Duration: 5 minutes (including printing time)

Learning Outcomes: Explore the tensile strength of paper and it’s similarities to birch bark. Learn about using natural materials to create art that is both beautiful and practical. Exercise fine motor skills by cutting and taping.

You’ll Need:

Line-12

Birch trees are found all over North America and Eurasia and before the widespread use of pottery and ceramic containers, birch bark and wood were the most flexible materials available. The wood and bark of this tree were used by a variety of cultures. Native American and First Nations birch bark baskets might be one of the better-known uses for birch bark, but native peoples in North America also use birch bark for canoes, wigwams and tinder.

Asian countries (including Siberia, Ancient China and Ancient Assyria), Scandinavia and Finland used birch bark to make storage containers, roof coverings and waterproof coverings for bows. In Russia and India, birch bark was used to record manuscripts before the availability of parchment, vellum or paper. Some of the oldest known Buddhist texts were written on Birch Bark.

Our paper version of this ancient craft is quick and simple. Start by downloading the Birch Bark Basket template. The template contains two different style of basket. Print out the templates on a sheet of craft paper. It may take some experimenting to see which way you need to put the craft paper into the printer so the lines print on the white side. We used the birch bark design for our basket, but you can choose your favorite paper! These templates would also work well with our R15294 Terrific Tree Craft Paper.

Once you have printed out the templates, cut along the solid lines. To construct your basket, simply overlap the edges of the template and tape closed. We have created a video to demonstrate the construction:

Once your basket is ready, you can add embellishments. We used the leather design paper to create a fringe for our basket, but you can leave it plain too.

Line-11

Like us on FacebookShare this post with your friends, or Subscribe to this blog today to receive original craft project updates every week!


Prehistoric Marbled Slinky Fish

15401 Marble Paper - Fish

This adorable fish is fun to make and even more fun to play with!

Age: 5+

Duration: 15 minutes

Learning Outcomes: Exercise fine motor skills. Create a 3D pal for dramatic play.

You’ll Need:

Line-13

Start with a sheet of marble paper, white side up. Fold it diagonally, and trim off the excess. When you unfold the sheet, you should have a square.


Still with the white side up, turn the sheet so it looks like a diamond, and the fold line is vertical. Next, fold the left and right points of the diamond in, until you have an inverted kite shape.


Trim the shorter point so it is rounded. Next, unfold the two sides.

DSC_6989

Fold your paper in half along the original fold line, and carefully cut a series of slits from the point to about 2″ before the curve. Your cuts should only be as deep as your second set of fold lines.


Overlap the two outside triangle and tape them securely to create the 3D body of your fish. You should have a triangular prism.


Choose another sheet of marble paper, preferably in a contrasting pattern from the body of your fish. Fold the sheet so you have approximately 2″ of paper below the fold.


Draw shapes for fins and a tail for your fish. I drew triangles for the fins, and rounded shapes for the tail, and then cut them out on the fold. You’ll need to cut the fins apart, but leave the tail as one piece. Tape the fins and tail to the underside of your fish.

To give your fish some personality, add eyes and a tongue! I used the blue marble paper for the eyes, and the pink paper for the tongue. Tape the tongue inside your fish’s mouth, and the eyes to his head in front of the slits.

DSC_7001

Now your fish is ready to swim!

Line-21

Like us on FacebookShare this post with your friends, or Subscribe to this blog today to receive original craft project updates every week!

Let’s Make a Mother’s Day Bouquet!

Roylco Mothers Day Bouquet 

Age: 6+

Duration: 1 hour, plus drying time.

Learning Outcomes:

We’re learning how to complete a project made of several different components, and how each of those unique parts is needed to create the final craft.

Here’s what you need:

Color Diffusing Paper 9”x12” (R15213)

Fancy Stringing Rings (R2183)

Botanical Cuts (R15333)

Chenille Stems

Straws

Glue

Water

Paints (liquid watercolors & acrylics recommended)

Fine Mist Spray Bottles

Brush (foam or bristle)

Cotton Balls

Small Rock (optional)

Mother’s Day is just around the corner, so now is a good time to get crafty. We’re going to make a bouquet of flowers to show Mom that we appreciate all that she does for us everyday. A garden bouquet looks best when you mix a few different things together, so we’ll do that one step at a time, following the instructions below.


Roylco Mothers Day Bouquet Craft Parts Display

   Roylco Sketch Art of Flower

Here’s how you do it:

Step 1:

Prepare your work surface. If you don’t want to mess up your table, cover with some newsprint or butcher paper.


Step 2:

To begin, we need to paint our 9”x12” Color Diffusing Paper (R15213). This is what we’ll use to cut our flower shapes from. You’ll need 2–4 sheets. To get the most beautiful color blends, I recommend using liquid watercolor paint in a mister bottle. Spray the colors you like onto the sheet of diffusion paper. Then use another mister bottle to spray clean water over your colors.


Set aside to dry. Be careful where you put them, they can make a mess. To speed up the drying time, I like to hang them up for good air circulation. They should be dry enough to use in about 30 mins.


Step 3:

Okay, let’s find a cardboard tube. A toilet paper roll works great. Yeah, that’s right — we use those things! If you don’t have one handy (might want to take care of that), try a paper towel roll. For our bouquet, it will need to be about 3.75” long.


Now, we want to paint the tube. What’s your Mom’s favorite color?


Sounds like a good color to me. Go ahead and paint the tube. Acrylic paint is probably going to work best and dry fastest. Set the tube aside to dry.

 Roylco Mothers Day Bouquet Painting Tube


Consider this:

I thought it would be cool to paint the inside of the tube. I used a different color than the outside. You can use the same color, or not paint the inside. It’s up to you.


You’ll only need to paint one side. The bottom of the tube will be covered.


Step 4:

We’re going to need 3 straws to make our flower stems. I cut mine to lengths of 6.5”, 7” and 8”.


Paint the straws. The bottoms of our stems will not be visible from inside the tube, so you can hold one side and paint the other.


I painted mine green, but if you like red or purple flower stems, go for it. Set the straws aside to dry.

 Roylco Mother's Day Bouquet Painting Straws

Step 5:

I’m using some really neat Botanical Cuts (R15333) to add some garden flair to my bouquet. There are plenty of patterns to choose from in the pack. I chose 3 of them. If you’d like to add these in, now is a good time to decide on your patterns.


Step 6:

Now, let’s go back to our color diffusing paper. What we want to do is cut 4” round flower shapes from our beautifully painted paper. I like to look for the best patterns within the color and use them for outlining my flower shapes.

We’ll need to cut 4 shapes.

I’ve included a PDF template in case you would like to use it. Otherwise, create any flower shape you can imagine. Just remember, it will need to be about 4” round to work with all our other bouquet components.

 Mothers Day Bouquet-Flower Petal Template


Step 7:

We’re going to use one of our flower shapes for covering the bottom of the tube. Add some glue to one side in each of the petals. Then, place the tube in the center of the flower shape and fold the petals up. They should attach to the sides of the tube, closing up the bottom. I added 3 cotton balls to the bottom of my tube to keep the straws from poking through the bottom.


Step 8:

Speaking of the straws, let’s go ahead and add those in. Just add some glue to one side and place them in the tube. Press the straw against the tube to help the glue hold. Attach all 3 straws in this way.


Step 9:

Let’s make our 3 flowers next. Using a sharpened pencil, poke a hole through the center of your flower petals. Don’t make the hole too big. The pencil point should be enough.


Next, we need to use our 3 chenille stems. I cut mine to the same length — about 6”. On one side of the chenille stem, starting about an inch from the end, bend a right angle. Then make a “U” shape in the center of that bend (see the image).

Put one of the flower shapes onto a stem, moving it down to the bottom of the “U” shape.


To give my bouquet a jewel-like quality, I added a Fancy Stringing Ring (R2183) in front of the flower. Place it into the “U” shape as well, and then curl the end of the chenille stem around the ring to hold it in place.


Finish all 3 flowers.


Consider this:

These little flowers are so simple and beautiful, they kind of work on their own. If you want to do a quick craft, try just making the flowers, with the beads and the chenille stems. Tie them together with some ribbon, or a Fabric Strip (15655), and you’ll have a simple and sweet bouquet for Mom.


Step 10:

If you decided to go with the botanical cuts, this is where you’ll attach them. Use your creativity here. I chose 3 patterns and attached them with glue to the outside of the tube, from the bottom up. Pay attention to where your flower stems are. I think it’s neat to curl them botanical cuts around the straws a little.


Step 11:

Simply place the chenille flower stems inside each straw. Push them all the way down to the bend.


That’s it. You did it!

Your garden bouquet is ready to make your Mother’s day complete!

Consider this:

If your bouquet is a little wobbly, drop a rock in it. You may even want to fill the tube with colorful beads or small stones.

 Roylco Sketch Art of Kid 1

Let’s Make A Window Cling!

BP- Window Cling Rubbing Plates 4 Large

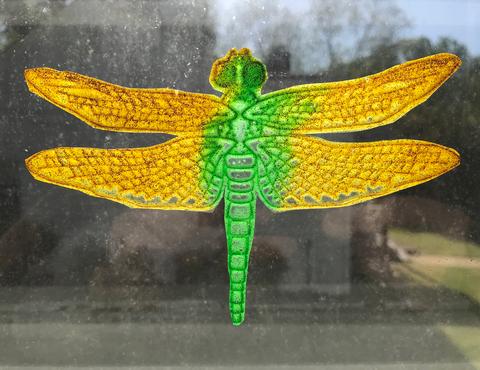
Age: 4+

Duration: 30 minutes (or more, depending on your design preferences), plus drying time.

Learning Outcomes:

We’re going to be mixing ingredients, painting and decorating with our creations.  We can learn about the subjects related to our rubbing plates, nature, science, etc. And, we can even have a discussion about sunlight and color as we enjoy our window clings.

Here’s what you need:

Any of our Rubbing Plates will work perfectly for this project.

Non-Toxic White Glue

Dish Soap

Food Coloring (liquid or gel)

Glitter (optional)

Brush (foam or bristle)

Sandwich Bag (optional – for detailed application of color)

If you’ve worked with our rubbing plates before, you’re going to love this project. It’s easy — and fun to mix, make, and use! I’m using the Insect Rubbing Plates (R5803), but our entire line of Rubbing Plates can be used in this way.

We’re going to create a very cool window cling using non-toxic white glue, some dish soap, and food coloring (you can use liquid or gel food coloring — both work great).

Kids as young as 4 will enjoy this project, with some help and guidance. Kids 4+ will need minimal help but will probably have an excellent time.

Here’s how you do it:

Step 1:

Anytime you’re working with glue things can get a little messy. You’ll be doing yourself a favor if you put some wax or parchment paper down on your work surface. This will also help to keep your rubbing plates from sticking to stuff.

Step 2:

Time to mix some colors! All these materials are safe, so it’s okay to use a cup or a bowl from the kitchen to mix your ingredients.

Start with about 2 tablespoons of white glue. Add a couple of drops of dish soap. It’s okay if your measurements are not super precise.

Next, add the food coloring. A little is plenty. For darker colors, add more. If you don’t have the color you need, try mixing the colors you have. You could also leave the color out to create a translucent appearance (perfect for bug wings).

Consider this:

If you want to use more than one color, you’re awesome! It might be a good idea to prepare all your colors during this step.

Also, glitter doesn’t work great everywhere — but it works great here! Add some glitter to your color during this step, and it will really add a nice, sparkly effect to your window cling. It will be so pretty when the sun is shining through!


Step 3:

Before you begin, make sure to use the side of the rubbing plate on which the pattern is sunk (not raised). It’ll help to keep the color in place.

A foam, or bristle brush, will work great for covering the bug with your mixture. For more precision, try using a pastry bag. Just pour the mixture into a sandwich bag, pushing it down to the corner, then snip a tiny hole in the point.

Really precise images will take some practice. You learn the best amount of glue as you go. But, keep in mind, the thinner the coverage, the more fragile your window cling will be.

Step 4:

We need to let it dry. Depending on how much glue you used, it could take up to 12 hours to dry.

Step 5:

Removal. You know how when you get some glue on your finger, and after it dries you peel it off, and somehow that makes you really happy? This step is like that — times 10.

Watch the edges. The glue can get under the plate, so make sure to peel any away from the back.

AHHhhh… that was fun.

Now you have a window cling!

Consider this:

Trim the edges for a more elegant design.

Step 6:

The time has come to display your creation! Find a good spot in the window and give it a quick wipe with a damp paper towel. Be sure to dry it. Now, use your wet paper towel to dampen the flat side of your window cling. Press it firmly onto the window.

You did it!

Roylco Window Cling Tie Dye Look

Roylco Window Cling Blue and Green Bug

Roylco Window Cling Green Cut Out Bug

This is a great way to add a fun, science and nature theme to any environment —classroom, bedroom, kitchen, office — anywhere you want to hang up some inspiration.

Use your rubbing plates as many times as you like to create more window clings. Experiment with colors, color placement, backgrounds, trimming… get creative and make it your own!

Roylco Sketch Art of Kid on Tricyle

Spotlight On: Stand-Up People

53001 Collection 2

Create cute, miniature people who can stand on their own two feet!

These sturdy card stock figures are terrific for a multitude of different art projects and as components in presentations for other subjects. Use paint, marker, crayon, pencil crayon and collage materials to decorate your stand-up person. The large size (7 1/4 x 11 1/2″) is perfect for bringing out the fine detail in your artwork.

Use these art bases for “All About Me” art! Glue a photograph to the face of a figure, and decorate the body to resemble your favorite outfit. Finish by writing your name on your stand-up person so your classmates will always recognize you!

Create an abstract self-portrait! Try using our paint pad with tempera paints to create a colorful base. Then gently press a card person into the paint. Remove, and allow to dry. Then tape a photograph of yourself to the face! For more about using our paint pad to make beautiful pints, check out this blog posts.

A great first week of school activity is pairing students off and challenging them to introduce their partner to the class! Have students interview each other, and create a portrait of their partner to present to the class along with personal facts like age, favorite food, and favorite color!

Are written book reports starting to become a grind? Add a new dimension to them by challenging students to create a portrait of their favorite character in their book. The portrait can serve as a visual aid to help keep other students engaged.

Bring social studies to life with historical figures! Consider assigning each table (or group) a theme, and each student will create a portrait of a different historical figure. If students have a math theme, they might create figures of Ada Lovelace and Pythagoras. A science theme could include Einstein and Marie Curie.

Line-14

Like us on FacebookShare this post with your friends, or Subscribe to this blog today to receive original craft project updates every week!


Create a Craft Circle Giraffe!

craft circle giraffe.jpg

This adorable critter is simple and fun to make!

Age: 5+

Duration: 10 Minutes

Learning Outcomes: Exercise fine motor skills. Practice composing figures out of geometric shapes. Create adorable animal crafts.

You’ll Need:

Line-01

  1. Decide what kind of animal you want to make. We chose to make a giraffe!
  2. Using the double color card sheets. draw an outline of the giraffe’s head and neck. Cut out the outline. Use washable markers to add eyes, a mouth and spots!
  3. Choose a craft circle to be the body of your giraffe. Fold the craft circle in half.
  4. Glue the head and neck to the back of your folded craft circle.
  5. To make the legs of your giraffe, cut four equal lengths of brown yarn.
  6. Tape one end of each piece of yarn to the INSIDE of the folded craft circle.
  7. Cut four squares out of brown card. These will be your giraffe’s hooves. Tape each square to the loose end of the yarn legs.
  8. Use a smaller length of yarn as the tail. Tape the tail to the inside of your half circle, near the crease.
  9. Using your glue stick, glue your half circle closed. This will make the giraffe look neat, and prevent flapping in the breeze if you decide to transform your giraffe into a puppet.

Ideas

  • Use Popsicle sticks to turn your animal into a puppet! Use a Popsicle stick for the body, and additional ones on any legs you want to be able to move.

Bundle Savings

Get all the Roylco items used
in this project and save 15%!

$24.63 USD
bundled price
Add Bundle
to Cart

Line-05

Like us on FacebookShare this post with your friends, or Subscribe to this blog today to receive original craft project updates every week!


Natural Materials Cuff Bracelet

bracelet blog image.jpg

This wearable art is a terrific fashion statement!

Age: 5+

Duration: 10 minutes (excluding drying time)

Learning Outcomes: Learn about the textures and properties of natural materials through manipulation of paper and card board. Exercise fine motor skills.

You’ll Need:

Line-20

Before metalwork became commonplace, jewelry was made with natural materials like wood, bone, leather and porcupine quills. Bone and wood beads could be strung on leather strips, but porcupine quills have to be softened before they can be used. Additionally, rawhide can be wet down, molded and once dry will keep it’s shape. Finally, wood can be steamed to the point where you can bend it! Our version of this craft doesn’t use real rawhide, but students can experiment with paper-based versions of rawhide wet-molding and wood bending.

First cut a 2″ strip of the leather design craft paper and set it aside. You will need it later.

To start, mix a solution of 1/2 a cup of white school glue and 1/2  a cup of tap water. Warm water makes mixing easier, but cool or cold water works too. Just make sure you mix the glue in completely, so there are no gluey lumps in the solution. Once your solution is thoroughly mixed, submerge your craft stick in the mixture for up to 90 seconds. To make this process easier, we used the lid of one of Roylco’s beautiful bins!

Once the craft stick is soaked, pull it out of the solution and start to gently bend it into a circular shape. Just like traditional bending wood, your craft stick can still break if it dries out or if you bend it too quickly. Carefully place the bent craft stick inside an empty Play-doh® container so the bracelet will keep its shape. Allow to dry for at least two hours.

Once the craft stick is dry, remove it from the Play-Doh® container. Lay the 2″ strip of paper in your glue and water solution for a second or two and then gently roll the sheet over the outside of your craft stick. Fold the edges inside so the paper is smooth over top of the craft stick. This technique is similar to wet-molding, and because there is glue in your solution, the paper will be firmly glued to your craft stick once everything dries. Place the paper-covered craft stick back in the Play-Doh® container.

Once the bracelet is dry, decorate it with pencil crayon, marker, crayon or paint. Or try cutting out collage shapes from other sheets of craft paper and glue them on to your bracelet.

Bundle Savings

Get all the Roylco items used
in this project and save 15%!

$18.44 USD
bundled price
Add Bundle
to Cart

Line-13

Like us on FacebookShare this post with your friends, or Subscribe to this blog today to receive original craft project updates every week!

Make Miniature Moccasins

moccasin image for blog.jpg

Create adorable moccasins that make a great take-home craft! This craft helps immerse students in Native American and First Nations cultural garb. We have included two templates: a larger one for take-home crafts and a smaller one that creates moccasins to fit on dolls!

Age: 5+

Duration: 10 minutes

Learning Outcomes: Explore Native American and First Nations cultural heritage. Learn about the ways natural materials were used to make practical and beautiful items. Exercise fine motor skills by cutting and folding.

You’ll Need:

Line-22

Traditionally, moccasins are made of soft leather (usually deer, although native peoples in Alaska often used seal or caribou leather, depending on the resources available; for more information check out this cool museum!), and are decorated with beads, porcupine quills or fur. Each culture has their own unique styles and designs for moccasins, but the basic design includes a sole (the bottom of the moccasin) and an upper that is stitched together at the top. Some designs also include a vamp (the middle piece that covers your toes and the top of your foot).

Etymologically, the word moccasin derives from the Algonquian language Powhatan word makasin (cognate to Massachusett mohkisson / mokussin, Ojibwa makizin, Mi’kmaq mksɨn), and from the Proto-Algonquian word maxkeseni (shoe).

To create your own moccasins, start by downloading the moccasin template, and printing it out on a sheet of craft paper. It may take some experimenting to see which way you need to put the craft paper into the printer so the lines print on the white side. We used the deer hide design for our moccasins, but you can choose your favorite paper!

The Miniature Moccasins template needs two sheets of paper to create one pair of moccasins. The Doll Moccasin template needs one sheet of paper to make two pairs of moccasins.

Once you have printed out the template, students can use marker, crayon, glue and collage materials to decorate their moccasins if they want. I suggest decorating before you assemble the moccasin! Once you are ready to assemble your moccasins, cut on the solid lines, and fold on the dotted lines. Next, tape the vamp and upper to the sole of your moccasin. This part can be a little tricky, so we created a video to demonstrate:

Your moccasin crafts can be a final art product in and of themselves, or they can be added to presentations, posters and reports as visual aids.

Line-01

Like us on FacebookShare this post with your friends, or Subscribe to this blog today to receive original craft project updates every week!