Age: 6+
Duration: 1 hour, plus drying time.
Learning Outcomes:
We’re learning how to complete a project made of several different components, and how each of those unique parts is needed to create the final craft.
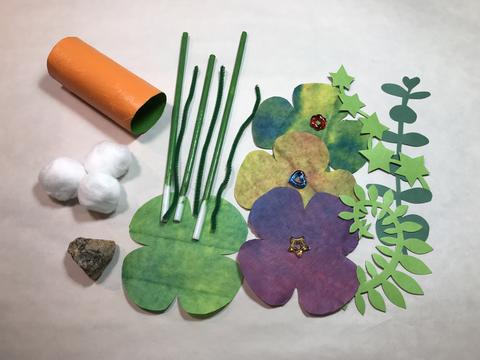
Here’s what you need:
Color Diffusing Paper 9”x12” (R15213)
Chenille Stems
Straws
Glue
Water
Paints (liquid watercolors & acrylics recommended)
Fine Mist Spray Bottles
Brush (foam or bristle)
Cotton Balls
Small Rock (optional)
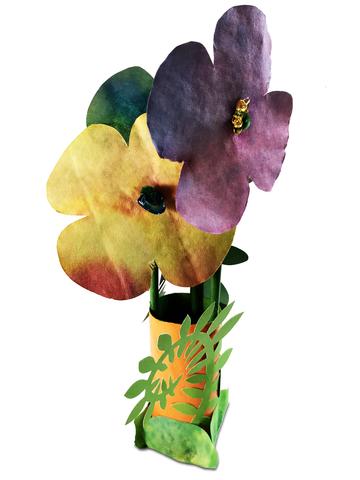
Mother’s Day is just around the corner, so now is a good time to get crafty. We’re going to make a bouquet of flowers to show Mom that we appreciate all that she does for us everyday. A garden bouquet looks best when you mix a few different things together, so we’ll do that one step at a time, following the instructions below.


Here’s how you do it:
Step 1:
Prepare your work surface. If you don’t want to mess up your table, cover with some newsprint or butcher paper.
Step 2:
To begin, we need to paint our 9”x12” Color Diffusing Paper (R15213). This is what we’ll use to cut our flower shapes from. You’ll need 2–4 sheets. To get the most beautiful color blends, I recommend using liquid watercolor paint in a mister bottle. Spray the colors you like onto the sheet of diffusion paper. Then use another mister bottle to spray clean water over your colors.
Set aside to dry. Be careful where you put them, they can make a mess. To speed up the drying time, I like to hang them up for good air circulation. They should be dry enough to use in about 30 mins.
Step 3:
Okay, let’s find a cardboard tube. A toilet paper roll works great. Yeah, that’s right — we use those things! If you don’t have one handy (might want to take care of that), try a paper towel roll. For our bouquet, it will need to be about 3.75” long.
Now, we want to paint the tube. What’s your Mom’s favorite color?
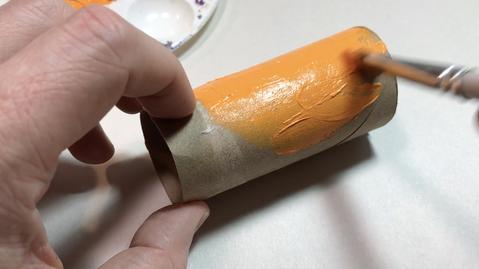
Sounds like a good color to me. Go ahead and paint the tube. Acrylic paint is probably going to work best and dry fastest. Set the tube aside to dry.

Consider this:
I thought it would be cool to paint the inside of the tube. I used a different color than the outside. You can use the same color, or not paint the inside. It’s up to you.
You’ll only need to paint one side. The bottom of the tube will be covered.
Step 4:
We’re going to need 3 straws to make our flower stems. I cut mine to lengths of 6.5”, 7” and 8”.
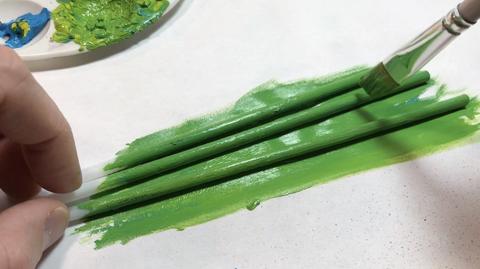
Paint the straws. The bottoms of our stems will not be visible from inside the tube, so you can hold one side and paint the other.
I painted mine green, but if you like red or purple flower stems, go for it. Set the straws aside to dry.

Step 5:
I’m using some really neat Botanical Cuts (R15333) to add some garden flair to my bouquet. There are plenty of patterns to choose from in the pack. I chose 3 of them. If you’d like to add these in, now is a good time to decide on your patterns.
Step 6:
Now, let’s go back to our color diffusing paper. What we want to do is cut 4” round flower shapes from our beautifully painted paper. I like to look for the best patterns within the color and use them for outlining my flower shapes.
We’ll need to cut 4 shapes.
I’ve included a PDF template in case you would like to use it. Otherwise, create any flower shape you can imagine. Just remember, it will need to be about 4” round to work with all our other bouquet components.
Mothers Day Bouquet-Flower Petal Template
Step 7:
We’re going to use one of our flower shapes for covering the bottom of the tube. Add some glue to one side in each of the petals. Then, place the tube in the center of the flower shape and fold the petals up. They should attach to the sides of the tube, closing up the bottom. I added 3 cotton balls to the bottom of my tube to keep the straws from poking through the bottom.
Step 8:
Speaking of the straws, let’s go ahead and add those in. Just add some glue to one side and place them in the tube. Press the straw against the tube to help the glue hold. Attach all 3 straws in this way.
Step 9:
Let’s make our 3 flowers next. Using a sharpened pencil, poke a hole through the center of your flower petals. Don’t make the hole too big. The pencil point should be enough.
Next, we need to use our 3 chenille stems. I cut mine to the same length — about 6”. On one side of the chenille stem, starting about an inch from the end, bend a right angle. Then make a “U” shape in the center of that bend (see the image).
Put one of the flower shapes onto a stem, moving it down to the bottom of the “U” shape.
To give my bouquet a jewel-like quality, I added a Fancy Stringing Ring (R2183) in front of the flower. Place it into the “U” shape as well, and then curl the end of the chenille stem around the ring to hold it in place.
Finish all 3 flowers.
Consider this:
These little flowers are so simple and beautiful, they kind of work on their own. If you want to do a quick craft, try just making the flowers, with the beads and the chenille stems. Tie them together with some ribbon, or a Fabric Strip (15655), and you’ll have a simple and sweet bouquet for Mom.
Step 10:
If you decided to go with the botanical cuts, this is where you’ll attach them. Use your creativity here. I chose 3 patterns and attached them with glue to the outside of the tube, from the bottom up. Pay attention to where your flower stems are. I think it’s neat to curl them botanical cuts around the straws a little.
Step 11:
Simply place the chenille flower stems inside each straw. Push them all the way down to the bend.
That’s it. You did it!
Your garden bouquet is ready to make your Mother’s day complete!
Consider this:
If your bouquet is a little wobbly, drop a rock in it. You may even want to fill the tube with colorful beads or small stones.

