Origami Heart Garland

Origami Heart Garland

finished craft.jpg

This easy five-minute origami project is perfect for Valentine’s Day!

Age: 4+

Duration: 5-10 minutes (depending on the length of your garland)

Learning Outcomes: Practice origami and fine motor skills. Complete a simple but beautiful classroom decoration.

You’ll Need:

Line-12

For this project, you’ll need origami paper, a hole punch, yarn, and lots of willing hands!

step 1

First we’ll teach you how to fold the origami heart. Start by folding your paper diagonally, so you have a triangle. Open the triangle, and fold on the other diagonal. Open the paper again. You should have crease marks going from point to point.

Turn your paper so it looks like a diamond in front of you. Fold the top point down to the center of the paper and crease it.

step 6

Fold the bottom point up to meet the center of the top fold.

step 7

From the center crease on the bottom fold, fold the right half of your soon-to-be heart up.

step 8

Bring the left half up to meet the right half in the middle.

step 9

Flip your soon-to-be heart over. Fold down the top two points. Fold in the left and right points. When you flip it back over, your heart will be finished! Challenge each student to make several hearts. Not only does practice make perfect, but the more hearts you have, the longer your garland will be!

step 11.jpg

Once you have collected the class’s hearts, break out the hole punch and the yarn. Punch two holes in the top of each heart.

step 12

Finally, thread the yarn through the holes. If the yarn frays or the small holes are tricky for little fingers, try our plastic lacing needles to make the job a little easier.

step 13

Once your garland is strung, only your imagination limits its uses! Tape the garland to the edge of tables, desks or cabinets to add color to the classroom. Use the hearts to decorate bulletin boards, doors and hallways!

Line-04

Like us on FacebookShare this post with your friends, or Subscribe to this blog today to receive original craft project updates every week!

Pop-Up Valentines Day Cards

Pop Up Valentine Card

finished craft.jpg

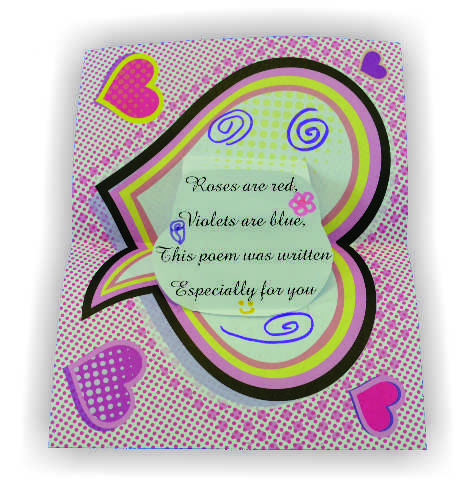
These hand-made cards make your feelings POP on Valentine’s day!

Age: 5+

Duration: 15 minutes

Learning Outcomes: Exercise fine motor skills. Encourage creativity. Integrate art, literacy, and holiday activities. Makes a perfect take-home craft.

You’ll Need:

Line-07

  1. Type a Valentine’s day poem into a word document.
  2. Print out the poem and cut it out.
  3. Fold a sheet of heart-themed Pop Culture Paper in half, hamburger style.
  4. Cut two parallel slits in the fold. Mae sure you cut each slit approximately the same width. We suggest no more than 2″.
  5. Open your sheet of paper. You should have a flap of paper with a crease in the center. Pull the flap forward gently, and crease the flap the opposite way. Then close your card with the flap on the inside. Crease. This will create the support for you pop-up. Your card should look like a folded sheet of paper with a square missing from the fold side.
  6. Open your card. Apply glue to ONE SIDE of the pop up.
  7. Glue your poem to the popup.
  8. Decorate your card.
  9. Present the card to your Valentine!

Line-17

Like us on FacebookShare this post with your friends, or Subscribe to this blog today to receive original craft project updates every week!

Christmas Tube Gift Boxes

Photo of Christmas Tube Gift Boxes Artwork

OLYMPUS DIGITAL CAMERA

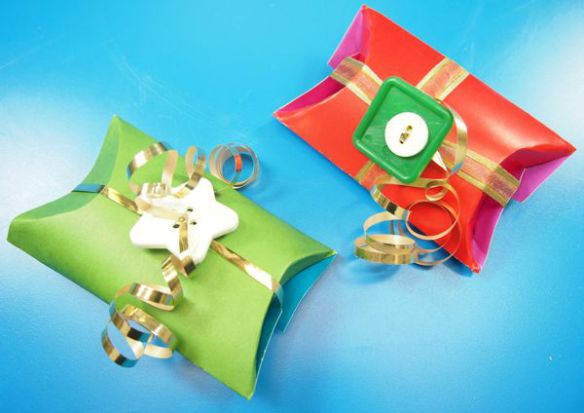
Make beautiful Christmas gift boxes with our R39301 Tube Crafts

Age: 5+

Duration: 10 minutes

Learning Objectives:

You’ll Need:

R39301 Tube Crafts

R2143 Really Big Buttons

• Ribbon

• Tape, if required

Line-15

OLYMPUS DIGITAL CAMERA

Collect all your materials that you’ll need. You can choose any color of Tube Crafts as they are double-sided.

OLYMPUS DIGITAL CAMERA

Roll the flattened sheet across the short sides. We’ve designed the Tube Craft sheets on one side with tabs and slots on the other to help secure the tube in place.

OLYMPUS DIGITAL CAMERA

Flatten the tube on both sides.

OLYMPUS DIGITAL CAMERA

Press in one side of the tube, followed by the other side. Leave the un-flattened end open to allow small gifts or candies to be placed inside.

OLYMPUS DIGITAL CAMERA

Close up the other side once you have placed your gift inside.

OLYMPUS DIGITAL CAMERA

Wrap the gift box with gold ribbon. Secure with a knot then thread the ends through the holes in our Really Big Buttons.

OLYMPUS DIGITAL CAMERA

And voila! You have yourself a perfectly-wrapped gift for a special person during the holiday season.

Line-09

Like us on FacebookShare this post with your friends, or Subscribe to this blog today to receive original craft project updates every week!

Flag Windsocks

Windsock Artwork made from Color Diffusing Paper

2014-05-25-FeatureImage Make brilliant designs on Color Diffusing Paper using clear glue! Incorporate windsocks into a national holiday craft or use to cheer on your favorite team.

Age: 5+

Duration: 20 minutes

Learning Objectives: Create product art with an emphasis on using fine motor skills. Trace designs onto paper or draw freehand using references. Encourage scissor skills development. Incorporate windsock designs with themes learnt through social studies subjects or in observation of upcoming national events. Talk about significance of wind patterns and weather changes.

You’ll Need:

R15212 Color Diffusing Paper 12 x 18″

• Watercolor paint

• Plastic paint trays

R54460 Squiggle Pipettes OR paintbrushes

• Scissors

• Hole punch

• Yarn

• Tape

• Clear glue (preferrably with applicator tip)

Line-03 This activity is perfect for making a take-home craft that kids will love. You can decide to have kids draw their flag designs freehand, or print out a large flag design in black and white line-art that kids can use as a template beneath their Color Diffusing Paper sheet. In this activity, I’ve used both techniques.

Click on any of the links below to skip to a portion of this tutorial:

1. Designing your windsock

2. Making streamers

3. Assembling your windsock

P6179636 Here, you can see all the materials I’ve assembled. Using bowls to contain the watercolor paint makes it easy for kids to keep their work-spaces clean. Pipettes are a great way to get children with developing finger muscles to experiment with different squeezing techniques.

Alternatively, use paintbrushes to apply the watercolor to the Color Diffusing sheets.

P6179640 First, decide on your design. If you decide to get students to freehand the design, it’s a good idea to print out a reference for students to look at. They can lightly pencil in their design if they’d prefer, then go over top of the design with the clear glue.

It’s ideal if the clear glue dispenser has a pointed applicator that kids can use like the point of a marker or pencil. Gently press the glue down onto the Color Diffusing Paper on top of your penciled design.

P6179642The photo above won’t clearly show the image, but I’ve “drawn” 50 stars with the clear glue in a stacked sequence. Can you guess the flag I’m making?

P6179644Wait until the glue is completely dry! This usually doesn’t take too long, but if you are worried about time, be sure to do the glue “drawing” on a day before your painting class. You can speed up by the process by leaving the drying artwork under an oscillating fan. Once you are ready to paint, place the Color Diffusing Paper into a plastic paint tray.

For this particular project, I’ve grabbed blue watercolor. Notice how nicely the Squiggle Pipette fits into the colorful paint bowl. You can place the bowl in the center of a group of students and have them all grab their paint from that one location.

P6179664This is my favorite part!! As I release the blue watercolor paint from the Squiggle Pipette, the paint carefully avoids any place where I’ve “drawn” in the glue. This is because the glue has seeped completely through the paper and acts as a barrier to the oncoming ink.

P6179668It will take a few squirts from the Squiggle Pipettes to fill the entire canvas, but it’s well worth it for the colorful effect and design popping through!

P6179671For a project like the Union Jack flag, I placed a line-art print of the flag design beneath the Color Diffusing Paper and traced out all the lines with the clear glue. Once the glue was dry, I used a paintbrush to apply the paint. This helped maintain an even layer of paint throughout the design.

P6179714 Take your main windsock design and prepare it for lift-off!

P6179717First, roll the windsock into a tight tube. This will help it retain a cylinder shape once you string it up.

P6179719 Unwind the tube until the ends are overlapping by 2″ on both sides. Tape the edges together.

P6179724 Next, make four holes at equal intervals along the top edge of your flag windsock.

P6179726Grab a large run of yarn, about 2 yards (1.8 m) in length.

P6179729 Loop one end through a hole and hold. Make a second loop with the other end of the yarn and hold that along with the first strand. Use the remaining yarn to pass through a second hole.

P6179731Loop back up and hold the loop in your hand along with the rest of the previous loops. Pass the end of the yarn through a third hole.

P6179732Loop back up through the hole and hold the loop in your hand with the rest. Thread the final stretch of yarn through the fourth hole.

P6179734Then loop back up and hold this loop in your hand with the remaining loops. There should be some leftover length of yarn to use as the string from which you’ll hang the windsock. Twist all the loops together, as one, into a tight knot.

P6179737You can trim some of the excess loops above the knot part. Just make sure not to snip the long piece of string! The first part of the windsock should look something like this.  

P6179681 Now it’s time to make the streaming ends for the windsocks. Place the Color Diffusing paper lengthwise, then spread the paint any which way you’d like. Make lines, spots, color entire strips of paper or intertwine the colors together.

P6179712When this particular sheet of paper has dried, cut it into strips lengthwise.

P6179747 Now grab some glue! We’re ready to attach the final portion of the windsock.

P6179748Put a bit of glue on the inside of the windsock’s bottom edge.

P6179749Press a streamer down onto the glued portion. Space out your streamers into equal intervals and continue all the way around the bottom of the windsock.

P6179752Here’s a look at our windsock! Isn’t it a beaut!

P6179757 You can see further completed designs here, including the American flag, Canadian flag, and the Union Jack!

OLYMPUS DIGITAL CAMERA Here’s a shot of our windsocks fluttering outside from our local pine trees!

P6209823 Another gorgeous look at our lovely flag designs! Watch how they flutter animatedly in the breeze! Line-03 Thanks for checking out this post! Like us on FacebookShare this post with your friends, or Subscribe to this blog today to receive original craft project updates every Monday, Wednesday and Friday!

Hatch a Baby Dinosaur This Spring

Roylco baby dinosaur lesson plan

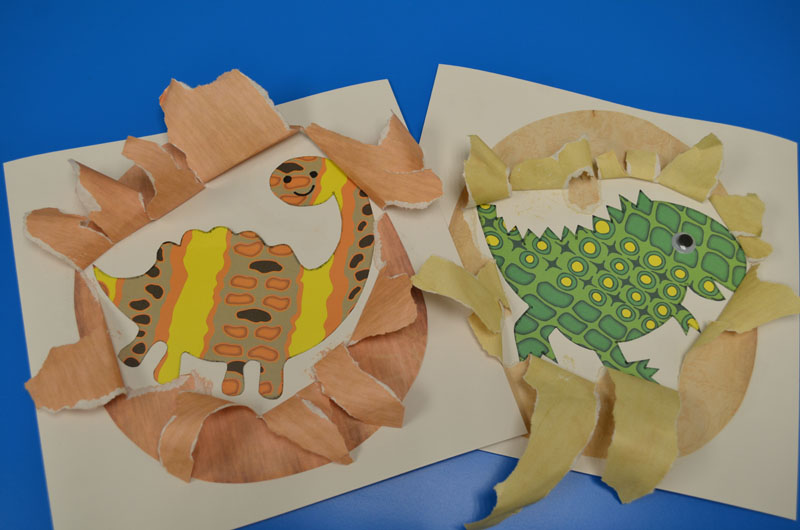
Most young children are fascinated by dinosaurs. They are curious about these mighty creatures that lived millions of years ago. Where did the dinosaur come from? Today we are going to introduce a hatching baby dinosaurs craft activity that children will love. This is a great class activity when you are teaching about dinosaurs.  You can also introduce it at the end of the dinosaur discovery tour at the museum.  Use this activity to talk about how a baby dinosaur grows inside the egg. Children will love to help the baby dinosaur hatch from the egg.

Age: 5+

Duration: 10 – 15 minutes

Learning Outcomes:  Learning evolutionary concepts. Practice drawing skills. Exercise Fine motor skills. Growing children’s interest in science.

You’ll Need:

Let the children choose one piece of paper with their favorite colors and patterns (R15311 Dinosaur Print Papers).

Encourage children to use a pencil to draw the baby dinosaurs at the back of the dinosaur print paper. After they draw the baby dinosaur, they can use the black marker to trace it.

Then cut out the baby dinosaur.

Glue the dinosaur on the white craft paper. You can glue the eye or draw the eye on the dinosaur.

Choose a piece of antique paper ( R15286 Antique Paperthat you like and lay it on top of the baby dinosaur. Use a pencil to draw an egg outline and cut it out.

Add glue to the outline of the brown egg and place it on the white craft paper over top of the baby dinosaur. Make a small cut in the middle the egg.

Ask the children to write their names on the white craft paper and exchange their crafts.

Here comes the exciting moment of this activity.

Invite children to help the dinosaur hatch from the egg by tearing open the paper (where you have made the small hole) to reveal the baby dinosaur inside the egg!

It’s a lot of fun for children to discover the different types of baby dinosaurs.

Please visit https://roylco.com/shop/r15311-dinosaur-print-papers/ for more information.

Bundle Savings

Get all the Roylco items used
in this project and save 15%!

$14.52 USD
bundled price
Add Bundle
to Cart

Tube Craft Flower

Tube Craft Flowers

tube crafts flowers

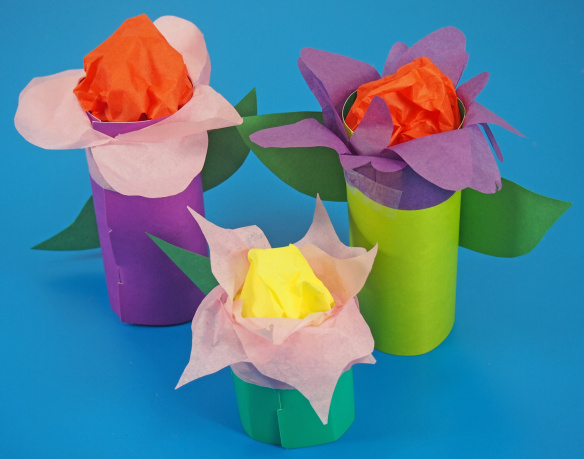
Using simple materials such as tube rolls and tissue paper, you can make the most intriguing flower decorations for your spring display! Try it with our R39301 Tube Crafts!

Age: 5+

Duration: 5-10 minutes

Learning Objectives: Use scissor skills to create beautiful flower decorations. Develop fine motor skills through rolling and securing the tubes. Create a lovely decorative addition to your spring/summer art display.

tube crafts flowers

You’ll Need:

R39301 Tube Crafts

• Scissors

• Tissue paper

• Tape

• Construction paper

• Pencil

Line-18

tube crafts flowers

Choose one of the flat Tube Crafts. The tubes have colors on both sides so you can roll it according to the side you want.

tube crafts flowers

Gently roll the card into a tube shape and secure with the specially designed notches and tabs. This tube will form the base of the flower.

tube crafts flowers

Next, cut a long strip of tissue paper from your sheet. If you have smaller lengths of tissue, you can simply tape them together. The strip should be about 3 x 16″ wide.

tube crafts flowers

Accordion fold the strip of paper until it is all neatly tucked into a square.

tube crafts flowers

Cut the unfolded edge into a half circle shape, making sure to keep the side folds intact.

tube crafts flowers

Unfold the chain to reveal a petal-like design.

tube crafts flowers

Gather up the tissue paper that you will use to form the center of the flower.

tube crafts flowers

Scrunch all four corners together in the center and secure with a piece of tape.

tube crafts flowers

Tape one edge of the petal chain onto the top of your Tube Craft and roll it all the way around the tube edge.

tube crafts flowers

Once the tube is completely rolled with the tissue paper, fold the petals outward.

tube crafts flowers

Stuff the center of the flower inside the tube and secure with tape.

tube crafts flowers

Cut a strip of paper from the construction paper sheet.

tube crafts flowers

Fold the strip of construction paper in half and cut from the fold line to make a leaf shape. Unfold the sheet of construction paper.

tube crafts flowers

Tape the leaf shape to the back of the tube to finalize the flower.

tube crafts flowers

With these techniques, you can make a full garden of flowers!

Line-22

Like us on FacebookShare this post with your friends, or Subscribe to this blog today to receive original craft project updates every Monday, Wednesday and Thursday!

Chinese Lanterns

Color-In Chinese Lanterns Craft

2014-02-12-FeatureImage

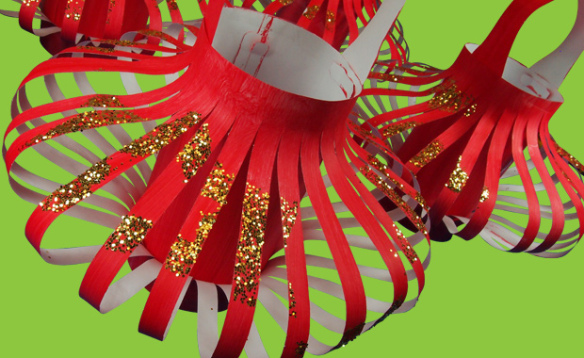
Get ready for Chinese New Year!  Learn how to create lanterns can help students work with form and color to create these awesome, decorative projects. We’ll show you the step by step process using our R22021 Color-In Chinese Lanterns and our R55009 Shape Sponges!

Age: 5+

Duration: 20 minutes

You’ll Need:

• R22021 Color-In Chinese Lanterns

• R55009 Shape Sponges

• Paint

• Glue

• Glitter (if desired)

• Paint tray

• Paint bowl

• Paint brush

• String

• Tape

Line-18

2014-02-12-Step01

It’s a good idea to use newspapers to contain glitter!

Each of the Chinese Lantern projects comes with 3 pieces: a large square with lines cut into it, a medium rectangle and a wavy-looking long piece.

2014-02-12-Step03Set each piece inside your paint tray. Paint all 3 pieces in a flat color. If needed, paint on two or three layers. When you are satisfied with the strength of the paint color, set aside to dry.

2014-02-05-Sponge-AnimationOnce the large square piece is completely dry, get ready to decorate it! Fill a plastic bowl with a bit of white glue. Select a favorite sponge shape and dip one side into the glue. Carefully stamp the sponge shape 4-6 times across the square lantern piece.

2014-02-12-Step05Make sure you do this step quickly, before the glue dries! Place the square piece onto newspaper. Sprinkle gold glitter glue completely on top of the stamped glue areas.

2014-02-12-Step06When the glue and glitter have dried, gently lift up one edge of the square piece and shake off the excess. Only the parts where the glitter met the glue will remain on the square piece. This creates a lovely surprise for students! Tip: Try to separate the die-cut lines if they are stuck together from the paint/glue.

2014-02-12-Step09

Now it’s time to switch back to the medium rectangle piece. There are two tabs at the top and of the rectangle piece. On the bottom are two slots. Flip over the piece and locate the tabs. Grab the sides of the tabs and fold them into the center.

2014-02-12-Step10Roll the rectangle piece into a tube. To secure the tube, slide the folded tabs into the slots.

2014-02-12-Step11Reach inside the tube and unfold the tabs to “lock” in place.

2014-02-12-Step12You can reinforce the tube with a bit of tape!

2014-02-12-Step13Now it’s time to attach the handle. That’s what the long wavy piece is for! Locate the two slots along the top edge of the tube and slide the ends of the handle through.

2014-02-12-Step14

This will create a little basket-like project. Lay your glitter-stamped square piece face down so that the unpainted side is facing up. Align the top edge of the basket tube with the top edge of the square piece.

2014-02-12-Step15Wrap the glitter-stamped piece all around the tube and secure the edges together with tape.

2014-02-12-Step16Now, flip the lantern over. To create the bowl effect, you need to match the bottom edge of the square piece with the bottom edge of the inner tube. This will cause the strips to fan out.

2014-02-12-Step17Tape the bottom edges together.

2014-02-12-Step18If needed, separate and fan out the individual strips.

2014-02-12-Step19A beautiful, glittery take-home gift or, use string to hang the lanterns together from the classroom ceiling.

Line-18

Thanks for stopping by to view this post! If you would like to share some of your or your students’ projects, send photos of your work to subscriber@roylco.ca! Thanks for visiting and check back soon!

Let’s make a mandala fractions t-shirt!

Blog Mandala T-Shirt Image

Roylco Fraction Mandala Stencils Hero Shot

Age: 4+

Duration: 30 minutes (or more, if you’re really having fun)

Learning Outcomes: A mandala is a spiritual symbol that represents the universe. So, this craft will give us an opportunity to start a conversation about the people who create these symbols. Also, we’re going to focus on the mathematical component of these intricate designs using fractions.

Here’s what you need:

Mandala Fraction Stencils (R58626)

T-shirt (follow washing instructions)

Fabric Paint or Fabric Markers (follow washing instructions)

BP-Mandala-T-Shirt-Supplies

What could be better this summer than to go out on all your adventures wearing a t-shirt designed by your very own crafty fingers? We’re going to make a cool, SMART design that you’ll be proud to wear when you play outside or travel abroad!

These mandala designs are inspired by the ancient Asian traditions of Hinduism, Buddhism and Jainism. Devoted worshipers created mandalas as a visual representation of the universe, as well as an aid for meditation.

The intricate, circular designs make this ancient art form ideal for splitting into parts. This is how we’re going to be able to use the patterns to help us sharpen our understanding of mathematical fractions.

Once you’ve finished your pattern, make it your own! It’s up to you to embellish and complete your design in any way that makes you happy. For inspiration, search online for mandala images. Or, better yet, take a trip to your local library to search for books about mandalas and the people who create them. You’ll discover fascinating representations of the universe that just might inspire your own creations.

BP sketch figure of girl

Step 1: Choose your pattern

Because mandalas can be extremely detailed and beautifully ornate, we have broken our designs into fractions. Each stencil is a like a slice of a pie: 1/2, 1/3, 1/4, 1/5, 1/6, 1/8, 1/10. Pick one stencil, and use it to create the outline of your design. For the 1/2 stencil, 2 parts make the whole. For the 1/10 stencil, 10 parts make the whole. The product guide will be helpful to understand the best way to use the stencils.

Step 2: Trace the pattern on your shirt

It might be a good idea to practice tracing your stencil on a sheet of paper first.

Before you begin, make sure you know how the pattern will fit on your shirt. The best way to do this is to mark the center with something that will wash out, like a very small pencil mark. Where you place the design is totally up to you, but you’ll want to know that it’s going to end up where you intended.

Here’s a tip for you: Depending on your art medium (markers or paint), you may want to place a sheet of cardboard or some other scrap material inside your shirt as you work. This will help to prevent the colors from bleeding through to the back of your t-shirt. If you do happen to get colors on the back accidentally, you could always draw another mandala on the backside.

BP-Mandala-T-Shirt-Color-Block-Insert

Now that your placement is all set, it’s time to start tracing your design with your fabric markers or fabric paint. And, hey, don’t worry about making mistakes. It’s totally fine if you get out of line! In fact, you might find that an unexpected mark is just the thing your design needs to make it more unique.

BP-Mandala-T-Shirt-Tracing-Stencil

Step 3:  Complete your image

This is the fun part. Doodles allowed! Make it unique. Have fun. Take your time. Refer to your library books for inspiration. Enjoy it!

Step 4:  Wear it!

Guaranteed — you’ll be the only one on the block with this cool t-shirt, made by you!

BP-Mandala-T-Shirt-Tracing-Complete

Consider This:

What was the most interesting thing that you learned about the culture of the people who created the mandala art form?

What are some other objects from around your house that could be broken into fractions?

Do you think the creators of the mandala art from used an understanding of mathematics to inspire their work?

How might you apply mathematical principals to help visualize your interpretation of your home, your neighborhood, your city, your world, your universe?

Blog Sketch Art Graphic

Stained Glass Christmas Ornaments

Stained Glass Christmas Ornaments

31100 Stainglass Ornaments Collection

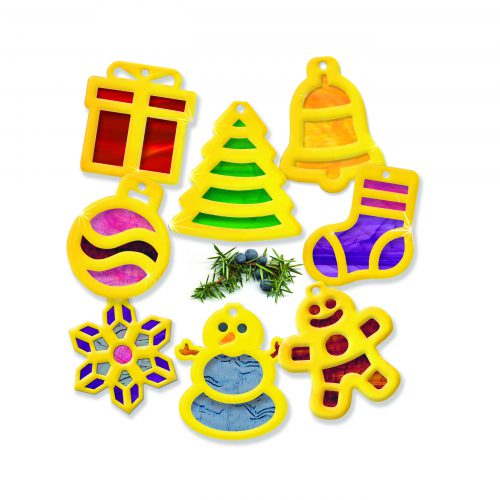
Need a fast and fabulous Christmas craft? These beautiful ornaments are the perfect project to spread holiday cheer!

Age: 4+

Duration: 10 minutes

Learning Outcomes: Explore the symbolism behind common Christmas emblems. Create beautiful take-home art that can be given as a gift. Exercise fine motor skills.

You’ll Need: 

Line-20

These ornaments are quick and simple to put together. Start by simply popping out the die-cut frames. Next, pop out the internal pieces, and set the frames aside.

Lay the internal pop-out on the stained glass paper and use a pencil to draw around the internal pop out. Make sure that you leave at least 1/4″ of space around the internal pop out so you have enough space to tape the stained glass paper into the frame. Cut out your stained glass pieces, and tape them to the inside (the white side) of the frames. Make sure to leave the small round hole at the top open!

Once your stained glass pieces are taped in place, fold the frame over and tape closed.

To finish off your stained glass ornament, cut a 6″ piece of yarn. Thread the yarn through the small round hole at the top of your ornament, and knot the loose ends into a circle. This will allow you to hang your ornament on your Christmas tree!

ornaments on tree.jpg

Have family members who don’t celebrate Christmas? Gift them the snowman or snowflake ornament and suggest they hang it in a window! Sunlight streams through the stained glass paper beautifully, and adds cheer to winter months.

ornaments on window.jpg

Line-21

Like us on FacebookShare this post with your friends, or Subscribe to this blog today to receive original craft project updates every week!