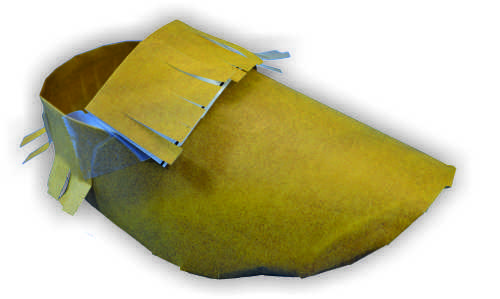
Create adorable moccasins that make a great take-home craft! This craft helps immerse students in Native American and First Nations cultural garb. We have included two templates: a larger one for take-home crafts and a smaller one that creates moccasins to fit on dolls!
Age: 5+
Duration: 10 minutes
Learning Outcomes: Explore Native American and First Nations cultural heritage. Learn about the ways natural materials were used to make practical and beautiful items. Exercise fine motor skills by cutting and folding.
You’ll Need:

Traditionally, moccasins are made of soft leather (usually deer, although native peoples in Alaska often used seal or caribou leather, depending on the resources available; for more information check out this cool museum!), and are decorated with beads, porcupine quills or fur. Each culture has their own unique styles and designs for moccasins, but the basic design includes a sole (the bottom of the moccasin) and an upper that is stitched together at the top. Some designs also include a vamp (the middle piece that covers your toes and the top of your foot).
Etymologically, the word moccasin derives from the Algonquian language Powhatan word makasin (cognate to Massachusett mohkisson / mokussin, Ojibwa makizin, Mi’kmaq mksɨn), and from the Proto-Algonquian word maxkeseni (shoe).
To create your own moccasins, start by downloading the moccasin template, and printing it out on a sheet of craft paper. It may take some experimenting to see which way you need to put the craft paper into the printer so the lines print on the white side. We used the deer hide design for our moccasins, but you can choose your favorite paper!
The Miniature Moccasins template needs two sheets of paper to create one pair of moccasins. The Doll Moccasin template needs one sheet of paper to make two pairs of moccasins.
Once you have printed out the template, students can use marker, crayon, glue and collage materials to decorate their moccasins if they want. I suggest decorating before you assemble the moccasin! Once you are ready to assemble your moccasins, cut on the solid lines, and fold on the dotted lines. Next, tape the vamp and upper to the sole of your moccasin. This part can be a little tricky, so we created a video to demonstrate:
Your moccasin crafts can be a final art product in and of themselves, or they can be added to presentations, posters and reports as visual aids.

Like us on Facebook, Share this post with your friends, or Subscribe to this blog today to receive original craft project updates every week!
