Art Propellor uses our Straws and Connectors!

KWFamilySunday-(10-of-21)

One Sunday a month, our local Kitchener-Waterloo Art Gallery hosts a family drop-in night, which brings in a large group of children of all ages! The programs are organized to help children explore a range of art materials and activities. A popular feature of these art programs is our very own Straws and Connectors!

Our local art gallery maintains its own blog at Art Propellor, also a WordPress site. Check out the artistic posts here!

The KWAG is a great place to be–whether you are gallery-viewing or dropping in for one of the many hosted art programs (ranging from audiences of children to adults), the gallery features a variety of inspirational activities.

Our Straws and Connectors made a big impact at the KWAG Family Sundays events. A post was made entitled: “Family Sundays are Back!” which not only highlighted the success of the event, but also featured images of our Straws and Connectors! The post was published on October 22, 2012.

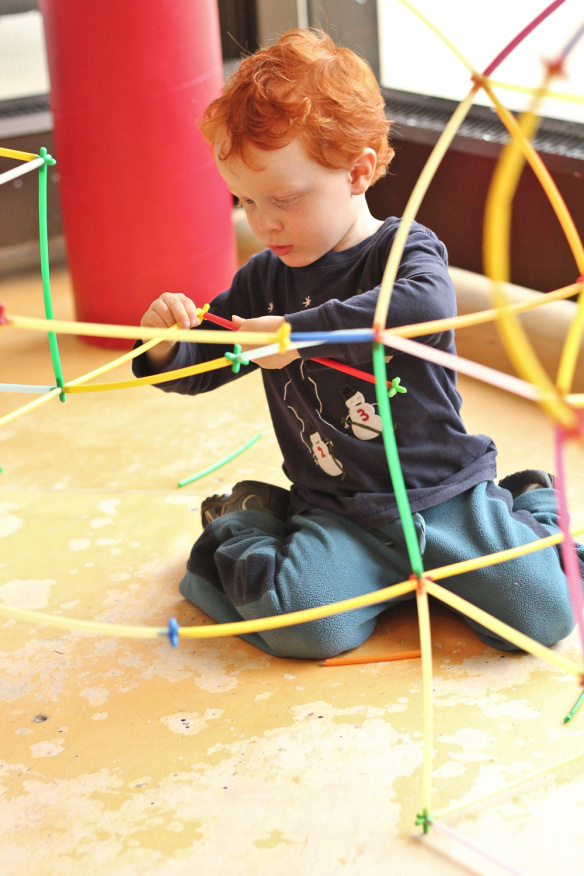
KWFamilySunday-(9-of-21)The Straws and Connectors are versatile enough for a variety of projects. Build sculptures, structures, and more!
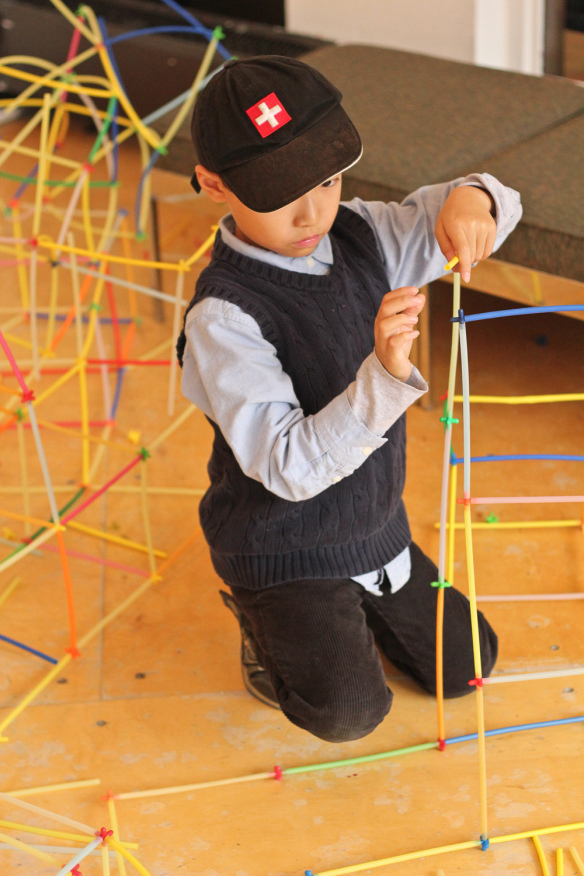
KWFamilySunday-(11-of-21)Connect the colorful straws together with 5-pointed connectors to make a variety of three-dimensional shapes.

Thanks to the KWAG for this post!

Images and original post © Propelart – KWAG

This post was not sponsored for a review. At LittleFingersBigArt, our mission is to present to our readers and viewers the newest and most creative craft ideas that fans of Roylco have made on their own. Our goal is to allow you and other educators and parents to reuse our products in fun ways so that children always get the best educational experience from them!

We’d love to see more ideas like this one! If you’ve got a brilliant craft idea or have made a version of one of our crafts that you would like to share with us, send an email to subscriber@roylco.ca with photos, descriptions or a link to your work. We will create a feature post and link back to you with full credit. We’d love to hear from you!

Line-14

Paint Bellows and Lace Circle Stencils

Feature-Image-lacebellows

Extending our exploration of Paint Bellows, I’ll show you how to use this unique painting tool to create beautiful stencil art combined with our Lace Circles! Read on for more details!


Age: 5-8

Duration: 10 minutes

You’ll Need:

• R5419 Paint Bellows

• R24910 Lace Circles

• Art paper

• Tempera paint

• Paint tray

Line-15

OLYMPUS DIGITAL CAMERA

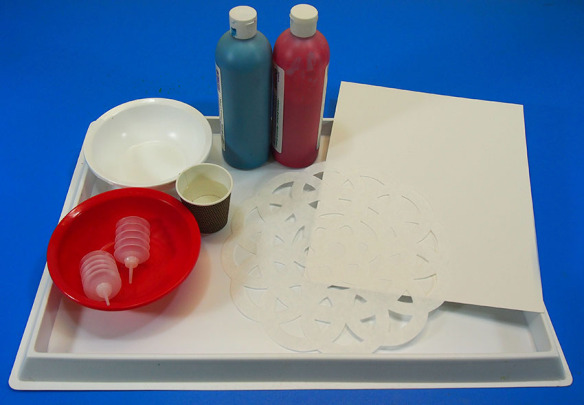
I recommend using card paper for the backing underneath the Lace Circle. Depending on what kind of paint you use, the splatter paint may seep through any weaker or thinner paper. You want to make sure that the art paper is strong enough to withstand the paint splatters.

OLYMPUS DIGITAL CAMERA

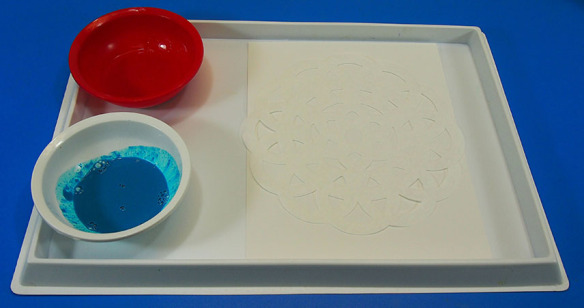
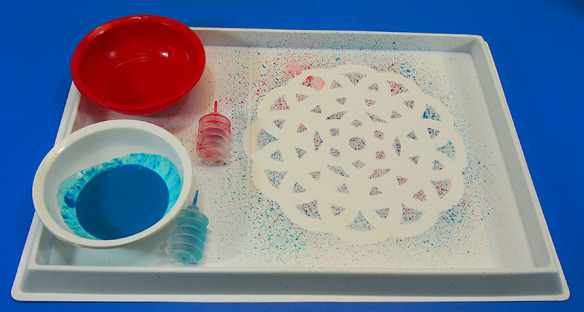
Fill the paint containers with a bit of water to make the paint easier to pick up in the Paint Bellows. Place the template or Lace Circle onto the card paper.

OLYMPUS DIGITAL CAMERA

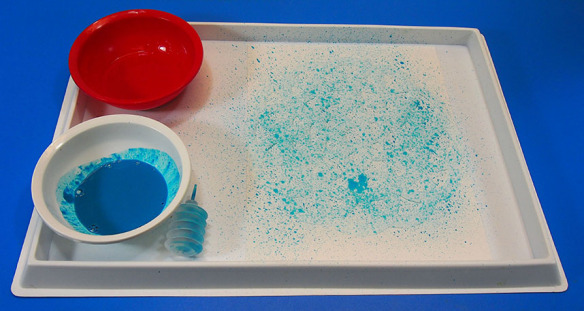
Press all the air out of the Paint Bellow before inserting the spout into the paint. Release the hold on the Paint Bellow to allow it to draw in the paint. Next, aim the Paint Bellow slightly above the art paper and quickly press the back of the Paint Bellows chamber towards the spout and release. Redo this action several times to get a great stippled effect on the paper!

OLYMPUS DIGITAL CAMERA

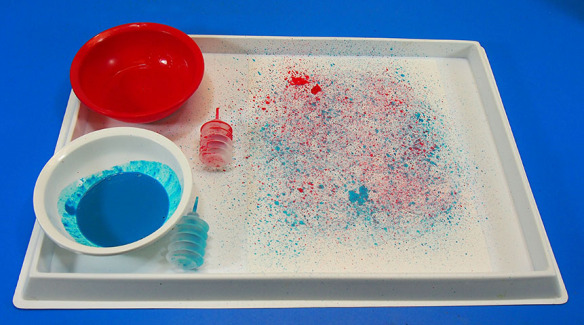
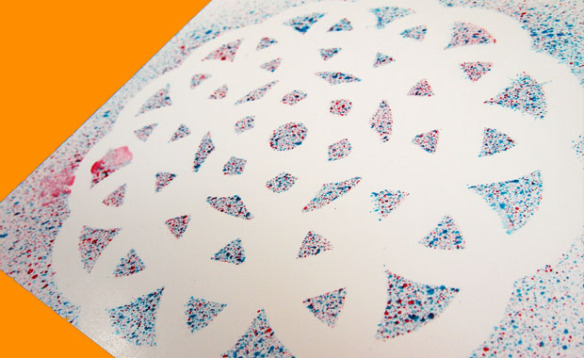
I wanted to use two different colors to make the artwork more interesting, so I used red. Spritz the red paint over the template. Tip: You can also remove your template and place it in another position over the stippled blue paint, then spritz with red to give your artwork a bit of dimension.

OLYMPUS DIGITAL CAMERA

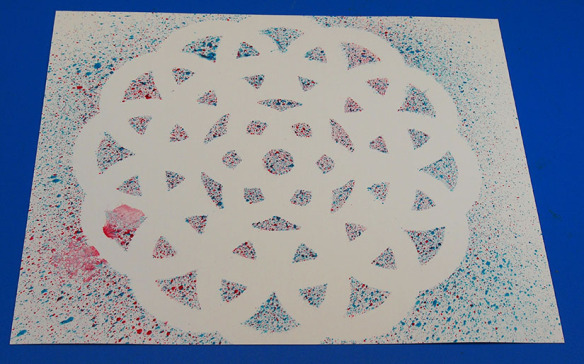
Remove your template to reveal a simple yet gorgeous piece of artwork underneath!

OLYMPUS DIGITAL CAMERALine-15

Show us some of your artwork using the Paint Bellows! Send us photos of your students’ work to subscriber@roylco.ca for a chance to be featured in our next post!

Craft Spotlight: Paint Bellows!

Feature-Image-paintbellows

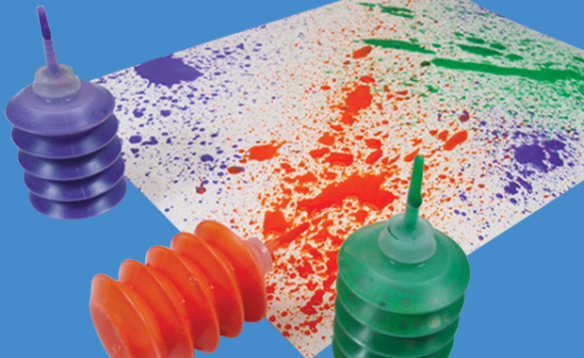
This week’s craft post focuses on our versatile Paint Bellows! These simple art tools make a big statement with interesting paint effects! The unique accordion-like chamber allows paint to be drawn into the bellow and helps propel the paint out when it is depressed and released. Watch the video for a look at what kinds of projects you can use Paint Bellows in!Visit our project guide at this link!

In order to use the Paint Bellows effectively, you will need tempera-like paint. The thicker the paint, the better the bellows will splatter the paint across the art paper.

The Paint Bellows feature two main parts: the clever accordion chamber to contain the paint, and the spout to propel the paint from.

To use the Paint Bellows, place your thumb on the back of the bellows chamber while cushioning the spout between your pointer and third finger. Press your thumb on the back of the chamber to push the accordion fold closer to the spout.

Next, dip the spout of the empty Paint Bellow into a bowl of tempera paint. While holding the Paint Bellows, release the pressure from your thumb to allow the chamber to draw in the paint. This technique is great for encouraging students to practice their fine motor skills with! Try perfecting this technique first before painting with the Paint Bellows!

In order to guarantee a smooth-running paint session, it’s a good idea to set up a painting workstation that students can experiment at with their paint tools. Place a plastic paint tray beneath the art paper. Poise the filled Paint Bellow over the paper and paint tray and press the back of the accordion chamber towards the spout to release the paint.

As you can see in the video, the paint splatter effect is striking!

R5419

Create interesting visuals with the Paint Bellows! Splatter the paint over top of art paper covered with various card templates. Remove the templates to reveal interesting images! Use different paint colors to create layers in your art!

Line-07Show us some of your students’ artworks using the Paint Bellows! Send us photos to subscriber@roylco.ca!

Jeanene from Earth Boys uses our Stained Glass images!

IMG_688732

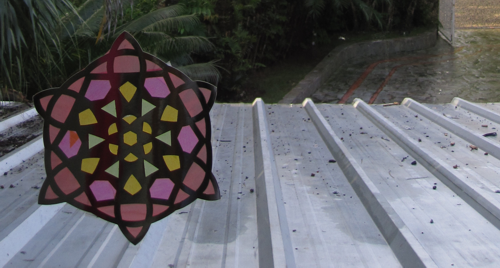
Jeanene from Earthboys posted a great feature on her blog about holiday crafts. One of the crafts featured was our R52085 Snowflake Stained Glass Frames! 

Jeanene’s post can be found at her site Earthboys and is entitled, “Handmade Holidays, Yarn Along — Angels and Fairies.” Her post was made on December 11, 2010.

IMG_688732fs

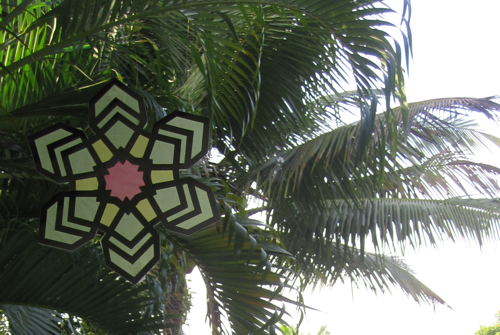
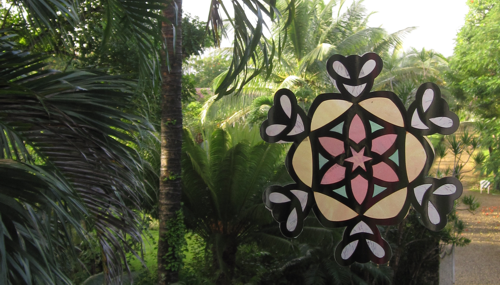
Jeanene’s photos show a beautiful backdrop of the lovely palm trees in her family’s yard. What a beautiful contrast! The colorful snowflake seems to “fit in” with the bright green and golds of the tropical forest.

IMG_688732fssd

Beautiful work! Jeanene’s boys helped to cut out each of the individual pieces and glue them to the sections of the stained glass design.

When hung from the window, the sunlight can beam through the colorful snowflakes to illuminate the paper.

Thanks to Jeanene for this illuminating post!

Images and original post © Earthboys.

This post was not sponsored for a review. At LittleFingersBigArt, our mission is to present to our readers and viewers the newest and most creative craft ideas that fans of Roylco have made on their own. Our goal is to allow you and other educators and parents to reuse our products in fun ways so that children always get the best educational experience from them!

We’d love to see more ideas like this one! If you’ve got a brilliant craft idea or have made a version of one of our crafts that you would like to share with us, send an email to subscriber@roylco.ca with photos, descriptions or a link to your work. We will create a feature post and link back to you with full credit. We’d love to hear from you!

Line-09

Color Diffusing Paper Game Pad

Feature-Image-diffusingpapergame

Combine all your favorite classic board games and take them with you wherever you go! Perfect for those long car-rides or for group playtime sessions in the classroom. 

Age: 6+

Duration: 20 minutes

You’ll Need:

• R15212 Color Diffusing Paper 12 x 18″ (30.5 x 46 cm)

• Assorted buttons: R2131 Bright Buttons or R2143 Really Big Buttons

• Paint

• Paint bowl

• Paint tray

• Hole punch

• Colorful ribbon

• Large wooden block (for stamping)

Line-13

This game pad is convenient to carry anywhere! I’ll show you how to attach a ribbon to the game pad so that it’s easy to roll up and secure.

OLYMPUS DIGITAL CAMERA

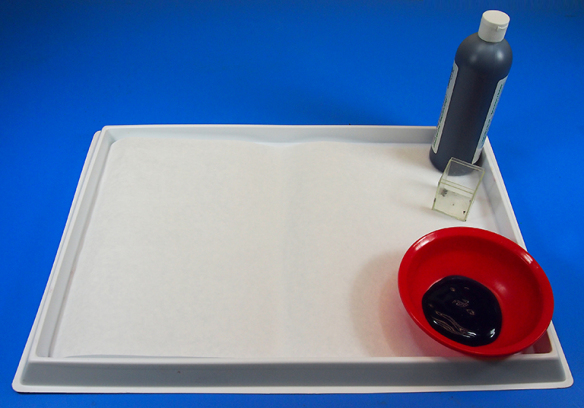
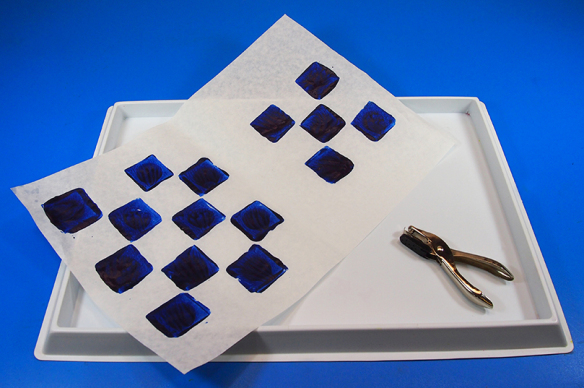
Lay out the paper on the tray. First, figure out which games you would like to include in the game board. If required, use a pencil to sketch out the game board before stamping out the various game spots.

OLYMPUS DIGITAL CAMERA

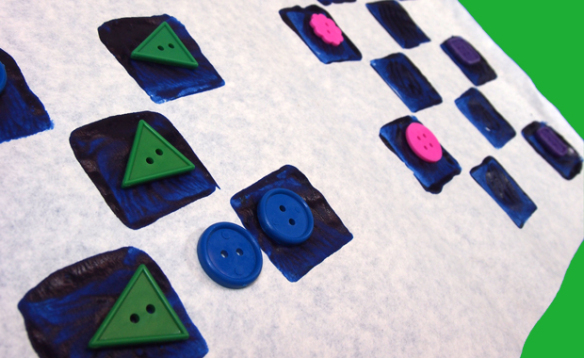
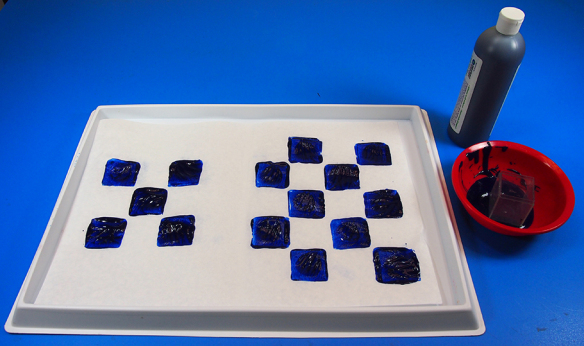
The game boards I chose were Tic-Tac-Toe and Checkers, which is pretty simple to stamp out. I used a small clear block to make the perfect-sized spaces for both game boards.

To stamp out the spaces, I used the white of the paper as half of the spaces and simply connected the spaces by the corners. Dip the block into the bowl of paint and stamp the spaces onto the paper.

OLYMPUS DIGITAL CAMERA

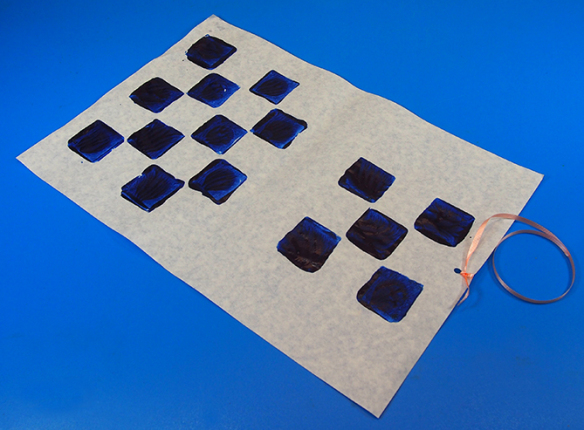
Leave the paint to dry. When dry, punch a hole on one end of the game board.

OLYMPUS DIGITAL CAMERA

Cut a length of ribbon and tie one end to the hole punched side.

OLYMPUS DIGITAL CAMERA

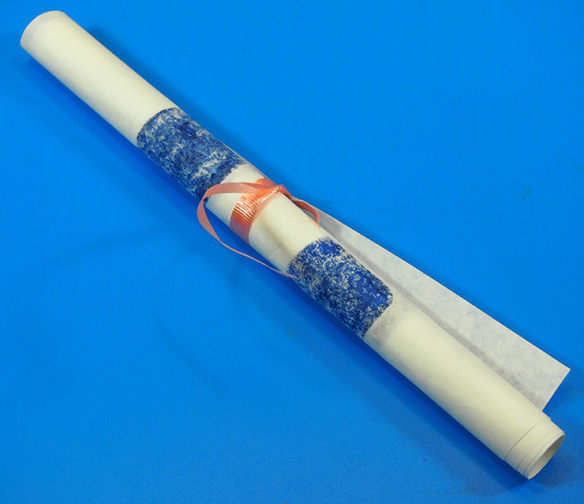
Now you can roll up the game pad and store it away for future use or take it with you on a long trip to play with friends!

OLYMPUS DIGITAL CAMERA

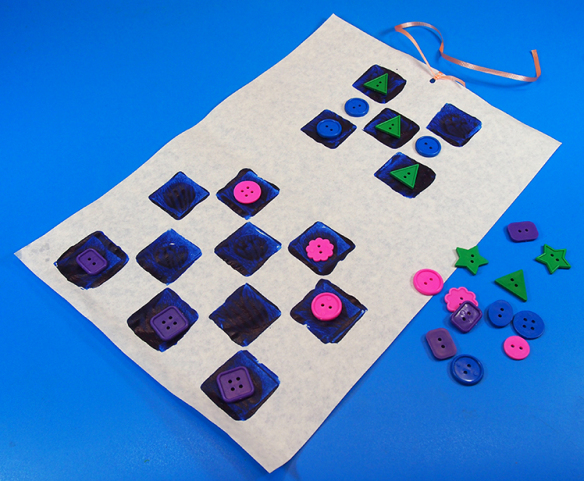
Use the buttons as game pieces! Play Tic-Tac-Toe by trying to get three of the same buttons in a row or use your game pieces to capture your opponents’ in Checkers!

Line-13

What kinds of game pads did your students make? Send us photos of some great game boards to subscriber@roylco.ca! We’d love to write a post about your students’ work!

Craft Spotlight: Touch and Match Animal Cards

Feature-Image-touchmatchcards

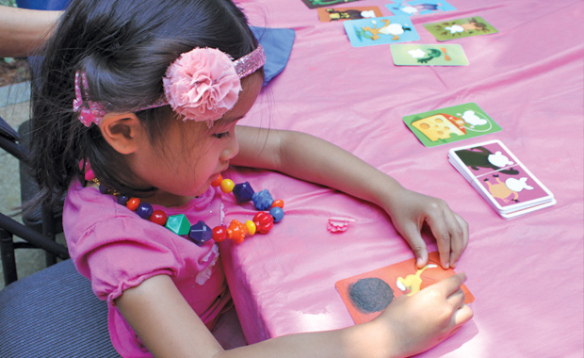
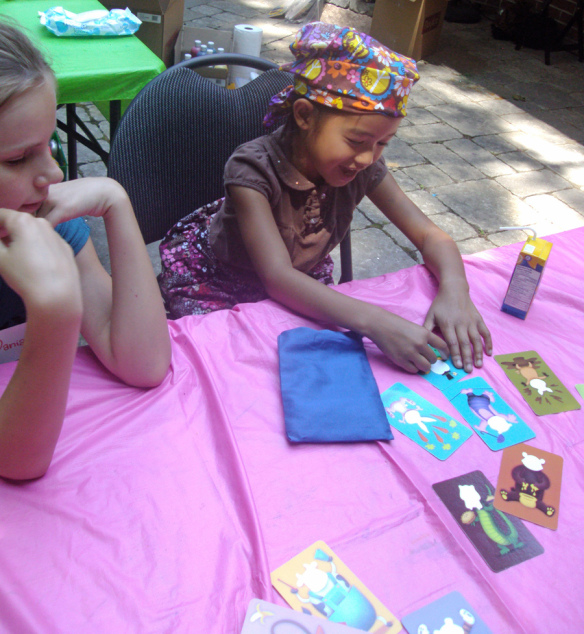
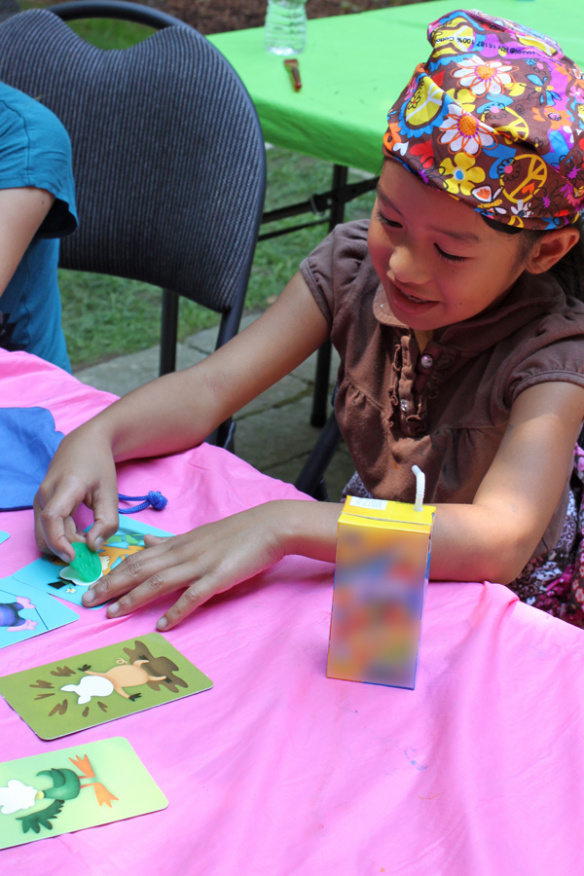
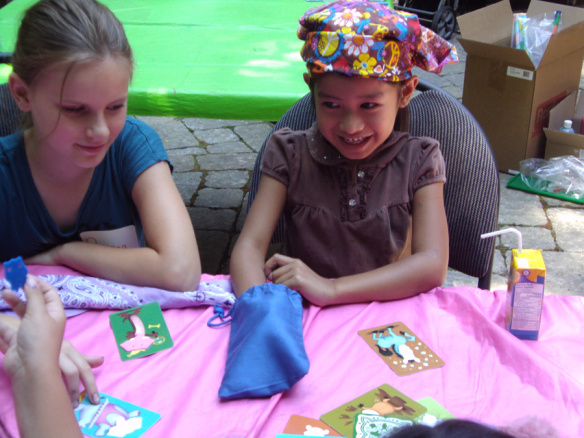
A good way to encourage sensory interplay is through games! Try our fun-tastic R76530 Touch and Match Animal Cards, which features colorful cartoon playing cards and animal-shaped buttons. Read on and learn how to play!!The Touch and Match Animal Cards are a great way to get groups of students together to play, especially if you are trying to break the ice!

DSC05443

The Touch and Match Animal Cards feature several types of playing cards. The playing cards are printed with illustrations of colorful cartoon animal and come in 4 sets. Each set represents a difficulty (easy–medium–intermediate–difficult).

IMG_2486

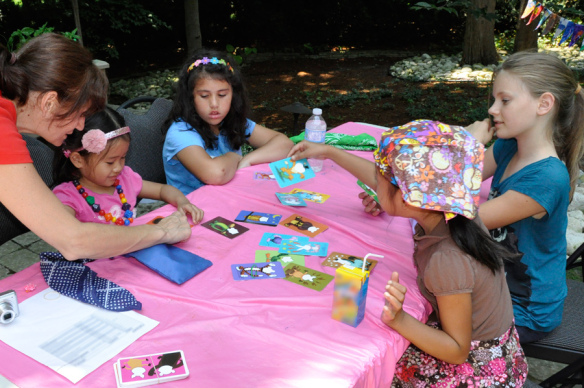
The objective of the game is to match the buttons to the cards! Choose one of the decks to play. Shuffle the cards and turn the cards face down. Take one card from the top and lay it on the table. Examine the card. What animal is printed on the card? Match a button to the face depicted in the card.

DSC05437

However, to make full use of your students’ sensory abilities, drop a handful of Animal Face Buttons into the provided blue bag (we recommend about 3-5 buttons at a time). Ask children to place their hands into the bag and feel around for the appropriate button.

DSC05443

This game is great for encouraging visual and tactile skills!

_DSC0297

The best way to distinguish the different decks is by the colors printed on the backs of the cards. The features of each deck is as follows:

Green deck – Easy – Find the face of the animal in the picture!

Yellow deck – Intermediate – Find the faces of both animals in the picture!

Red deck – Difficult – Find the correct face out of four provided faces for the animal body in the image!

Blue deck – Challenging – Find the Animal Face Button corresponding to the animal’s face in the image. There are no other clues provided so think hard about your selection!

Line-20


Show us your students’ playtime sessions using the Touch and Match Animal Cards! Send photos to subscriber@roylco.ca for a chance to be featured in our next post!

Nellie Mae from This Little Blog of Mine uses our Amazing Animal Paper!

Halloween has already come and gone, but if you are planning to host a kids’ dress-up party this weekend, take a cue from Nellie Mae and use some of our Animal Skins Paper to make quick and easy costumes!

Nellie Mae posted her students’ work on May 18, 2011 under the title, “Why I love the end of the year… Part 2.” Click on the link to visit her site!

The kids received various sizes of brown paper bags to make their hats and vests, but you can use regular Bristol paper and cut it to size. Nellie Mae’s students cut holes into the sides of the large brown bag to fit their arms through. The smaller brown paper bags were used as the hats.

You can decorate the hats and vests with printed pattern paper, such as the ones we make. The sheets only come in 8.5 x 11″ (21.5 x 28 cm) but use three sheets to decorate the paper bags. Glue two sheets onto the vest–one to the front and one to the back–then wrap a third sheet all the way around the paper hat.

Use any one of the following printed papers to make different kinds of costumes:

R15198 Creatures and Animals Value Pack — Featuring a diverse selection of animal, sealife, dinosaur and bug designs.

R15240 Dinosaur Craft Paper — Dress up as your favorite dinosaur!

R15237 Bug Craft Paper — Are you a butterfly or a bumblebee? Make your pick!

R15239 Sealife Paper — Discover wonderful aquatic colors and patterns!

The summer dress-up theme for Nellie Mae’s class was ‘animals’ so the thrifty teacher decided to use our R15256 Amazing Animal Paper to decorate the paper bags with!

R15256

Check out her link for photos of the students’ costumes. Some of them even made armbands with the leftover paper!

Thanks to Nellie Mae for this post!

Images and original post © This Little Blog of Mine.

This post was not sponsored for a review. At LittleFingersBigArt, our mission is to present to our readers and viewers the newest and most creative craft ideas that fans of Roylco have made on their own. Our goal is to allow you and other educators and parents to reuse our products in fun ways so that children always get the best educational experience from them!

We’d love to see more ideas like this one! If you’ve got a brilliant craft idea or have made a version of one of our crafts that you would like to share with us, send an email to subscriber@roylco.ca with photos, descriptions or a link to your work. We will create a feature post and link back to you with full credit. We’d love to hear from you!
Remembrance Day Wreath

Feature-Image-wreath

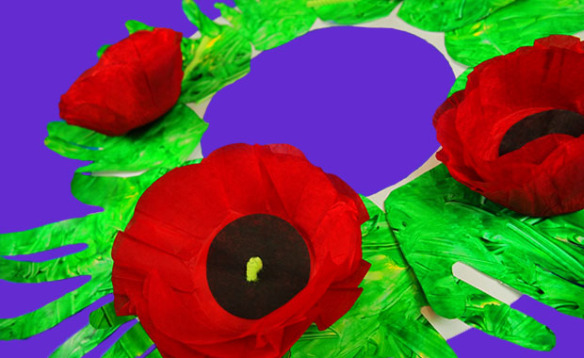
Use the poppies from our Remembrance Day Poppy kit to decorate your handmade Remembrance Day wreath! Everyone in your class can contribute to this activity using their hand-prints as leaves for the wreath!

Age: 5+

Duration: 30 minutes

You’ll Need:

• R42005 Remembrance Day Poppies

• Bristol paper

• Fingerpaint paper

• Green fingerpaint

• Glue

• Scissors

• Marker/pencil

Line-10

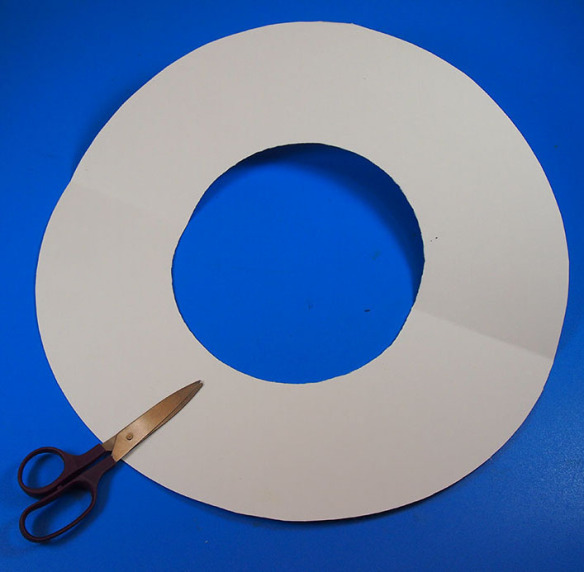
To begin your Remembrance Day wreath, you’ll need to first make the wreath base. The wreath base can be made by folding a large sheet of card in half. Use white or green Bristol paper to get a stiff backing.

OLYMPUS DIGITAL CAMERA

Cut a large half circle above the fold line. Cut a second smaller half circle in the center of the fold line. Unfold the cutout to reveal the wreath base.

OLYMPUS DIGITAL CAMERA

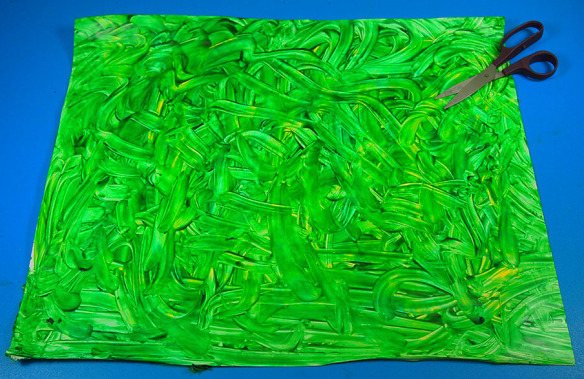
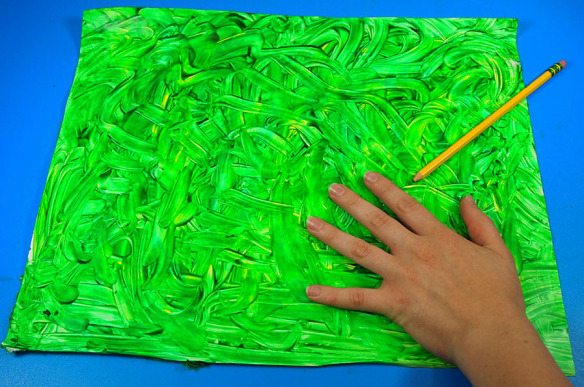
This next step will be fun for a lot of students. Give each student a sheet of fingerpaint paper and a bowl of green paint. Tip: Provide lots of sanitizing wipes and paper towels to keep workstations and clothes clean! Instruct the students to fingerpaint the entire sheet of paper so that none of the white shows beneath.

OLYMPUS DIGITAL CAMERA

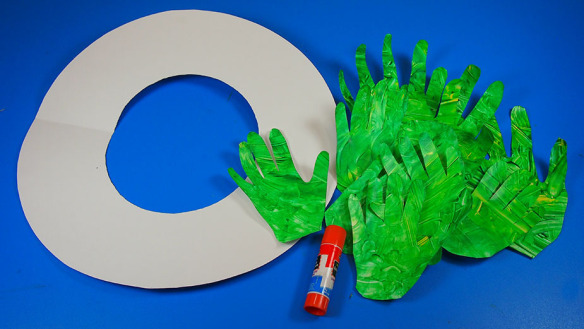
Trace your hand-print onto the painted sheet. Students can trace and cut out several of their hand-prints.

OLYMPUS DIGITAL CAMERA

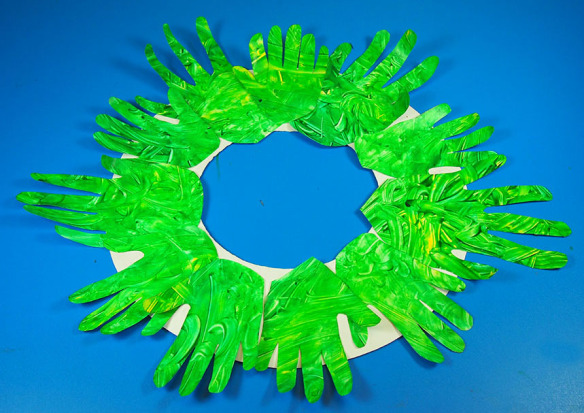
You will need about 8-10 pairs of hand-prints to fill the wreath.

OLYMPUS DIGITAL CAMERA

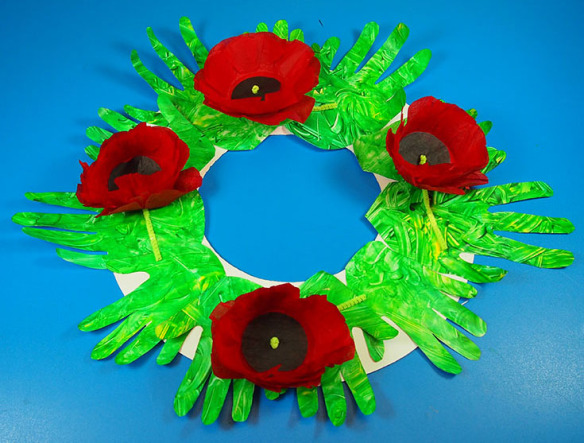
Rub a bit of glue onto the lower palm of each hand-print on the unpainted side. Paste each hand onto the wreath radiating outward from the circle. Note: You can add more fingerpainted hand-prints to the wreath to cover the white from the wreath base.

OLYMPUS DIGITAL CAMERA

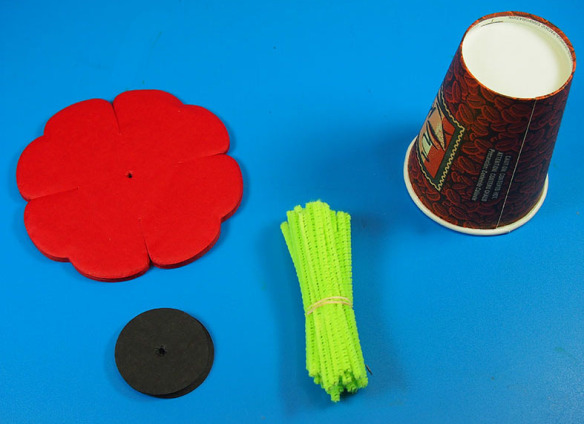
Next, assemble the poppies! Each Remembrance Day Poppies kit comes with enough die-cut tissue flowers for each student to make 2 poppies. First, spritz the tissue paper poppy with water and drape it over an upside-down cup. This will help the poppy form a flower-like shape. Note: Repeat these steps for two more poppy shapes. Once the poppies are dry, you can layer them to give them a dimensional look.

OLYMPUS DIGITAL CAMERA

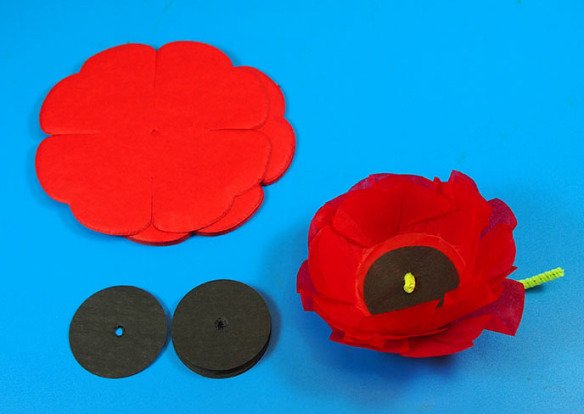
Once the poppy is dry, layer the two flower cutouts together and arrange so that the petals extend at various angles all around. Place the die-cut black circle in the center of the flower. Thread the green chenille stem through the hole in the center and twist the end to keep the layers intact.

OLYMPUS DIGITAL CAMERA

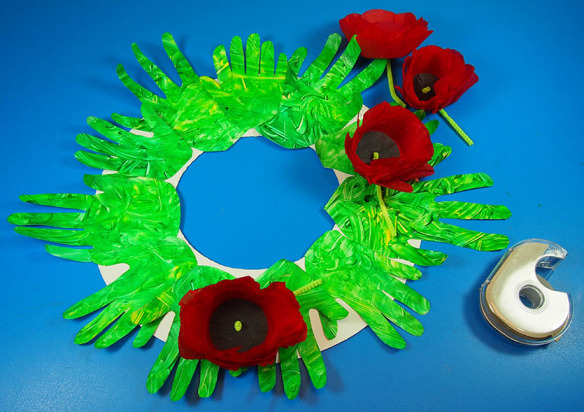
Attach the poppies to the fingerpainted hand-print wreath with tape.

OLYMPUS DIGITAL CAMERA

Ready to be displayed in your classroom!

Line-10

Show us your Remembrance Day spirit by sending us photos of your classroom projects to subscriber@roylco.ca! We’d love to hear from you!
Craft Spotlight: Remembrance Day Poppies

Image of Roylco Poppy Wreath

Feature-Image-remempoppywreath

As November 11 is fast-approaching, we recognize the importance of remembering and the bravery of veteran heroes around the world on Remembrance Day. Show your classroom’s appreciation with a beautiful classroom wreath!
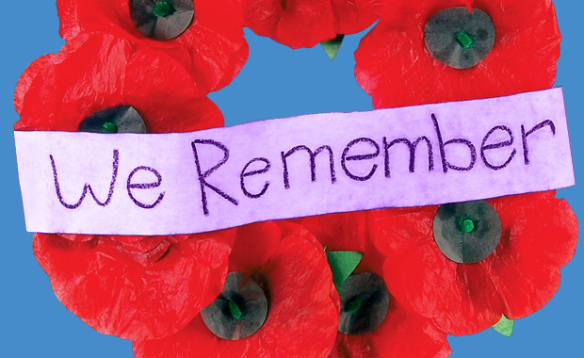
The R42005 Remembrance Day Wreath provides you with enough materials for every student to make at least 1 poppy. The kit features pre-cut red tissue paper poppies, and black centers that can be overlain to make the poppies. Tip: Use red marker to draw radiating lines out from the center of the tissue paper poppies. This will give the poppy a realistic appearance when assembled.

To further add dimension, soak the poppies with a light mist of water and drape over an upside-down cup to dry. The dried poppies will appear crinkled like real petals and take the shape of a flower.

Secure the tissue papers with the provided green chenille stem and attach die-cut green paper poppy leaves to complete the look. 

Combine all the poppies together to make this wreath a decorative tribute to those who have sacrificed so much. Talk about the deep history of Remembrance Day and research the significance of the poppy. You can read John McCrae’s famous poem, “In Flanders Fields” and encourage students to write their own poems on the significance of Remembrance Day. 

Watch the instructional video below to show you how to put together the wreath!

To construct the wreath, fold a card sheet in half and cut out a large half circle above the fold line. Cut out a smaller half circle from the fold line to make the center. Unfold the card sheet to reveal a circle with the center cut out.

Paste all the poppies around the wreath. You can make one large wreath or several smaller wreaths to decorate the classroom.

Line-20

Show us your Remembrance Day spirit by sending us photos of your class wreaths to subscriber@roylco.ca! We will feature the photos in one of our upcoming posts!