Posts Tagged ‘stencil art’
The Importance of Calm Down Corners
First things first: What are calm down corners? We’re glad you asked! Calm down corners are a space that help kids learn to understand, control, and regulate their feelings in a safe and familiar environment. Many of us do not think about the fact that controlling our emotions is something we once had to learn…
Read MoreNew Product Highlight: Color Wheel Stencils
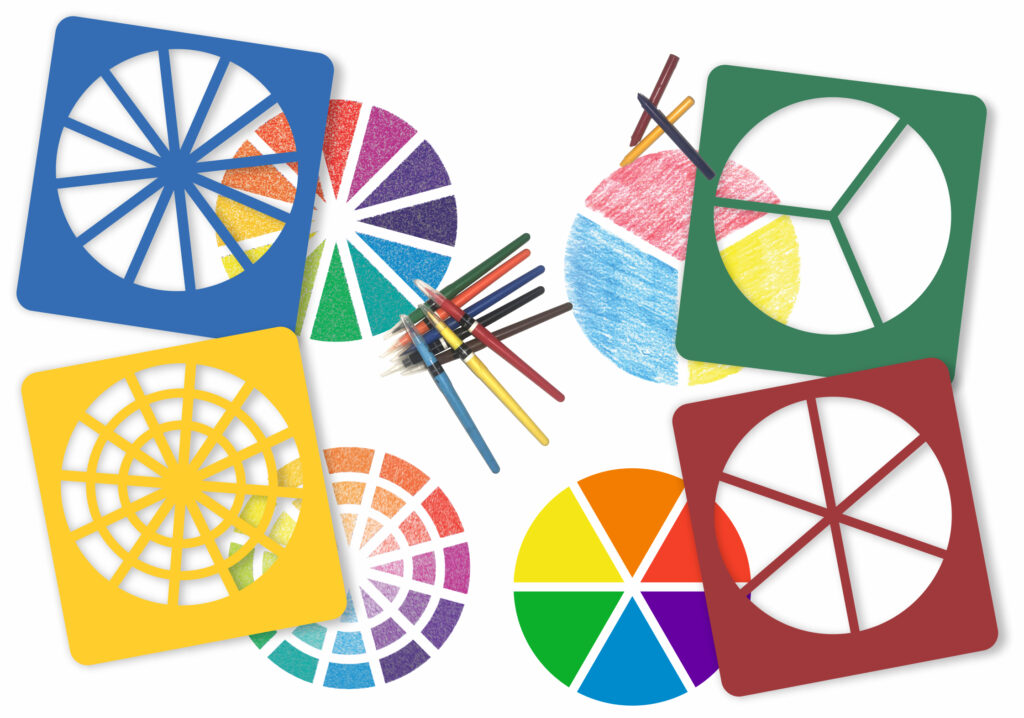
Create fun by encouraging students to create personal color wheels! We like this activity because it can be simple or complex, with a good balance between structure that guides students and open-ended fun that fosters creativity.
Read MoreLet’s make a Rangoli decorated entryway!
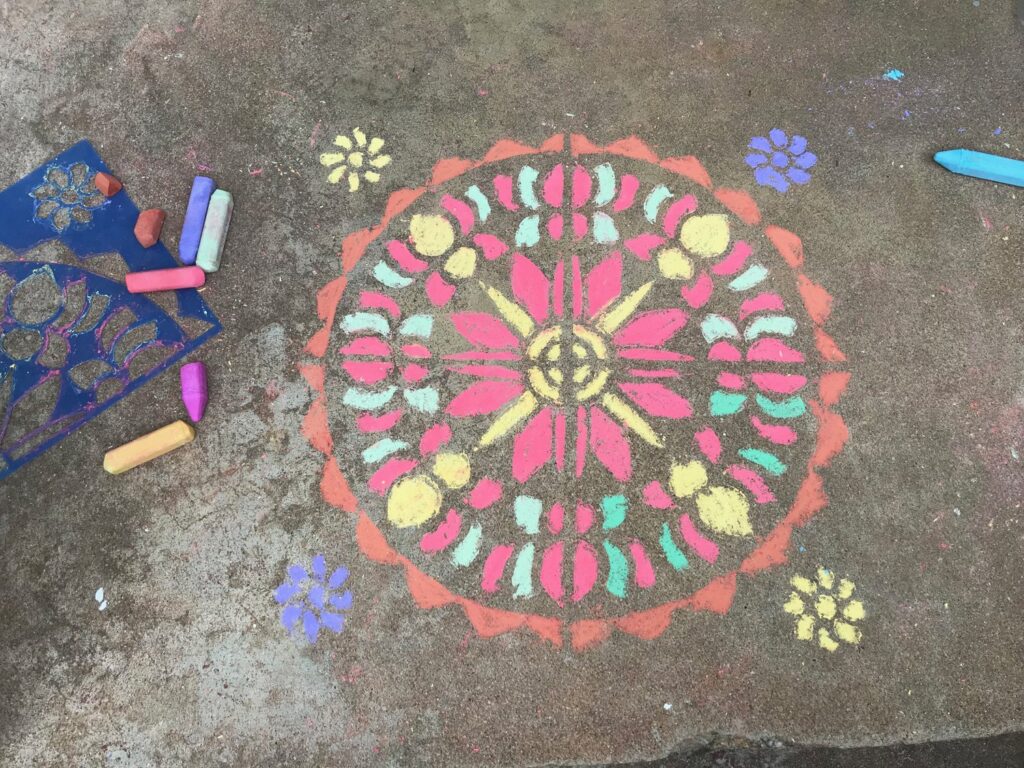
Age: 4+ Duration: 10 minutes Learning Outcomes: We want to start a conversation about Indian culture, Hindu traditions and Rangoli art to help us broaden our understanding of the people we share the world with. Here’s what you need: Rangoli Mega Stencils (R5621) Sidewalk Chalk If you’re looking for a fun, and very simple, summertime…
Read MoreOverlapping Stencil Shapes
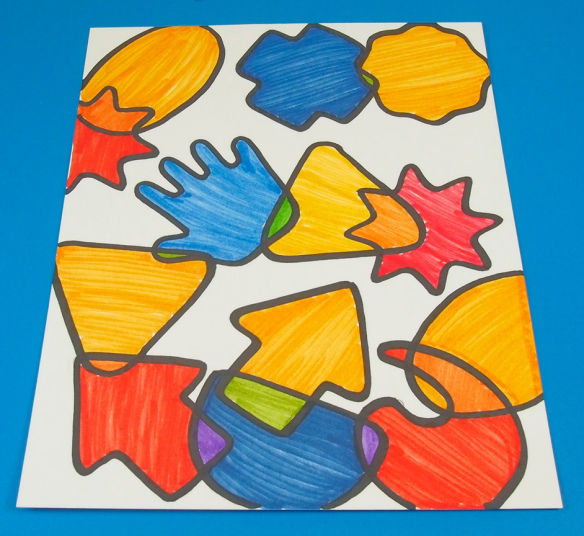
Blend basic shapes and create a colorful collage art piece! Great for rainy day art projects.Young children will love tracing out the fun shapes. The stencils are easy to manipulate and perfectly-sized for small fingers to handle. Build fine motor skills while combining colors and shapes for interesting effects! Age: 3-5 Duration: 15-20 minutes You’ll Need:…
Read MorePeek-a-boo Art Silhouettes
Give nature a makeover with these colorful silhouettes! Age: 5+ Duration: 20 minutes Learning Outcomes: Exercise fine motor skills. Explore the merging of several styles of art. Create a beautiful craft. You’ll Need: R22052 Double Color Sheets R5615 Nature Stencils R15203 Decorative Hues Paper Plain white paper Scissors White Glue Pencil Start by choosing one or two nature…
Read MoreCraft Spotlight: Super Snowflake Stencils
If you want to give some pizzazz to your winter-themed artwork, check out our Super Snowflake Stencils! We’ve created an assortment of beautiful snowflake designs that your students can use again and again!The Super Snowflake Stencils are jumbo-size, perfect for small hands to use, manipulate and trace! Our video below shows you several different techniques…
Read More