Remembrance Day Wreath

Feature-Image-wreath

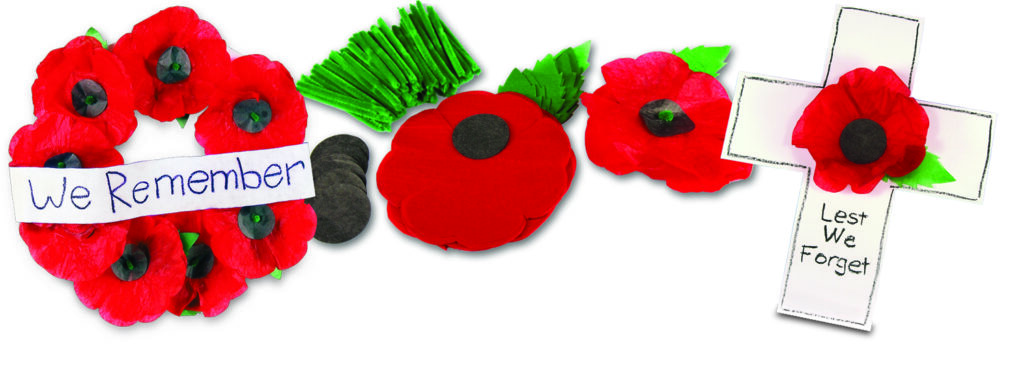
Use the poppies from our Remembrance Day Poppy kit to decorate your handmade Remembrance Day wreath! Everyone in your class can contribute to this activity using their hand-prints as leaves for the wreath!

Age: 5+

Duration: 30 minutes

You’ll Need:

• R42005 Remembrance Day Poppies

• Bristol paper

• Fingerpaint paper

• Green fingerpaint

• Glue

• Scissors

• Marker/pencil

Line-10

To begin your Remembrance Day wreath, you’ll need to first make the wreath base. The wreath base can be made by folding a large sheet of card in half. Use white or green Bristol paper to get a stiff backing.

OLYMPUS DIGITAL CAMERA

Cut a large half circle above the fold line. Cut a second smaller half circle in the center of the fold line. Unfold the cutout to reveal the wreath base.

OLYMPUS DIGITAL CAMERA

This next step will be fun for a lot of students. Give each student a sheet of fingerpaint paper and a bowl of green paint. Tip: Provide lots of sanitizing wipes and paper towels to keep workstations and clothes clean! Instruct the students to fingerpaint the entire sheet of paper so that none of the white shows beneath.

OLYMPUS DIGITAL CAMERA

Trace your hand-print onto the painted sheet. Students can trace and cut out several of their hand-prints.

OLYMPUS DIGITAL CAMERA

You will need about 8-10 pairs of hand-prints to fill the wreath.

OLYMPUS DIGITAL CAMERA

Rub a bit of glue onto the lower palm of each hand-print on the unpainted side. Paste each hand onto the wreath radiating outward from the circle. Note: You can add more fingerpainted hand-prints to the wreath to cover the white from the wreath base.

OLYMPUS DIGITAL CAMERA

Next, assemble the poppies! Each Remembrance Day Poppies kit comes with enough die-cut tissue flowers for each student to make 2 poppies. First, spritz the tissue paper poppy with water and drape it over an upside-down cup. This will help the poppy form a flower-like shape. Note: Repeat these steps for two more poppy shapes. Once the poppies are dry, you can layer them to give them a dimensional look.

OLYMPUS DIGITAL CAMERA

Once the poppy is dry, layer the two flower cutouts together and arrange so that the petals extend at various angles all around. Place the die-cut black circle in the center of the flower. Thread the green chenille stem through the hole in the center and twist the end to keep the layers intact.

OLYMPUS DIGITAL CAMERA

Attach the poppies to the fingerpainted hand-print wreath with tape.

OLYMPUS DIGITAL CAMERA

Ready to be displayed in your classroom!

Line-10

Show us your Remembrance Day spirit by sending us photos of your classroom projects to subscriber@roylco.ca! We’d love to hear from you!

Craft Spotlight: Remembrance Day Poppies

Image of Roylco Poppy Wreath

Feature-Image-remempoppywreath

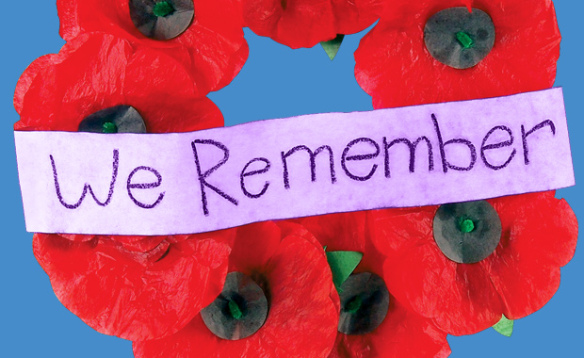
As November 11 is fast-approaching, we recognize the importance of remembering and the bravery of veteran heroes around the world on Remembrance Day. Show your classroom’s appreciation with a beautiful classroom wreath!

The R42005 Remembrance Day Wreath provides you with enough materials for every student to make at least 1 poppy. The kit features pre-cut red tissue paper poppies, and black centers that can be overlain to make the poppies. Tip: Use red marker to draw radiating lines out from the center of the tissue paper poppies. This will give the poppy a realistic appearance when assembled.

To further add dimension, soak the poppies with a light mist of water and drape over an upside-down cup to dry. The dried poppies will appear crinkled like real petals and take the shape of a flower.

Secure the tissue papers with the provided green chenille stem and attach die-cut green paper poppy leaves to complete the look. 

Combine all the poppies together to make this wreath a decorative tribute to those who have sacrificed so much. Talk about the deep history of Remembrance Day and research the significance of the poppy. You can read John McCrae’s famous poem, “In Flanders Fields” and encourage students to write their own poems on the significance of Remembrance Day. 

Watch the instructional video below to show you how to put together the wreath!

To construct the wreath, fold a card sheet in half and cut out a large half circle above the fold line. Cut out a smaller half circle from the fold line to make the center. Unfold the card sheet to reveal a circle with the center cut out.

Paste all the poppies around the wreath. You can make one large wreath or several smaller wreaths to decorate the classroom.

Line-20

Show us your Remembrance Day spirit by sending us photos of your class wreaths to subscriber@roylco.ca! We will feature the photos in one of our upcoming posts!