Good-Bye 2017! Looking Forward to 2018

As 2017 comes to a close, we thought we would look back on what a great year we have had, and give you some sneak peeks for the coming year!

We want to start with a look back at our favorite 2017 Blog Posts!

DSC_6465

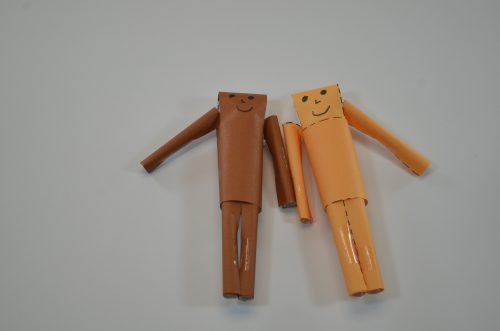
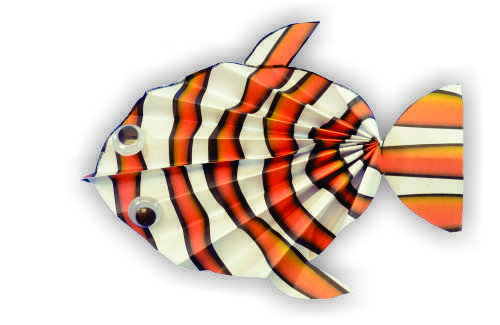
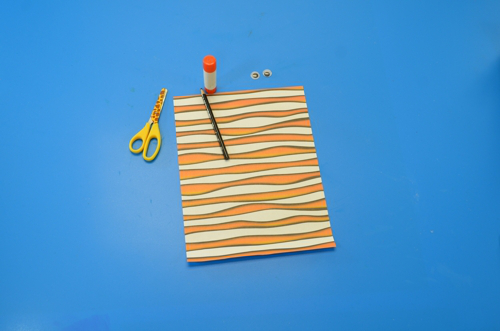
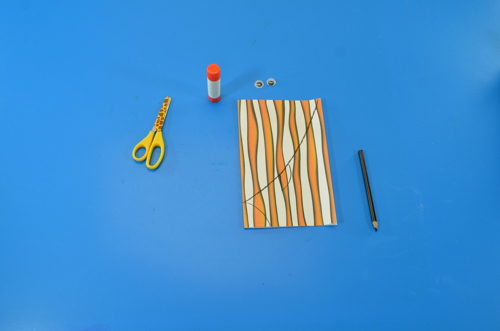
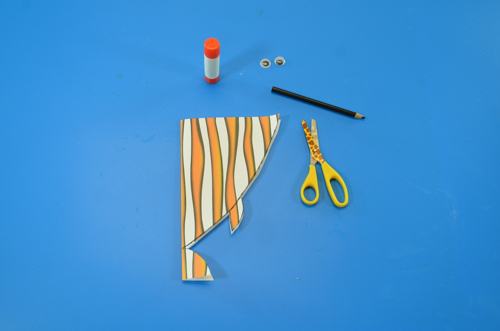
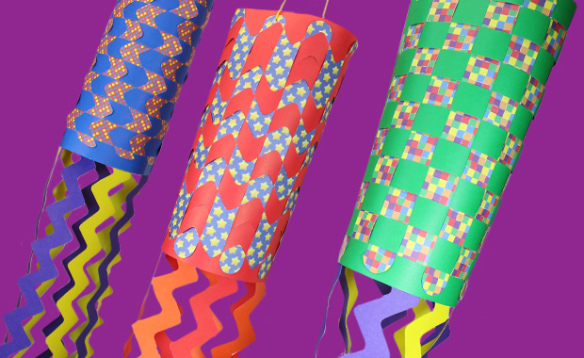
Our Roll-Up Paper Play Pals are a terrific craft for students! Use them in imaginative play, for “All About Me” activities and as a fun paper doll.


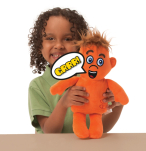
Roylco introduced two dolls in 2017, and they could not be any cuter! Encourage kids to explore their bodies and their emotions with these cuddly dolls.

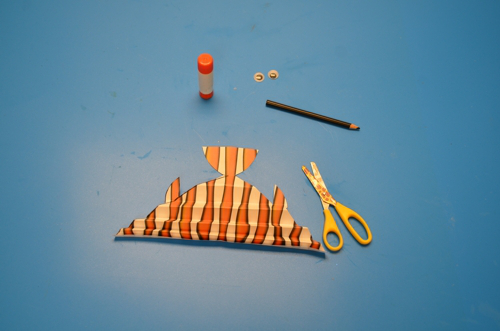
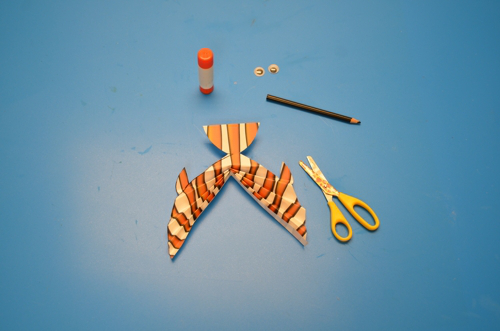
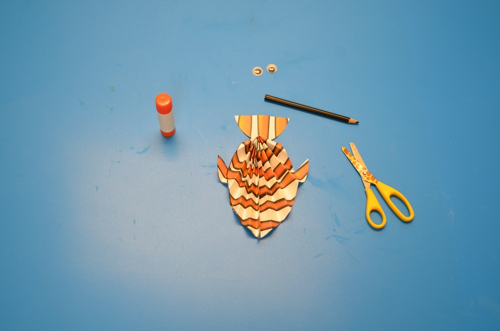
In an October full of masks, this was one of our favorites! This beautiful lion encourages kids to explore paper sculpting and to create wearable art!

finished craft

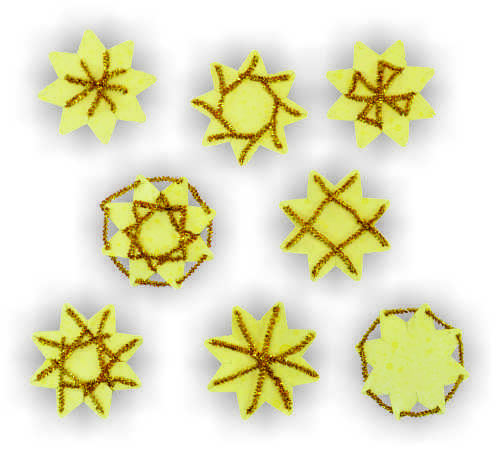
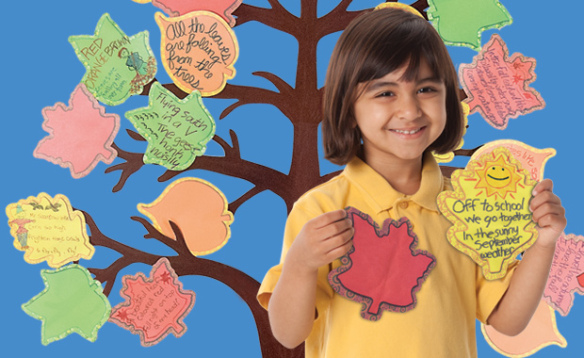
We loved how these vibrant and versatile stars brightened up the room!

Marbled - Catapillar2

Visual, tactile and beautiful, we absolutely love the marbling process used to create this adorable caterpillar!

Line-21

2017 has been a great year for us, but we are so excited to debut exciting new products and craft ideas to you for 2018! Stay tuned for future blog posts featuring exciting new products including:

green screen kit image.jpg

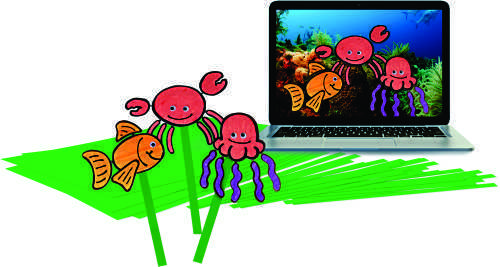
Roylco’s new R72020 Live Action Green Screen Kit allows students to create their own special effects and movies! The kit will include 6 green screens and 24 sticks to use to manipulate puppets of their own design. Stay tuned for blog posts featuring tips and tricks for green screen editing, puppet templates and more!

35076 Number Doll - Around a house.jpg

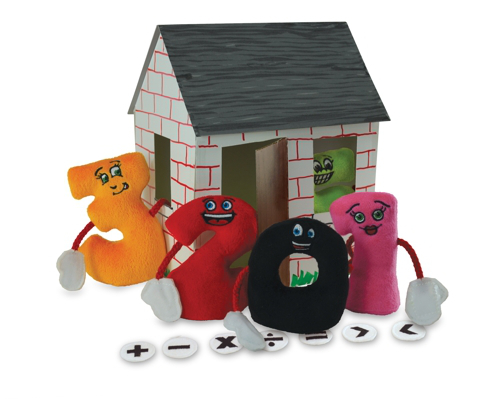
Roylco is expanding our line of dolls with these adorable numbers! The R35076 Number Dolls include 9 colorful dolls from 0-9, and seven hook and loop math signs. Stay tuned for blog posts exploring the mathematical possibilities of these friendly-faced dolls!

Line-06

Like us on FacebookShare this post with your friends, or Subscribe to this blog today to receive original craft project updates every week!


Accordion Fish

finished craft.jpg

These adorable fish are perfect as classroom decorations or as display pieces for reports and presentations!

step 1

Age: 4+

Duration: 5 Minutes

Learning Outcomes: Practice folding accordion-style. Exercise scissor skills.

You’ll Need:

Line-21

Start by folding your sheet of paper in half, hamburger style.

step 2.jpg

Draw an outline of a fish. Remember, you have folded your paper, so use the fold as the middle of your fish. You are really only drawing the outline of HALF a fish.

step 3.jpg

Cut out your fish, being careful not to cut the fold.

step 4.jpg

Open your fish up. Start at the nose, and accordion fold your fish until you reach the tail. DO NOT accordion fold the tail.

step 5.jpg

Once you have completed the accordion fold, fold the accordion in half.

step 6.jpg

The folds will spread out as you do this; that’s ok! Carefully tape the two sides together to complete your fish.

step 7

Add googly eyes or other details to cap off the look of your fish!

Line-06

Like us on FacebookShare this post with your friends, or Subscribe to this blog today to receive original craft project updates every week


Paper Sculpted Lion Mask

finished craft.jpg

These easy paper sculpting techniques create a beautiful 3D effect on any basic mask! 

Age: 5+

Duration: 20 Minutes

Learning Outcomes: Practice precision scissor skills! Explore the tensile strength and elasticity of paper. Learn how different textures create different looks!

You’ll Need:

Line-12

  1. Select your mask. We chose a lion mask for this project. Then we colored in the mane and snout with crayons while the mask was flat.
  2. Fold, crease, overlap and tape your mask so it is 3D! It is much easier to fold your mask up BEFORE you add the paper elements than trying to fold it up after.
  3. Cut strips out of your construction paper to form the lion’s mane. Strips that are approximately 4″ long worked best for the mane.
  4. Once all your strips are cut, gently roll each strip up, then let it relax.
  5. Tape your mane curls to the mask. We taped them in three rows, starting with the outermost row and working inward.
  6. Next, cut strips for the facial fur. We started with long strips and measured each strip against the section of mask we wanted to cover. Once each strip was the correct length, we cut the strip into a fringe and taped it down. Start from the lowest point that you want the fur fringe to cover and work upwards in layers.
  7. Use chenille stems and the pre-punched holes to secure the mask to your head! These masks are perfect finishing touches for Halloween costumes!

Line-06

Like us on FacebookShare this post with your friends, or Subscribe to this blog today to receive original craft project updates every week!


Terrific Tree Paper

R15294-A

Incorporate nature into your crafts with R15294 Terrific Tree Paper!

Eight types of wood are included in each package: Birch, Cedar, Cherry, Maple, Oak, Pecan, Pine, and Walnut. One side of each piece of paper features the bark pattern of the tree, while the reverse side features the corresponding wood grain pattern.

15294 Wood Collage

Here are a few interesting ways to use Terrific Tree Paper:

• Cut the paper into mosaics for nature-themed crafts or collage!

• Spice up paintings and drawings! Trace a tree onto Terrific Tree Paper, then cut it out and paste it into a drawing or painting for a different, naturalistic effect (for an even more realistic look use Crafty Leaves on the tree’s crown)!

• Create a 3-D classroom forest. Roll Terrific Tree Paper around old toilet paper or paper towel tubes and cut the tubes to make various tree heights. Then cut leaves out of green paper or use Roylco’s Botanical Cuts to create a full tree crown.

Stay tuned this week for a special post featuring this product!

Line-06

Like us on FacebookShare this post with your friends, or Subscribe to this blog today to receive original craft project updates every week!

Bird Watching Feeder + Binoculars

tube seed feeder crafts binoculars

Look at this cutie! He turned up to have a mid-afternoon snack after we finished making special feeders for the local wildlife and binoculars to observe them with! 

Age: 5+

Duration: 15-20 minutes

Learning Objectives: Observe the amazing details and beauty of nature. Create special feeders for birds, squirrels and other critters. Use fine motor skills to roll up tubes. Talk about local wildlife and natural habitats.

tube seed feeder crafts binoculars

You’ll Need:

R39301 Tube Crafts

• Peanut-free spread

• Birdseed

• Ribbon

• Plastic knife

• Paint tray

• Optional: Tape for binoculars

Line-06

tube seed feeder crafts binoculars

The Tube Crafts feature several flat cutout shapes that have colors printed on either side. One side of the flattened tube features tabs, and on the other side are slots that the tabs fit into. Roll the flat sheet into a tube like shape and slide the slots into the tabs. This keeps the tube’s shape.

tube seed feeder crafts binoculars

Cut a length of ribbon and feed it through the tube. Tie the ends of the ribbon together. This ribbon will help hang up the tube feeder.

tube seed feeder crafts binoculars

Place the tube onto a paint tray and smear the tube entirely with the peanut-free spread. Students can pair up together to complete this step. One student can hold the edges of the tube while the other student uses a plastic knife to smear the spread.

tube seed feeder crafts binoculars

Next, roll the tube across a pile of birdseed. Press the tube down onto the seeds so that the spread picks up a lot of seeds.

tube seed feeder crafts binoculars

You can pat down more of the seeds onto the tube to cover it completely.

tube seed feeder crafts binoculars

Find a nice low-lying branch to hang the tube feeder. If you would want to attract birds, hang the tube feeder on a higher branch.

tube seed feeder crafts binoculars

Meanwhile, you can make your own pair of binoculars to watch the tube feeder! Roll up two more of the tubes. Attach them together with strips of tape.

tube seed feeder crafts binoculars

These pair of binoculars were made by creasing down an edge of the tube. While pinching the crease, press in the opposite side and make a second inner crease. This will create a heart-like shape out of the tube. Connect the two tubes together with tape.

tube seed feeder crafts binoculars

You can also punch two holes into each side of the binoculars. Tie on a length of string to each hole so kids can wear the binoculars.

tube seed feeder crafts binoculars

Now what can we see? Let’s sit patiently and wait…

tube seed feeder crafts binoculars

Here comes a visitor!

tube seed feeder crafts binoculars

He noticed the Tube Feeder!

tube seed feeder crafts binoculars

Now it’s time for a snack!

Line-06

Like us on FacebookShare this post with your friends, or Subscribe to this blog today to receive original craft project updates every Monday, Wednesday and Thursday!

Sealife Weaving Mats

2015-06-29-FeatureImage

With the summer fast approaching, it’s time to get in gear for some summer crafting fun! Exercise fine motor skills while weaving mats shaped as your favorite undersea creatures! 

The Sealife Weaving Mats pack provides a great start for children who are honing their fine motor skills. There are 4 different shapes–a dolphin, fish, seahorse and shell–for your students to choose from. The colorful and heavy card paper is great for weaving as it holds its shape while students experiment with the over-and-under method of passing strips through the slots.

You can tape the paper strips down to prevent them from sliding as you weave them across the slots. The paper strips are cut into wave-like formations to add to the design of your woven shape.

Remember to alternate the start of the weaving so that the strips are started either one slot over or behind each row. This will ensure that you get that neat brick-like pattern as the weaving continues.

Once your students have finished creating their woven design, they can hang the finished pieces up on a display wall or take home. To extend the weaving activities even further, try out some of the tutorials below:

• Make weaving strips from Color Diffusing Paper! This special paper allows watercolors to blend together to make new interesting color designs. Wait until the paper dries, then cut it up into strips and use it to make your own colorful painted weaving mat!

• Turn a woven placemat into a windsock with this activity! Details here!

This activity is for more advanced weaving, but is a great exercise nonetheless! Use beads and string to turn an ordinary paper plate into an extraordinary piece of art.

• Once your students get really good at weaving, make some functional items including this basket! Students can use the baskets for storing or organizing important tools such as pens, pencils, erasers, rulers and calculators inside their desks.

Line-06

Like us on FacebookShare this post with your friends, or Subscribe to this blog today to receive original craft project updates every Monday, Wednesday and Thursday!

Weaving Mat Windsocks

weaving placemat windsock

After you’ve done your spring cleaning, hang up some bright and colorful windsock decorations! 

Age: 3+

Duration: 15-20 minutes

Learning Objectives: Exercise fine motor skills with precise weaving. Make a beautiful windsock craft for summer time using a multi-step process.

weaving placemat windsock

You’ll Need:

R16019 Placemat Weaving Mats

• Hole punch

• Tape

• Yarn

• Scissors

Line-06

weaving placemat windsock

Each pack of Placemat Weaving Mats come with an assortment of beautiful patterns and designs for the placemats. The placemats will be your base for making the windsocks. Choose the one that will best represent your windsock! The slots are pre-cut for easy weaving.

weaving placemat windsock

Each pack features die-cut patterned strips that can be intertwined with the placemat slots. Weaving the slots should be done in an over-and-under pattern. For each column you complete, be sure to alternate the start of your weaving.

weaving placemat windsock

Here’s what the placemat looks like when it’s all finished and woven!

weaving placemat windsock

You can secure all of the strips down with tape.

weaving placemat windsock

Roll the placemat into a cylinder and secure the edges together with tape.

weaving placemat windsock

Take one of the placemats with the pre-cut weaving slots and cut along the edge on one side. Repeat for the opposite side. This will allow you to easily detach the resulting slots apart to make your own streamers for the windsock. Alternatively, you can use scrapbooking scissors to cut your streamers from tissue paper or decorative paper.

weaving placemat windsock

Tape the individual strips to the inside bottom edge of the windsock.

weaving placemat windsock

Make sure the inside edge is completely filled with streamers.

weaving placemat windsock

Hole punch two holes on either side of the placemat weaving mat cylinder.

weaving placemat windsock

Cut a length of yarn and tie through the holes in the windsock.

weaving placemat windsock

Here’s a beautiful ensemble of Weaving Mat Windsocks hung up in front of a classroom wall! How pretty does that look? Good enough for a summer art display!

Line-21

Like us on FacebookShare this post with your friends, or Subscribe to this blog today to receive original craft project updates every Monday, Wednesday and Thursday!

Spotlight on… Poet Tree

2015-02-23B-FeatureImage

Say something nice for Poetry Day this March!

The R49132 Four Seasons Poet Tree comes with a full set: 32 beautiful leaf shapes in an assorted range of colors and a full sized classroom poetry tree on which to pin the leaves.

Mount the tree up on a wallboard in your classroom in a space that can be prominently seen. Tell students that the tree represents their knowledge of literacy. Anything that uses words in a descriptive way can be written onto the leaves and tacked up on the tree for everyone to see! This will fill up the tree to make it look bright, colorful and beautiful.

49132-Four-Seasons-Poet-Tree-art

For early years, focus on writing simple descriptive words and attaching those to the tree. For example, you could ask students to think of a word to describe how their day is going or what the weather is like outside. Use crayons or markers to add some color to your writing!

You can also use the tree as a base for introducing students to each other at the beginning of the school year. Give each student a leaf and tell them to write their name and birth date on it. Tack up the written leaves onto the tree and arrange them by succession according to students’ birthdays. This helps to keep track of everyone’s birthday, a bit like a birthday chart!

Older students can write a more sophisticated piece that relates to their current studies in literacy. If you were teaching your students how to write topic sentences for paragraphs, use the leaves as mediums for writing example topic sentences. Students can add to the topic sentence to make a complete paragraph!

Additionally, explore lessons in poetry with the use of descriptive words. You can introduce the students to this activity by asking them to write a random word that comes to their heads on the leaves provided. Place the words around the tree. Give each student scrap paper to write on. Ask them to observe the words on the tree and use the words as inspiration for descriptive writing. Perhaps students can write a short story or a poem about the words they see. There are so many different literacy exercises you can adapt to your classroom with the Poet Tree!

Line-06

Like us on FacebookShare this post with your friends, or Subscribe to this blog today to receive original craft project updates every Monday, Wednesday and Thursday!

Squarehead Teachers: Straws and Connectors Giveaway!

connectors-giveaway-2

Head on over to Squarehead Teachers and complete the challenge to win a FREE box set of Straws and Connectors! Contest ends December 16, 2014 at midnight.

The Straws and Connectors set is an awesome gift to give your kids or classroom of students this Christmas! Build and design beautiful structures or new shapes. You can learn more about the Straws and Connectors in our recent post at the link or visit the giveaway on SquareheadTeachers.com for more details!

The giveaway post features a full detailed description about the Straws and Connectors with gorgeous photos of various constructions! Check out the full post for contest details.

Are you stumped on where to find lesson plans for your grade-school classroom? Covering a specific unit and can’t find any ideas for it? Be sure to check out Squarehead Teachers! Besides providing you with a variety of amazing FREE PRINTABLES, you gain access to a wide range of subjects for any occasion. Use the resources for any educational space; learn at home or in the classroom with inspirational ideas.

cropped-blog-header-4-christmas-copy

Thank you to Mindy @ Squarehead Teachers for hosting this giveaway! 

Images © Squarehead Teachers

Line-06

Like us on FacebookShare this post with your friends, or Subscribe to this blog today to receive original craft project updates every Monday, Wednesday and Friday!