Growth Mindset Lesson Plan

You might be wondering what a growth mindset is, so let’s start by defining it. A growth mindset is the believe that we can improve our abilities through effort, practice, and learning from mistakes. The opposite of a growth mindset is a fixed mindset which is the believe that our abilities are set in stone.

So why is having a growth mindset important?

Having a growth mindset is vital to development because it allows us to view challenges as a growing opportunity, rather than as an unclimbable mountain. When we approach issues with a growth mindset, we are more likely to achieve goals and try new things that may be difficult or unfamiliar to us. These situations help foster perseverance, problem-solving skills, and a stronger work ethic.

A growth mindset is something that is learned, and therefore, must first be taught. Teaching children this practice from a young age is a great way to help them navigate the coming challenges in their lives, and will also help them to better resolve social issues. Take a look at a few of our products we recommend for exploring growth mindsets.

Roylco Laminated Speech Bubbles:

Our Laminated Speech Bubbles allow children to write how they think someone would respond to a certain situation with a growth mindset vs. with a fixed mindset. This is a great tool to visually show kids how having a fixed mindset often leads to more frustration and limitations, while having a growth mindset leads to greater positivity and success.

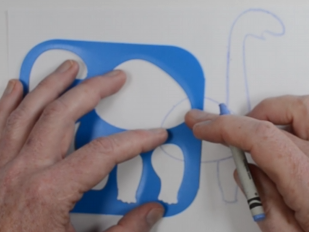
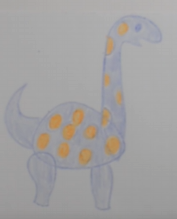
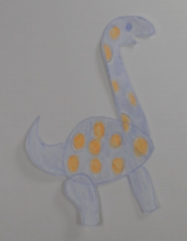
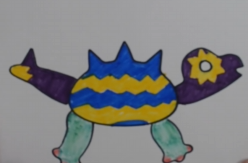
Roylco Stand-Up Self Portraits:

Using the Stand-Up Self Portraits, children are able to express what they imagine someone with a fixed mindset looking like (facial expression, what they would say, etc.) and someone with a growth mindset. This allows parents and teachers the opportunity to ask children questions of why they think someone with that specific mindset would think and feel that way, which leads to greater conversation of the benefits of having a growth mindset.

See the Growth Mindset Lesson Plan for greater detail on how to most effectively utilize these tools, Laminated Speech Bubbles and Stand-Up Self Portraits, as a method of teaching young learners the importance of adopting a growth mindset.

We hope you too see the importance of both adults and children putting into practice a growth mindset. It is never too early to learn to effectively overcome challenges and expand your mind to the possibilities in front of you!

The Importance of Calm Down Corners

First things first: What are calm down corners?

We’re glad you asked! Calm down corners are a space that help kids learn to understand, control, and regulate their feelings in a safe and familiar environment.

Many of us do not think about the fact that controlling our emotions is something we once had to learn and practice. We are all aware though that this is a valuable skill throughout every stage of life, which is why it is such an important thing to guide your kids through starting from a young age.

For the best calm down corner, you will want to create a comfortable space in a quiet room, and as you may have guessed, a corner is often best. Making the space comfortable and familiar will help the child feel safe and will also help them to engage in activities that allow them to calm down and understand what it is that they are feeling. You can do this by filling the area with things such as books, comfortable seating such as a bean bag, crafts, and toys!

Why are they important?

They provide a designated, safe area where children can go when they feel overwhelmed, anxious, or upset. Having a physical space designated for calming down can help children feel secure and supported. Calm down corners also teach children self-regulation skills by giving them the opportunity to identify their emotions and choose healthy coping strategies to manage them. When children learn to recognize their feelings and regulate their reactions, they develop important emotional intelligence skills that benefit them throughout life. Providing children with a designated space to calm down empowers them to take control of their emotions and behavior. Instead of reacting impulsively to strong emotions, children learn to pause, self-soothe, and make more thoughtful choices about how to respond.


Tools to help increase your child’s mindfulness include:

Mindfulness Tracers

Our Mindfulness Tracers are inspired by nature, body, and mind and help bring mindfulness and art together to create the perfect meditative exercise for calm down corners! Trace the design to help center yourself and de-stress, and then follow it up with decorating the design to create a beautiful piece of art.

Emotion Tokens

Foster your child’s emotional intelligence with our Emotion Tokens that allow kids to explore what they’re feeling in the form of art! Use different stencils and colors to better express emotions while also promoting empathy and understanding.

Creating a calm down corner in your home or classroom is an invaluable practice for both you and your child(ren). It is never too early or late to develop emotional intelligence, self-management, and core relational skills. Let’s help our kids become the best versions of themselves one emotional moment at a time!

5 Reasons Why Arts & Crafts Are Crucial For Early Development

Dinosaurs and unicorns are alive. Superheroes and insects work together to fight evil. Yep, you heard that right! Welcome to the world of arts and crafts – a magical world where children can put on their capes of creativity and curiosity, unlocking the secrets of their own potential. Arts and Crafts are the forefront of development and growth in young children. From open-ended creative expression to cognitive enhancement, arts and crafts truly impact young minds more than we might expect. Let’s explore five benefits that arts and crafts unlock.

Fine Motor Skill Development

Painting, drawing, cutting, and pasting may seem like simple, mundane activities, but they play a crucial role in developing fine motor skills. These activities require precise movements and coordination, which help children refine their hand-eye coordination and dexterity. As they work with various art mediums, they strengthen their muscles in their hands and fingers, laying the groundwork for future tasks like writing. Take a look at one of our new products that aids fine motor skill development in a big way:

Imagination and Creativity

One of the most significant benefits of arts and crafts learning is gaining the ability to ignite and nurture imagination from a creative point of view. Whether it’s molding clay into mythical creatures or using craft sticks to tell stories of ancient kings and queens, crafts encourage children to think out of the box and explore their creative abilities. This freedom sets children on a trajectory for future success in creative roles and professions. Here is our recommendation for products that enhance imagination and creativity:

Cognitive Development

Engaging in arts and crafts activities stimulates various cognitive functions in children. As children explore possibilities through color, they engage in a wide range of cognitive processes from selecting hues to blending shades to recalling memories evoked by colors. These cognitive processes are not limited to the realm of colors alone; they extend to activities like building structures with blocks or piecing together puzzles, where children combine spatial reasoning and critical thinking together to bring their ideas to life. Through these immersive experiences, children not only develop their artistic abilities but also strengthen essential cognitive functions, laying a solid foundation for lifelong learning and growth.

 Expression and Communication

Not only do arts and crafts provide children with freedom of creative expression, but they also provide a non-verbal outlet through self-expression. By exploring colors, shapes, and textures, they can convert their feelings, thoughts, and experiences into expressions. This form of artistic expression is especially beneficial for those who may find it hard to communicate their feelings verbally. By engaging in creative activities, children learn to express themselves in alternative ways, fostering emotional intelligence and communication skills. Art can also serve as a calming and therapeutic activity, helping children manage stress and anxiety. The process of creating art allows them to channel their feelings constructively and develop resilience when facing challenging situations.

Social Skills and Collaboration

Learning how to work with others is a crucial developmental skill that will be used throughout a lifetime. In fact, more that 50% of people say their jobs require collaboration with one another and 75% of employees rate team work as being crucial in the workplace. Arts and crafts often involve collaboration and social interaction, whether it’s contributing to a group project or sharing ideas and materials with peers. These interactions teach children key social skills like sharing, voicing your opinion, taking turns, and cooperating towards a common goal. They learn to respect diverse perspectives, communicate effectively, and work as part of a team, which are essential skills for navigating social relationships in the future.

Incorporating arts and crafts at an early age is more than just a recreational activity – it’s a powerful tool for holistic development. From honing in on fine motor skills and cognitive development to gaining emotional intelligence and social competence, the benefits are far-reaching and long-lasting. By providing opportunities for creative expression and exploration, we empower children to unlock their full potential and become confident and independent individuals. Let’s nurture their creativity, one masterpiece at a time!

Why STEAM Toys Matter

We’ve got the secret that all parents are looking for. STEAM toys. No, not toys that produce steam, but the acronym STEAM (science, technology, engineering, arts, and math). Parents are wanting them, and educators are pushing them. In a world now dominated by social media and gruesome video games, the yearn for real hands-on learning toys has become a must-have for parents, and rightfully so. These toys, designed to engage children in the five category disciplines listed above, are gaining major recognition for their profound impact on fine motor skill and cognitive development at every age. Let’s explore the importance of fostering STEAM toys into play.

Numbers, please!:

Yes, we get it. Where’s the truth without numbers? Our good friends over at The Toy Association have put together a fabulous White Page STEAM Toy summary with all the stats parents need to hop on the STEAM train. We’ll just summarize a few of those facts here:

  • 67% of parents believe that STEM/STEAM toys are the best way to push science, technology, engineering, and math skills in their child(ren).
  • 82% of parents acknowledge they look for ways to encourage learning in their child’s play
  • Screen time for children averages 3 ½ hours per day.
  • 9 out of 10 parents believe it’s important for their child(ren) to foster STEM/STEAM skills for further development.

All data gathered from The Toy Association, 2019.

Encourage a Love for Learning:

Out with the old and in with the new – STEAM toys turn learning into a fun and engaging trial-and-error adventure. They also encourage open-ended play – a valuable criterion that teaches every way to play is the right way. By merging play with education, children view learning as enjoyable with a yearn for further exploration.  Children are naturally curious, and STEAM toys harness that curiosity and ignite a passion for knowledge.

Develop Must-Have Critical Thinking Skills:

Critical thinking skills are the core of our everyday activities and successes. STEAM toys challenge children to solve problems, make decisions, and think from a creative point of view (just like every skill requirement listed on a college application or a job listing). Whether constructing a building made from early engineering blocks or testing out different color combinations in an art project, introducing analytical thinking and problem-solving skills at a young age is crucial for future development.

Learning There’s No I in Team:

Teamwork projects are the forefront of every class or work project – we function in teams. Many STEAM toys are designed to encourage collaboration and learning how to understand other points of view, which can be difficult at a young age. Working on a project together also teaches valuable social skills that can be masked by social media usage. Learning teamwork, social, and problem-solving skills?

To wrap it all up, STEAM toys are much more than playthings – they are the catalysts for a love of learning and exploration. By introducing STEAM early on, we empower young children to become revolutionized critical thinkers, collaborators, and innovators. So, what are you waiting for? Hop on the STEAM toy train today! As we say at Roylco, let’s build tomorrow’s generation together.

Unleash Your Creativity: Crafting Adventures with Paper!

Paper, the unsung hero of crafting materials, is like a versatile superhero ready for action! Dive headfirst into the world of crafting fun as we unravel the ABCs of crafting skills and share some nifty tips to kickstart your creative journey. Let the paper party begin! 🎉

  1. Versatility Unleashed: Paper is more than just a plain canvas; it’s a chameleon that can transform into a multitude of creative wonders. From origami masterpieces to intricate paper-cut art, its versatility knows no bounds. Embrace the endless possibilities and let your imagination run wild.
  2. Crafting ABCs: Every superhero needs a set of skills, and crafting with paper is no different. Discover the basics of folding, cutting, and shaping to unlock your crafting potential. The ABCs of crafting skills are your gateway to creating stunning paper creations effortlessly.
  3. Tips and Tricks to Elevate Your Craft: Elevate your crafting game with some nifty tips and tricks. Want to add texture to your paper projects? Try crumpling the paper before crafting. Looking for precision in your cuts? Invest in a quality pair of crafting scissors. These small but mighty tips will make a significant difference in your paper crafting endeavors.
  4. Paper Party Inspiration: Gather your crafting supplies, invite your friends, and let the paper party begin! Organize a crafting session where everyone explores the wonders of paper. Share ideas, swap tips, and marvel at the unique creations that unfold during your crafting extravaganza.
  5. Show and Tell: Showcase your paper masterpieces! Whether it’s a hand-folded origami menagerie or a meticulously crafted paper collage, let your creativity shine. Share your creations on social media with the hashtag #CraftingWithPaper to inspire others and join the vibrant community of paper craft enthusiasts.

In the realm of crafting, paper stands tall as the superhero material, ready to embark on creative adventures with you. Uncover the ABCs of crafting skills, implement some handy tips, and let the paper party commence! 🎉 Embrace the versatility of paper, and watch as your crafting endeavors soar to new heights. Happy crafting!

Roylco is now well on it’s way towards FSC paper compliance! Follow along to track our process.

Dream Catcher

New ideas for Craft! Create your own beautiful modern style Dream Catcher using our R42280, release stress and relieve yourself. Learn how to create these dream catchers and add a wonderful touch to your home.

Age: 4+

Duration: 20 Minutes

Learning Objectives:  Decorate the thick cardboard hoops with markers, paint or crayons before threading the string through the pre-punched holes. Use our stringing suggestions or ask students to invent their own patterns. Don’t forget to decorate the included card feathers.

You’ll Need:

line-03.png (585×76)

Take the cardboard dream catcher and pop out the cardboard hoop and feathers.

On the back side of Cardboard hoop, number the holes on the hoop from 1-12 and decorate the front with paint or color of your choice.

Once you are done, take the plastic needle and twine. Pass the twine through the needle.

Now, start threading the string through the pre-punched holes. Let’s Begin at hole #1. Pass the needle from the back of hoop no. 1 and now, pass it through hoop no. 8 form the front.

Follow this pattern: 1,8,3,10,5,12,7,2,9,4,11. (You can also make your own weaving patterns).

Keep following the pattern and once you reach at hoop no. 11, you’ll see a beautiful pattern. Now, Cut off the extra twine from both ends and tie at the back. Our Net is complete.

It’s time to decorate the feathers. Paint the cardboard feathers with the color of your choice and let it soak for few minutes. After 20-30 minutes, pop the feathers out.

Take the plastic needle again and thread the twine through the hole in the chipboard feather. We’ll use beads this time to get an attractive look. Pass the feather and beads through needle.

Add as many beads as you want in it and tie them to the hole no.#7. Repeat the same procedure and make three hanging strings.

Let’s decorate our dream catcher and give it an eye catching look. Use Our R15703 Hair Paper. It includes number of colors. Choose one of your choice and glue it at the back of Cardboard hoop.

Take a craft paper, pencil and scissor and draw this flower shape. Cut it off and start rolling it inwards. Glue it at the end. You’ll get a beautiful flower.

Follow the same steps and make some flowers of pink and green color and stick those on our dream catcher. Make some butterflies with craft paper and glue the butterflies on the net.
Our Dream Catcher is ready.

line-03.png (585×76)

Thanks for checking out this post! Like us on FacebookShare this post with your friends, or Subscribe to this blog today to receive more project ideas!

Valentine’s Day: Pop Up Pivot Cards

Make your Valentine feel Special. Create your own Super Cute Valentine Card by using our New R51460 Pop Up Pivot Cards. Send a love note to all your friends and family members with this sweet Valentine’s Day card. The clever design is easy to assemble and fun to decorate. The three-dimensional message card unfolds and pivots as the card opens.

Age: 5+

Duration: 15-30 minutes

Learning Objectives: Makes a perfect take-home craft. Encourage creativity. Integrate art, literacy, and holiday activities. Exercise fine motor skills.

You’ll need:

This Craft Lesson is divided into three Parts:

  • The front card
  • The Pivot Mechanism
  • The Pop-Up Message Card

Let’s get started

There are three pieces to each card: the card, the pop-up message card and the pivot mechanism. Take all three and fold the card in half.

Now, start decorating the card. Take craft papers of different bright colors. Make some heart shapes (small and big) and cut those out. Once you get your heart shapes, glue the smaller hearts onto the bigger ones.

Glue all the heart shapes onto the front of Card. To make the cad looks attractive, glue the bigger shapes first and then the smaller ones. You will get a beautiful front.

Take the Pivot Mechanism. Fold it in half horizontally along the score line. Fold down and inside both the left and right wings.

Take the pop-up message card. Fold it in a zigzag fashion along the score line.

Now, apply glue to both the left lower and upper right flaps of the pivot mechanism. Unfold the message card and align both ends to the glued area of pivot mechanism.

Let’s decorate the message card, take a colored craft paper of your choice. Fold it in half and draw three heart shapes(just draw one sided hearts).

Cut out the heart shapes. Make two kissing emojis and one heart eyes emoji using black marker and small heart shapes. Glue the heart eyes emoji at the center of message card and kissing emojis on the left and right flaps.

Once you are done, apply glue within the indicator lines on the inside of the card and then apply glue to the top of the pivot mechanism. Fold the card shut.

It’s time to decorate the inside of card. Take a craft paper, fold it from center and draw one sided heart. Cut the heart shape out.

Then, take any couple’s picture. Start cutting the picture. Choose your spot from where to start and follow along the lines. Cut nicely around the couple and once you are done, glue it on the heart shape.

Glue the decorated heart on the upper side of card and draw any teddy or cartoon on the other side and fill it with some nice crayons or pencil colors. Your Valentines Card is ready.

Happy valentine’s Day!

Use these cards for Birthdays, Get Well Soon, Mother’s or Father’s Day.

line-13.png (585×76)

Thanks for checking out this post! Like us on FacebookShare this post with your friends, or Subscribe to this blog today to receive more project ideas!

New Product Highlight: Dinosaur Unruly Rulers

Get ready for an art adventure! This set of 6 stencils is fun and useful. Use these Dinosaur Rulers to create your own Dinosaur. Trace around the stencil and add colors when finished.

Age: 3+

Duration: 15-20 minutes

Learning Objectives: Mix and match dinosaur elements to create unique prehistoric animals. Use colored pencils, markers and crayons to decorate your dinos. The simple designs are easy by a wide range of ages.

You’ll need:

  • Crayons, Pencil crayons or markers to design and decorate the dinos
  • Scissor
  • Glue Stick
line-08.png (585×76)

Take a stencil and place it onto a paper. Start tracing the interior edges to draw a perfect dinosaur.

Trace all the body parts starting from head to toe. Mix & match all the elements to give it a proper shape.

Finish the dinosaur shape off with a tail. Here you can see how well the patterns transfers onto the sheet.

Now, it’s time to give colors to this dinosaur. Start filling the shape with your preferred color of crayons and decorate it with your favorite color combination.

To make it more unique, cut out the dinosaur. Choose any picture or a piece of craft paper and glue it on it.

It’s a lot of fun for children to discover the different types of dinosaurs. Try all Dinosaur Rulers and make your own Dinosaur.

Please watch the full video here: https://youtu.be/VM-YXhzKXcw
Visit our website https://roylco.com/shop/dinosaur-unruly-rulers/ for more information.

New Product Highlight: Color Wheel Stencils

Create fun by encouraging students to create personal color wheels! We like this activity because it can be simple or complex, with a good balance between structure that guides students and open-ended fun that fosters creativity.

Age: 4+
Duration: 15-30 minutes

Here are few ideas on how to use them:

Idea 1: Get familiar with colors by keeping it simple.

What you’ll need:

LET”S GET STARTED

Take a wheel Stencil of your Choice. Put it onto a paper. Start filing up the inner edges with your choice of Color. To get an attractive look, try different colors. You can use Crayons, Markers or Pencil Colors. Once you are done, take off the stencil and see how beautifully the patterns get transfer to the sheet!

Idea 2: Take your color wheels up a notch by adding texture.

What you’ll need:

Take a Wheel Stencil and place it onto a white paper. Place one of our R48250 Rubbing Plate underneath the white paper. The twist starts from here. Fill the first wheel pattern with color of your choice. Once you are done, take that rubbing plate out and switch it with another rubbing plate. Fill up all the patterns by using as many rubbing plates you want and you’ll see the difference.

Idea 3: Take your color diffusing projects in a more structured direction by incorporating the color wheel.

You’ll need:

Take a R15212 Color diffusing Paper and place a wheel stencil over it. Outline the wheel patterns with a chalk or with a white crayon. Now, place the diffusing paper on a no mess tray. Take Our R54466 Junior Paint Spritzers, fill the bottle with liquid water color paint and spritz out a fine mist of color. Use different colors to create different effects.

Let us know how you choose to use your Color Wheel Stencils! Have fun and get creative!
Visit our website https://roylco.com/shop/color-wheel-stencils/ for more information.

Line-08

Thanks for checking out this post! Like us on FacebookShare this post with your friends, or Subscribe to this blog today to receive more project ideas!