Educational Light Cube: Dimensional Art by Twins at Play!

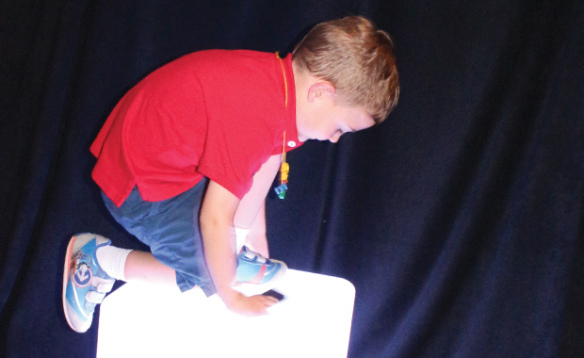
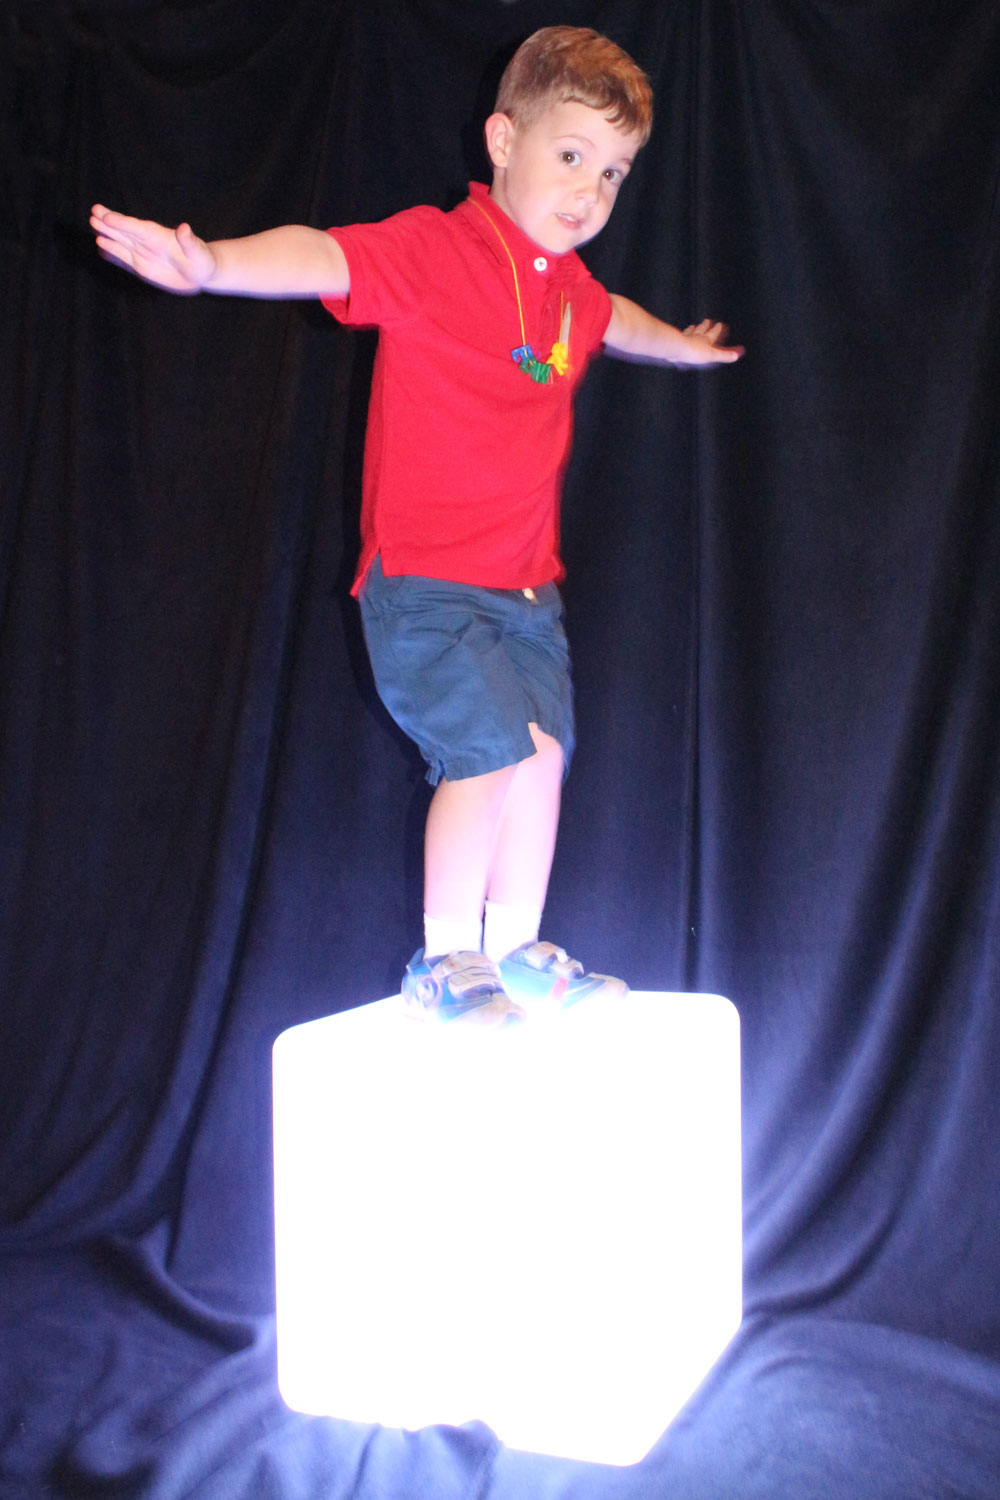
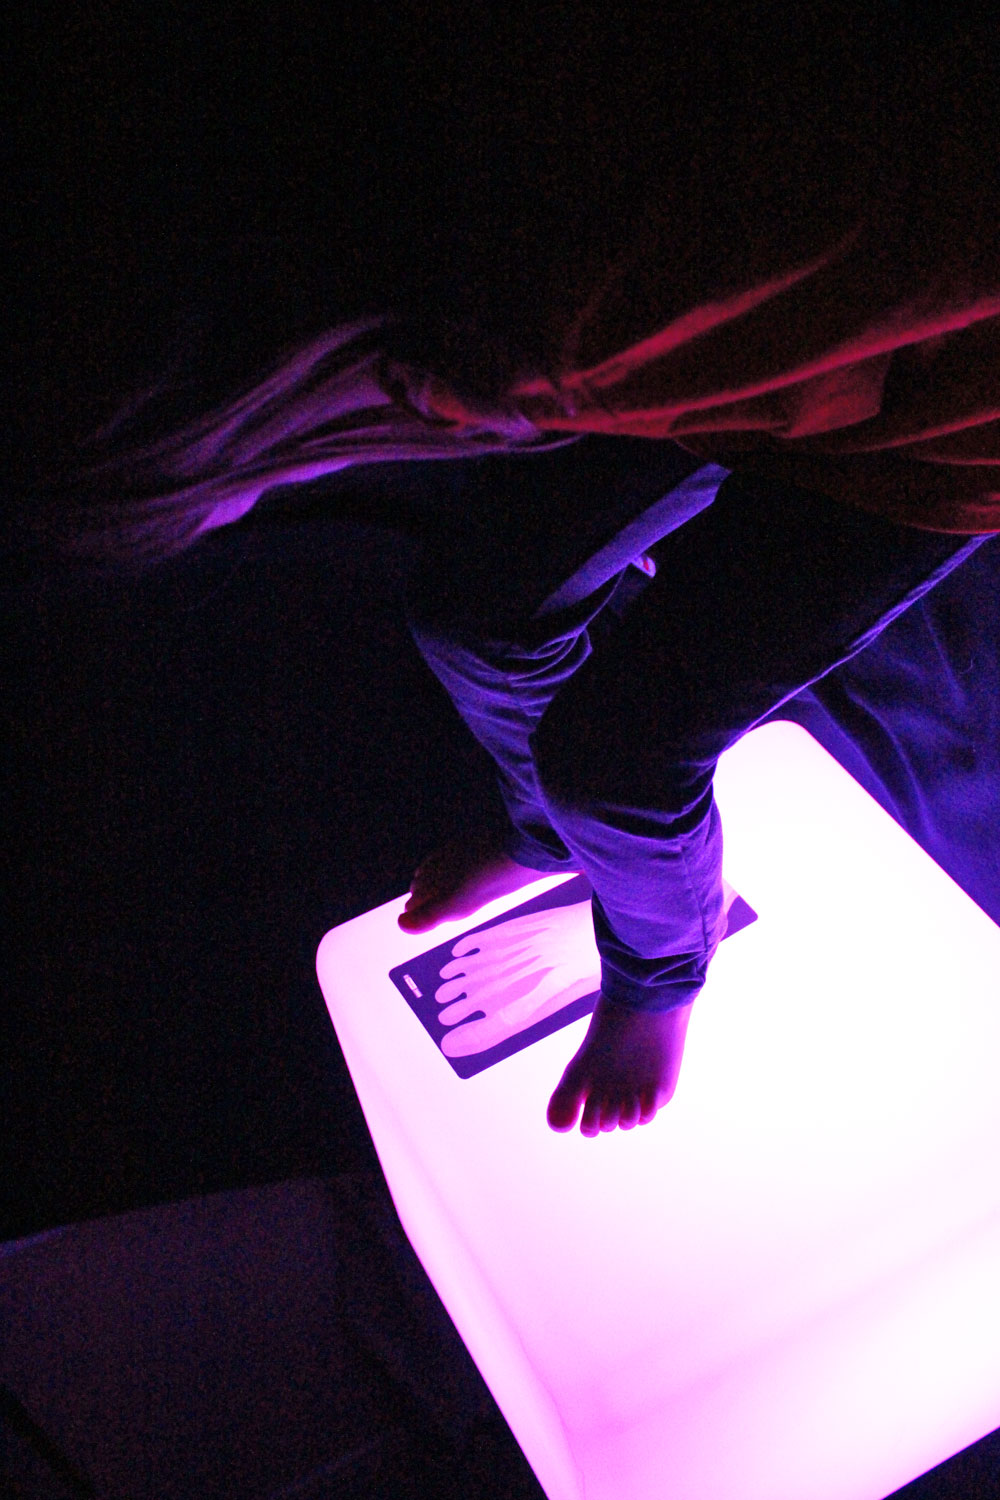
The awesome sensory and light play blog Twins at Play delivers a new post about our Educational Light Cube! Check out this great combination of our Light Cube Building set and Constructa Clips on a beautiful illuminated surface and the coolest sculpture you’ve seen yet! 

© Kristen from Caution! Twins at Play! blog

This is what Kristen from Twins at Play had to say about her twins’ experiences with these products:

My twins and I have been enjoying making awesome shapes, sculptures, and art on the light cube with the Constructa Clips light table building kit! The kit comes with 48 red clips and 32 mylar shapes. The shapes are nice and sturdy but do bend a little for awesome building fun! The shapes are also great for color lessons! I love this kit, it is perfect for the light cube, light table, or even natural light play! They cast great color in sunlight!!

In the photos below, we used the clear plastic trays for the light cube to hang the clips from. Then we were able to build outward and downward with the constructa clips and shapes!  This was a really fun and unique building experience. This was also a very unique light cube/light table play experience.
We also used a plastic straw to create art sculptures. We used the 4 clip constructa clips to attach shapes and then we just put the straw through the whole in the center of the constructa clips. What a fun way to create art and building at the same time on the light cube!!

Thanks to Kristen @ Twins at Play for putting together this awesome post!

To see more about our R59601 Educational Light Cube, visit here!

R60165 Constructa Clips Light Table Building Kit can be viewed in-depth here.

Line-07

Like us on FacebookShare this post with your friends, or Subscribe to this blog today to receive original craft project updates every Monday, Wednesday and Friday!

Educational Light Cube: As Furniture?!

2014-09-25-FeatureImage

Yes, you heard right! Our R59601 Educational Light Cube can be used as a wonderful furniture addition to your classroom! The sturdy design makes it perfect not only as a table at the play center, but as a stool, a climbing base and more. 

We recommend placing the Educational Light Cube in a ‘quiet’ location, such as a reading area or playtime corner. It’s a good idea to have the cube fully charged before allowing students to use it as a furniture piece. Charge up the cube the night before to ensure that it has enough battery life (3-4 hours) to be used in the main classroom area. This eliminates the need to leave the AC adapter cord lying on the floor–if you have to have the Light Cube plugged in, tape down the cord or place a cord cover on top to prevent it from becoming a trip hazard.

IMG_8738The Light Cube is a great complement to a variety of educational resources such as x-rays, overhead projection sheet activities and much more!

IMG_8745

The Light Cube doesn’t stand too far off the ground and is sturdy enough to support the weight of a student on it. As a result, it can be used as a light platform. Plus, it is the perfect height–not too high, and not to low! Students can easily kneel at the Light Cube and get the full benefit of being able to experiment with light as they manipulate the materials on top.

IMG_9826

As students become more familiar with the Light Cube, they can extend their learning to incorporate gross motor as well as fine motor skills. Stand or sit up on the Light Cube to measure the size of your feet in comparison to an R5911 True to Life Human X-Ray foot, just like this student did! Or play Light games around the cube! Play memory games and hide various objects under cups, then shuffle them around. There’s tons of things to do on the Light Cube… just using it as a furniture piece alone is lots of fun!

Line-08

Like us on FacebookShare this post with your friends, or Subscribe to this blog today to receive original craft project updates every Monday, Wednesday and Friday!

Craft Spotlight: My Very Own Puppet Theatre

2014-06-23-FeatureImage

Play and perform with your personalized puppet theatre! The projects are die-cut to look like theatre curtains and come with two puppet cutouts to decorate and use as characters in your very own play!

R39201 My Very Own Puppet Theatre projects are each hole-punched on either side so they can be threaded with string and worn like a great big necklace.

IMG_7717
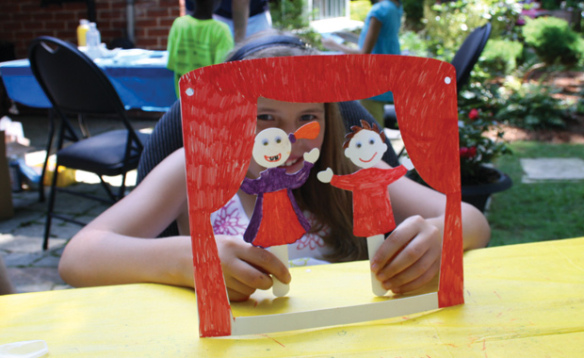
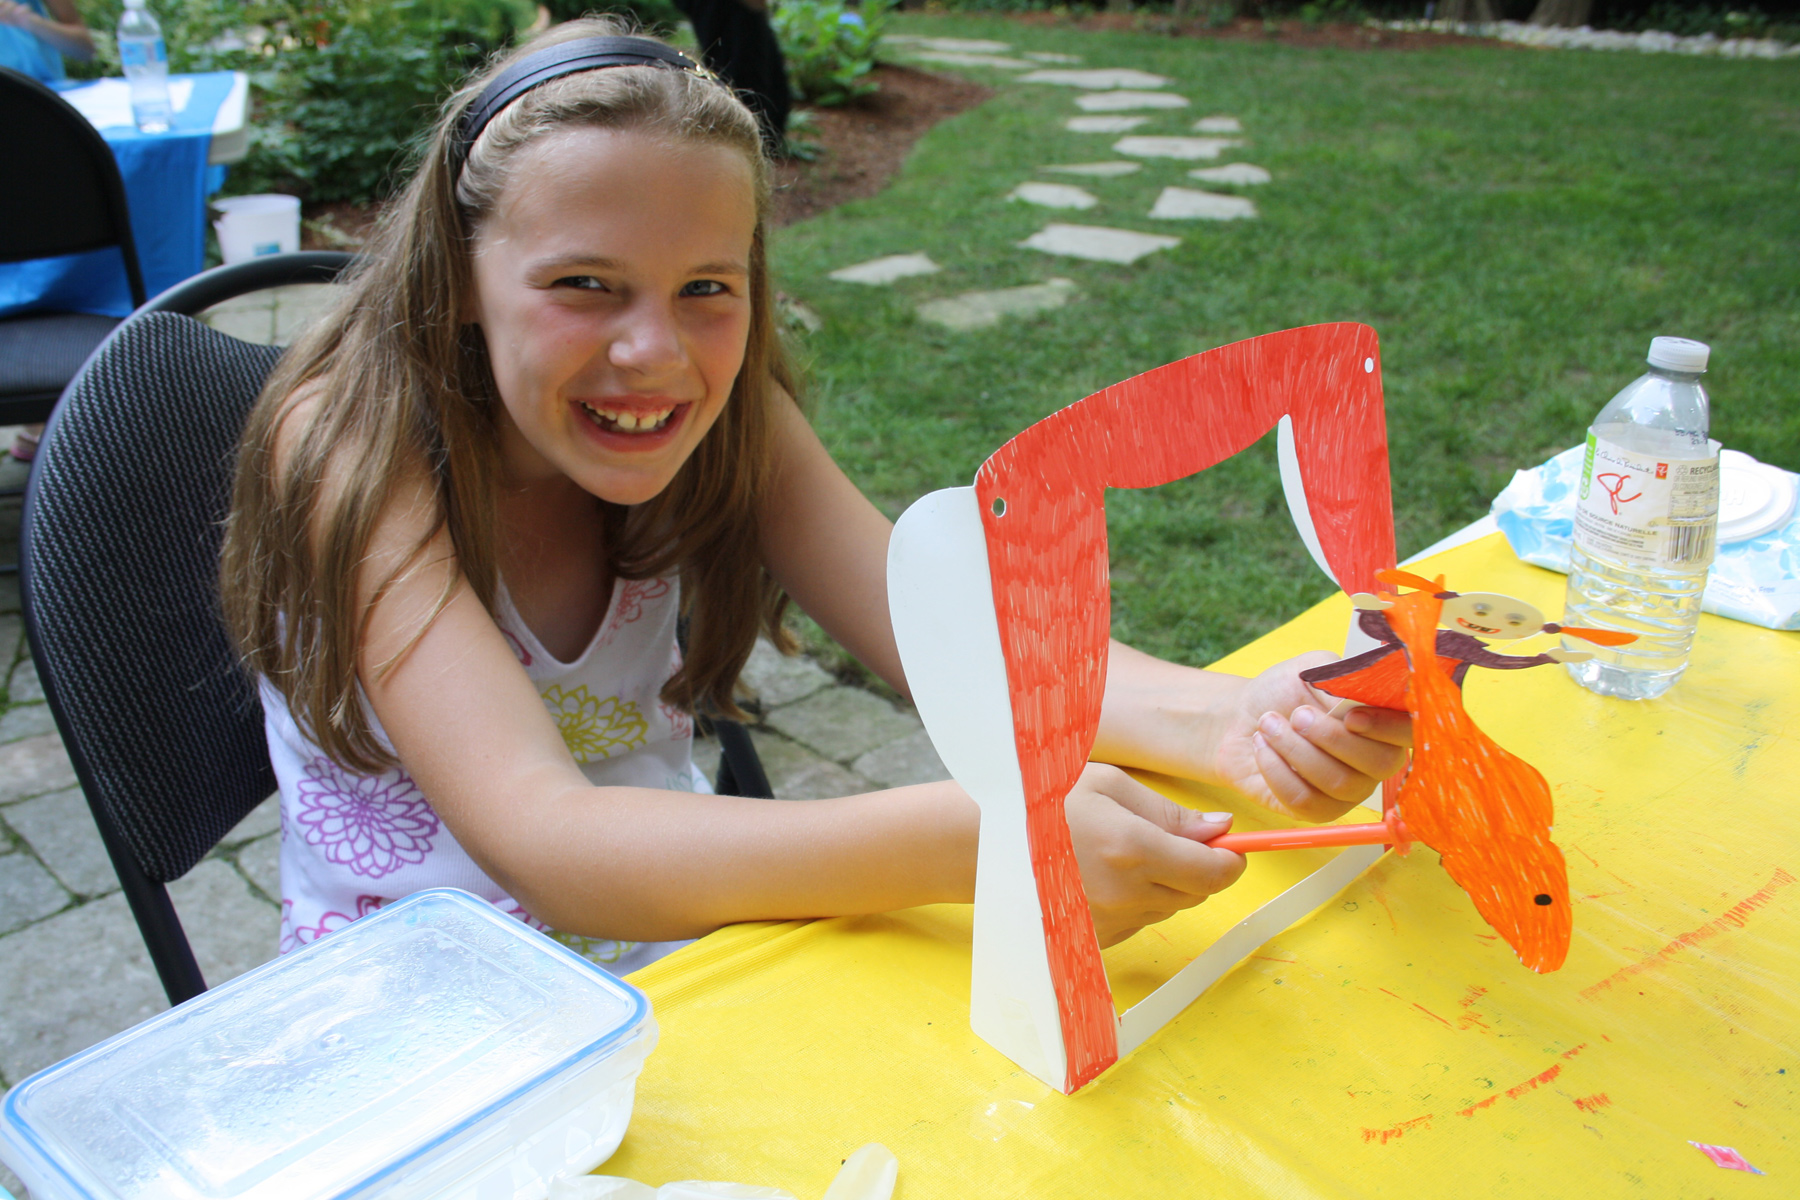
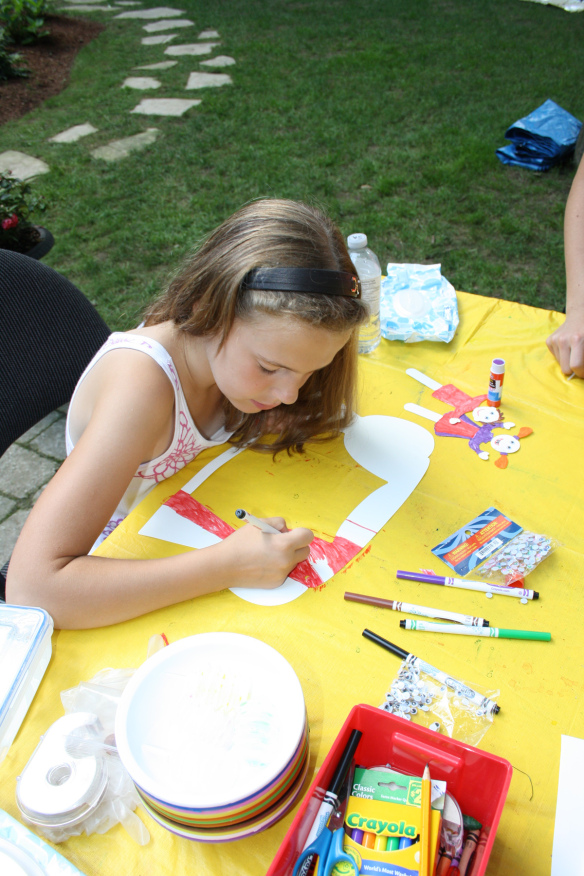
First pop out the puppet theatre from the backing. Color in the theatre with bright marker colors, like red or purple! Color in the puppet characters as well. The characters are cut with a handle so they are easy for kids to hold.

IMG_7727

One of our art campers came up with an idea to make her own puppet character. She used card to cut out a fish shape, colored it in, then attached it to one of our Goo Spreaders! Your students can experiment with different ideas like this.

R39201

Kids can wear the puppet theatre and perform puppet plays anywhere! Read the Puppet Theatre full web guide here to discover curriculum connections and great activities for the classroom.

Line-05

hanks for checking out this post! Like us on FacebookShare this post with your friends, or Subscribe to this blog today to receive original craft project updates every Monday, Wednesday and Friday!