Spotlight On: Curlicue Rods!

coiled pile.jpg

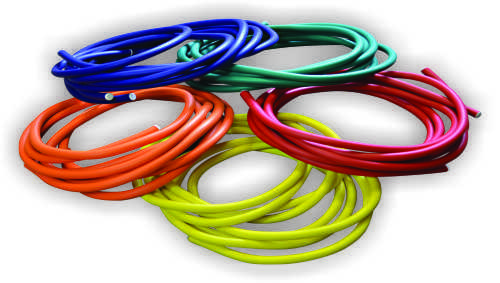
Weave, build and make shapes with these squishy, brightly colored sculpting rods!

The strands come in five vibrant colors that are perfect for color-coordinating activities.  Use indoors to make giant grids for rainy day math and sorting activities. Take them outside and make mazes, grids and play environments. Use inside to create play spaces! Each squishy strand is 3 meters (almost 10’) long to encourage gross motor development.

bridge with girl.jpg

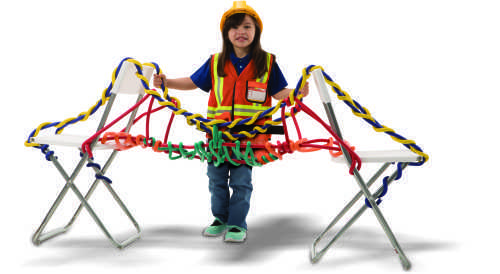
The best part of rainy afternoons is making a fort! The length of these jumbo rods and their flexible cores make them the perfect material to string across chairs or book shelves to make forts. Each strand stays bent in place but pulls off easily. Curl the loose ends around something cylindrical to create adorable curlicue decorations for your fort!

fort with boy.jpg

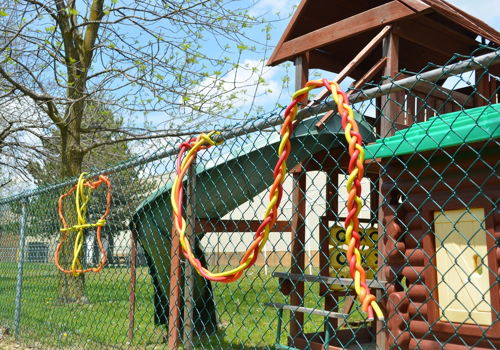
The bright colors of the strands are clearly visible inside and outside! Combine both fine and gross motor skills by challenging kids to weave the strands through a chain-link fence. This activity captivates kids and the results are beautiful!

60551 Curlicue Rods - Outdoors On Fence.jpg

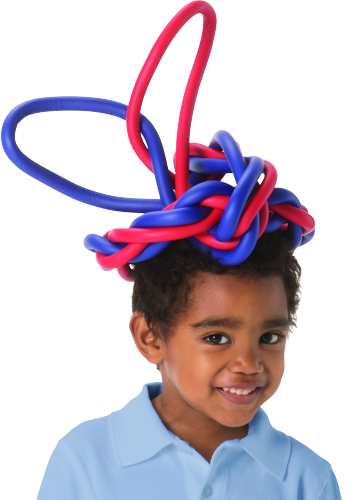
Twist one or two rods around themselves to create a colorful, funky hat!

boy with hat.jpg

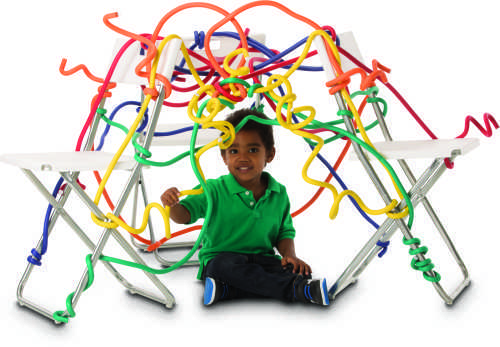
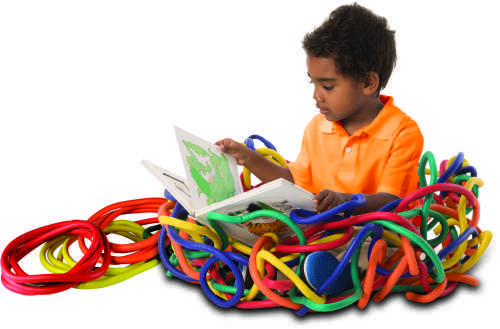
Need a brand-new kind of reading nook in your classroom? Simply twist and weave the long rods together to create a reading nest! Add a blanket or a pillow for comfort, and encourage early literacy.

nest with boy and book 1.jpg

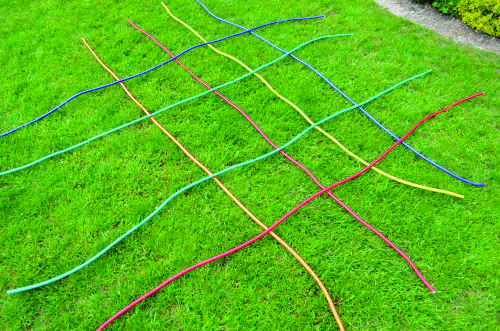
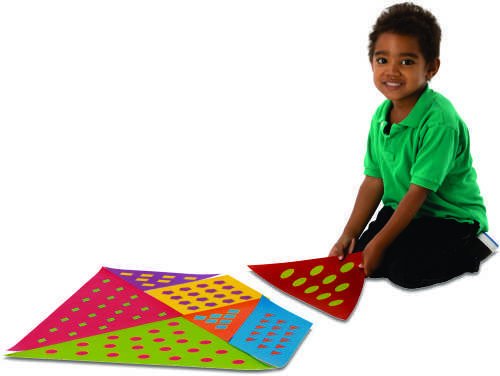
Whether indoor or outdoor these strands make the perfect foundation for big floor grids. Use for games, sorting, patterning and active learning!

grid on grass.jpg

Line-01

Like us on FacebookShare this post with your friends, or Subscribe to this blog today to receive original craft project updates every week!

Spotlight On: Fraction Friends Mosaics

Fracton Friends_Product Shots_Fan with Scissors

These bright, beautiful circles are printed with fraction lines to create precise, proportional and pretty works of art!

Fraction Friends Mosaics are multi-purpose classroom tools! Designed with both art and math lessons in mind, these circles make a set of unique math manipulatives for early numeracy and a student’s introduction to fractions.

  • Sort and count the circles! The different textures and bright colors make the circles easy to see and differentiate from each other.
  • Practice fine motor skills while cutting out the different fractional pieces!

In art lessons, the pre-printed fractions allow students to cut out the perfect sized pieces to create 20 different animal friends, including:

To create these (and more!) fraction friends, simply cut the circles to the appropriate size, and use a glue stick to glue each animal together using a sheet of craft paper as a base to make take-home art! To add some pizzazz to your art, try using any of our rubbing plates to create a textured background for your fraction friend.

Line-01

Like us on FacebookShare this post with your friends, or Subscribe to this blog today to receive original craft project updates every week!

Really Big Tangrams

girl tangram.jpg

We scaled up these tans to scale up the fun of  solving tangrams!

Get ready to have fun with our Really Big Tangrams! You’ll have to make a lot of room on the floor for this huge version of the classic Chinese dissection puzzle. Learn to use mathematical principles by arranging the 7 pieces, called tans, to make geometric shapes and figures. It won’t take long to realize the puzzles are not as simple as they seem. Printed on durable, weather resistant material, Really Big Tangrams are perfect for group activities in the classroom OR on the playground. Let everyone work together to exercise creative strategies for practical problems. The included guide will get you started with three different levels of difficulty. Use our Really Big Tangrams as a teaching tool for 2D spatial relationships, working together as a team, and for active play!

What is a dissection puzzle? Dissection puzzles are puzzles that are made with tiles of varying sizes. The hallmark of dissection puzzles is that the pieces can be assembled to create two or more distinct geometric shapes. Dissection puzzles are as old as Plato, with the earliest puzzles being described in Ancient Greek texts. Tangrams came to the west in the 19th century (the 1800s) when American sea captain M. Donaldson brought a set back with him on his ship, the Trader, in 1815. These puzzles were less popular in the latter half of the 19th century, but saw a resurgence during the first world war.

boy tangram.jpg


Tangrams can form all different kinds of puzzles! Some common themes are:

  • Animals
  • Plants
  • Buildings
  • Geometric Shapes

You can find some puzzle ideas in the guide included with these tans, but you can also visit your local bookstore for puzzle books. The internet is also a great resource!

Line-05

Like us on FacebookShare this post with your friends, or Subscribe to this blog today to receive original craft project updates every week!

Marble Paper Art Tiles

15401 Marble paper - Yellow Leaves
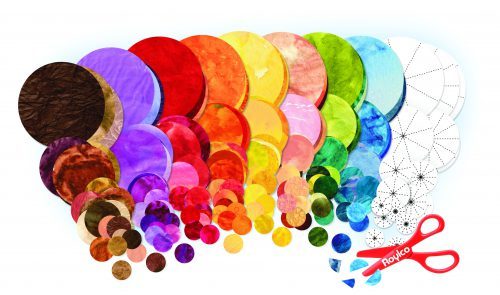
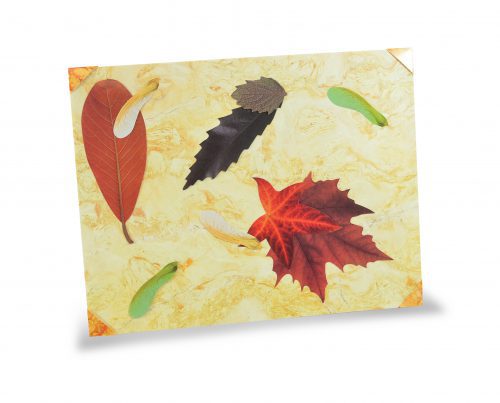
Bring color and beauty to the classroom with these simple but beautiful tiles!15401 Marple Paper - Purple Leaves

The middle of winter can feel long and dreary, so lighten up the atmosphere by creating art tiles! These tiles can be used to create a beautiful bulletin board, classroom door or hallway display. Alternatively, they make a simple but beautiful piece of take-home art.

Age: 4+

Duration: 5 minutes

Learning Outcomes: Explore colors and textures. Mosaic abstract shapes together. Practice fine motor skills.

You’ll Need:

Line-07

Start this activity with a sheet of Marble Sculpture Paper. If this is a take-home activity, kids can cut their tiles to whatever size and shape they want. If you plan to use this for a classroom art piece however, it’s easier if all the tiles are the same size. Scraps of the paper can be effectively used as corner frames (like in the yellow tile) if desired.

We suggest using a paint tray in the center of a group table to keep the crafty leaves from flying everywhere. Older students can pop out the die cut leaves on their own. For young students, you may want to pop the pieces out beforehand and let the kids choose and glue them.

Using a glue stick, glue the leaves onto the tiles. Kids can choose to make abstract patterns with their leaves like we did, or they might want to create animals. You can choose a theme for everyone to adhere to, or let the artistic moment dictate decisions.

Once students have completed their tiles, they can either take their artwork home, or it can be used to create a spectacular hallway or bulletin board mosaic!

Bundle Savings

Get all the Roylco items used
in this project and save 15%!

$16.14 USD
bundled price
Add Bundle
to Cart

Line-12

Like us on FacebookShare this post with your friends, or Subscribe to this blog today to receive original craft project updates every week!


Spotlight On: Counting Fingers Hand Book

Roylco_7796 Counting Finger Handbook child.jpg

Need a few extra fingers to count with? These hand-sized books make perfect math manipulatives!

Each page is printed in fleshtone colors with foldable fingers to use as a math manipulative. Use the pages to practice numbering, writing out equations or for math journaling. Each book has a card stock front and back cover along with 10 pages and measures 4 x 4½ (10 x 11.5 cm). Fold down the fingers just like you would curl in your own fingers to represent numbers! For example, if you want to show the number 2 with your hand book, fold down the thumb, ring and pinkie fingers on one hand. You can also fold down all but the pointer fingers on two pages.

49145 - Counting Hadbook Stack and Open

Make math facts concrete by folding down fingers and writing the math facts on the palms!

49145 - Counting Handbook 2 and 1

These books are also great for early learners! There are a lot of different ways to write out 4, so match the fingers with the words and symbols!

49145 counting hand book 4 four.jpg

Make a unique “All About Me” book with a numeracy theme! Start with a self portrait, and fill each page with numbered favorites.

49145-counting-handbook-smile-hands-e1497978352488.jpg

Line-02

Like us on FacebookShare this post with your friends, or Subscribe to this blog today to receive original craft project updates every week!


Spotlight On: Number Dolls

Alldolls and signs

Make math cuddly and explore early numeracy with these brightly colored, size-scaled dolls!

Even the most reluctant learner will want to engage with these plush, smiling dolls. Ranging in size from a 3 1/2″ doll in the shape of a 1 to a 6 1/4″ doll shaped like a 9, the numeric value of each number is clearly visible in relation to the other numbers. Line all ten numbers up in order and they create a mathematical rainbow!

The firm base of each number allows the dolls to stand on their own. Each doll loves to hold hands with their friends and Velcro™ 
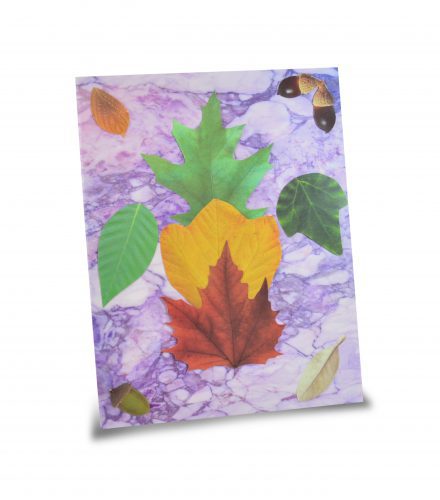
lets them do just that! We have also included Velcro™ math signs that let students create their favorite math facts in 3D. Early numeracy students can use the < and > signs to demonstrate an understanding of relative value. Math facts can seem abstract and difficult to comprehend. These dolls make math facts concrete!

8-1 image

Put students on the path to STEAM (Science, Technology, Engineering, Art and Math) excellence with plush equations and smiling number pals!


Line-03

Like us on FacebookShare this post with your friends, or Subscribe to this blog today to receive original craft project updates every week!


Origami Dinosaurs

These adorable dinosaurs are the perfect addition to a diorama or as a Father’s day gift to a dino-rrific dad!

Age: 4+

Duration: 10 minutes

Learning Outcomes: Integrate art and science! Exercise fine motor skills. Create adorable take-home art.

You’ll Need:

Line-01

We loved dinosaurs as children and since the real things are sadly extinct, these adorable paper versions of brontosauruses are the next best thing!

The taller dinosaur is simple to fold, and can be made by students as young as four. Since origami instructions can be complicated and difficult to follow when they are written, we have created a video to show you how to fold this adorable dinosaur:

The longer dinosaur is more challenging to fold, and is more suited to older students. Here is the video with the folding demonstration:

The brontosaurus, or Thunder Lizard, was a four-legged herbivore that lived in the late Jurassic. The largest brontosaurs weighed up to 15 tons and measured up to 22 m (72 ft) long from head to tail. Historically, the Brontosaurus was believed to be too big to support its own weight on dry land, so paleontologists thought they must have lived partly submerged in water, maybe in swamps. Today, however, brontosaurs are thought to have lived just on land.

Ideas

  • Once you have folded your brontosaurus, you can add them to birthday or Father’s day cards.
  • Use them with our diorama boxes to add pizzazz to research and reports. fathers day dino diorama.jpg
  • Want to decorate your classroom? Use a hole punch to create holes in your dinosaurs, and string them on yarn to create dinosaur garlands! The 8 different designs and various color schemes of the dinosaur paper will ensure that your garlands will be bright and beautiful.
  • Try using our economy origami paper to fold these dinosaurs. The smaller paper and smaller size of the finished dinosaurs makes them perfect for pop-up cards or necklaces!

dinos different sizes.jpg

Line-22

Like us on FacebookShare this post with your friends, or Subscribe to this blog today to receive original craft project updates every week!

Stretched “Hide” Craft

The ultimate fine motor skills craft, kids will cut, lace and tie to create this old-style hide rack!

Age: 6+

Duration: 15 minutes

Learning Outcomes: Learn about ancient techniques for drying and stretching animal hides and creating leather. Exercise fine motor skills as students cut, lace and tie this challenging craft.

You’ll Need:

Line-14

Start by choosing two sheets of craft paper. I chose to use the deer hide and the leather sheets, to show the two possible outcomes of drying animal hides. Use a small loop of tape in the center of the white sides of the sheets to hold them together. This way, both of your hides will be exactly the same shape when you cut them out.

Students can be as creative or literal as they want to when they cut the shape of their hides out. Remember that every animal is a slightly different size, so every hide is unique! I kept my shape vaguely rectangular, but you can choose a wild shape if you want to.

Once you have your hide shape cut out, use your hole punch to make regularly spaced holes. These will allow you to anchor your hide to the frame.

Now it’s time to create your frame. I used four 10″ (25.5 cm) long dowels from the craft store. You can use chopsticks if you want, or students can use small, straight twigs from the playground. Cut four 6″ (15 cm) pieces of yarn. Cross the ends of two of your dowels so that make a right angle. Use a piece of yarn to tie the two together. For a more secure tie, I wrapped my yarn twice in each diagonal, and twice above and below. Trim off any excess yarn.

Continue tying the ends of the dowels together until you have a square frame.

Once your frame is all put together, it’s time to hang your hide on it. Cut a piece of yarn approximately 30″ (76 cm) long, and thread one end through one of our plastic lacing needles. The flexible eye makes threading a breeze! Tie the other end of the yarn to the center of one of your four dowels. Loosely “sew” your hide to your frame. Remember that your hide is supposed to be suspended in the middle of the frame, so don’t pull your yarn too tight. When you come back to the place you started, tie the free end of the yarn to your frame. Trim off any excess yarn.

Now that your hide is stretched, it’s time to decorate! I used washable markers to create a design on the leather side of my hide, and left the deer hide half as it was. Students can use washable markers, crayons or colored pencils to decorate their hides.

This is a great take-home craft, but it also is a great addition to a report or presentation. A dynamic and tactile visual aid can help students absorb information and stay focused!

Bundle Savings

Get all the Roylco items used
in this project and save 15%!

$10.78 USD
bundled price
Add Bundle
to Cart

Line-13

Like us on FacebookShare this post with your friends, or Subscribe to this blog today to receive original craft project updates every week!

Elementary Animals: Fold A Mouse!

Welcome to our fifth and final origami animal project: the mouse!15219 - Mouse Carft (eyeballs).jpg
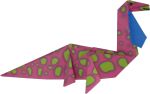
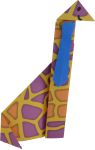
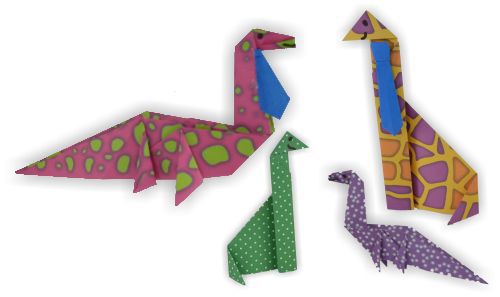
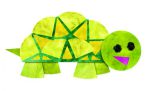
This project is definitely best-suited to third graders because the folds are a little more intricate than our previous projects.

Age: 7+

Duration: 10 minutes

Learning Outcomes: Practice reading and understanding step-by-step directions independently. Exercise fine motor skills. Develop patience.

You’ll Need:

Line-21

Start by downloading and printing the mouse folding instructions. This fully illustrated, step-by-step instruction sheet allows students to work independently to create an adorable mouse pal. We have also created a step-by-step video for visual learners:

These adorable mouse pals can serve as take-home art projects in and of themselves. However, if you want to extend the activity, challenge students to use their mice to recreate a favorite scene from their favorite mouse book! Our Set the Scene! Diorama Boxes are an excellent tool for this project. Some great books to use for this project include:

Line-21

Like us on FacebookShare this post with your friends, or Subscribe to this blog today to receive original craft project updates every week!