Origami Dinosaurs

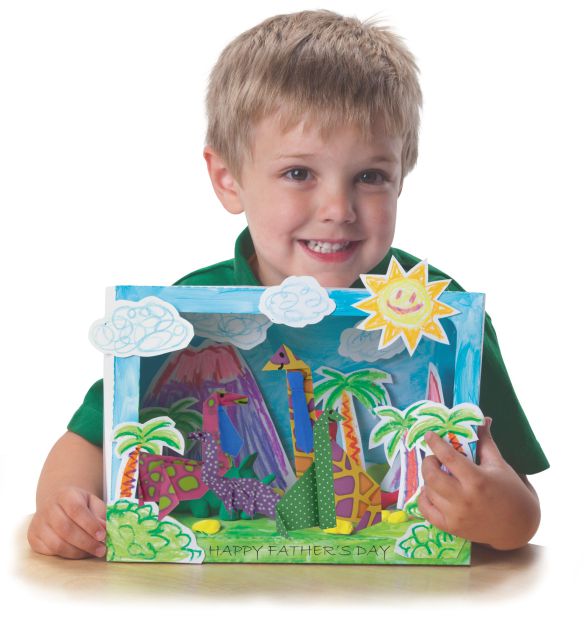
These adorable dinosaurs are the perfect addition to a diorama or as a Father’s day gift to a dino-rrific dad!

Age: 4+

Duration: 10 minutes

Learning Outcomes: Integrate art and science! Exercise fine motor skills. Create adorable take-home art.

You’ll Need:

Line-01

We loved dinosaurs as children and since the real things are sadly extinct, these adorable paper versions of brontosauruses are the next best thing!

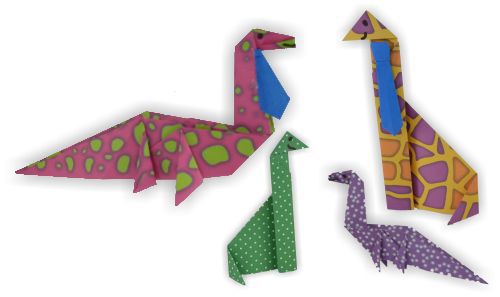
The taller dinosaur is simple to fold, and can be made by students as young as four. Since origami instructions can be complicated and difficult to follow when they are written, we have created a video to show you how to fold this adorable dinosaur:

The longer dinosaur is more challenging to fold, and is more suited to older students. Here is the video with the folding demonstration:

The brontosaurus, or Thunder Lizard, was a four-legged herbivore that lived in the late Jurassic. The largest brontosaurs weighed up to 15 tons and measured up to 22 m (72 ft) long from head to tail. Historically, the Brontosaurus was believed to be too big to support its own weight on dry land, so paleontologists thought they must have lived partly submerged in water, maybe in swamps. Today, however, brontosaurs are thought to have lived just on land.

Ideas

  • Once you have folded your brontosaurus, you can add them to birthday or Father’s day cards.
  • Use them with our diorama boxes to add pizzazz to research and reports. fathers day dino diorama.jpg
  • Want to decorate your classroom? Use a hole punch to create holes in your dinosaurs, and string them on yarn to create dinosaur garlands! The 8 different designs and various color schemes of the dinosaur paper will ensure that your garlands will be bright and beautiful.
  • Try using our economy origami paper to fold these dinosaurs. The smaller paper and smaller size of the finished dinosaurs makes them perfect for pop-up cards or necklaces!
dinos different sizes.jpg

Line-22

Like us on FacebookShare this post with your friends, or Subscribe to this blog today to receive original craft project updates every week!

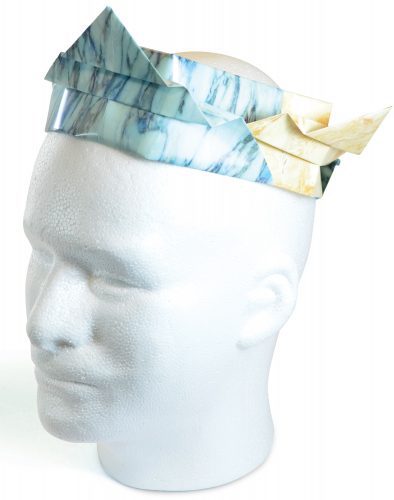
Origami Marble Paper Crown

15401 Marble Paper - Crwon Head

Crown yourself with a simple origami craft that the Greek statues would be proud to wear!

Age: 5+

Duration: 10 Minutes

Learning Outcomes: Exercise fine motor skills as you fold and construct this crafty crown. Create costume pieces for dramatic play.

You’ll Need:

Line-08

Start with a single sheet of marble sculpture paper. To complete this crown you will need 3-4 sheets of paper, depending on the size of your head but I want to start by walking you through the basic component. Start by folding the sheet diagonally, and cut off the excess. Unfold the triangle; you should have a square sheet. Fold the square sheet in half, then open it, and place the white side up on the table.

For the rest of the folding instructions, I have created a video for you:

  1. Fold the top two corners to meet at the center fold line. Your sheet should have a point at one end.
  2. Fold the square bottom up to meet the bottom of the arrows. Crease firmly.
  3. Fold the folded rectangle up, and flip the whole sheet over. You should have a triangle with flaps sticking out from behind on either side.
  4. Pleat the triangle by folding it down, then folding it up approximately 1/2″ above your first fold. Repeat 1-2 times to create the graduated steps that serve as decorations.
  5. Repeat steps 1-4 three more times, until you have four components.
  6. Choose one component. Lay it on the table in front of you with the triangle’s point facing away from you. Open the component so you can see the white inside. Slide the squared edge of another component onto the white area, overlapping the two pieces by 1-2″.
  7. Fold the rear flap and triangle over top of the second component.
  8. Carefully slide a third component into the second component, repeating steps 6-7. Be careful not to pull the second component out of the first component.
  9. Add the fourth component into the third component.
  10. Now it’s time to finish the loop and make your crown wearable. Using steps 6-7 again, place the free end of the first component inside the free end of the fourth component. Now you should have a “seamless” loop. The components can slide in and out of each other, so you can make small adjustments for individual head sizes. For adults, you may need to add a fifth component. Very young children may only need three components.

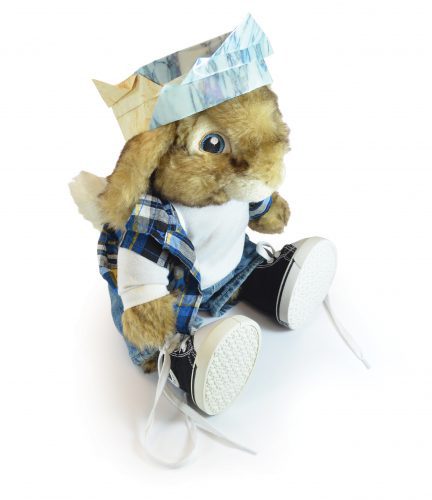
You can even make a crown for your best furry friend:

15401 Marble Paper - Crown Bunny

Line-01

Like us on FacebookShare this post with your friends, or Subscribe to this blog today to receive original craft project updates every week!


Project Spotlight: Really Big Origami Paper

2014-12-02-FeatureImage

Fold perfect origami ornaments or use as wrapping paper! The R15208 Really Big Origami Paper designs are beautiful and ornate, doubling as festive paper for this holiday season!

The sheets are perfect squares at 12 x 12″ (30 x 30 cm) making them the perfect cut and size for practicing to fold complex origami designs. Don’t work with standard sized paper that needs to be cut and prepared ahead of time. Start immediately folding gorgeous paper sculptures.

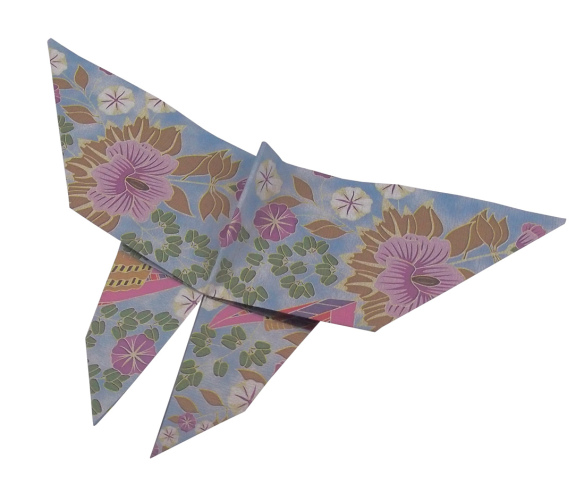
Origami-Butterfly

There are 6 different designs that you can use to make your origami sculptures. To learn more about the different designs, visit our origami page on the blog!

Try some of these project ideas with the R15208 Really Big Origami Paper!

You can view each of the folding techniques step-by-step in our exclusive videos below! Simply click on any of the animal origami links to view more:

Origami Fish  

Origami Frog

Origami Boat

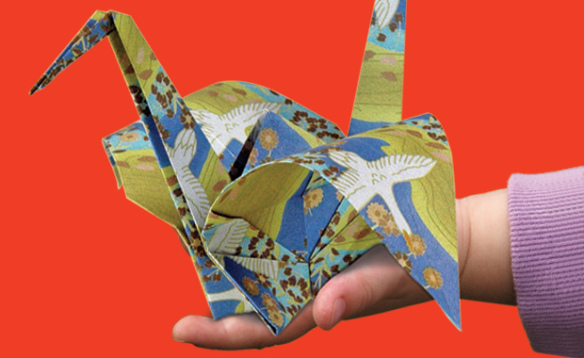
Origami Crane

Origami Bird

Origami Butterfly

Once you are finished folding up your origami designs, punch a hole through the top and string through some ribbon to make a loop. Tie off the loop with a knot. Hang the origami ornaments on a crafty Christmas tree!

In addition, make snowflakes with the Origami Paper! We show you how to make beautiful snowflakes with intriguing designs in the R15314 Super Slick Paper video, which you can view here.

Line-16

Like us on FacebookShare this post with your friends, or Subscribe to this blog today to receive original craft project updates every Monday, Wednesday and Friday!

Project Spotlight: Super Slick Craft Paper

SuperSlickCraftPaper-FeatureImage

Turn your regular craft paper designs into spectacular projects with R15314 Super Slick Paper! The paper is coated with a gloss to make the colors vibrant and the paper texture smooth and easy to work with. Super Slick Craft Paper is a great material to work with as the range of colors will inspire you to fold, cut and glue a variety of different projects!

To add interest to your projects, cut out basic shapes such as squares, rectangles, triangles and more! Arrange the shapes onto a sheet of construction paper and paste down. Make familiar objects or scenes such as the outdoors, cityscapes, vehicles, robots and more!

The Super Slick Craft Paper is standard 8½ x 11″ so you can fold it from corner to edge and cut off the bottom to make a square. The square can then be used for origami projects.

Our YouTube video below, we show you how to make your own pop art using two sheets of Super Slick Craft Paper. On the first sheet, fold and cut out a snowflake design while retaining the four corners. Paste on top of a separate sheet of colored paper.

Line-16

Like us on FacebookShare this post with your friends, or Subscribe to this blog today to receive original craft project updates every Monday, Wednesday and Friday!