Spotlight On: Fraction Friends Mosaics

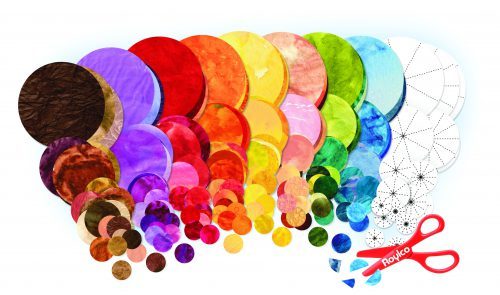
Fracton Friends_Product Shots_Fan with Scissors

These bright, beautiful circles are printed with fraction lines to create precise, proportional and pretty works of art!

Fraction Friends Mosaics are multi-purpose classroom tools! Designed with both art and math lessons in mind, these circles make a set of unique math manipulatives for early numeracy and a student’s introduction to fractions.

  • Sort and count the circles! The different textures and bright colors make the circles easy to see and differentiate from each other.
  • Practice fine motor skills while cutting out the different fractional pieces!

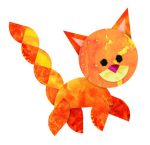
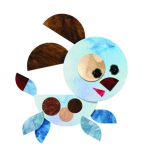
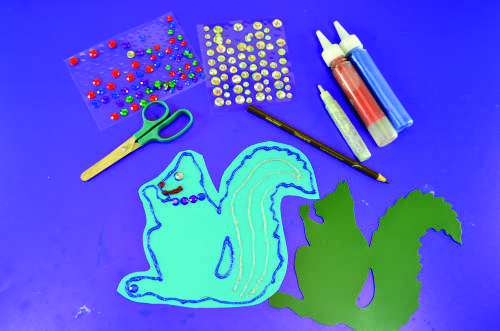
In art lessons, the pre-printed fractions allow students to cut out the perfect sized pieces to create 20 different animal friends, including:

To create these (and more!) fraction friends, simply cut the circles to the appropriate size, and use a glue stick to glue each animal together using a sheet of craft paper as a base to make take-home art! To add some pizzazz to your art, try using any of our rubbing plates to create a textured background for your fraction friend.

Line-01

Like us on FacebookShare this post with your friends, or Subscribe to this blog today to receive original craft project updates every week!

Mosaic Name Tags

finished crafts

Give students an artistic way to label their desks or spots at their table!

This activity is great for the first week of school! Practice literacy and create artistic name plates for each student’s seat.

Age: 5+

Duration: 10 Minutes

Learning Outcomes: Practice spelling names, and exercise fine motor skills.

You’ll Need:

Line-11

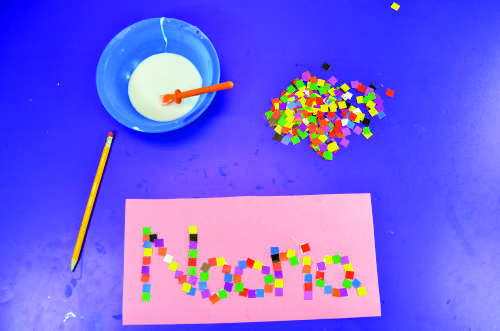
Start with a sheet of construction paper. For this project, we used 4 1/4 x 5 1/2″ sheets (a sheet of letter or A4 cut in half). Challenge the students to write their names in pencil on the sheets, taking up the whole sheet. The pencil lines will guide their placement of the mosaic pieces, and it gives students and teachers a chance to double check uneasy spellers!step 2

Using goo spreaders and white glue, challenge students to glue mosaic pieces over the pencil lines. The goo spreaders help prevent wasted glue and sticky messes! They also exercise fine motor skills, which is crucial in a world that is increasingly becoming technological.

Students can choose their favorite colors, use a wild arrangement, organize colors by letter, or however they want to. When they are finished, they will have a beautiful, unique name plate!

step 8

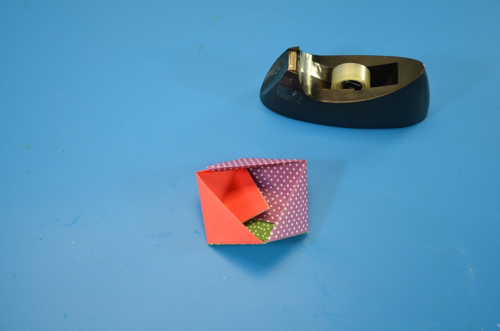
Use clear packing tape to secure each name plate to students’ desks. This example used double color mosaics, but other ideas include:

  • Use alphabet pasting pieces to mosaic a name plate! Each letter of the student’s name is made up of multiple pasting pieces of that letter. For example, the letter A would be made up of several mosaic pasting pieces showing the letter A.
  • Create a name rainbow! Using pictures of rainbows as reference, challenge students to make the first letter of their names with red mosaic pieces, the second with orange, and so on.
  • Don’t be bound by geometry! Most of our pasting pieces are square, but don’t let that limit kid’s imaginations. Encourage them to rotate, layer, and offset their mosaic pieces to create interesting shapes and textures.

Line-13

Like us on FacebookShare this post with your friends, or Subscribe to this blog today to receive original craft project updates every week!


R15673 My First Mosaics


15673_My First Mosaics_Pile

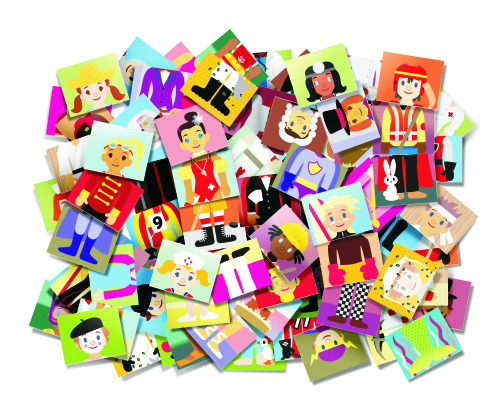
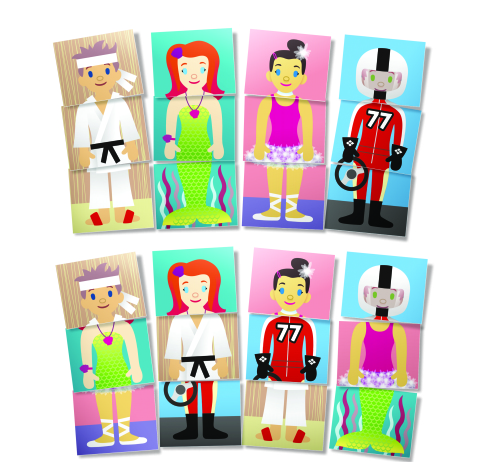
Create your own fun characters with mix and match mosaics! Learn about basic human proportions and fun character costumes.

Students will love piecing the different cards together! Organizing the mosaics to make people pictures is a great way to develop critical thinking skills.

15673_My First Mosaics_Fan

The large size and simple “puzzle-like” artwork make them perfect for young children. Introduce mosaics to students with fun images of children in uniforms, fantasy costumes or historical clothes. Featuring bright colors and backgrounds to distinguish each set of character pieces. The characters are illustrated with a variety of props to help students identify them easily.

Each complete image is made of 3 mosaics; the head, body and legs.

Mix and match assorted pieces, then glue onto a sheet of card to make a funny, unique character. Makes a great “take home” art project!Line-10

Like us on FacebookShare this post with your friends, or Subscribe to this blog today to receive original craft project updates every week!

Earth Mosaic Glass Jars

OLYMPUS DIGITAL CAMERA

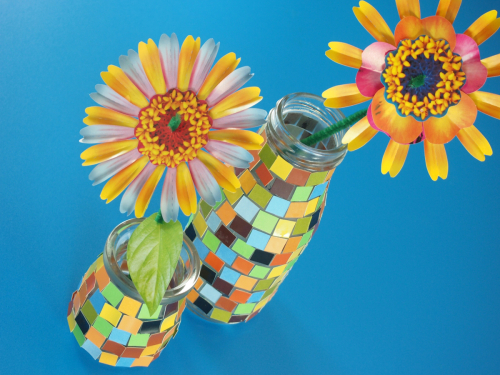
Our beautiful R15666 Earth Mosaics are perfect for decorating glass jars! Use a watered-down glue solution to adhere the mosaics to the jars. You can use any old recycled jars or ask your class to bring in their own. Makes a great rainy-day or calming activity!

Age: 5+

Duration: 10-15 minutes

Learning Objectives: Spend time deliberately placing mosaics around glue areas of the jar. Use fine motor skills to delicately place mosaics. Create a project based on coordinated colors. Talk about color associations and how colors elicit certain “moods” or “themes” when paired together.

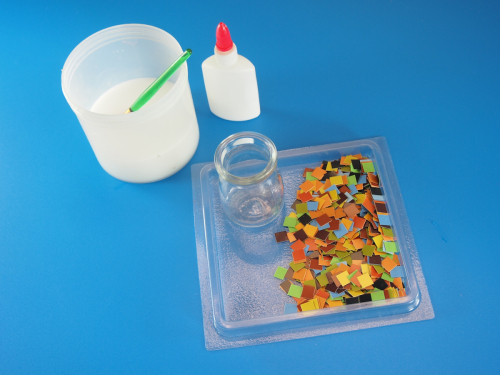
You’ll Need:

Line-20

OLYMPUS DIGITAL CAMERA

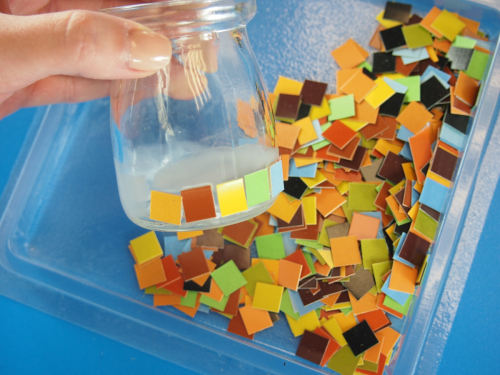
Mix 1 tablespoon of glue with 1/4 cup of water. Stir the mixture around until it becomes a milky consistency.

OLYMPUS DIGITAL CAMERA

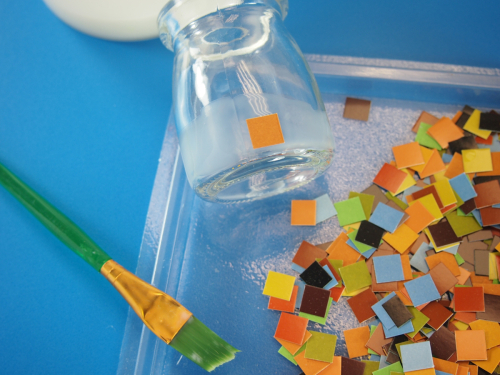
Use a paintbrush to dab a bit of the glue-water mixture onto the lowest part of the jar. Start small, with just a dab of glue. Press one mosaic onto the glued-in part, and press to adhere.

OLYMPUS DIGITAL CAMERA

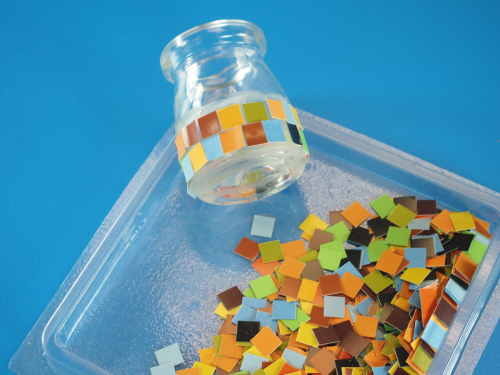
Add more mosaics in a single row and wrap it around the circumference of the jar. Alternate the colors as you go!

OLYMPUS DIGITAL CAMERA

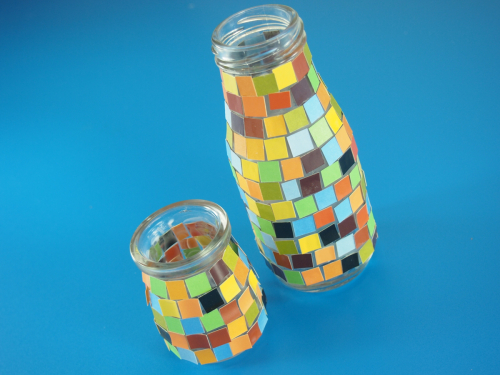
I’ve added another row here so you can see how the jar is coming along in its new makeover! Continue adding rows all the way up to the neck of the bottle. Leave to dry overnight.

OLYMPUS DIGITAL CAMERA

All done! Here’s a look at the final project. You can reuse the bottle for a variety of purposes, such as storing your writing tools…

OLYMPUS DIGITAL CAMERA

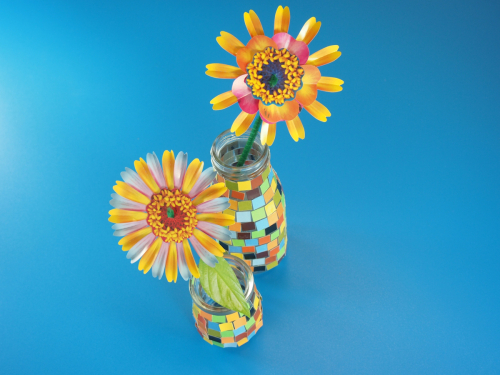
…Or as a vase! You can glue the mosaics onto any glass, porcelain or plastic container, using glue and a paintbrush. Check out our other great mosaic products including:

Line-18

Like us on FacebookShare this post with your friends, or Subscribe to this blog today to receive original craft project updates every week!

Earth Mosaics

15666 Earth Tone Mosaics girl web

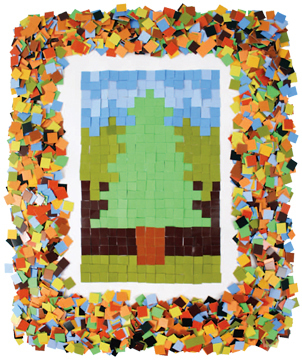
There is no end to the fun nature-themed crafts you can make with R15666 Earth Tone Mosaics. The squares come in rich, earthy tones of different colors such as blue, green, yellow, orange, and others.

Each square has a different color on either side, so you won’t have to worry about flipping every square over to get to the colored side. A matte finish on the back of each square makes for easier gluing, but either side can be glued, depending on which color or finish
(matte vs. coated) you want to use.

Use the squares to make patterns and decorations for:

  • A favorite journal or notebook
  • Jewelry box
  • Vase
  • Plant pot
  • A placemat

Print

Create cool nature scenes! The rich, earthy colors of the squares make for ideal seasonally-themed or Earth Day crafts. Your creations will be a great way to bring nature indoors.

Line-20

Like us on FacebookShare this post with your friends, or Subscribe to this blog today to receive original craft project updates every week!

Tessellations Nature Mobile

OLYMPUS DIGITAL CAMERA

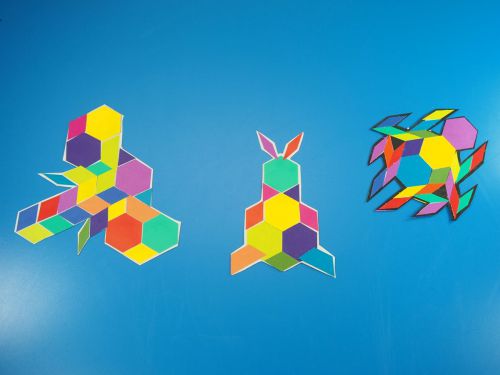
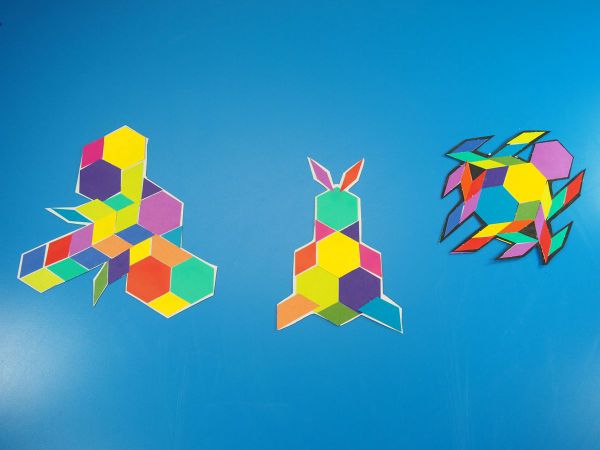
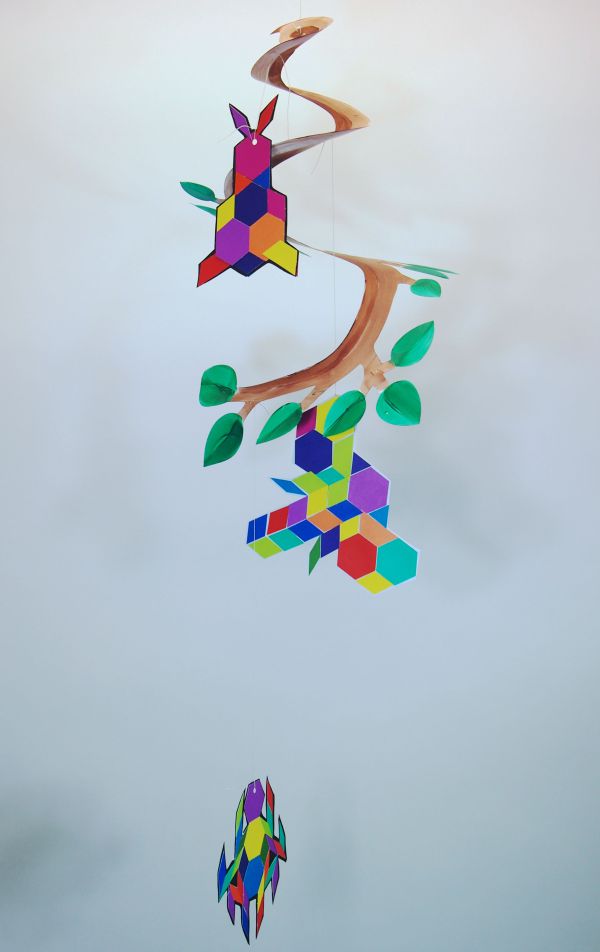
Don’t hesitate—tessellate! We’ve got a load of fun animal designs you can make from the R15664 Tessellations Mosaics. Turn your beautiful artwork into a hanging mobile using our R51302 Nature Mobile.

Age:

Duration:

Learning Objectives:

You’ll Need:

Line-12

OLYMPUS DIGITAL CAMERA

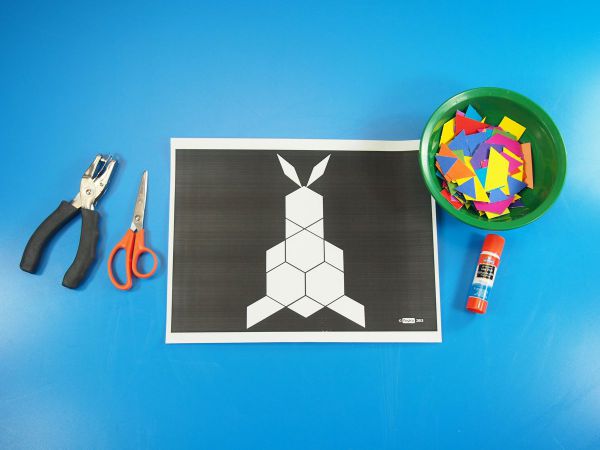
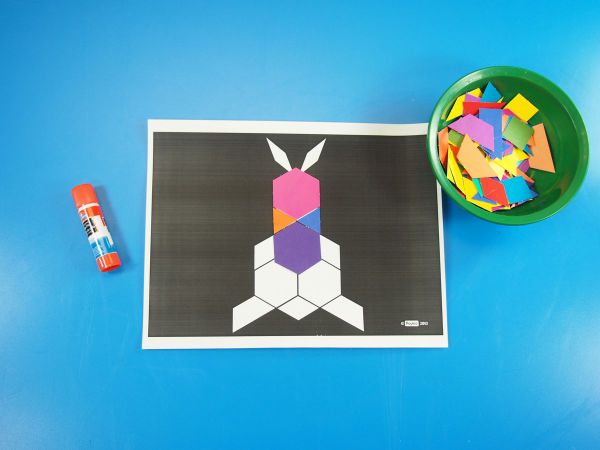
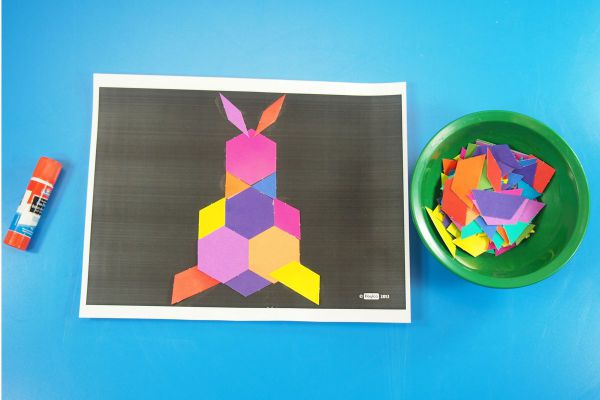
Print out the artwork onto photocopy paper and arrange the Tessellations Mosaics onto the paper. Use the outlines within the design as clues to what kinds of shapes you’ll use to fill in the designs.

OLYMPUS DIGITAL CAMERA

The shapes and sizes of our Tessellations Mosaic are similar to traditional Pattern Blocks but in different colors. You can use your Pattern Blocks resources with our mosaics.

OLYMPUS DIGITAL CAMERA

Our Tessellations Mosaics are capable of presenting you with the same educational value as Pattern Blocks but are more plentiful to allow your entire class to benefit from the experience of putting them together. These mosaics help to build critical thinking skills and allow students to explore the properties of geometric shapes. Using the Tessellations Mosaics, you can explore a variety of puzzle-solving exercises below or come up with your own!

OLYMPUS DIGITAL CAMERA

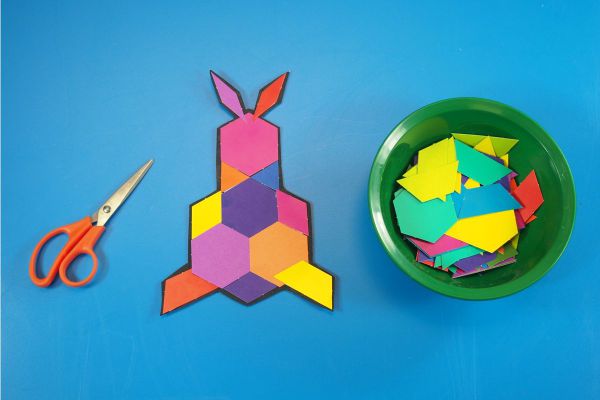
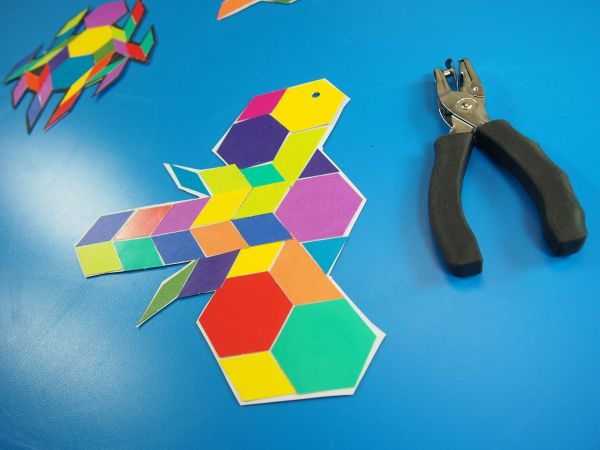
Cut around the outside edge of the animal tessellation.

OLYMPUS DIGITAL CAMERA

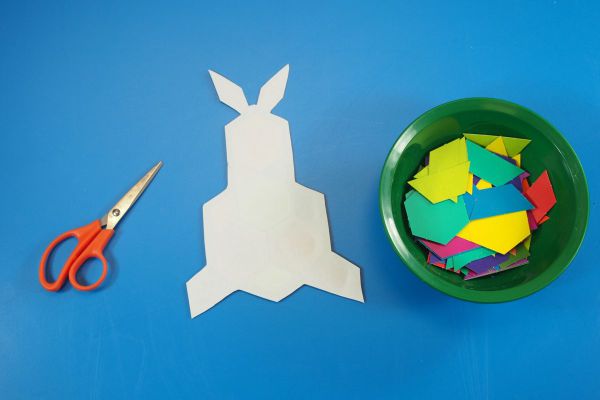
Flip the card sheet over to the blank side. Give your students more Tessellations Mosaics to fill in the other side.

OLYMPUS DIGITAL CAMERA

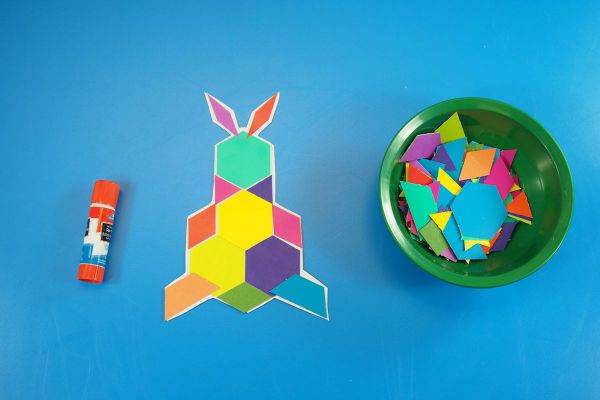
Challenge students in older grades to not look at the opposite side of the cutout to match the arrangement, but instead come up with a new one!

OLYMPUS DIGITAL CAMERA

Once students are satisfied with their new pattern, they can paste it down to the back of the cutout.

OLYMPUS DIGITAL CAMERA

Punch a hole through the top of the cutout and attach some string to it.

OLYMPUS DIGITAL CAMERA

Tie the other end of the string to our R51302 Nature Mobile Maker to make a Tessellations Mosaics mobile! The bright and beautiful colors of the Tessellations Mosaics work very well against the subtle nature-inspired design of our Nature Mobile Maker.

Line-09

Like us on FacebookShare this post with your friends, or Subscribe to this blog today to receive original craft project updates every week!

Tessellations Mosaics

Print

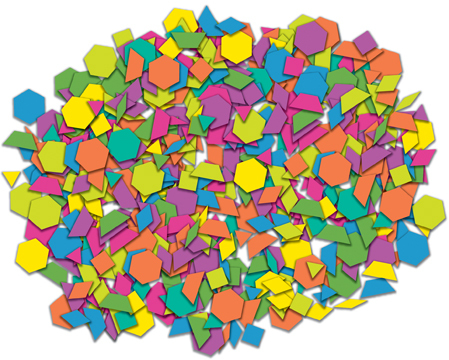
Inspired by Pattern Blocks, we’ve created 6 shapes that can be used to make wonderful tessellation patterns. Shapes are: equilateral triangle, rhombus, trapezoid, hexagon, square and small rhombus. Each shape is carefully crafted to match the sides and angles of the other shapes allowing your students to use the shapes to create seamless tessellations or to design animals, people, vehicles, structures and patterns!

Unlike Pattern Blocks, which have specific colors for specific shapes, our tessellations mosaics come in a range of 12 bright, glossy, double-sided colors. Your students can make patterns with similar colors or challenge themselves by creating patterns in different colors. Get students acquainted with the different shapes and talk about their characteristics by giving each group a bowlful of the Tessellations Mosaics. Ask students to sort the mosaics only according to color. They must choose one color and find all the shapes in that color. Note: Make sure to point out that the mosaics are double-sided!
Once all the shapes are found, ask students to describe each shape to you.
Print

What do the shapes look like? For instance, some children may say the trapezoid reminds them of a roof. Once your students get a chance to share their opinions on the shapes, discuss the characteristics of the shapes. We’ve included a short description of each of
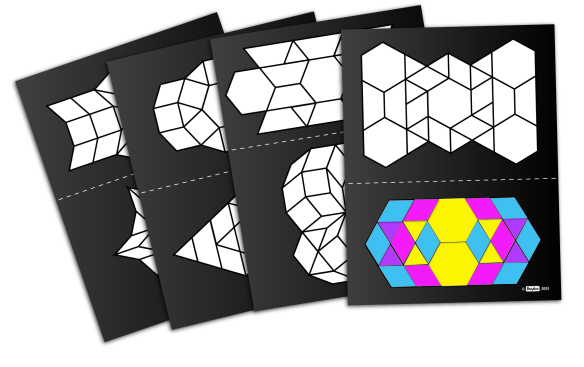
the shapes later on in this guide. Now comes the fun part—putting the Tessellations Mosaics together! Pull out the provided pattern sheets and photocopy each set. Keep the
original sheets safe for future use. There are 2 patterns on each sheet. Print as many sheets as required for your class. You can provide the entire sheet with both patterns to students or cut the sheets and hand out one pattern each.

Fill in the puzzles with the shapes shown in the outlines. Before students fill in their patterns with the mosaics, encourage them to experiment with colors. For their first pattern, students can make the shapes match all in one color. Once they get comfortable with arranging the Tessellations Mosaics onto the pattern sheet, they
can switch out different colors for the same shapes. For instance, instead of filling a pattern sheet with Tessellations Mosaics all in red, students can switch out some of the red shapes for the same shapes in blue.
15664 Tessellations Mosaics girl web

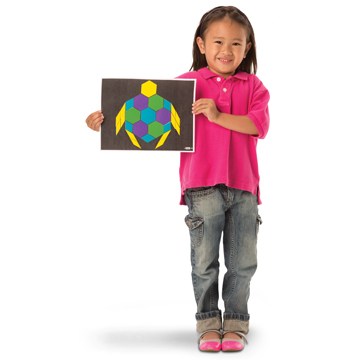
Make new patterns with these color arrangements! After all the students have arranged and glued down their mosaics, compare the patterns to see how different color combinations change how the patterns look. These patterns are intended to teach students how to put the mosaics together. They are meant as a guide to understand how the edges and angles of the shapes can be matched. Some of the patterns can be replicated to make regular tessellations. These patterns can be tiled together to make even larger and more impressive patterns. Ask children to cut their patterns and arrange one big tessellation on a bulletin board.

To add more value to your Tessellations Mosaics pack, go online to download our amazing patterns featuring kaleidoscope-like designs and fun animals! Click on the ‘Artwork’ link to access the resources in printable PDFs. You can access the artwork directly here. Fill in the designs with the Tessellations Mosaics! Draw thematic backgrounds, such as an ocean, the plains or a jungle onto the animal puzzle cards!

Line-11

Like us on FacebookShare this post with your friends, or Subscribe to this blog today to receive original craft project updates every week!

Mosaic Buttons and Beads

mosaics and buttons

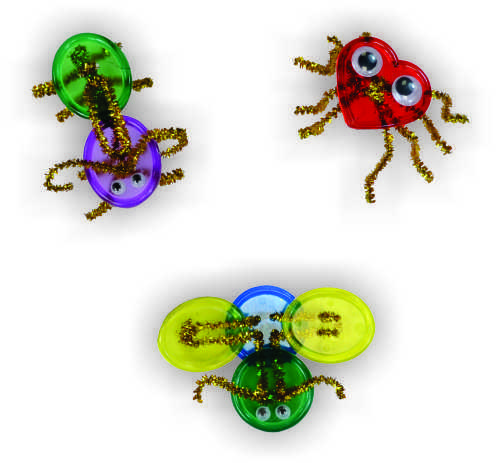
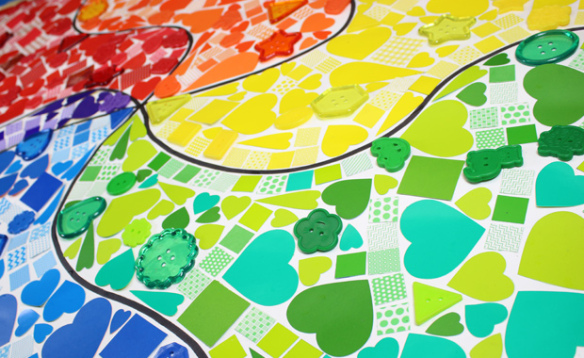
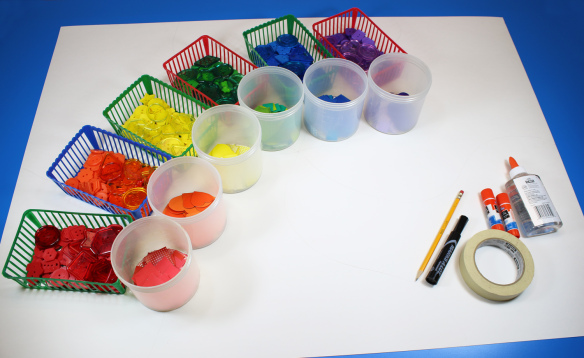
Last year we made a project similar to this one with an assortment of beads and buttons. This year, we are adding a few more mosaic pieces and stylish buttons to our Big Ideas project to turn it into a beautiful art display!
Age: 3+

Duration: 10+ minutes

Learning Objectives: Use multiple materials to create one solid artistic masterpiece. A great group activity that requires students to work together to fit materials into the appropriate blank spots on the drawing. Talk about the different colors in the artwork. Sort the materials into groups by similar colors. Incorporate patterning within the mosaic artwork.

IMG_6978

You’ll Need:

• Mosaics (R15649 Petit Pattern Mosaics, R15639 Spectrum Mosaics)

• Buttons (R2131 Bright Buttons, R2143 Really Big Buttons, R20208 See-Through Buttons)

• Poster board

• Pencil

• Tape

• Glue

Markers

Line-20

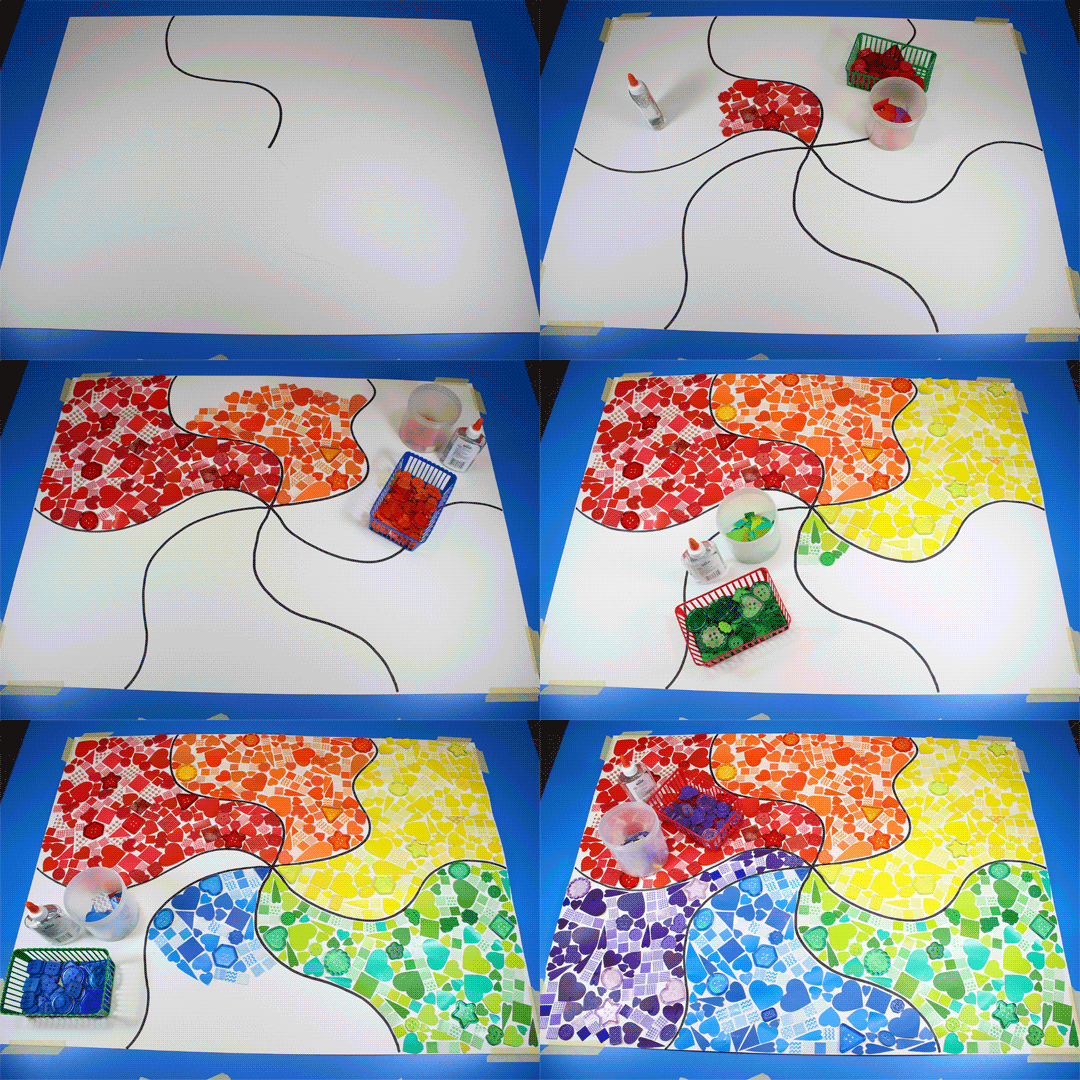
This project can be done over a period of several days or within a single art class. It all depends on the scope of your project. Every student can contribute to the art project or you can separate your classroom into groups of 4 or 5 and get each student to work on their own section in the mosaic artwork.

Mosaic-Animation

In the animation above, you can see how all of the pieces come together. We separated the giant sheet into six sections. Each section is represented by a specific color. Sort the mosaics and buttons into similarly colored groups, then begin gluing down all the pieces. Rotate the different pieces to glue them down in the appropriate spots. Continue through the entire section and make sure that the buttons and mosaics are snugly fit together. At the end, you get an amazing blend of materials to make a glorious masterpiece!

Line-18

Like us on FacebookShare this post with your friends, or Subscribe to this blog today to receive original craft project updates every Monday, Wednesday and Thursday!

Educational Light Cube: Sorting Manipulatives

2014-11-27-FeatureImage

Getting students to sort manipulatives is a double-duty task. While they sort and differentiate between the objects in front of them, students get to exercise their fine motor skills, too!


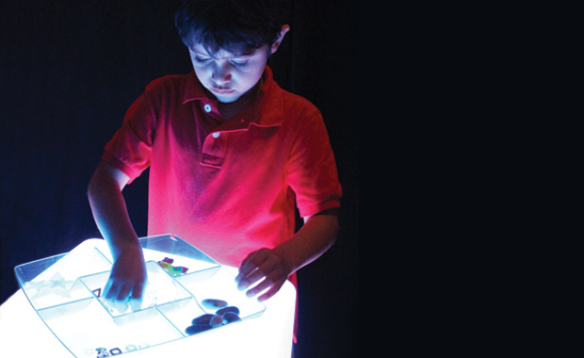
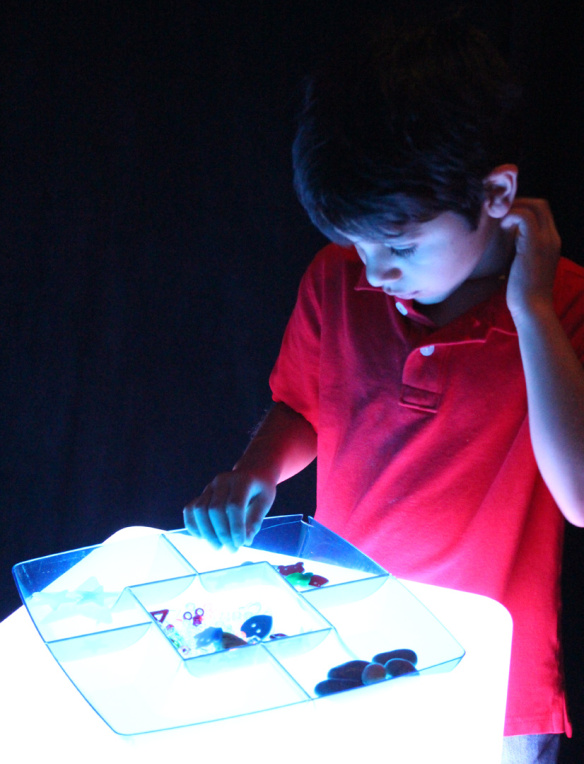
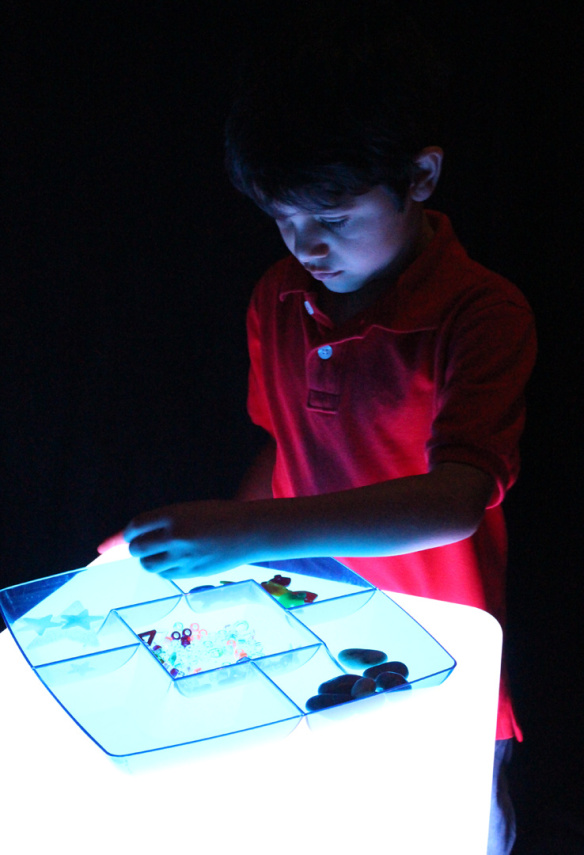
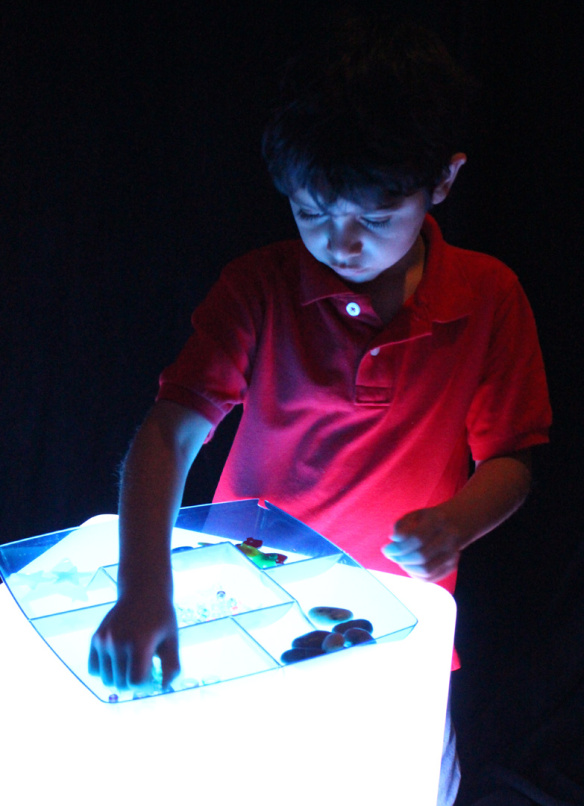
On the R59601 Educational Light Cube, sorting gets so much more fun to do! Turn on the fading function of the Light Cube to gradually cycle through colors. This produces a calming effect on students, getting them to slow down and focus on their task.

IMG_9559

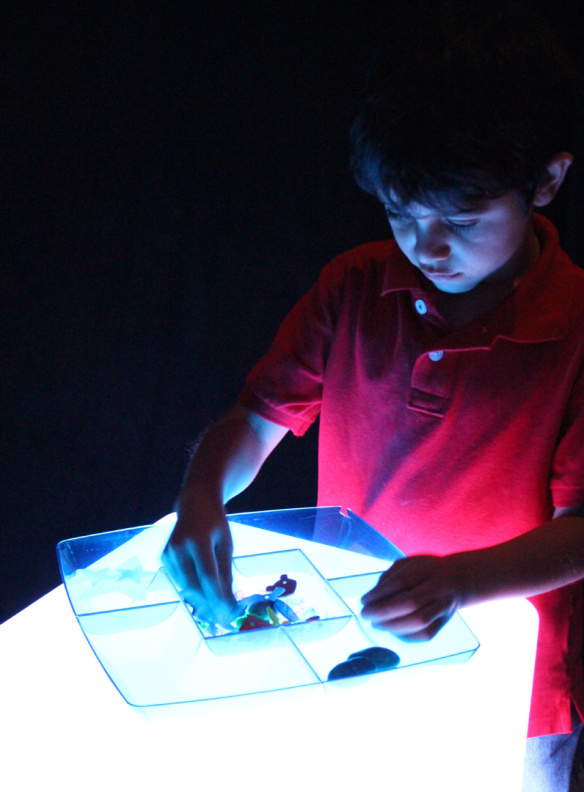
Our first step was to find a snack platter at the dollar store. Use the snack platter to encourage proficiency in identifying like and unlike objects. Gather a variety of different types of manipulatives. We suggest using items such as buttons (R2131 Bright Buttons), letters or numbers beads (R2185 Math Beads and R2184 Manuscript Letter Beads), mosaics (R15367 Heart Mosaics) and more! Place all the manipulatives in the center of the snack platter.

IMG_9561

Ask students to sort through all the different manipulatives and pick out similar ones. Place similar items in one of the snack platter dividers. Repeat for all other items in the snack platter.

IMG_9562

If you cycle through the colors more rapidly on the Light Cube, it challenges students to notice the differences between objects that are transparent versus those that are opaque.

IMG_9566

It’s a great exercise that students will love to try!

More curriculum-based activities on the Light Cube:

Use readily-available materials for counting and sorting

• Build stacking abilities with dollar store party cups

• Find out just how sturdy the Light Cube is!

Share your stories about the Light Cube! What activities do your students use the Light Cube for?

Line-20

Like us on FacebookShare this post with your friends, or Subscribe to this blog today to receive original craft project updates every Monday, Wednesday and Friday!