Education & Inspiration

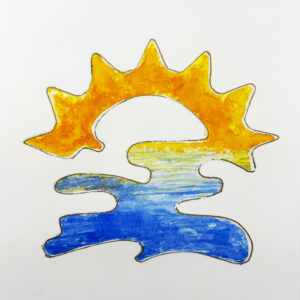
Brighten Your Art Room with Our Free Inspirational Mini-Poster! As an art teacher, you know the power of creativity, encouragement, and inspiration in the classroom. That’s why we’ve designed a FREE inspirational mini-poster just for you! This beautifully crafted poster is perfect for your classroom walls, bulletin boards, or even as a handout for students.…
Every May, we recognize Mental Health Month, a time dedicated to raising awareness about mental well-being and the importance of emotional health. For educators, parents, and homeschoolers, this is a wonderful opportunity to incorporate activities that support children’s emotional development, self-awareness, and mindfulness in a creative and engaging way. What is Mental Health Month &…

You’re in! This is Roylco’s page for all things ASTRA! – News & Announcements: ASTRA In-Show Special: Scroll down to see it! FREE Demo Kits: We have FREE demo kits for play areas or displays are available for our 4Q best-sellers. Come by the booth and ask for these to be added to your order.…
A new video from Arts Grow SC, in partnership with SC Future Makers and the SC Manufacturers Alliance, spotlights how creative talent drives innovation in South Carolina manufacturing. Filmed in our plant, this video highlights the essential role of designers and artists in manufacturing. In our case, our Art Director Warren Manly uses his artistry…

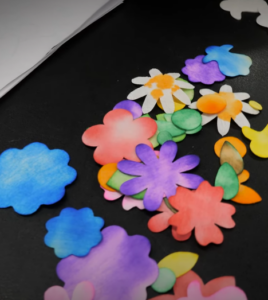
Spring is the perfect time to bring creativity into the classroom with hands-on crafts that celebrate the season of growth and renewal. Using simple yet engaging materials, teachers can inspire their students with colorful, nature-themed activities. Here are five fun and educational spring crafts featuring Roylco’s high-quality, classroom-friendly products. – 1. Botanical Garden Landscape Featuring:…

The water cycle is one of nature’s most fascinating processes, and with Roylco’s Water Cycle Experiment Kit, students can experience it firsthand in a creative and engaging way. This interactive science kit is perfect for parents and art teachers looking to introduce young learners to the wonders of evaporation, condensation, and precipitation. – A Creative…
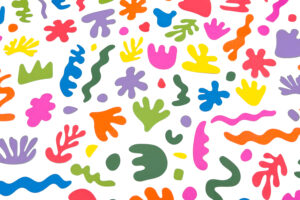
Bring Matisse to Life in Your Classroom! 🎨✨ Looking for a fun, engaging way to introduce your students to the bold, colorful world of Henri Matisse? Our free activity guide is the perfect resource to help you lead an inspiring art lesson using our pre-cut Matisse Shapes! – With this guide, your students will:✅ Explore…
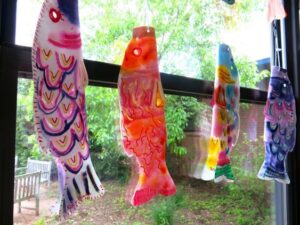
Koinobori is the way Japan celebrates children! Bring Koinobori into your classroom with this carp windsock activity and free printable. Every spring, Japan celebrates Koinobori, a traditional holiday that honors children’s growth and strength. This colorful festival is filled with flying carp-shaped windsocks, representing the wish for children to grow up strong and healthy.…
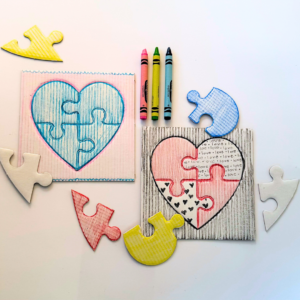
Looking for a fun and meaningful way to celebrate Valentine’s Day, Mother’s Day, or any special occasion? Look no further than Roylco’s Love You to Pieces Heart Puzzles! These charming, eco-friendly puzzles offer the perfect opportunity for children to craft personalized gifts that are not only heartfelt but also kind to the environment. What…