Posts Tagged ‘kids crafts’
Tessellations Mosaics
Inspired by Pattern Blocks, we’ve created 6 shapes that can be used to make wonderful tessellation patterns. Shapes are: equilateral triangle, rhombus, trapezoid, hexagon, square and small rhombus. Each shape is carefully crafted to match the sides and angles of the other shapes allowing … Continue reading ![]()
Flag Designer
Create your own beautiful flags or duplicate your country’s flag with our Flag Designer kit! Use the blank card flags to initiate discussion about country flags and their symbolism. Talk about your own country’s flag and what the colors or … Continue reading ![]()
Butterfly Ornaments Bracelets
Turn beautiful Butterfly Ornaments into wonderful bracelets! Age: 4+ Duration: 15-20 minutes plus drying times Learning Objectives: Use a unique material to create a color resist effect. Learn to diffuse colors with special paper. Create swirly designs, shapes and interesting patterns … Continue reading ![]()
Spotlight on… Pocket Portfolio!
Need something to do on those long road trips? Or just feeling very artistic? Try our R82051 Pocket Portfolio, ready set with all the materials you need to make a sketchbook of unique illustrations! The R82051 Pocket Portfolio is a … Continue reading ![]()
Four Leaf Clovers
Make your own lucky charm just in time for St. Patrick’s Day! Age: 5+ Duration: 10 minutes Learning Objectives: Learn basic cut and fold techniques. Use ruler to measure a certain width for each strip in the lucky charm. Talk … Continue reading ![]()
Thank You 2013 Art Camp Kids!
Today’s post is a little bit different than our regular series of posts! The folks at Roylco enjoyed a fantastic summer art camp in 2013 thanks to our brilliant art campers. Using our classroom materials, the group completed a variety of … Continue reading ![]()
Tropical Art-a-Roni Bracelets
Today’s craft is pretty simple, but no less fun to try out! We’re making use of our extra-bright and colorful Tropical Art-A-Roni® Noodles to fashion exotic-looking bracelets. Age: 4+ Duration: 5-10 minutes Learning Objectives: Develop manual dexterity while threading pasta beads through pipe … Continue reading ![]()
Chromatography Flowers
Find out what colors of ink are used in your markers! Chromatography is used to break a solution into its component parts. In other words, the colors of markers are often made by combining several other colors together. To split these … Continue reading ![]()
Craft Spotlight: Flower Forms
Flower Forms are plastic flower bases with slots for threading through your own petal designs! Make your own chain of flowers or use to decorate hair bands or bracelets! Flower Forms come in a variety of colors to match various … Continue reading ![]()
Snowflake Wax Resist Art
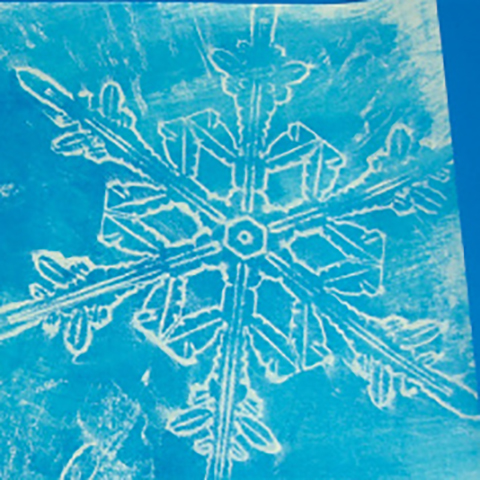
Learn the technique for making beautiful wax resist art–give your students something to work on as they return to their school routine after the holidays, and help them create an art piece that they can be proud of! Age: 3+ Duration: 15 minutes You’ll Need: • R58622 Super Snowflake Stencils • Paper towel • White…
Read More