Craft Spotlight: Flower Forms

2014-07-27-FeatureImage

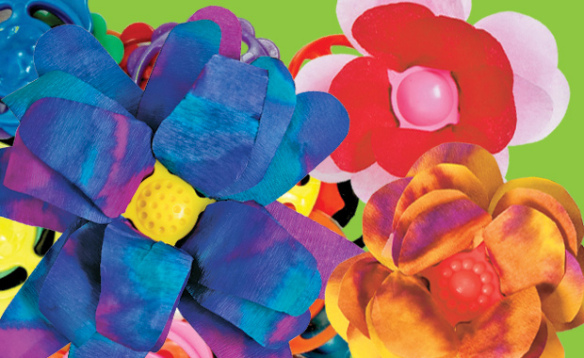
Flower Forms are plastic flower bases with slots for threading through your own petal designs! Make your own chain of flowers or use to decorate hair bands or bracelets! 

Flower Forms come in a variety of colors to match various different types of petals. They are sturdy enough to hold the shape of the flower form, but flexible enough to allow tiny fingers to manipulate and place petals through.

R2453

You can use either decorative papers, printed flower images, Color Diffusing Paper or tissue paper to form your petals. To decorate Color Diffusing Paper, drop some liquid watercolor onto the sheet. Watch the color expand across the sheet, then drop another color to see how they blend to create new colors! Leave the Color Diffusing Paper to dry overnight. You can use the colored sheet to cut out large peanut-shaped petals, or simply cut out from decorative paper.

Accordion fold the paper shape across so that it is thin enough to fit into the Flower Form slots. Slide one end of the folded shape into one slot, and thread out through the slot on the opposite end of the Flower Form.

To view detailed information on how to put together your Flower Form, watch the video below!

Line-13

Thanks for checking out this post! Like us on FacebookShare this post with your friends, or Subscribe to this blog today to receive original craft project updates every Monday, Wednesday and Friday!

Snowflake Wax Resist Art

Roylco Snowflake Wax Resist Art

Feature-Image-rubplatesnowflakesLearn the technique for making beautiful wax resist art–give your students something to work on as they return to their school routine after the holidays, and help them create an art piece that they can be proud of!

Age: 3+

Duration: 15 minutes

You’ll Need:

R58622 Super Snowflake Stencils

• Paper towel

• White crayon

• Blue watercolor paint

• White paper (8.5 x 11″)

• Paint tray

Line-20

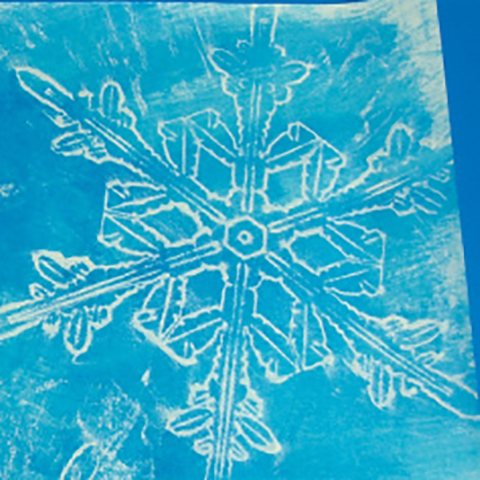
We’ve done it! Days of experimentation, combining a multitude of products and materials, testing this paint versus that crayon…. and here we are! Use our Snowflake Rubbing Plates to make simple but beautiful wax resist art. Decorate your classroom during the winter months with your students’ projects!

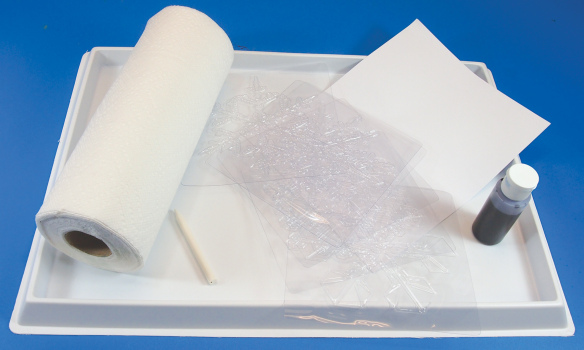
2013-12-12-snowflakerubplates01The paint tray is essential for keeping work-spaces clean while spreading paint onto the paper.
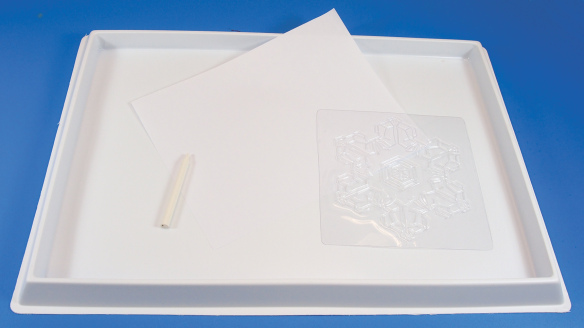
2013-12-12-snowflakerubplates02Place one of the Snowflake Rubbing Plates underneath the white paper. Tip: Tape the edges of the Snowflake Rubbing Plate to the paint tray to keep it from moving about. This will be important for the next step.
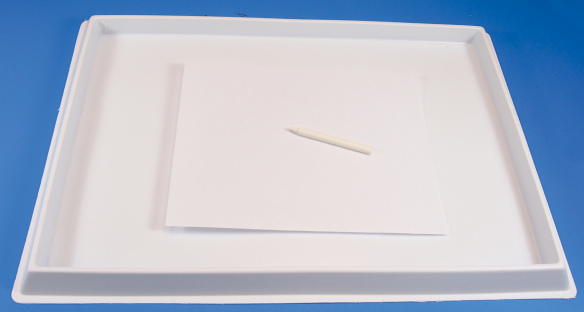
2013-12-12-snowflakerubplates03Rub the white crayon across the surface of the paper. Make sure the rubbing plate stays in one spot while you rub the page with the crayon.2013-12-12-snowflakerubplates06
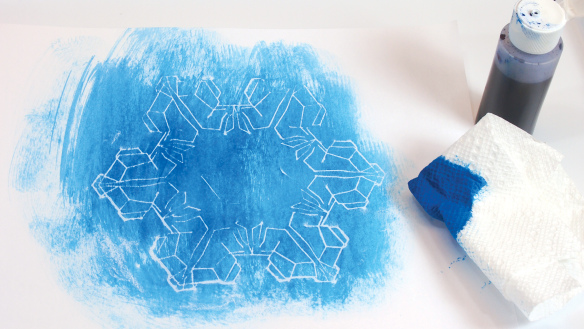
Tear one sheet of paper towel and fold it into a square. Dip a corner of the square into the blue watercolor paint. Next, dab the dipped corner onto the white crayon rubbing. Spread the paint outwards from the center. You will start to notice the crayon rubbing “pop” out from the paint color.

2013-12-12-snowflakerubplates08

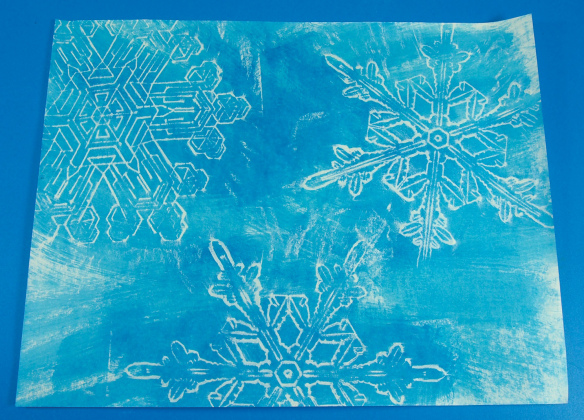
Make additional crayon rubbings at various angles on the white paper. Use different Snowflake Rubbing Plates or vary the position of the snowflakes.

Line-20

Thanks for stopping by! If you liked this craft and would like to share your version with us, send us an email to subscriber@roylco.ca with photos! We’d love to hear from you!

Christmas Tree Flourish Ornaments

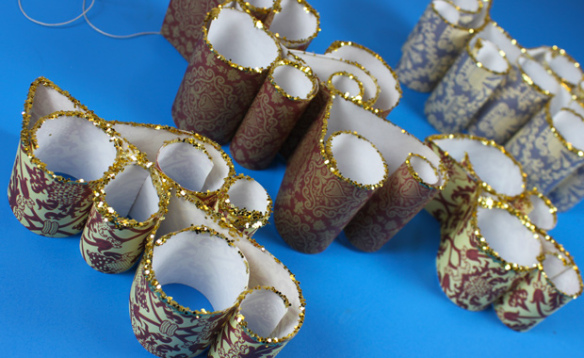
Feature-Image-CurlDecorationsAdd a fancy touch to your Christmas tree or include it in your holiday classroom decorations. The glitter can be a bit messy to work with, but in this craft, your students won’t have to get their hands in it! Super simple and stunning–that’s what we like!

Age: 5+

Duration: 15-20 minutes

You’ll Need:

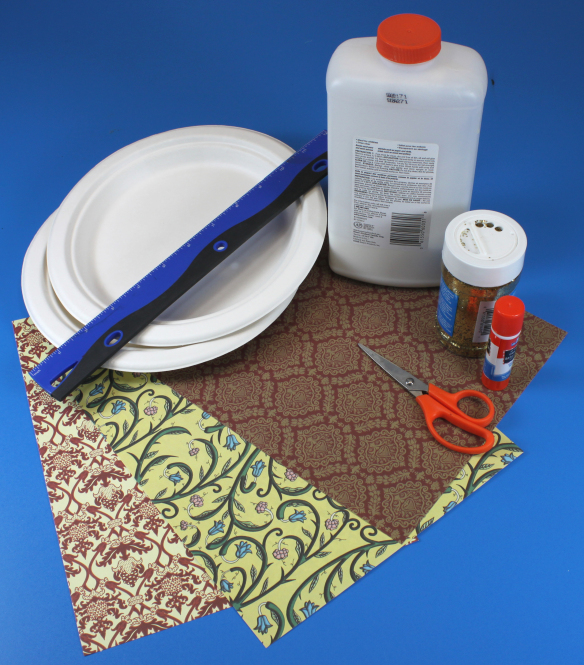
R15305 Renaissance Era Paper

• Glitter

• Scissors

• Glue

• Paper plates

• Ruler

Line-07

You can use any one of our decorative papers to customize your own flourish ornament. When you’re done making the ornaments, send us a picture of how they look like on your Christmas tree!

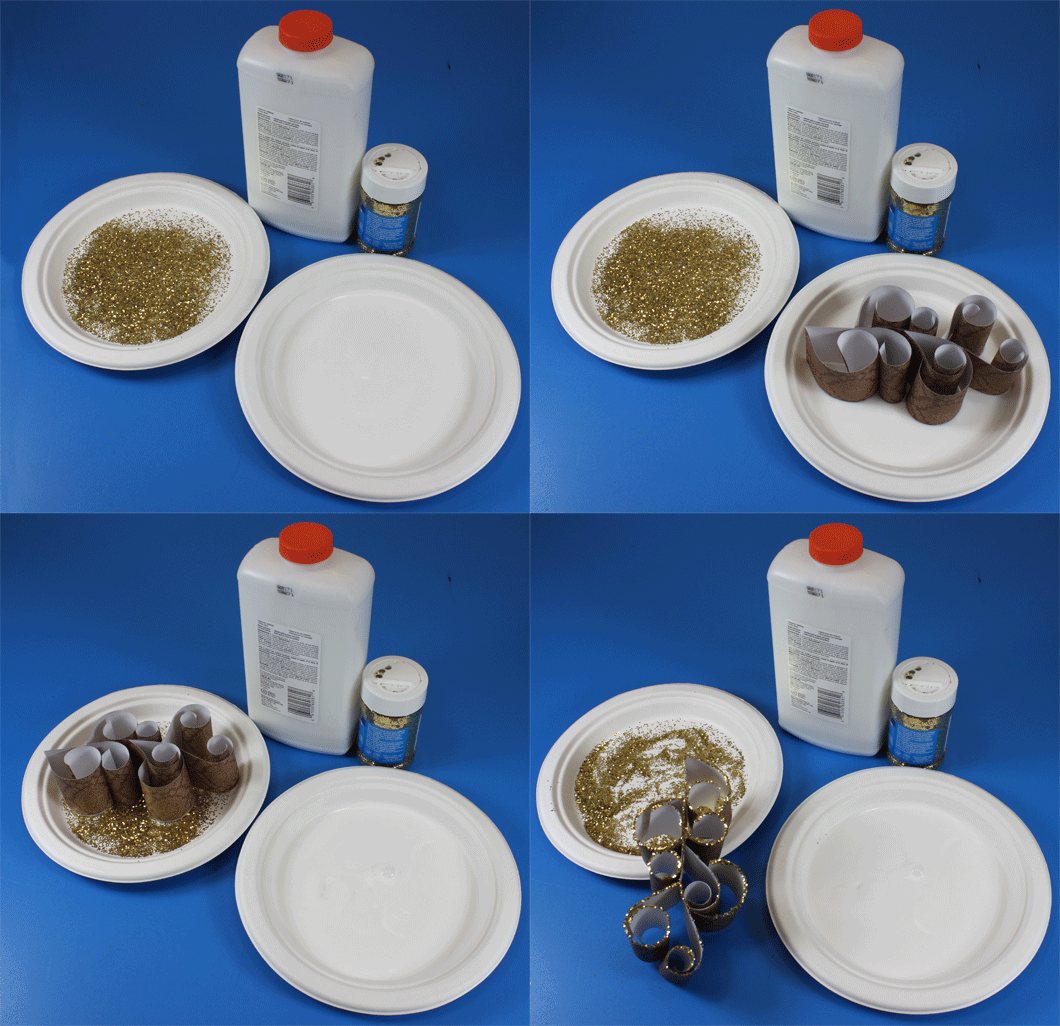
IMG_7925Paper plates will come in handy when adding glitter to your flourish ornament!

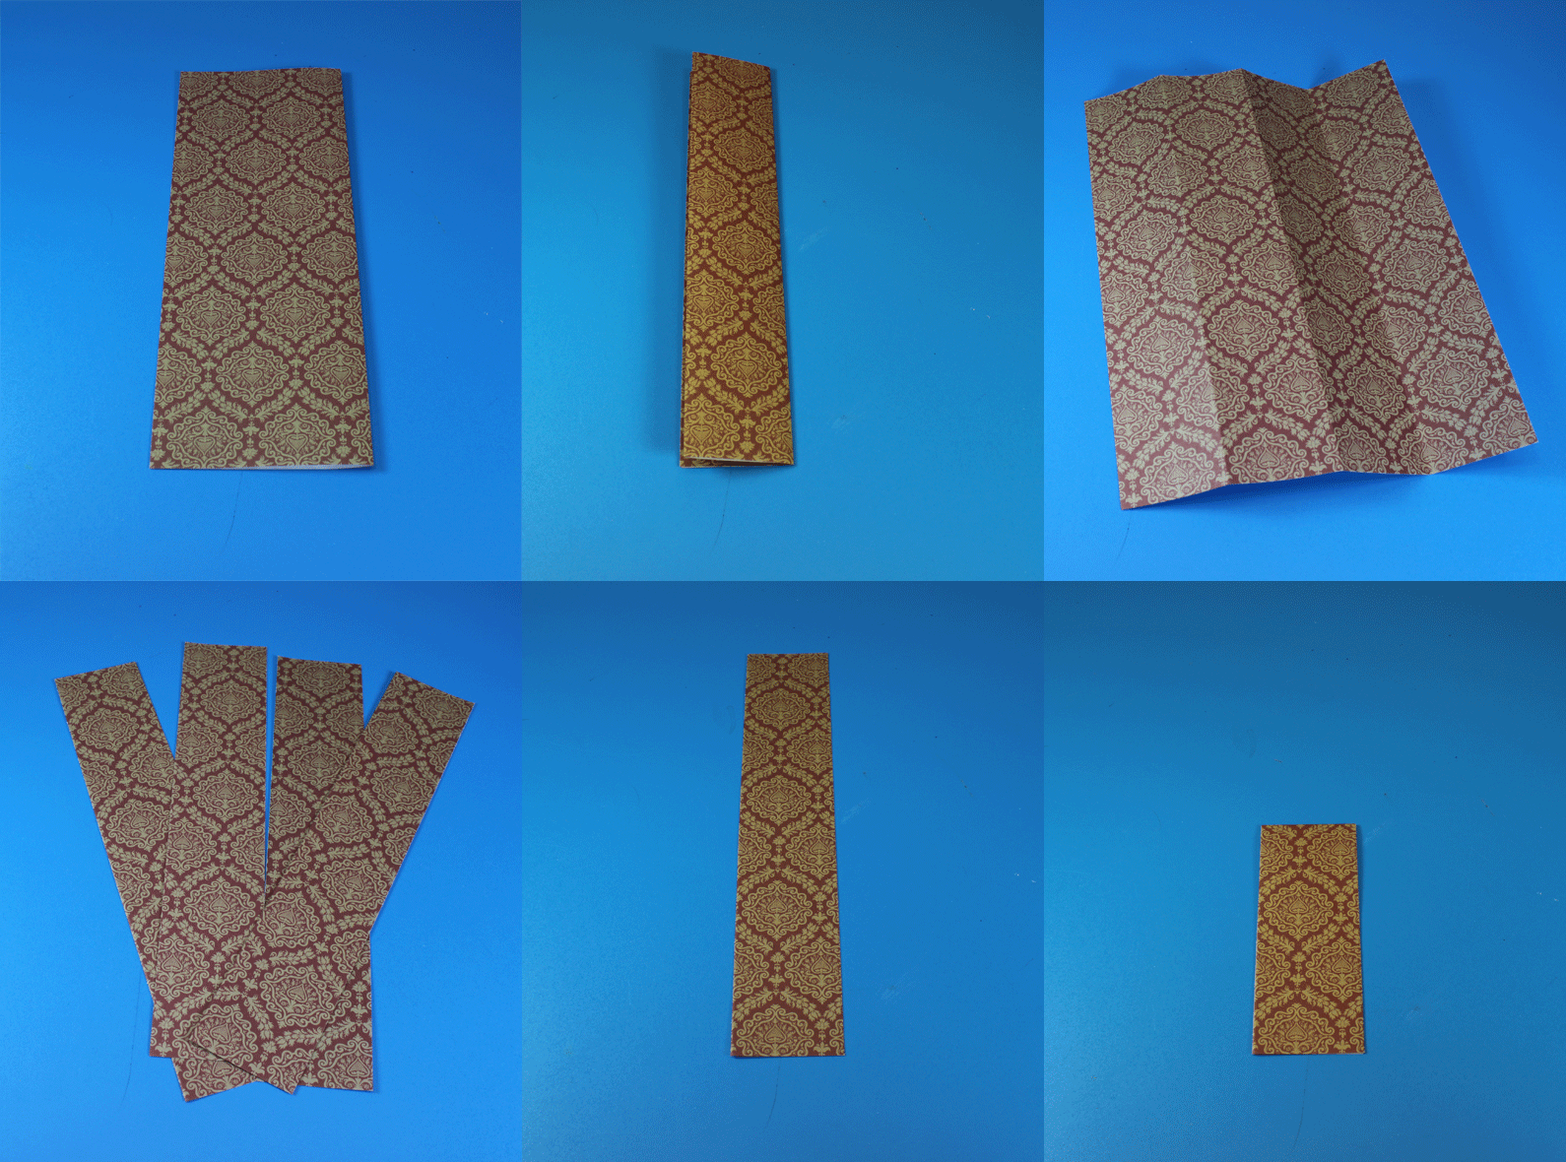
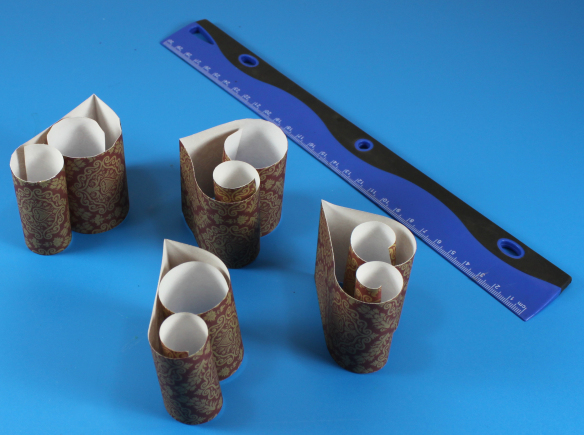
CurlDecoFoldCut-AnimationFirst, fold your paper lengthwise in half, then fold once again. Unfold your paper, to reveal three fold lines in total. Cut along the fold lines to separate the paper into four equal strips.
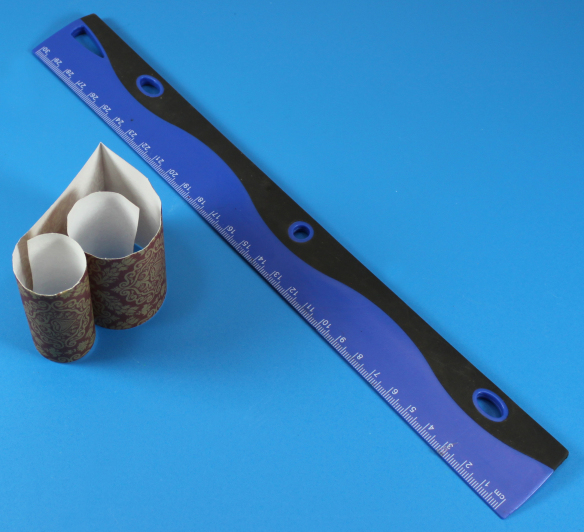
IMG_7933To make the curls on your flourish ornament, fold one strip of paper in half. Press the edge of a ruler to the underside (unprinted part) of one half of the paper strip. Stabilize the top of the paper with your thumb and pull the ruler with your thumb over the remaining length of the paper strip. This will curl the paper inwards.

Repeat for the opposite side of the paper strip.

IMG_7934Do the same for the remainder of the paper strips.

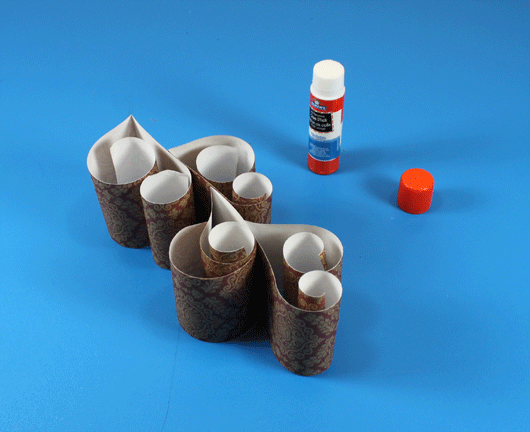
CurlDecoGluing-AnimationNext, glue the edges of your paper curls together. Join the edges together and fan the curls outwards from the center.

CurlDecoGlitter-AnimationFill the bottom of one paper plate with glue. Fill the bottom of a second paper plate with glitter. Dip one side of the flourish ornament in the glue. Lift, then dip the same side down into the glitter. Remove and set aside to dry.

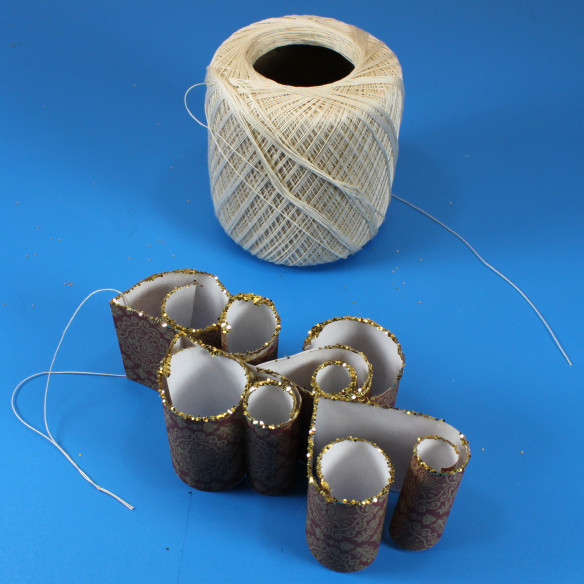
IMG_7948Thread a length of string through the top of the flourish ornament and tie a knot at the opposite end. Now it’s ready to hang!

Line-07

Thanks for checking out our Christmas countdown posts for this week! Stay tuned next week for more crafty holiday projects! Email us your projects to subscriber@roylco.ca. Looking forward to hearing from you!

Mrs. Knight uses our Retro Pop Paper!

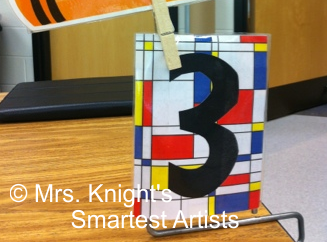
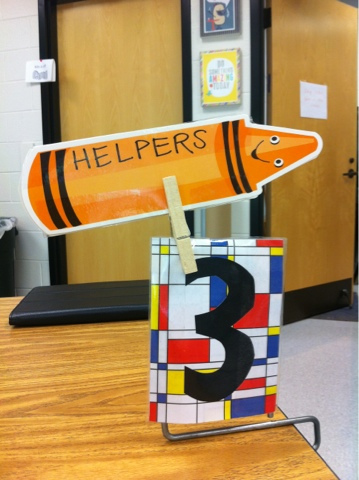
blogger-image--2079829474 scsMrs. Knight shows us her beautiful classroom with her detailed photo gallery! One of the photographs shows Mrs. Knight’s take on table numbers!

Mrs. Knight published “Inspiration to Fruition… Thank you!” on August 9, 2013 where she talks about her various inspirations for her classroom.

The table numbers she made were made from our R15303 Retro Pop Paper. Cover a metal table clamp with a folded sheet of Retro Pop Paper! Tape the edges of the paper together to secure. Decorate the front and back of the Retro Pop Paper with black marker–write a letter or a number to organize your students into groups!

blogger-image--2079829474Thanks to Mrs. Knight for her post!

Images and original post © Mrs. Knight’s Smartest Artists.

This post was not sponsored for a review. At LittleFingersBigArt, our mission is to present to our readers and viewers the newest and most creative craft ideas that fans of Roylco have made on their own. Our goal is to allow you and other educators and parents to reuse our products in fun ways so that children always get the best educational experience from them!

We’d love to see more ideas like this one! If you’ve got a brilliant craft idea or have made a version of one of our crafts that you would like to share with us, send an email to subscriber@roylco.ca with photos, descriptions or a link to your work. We will create a feature post and link back to you with full credit. We’d love to hear from you!

Line-14

Thanksgiving Hat

Feature-Image-featherhatcraft

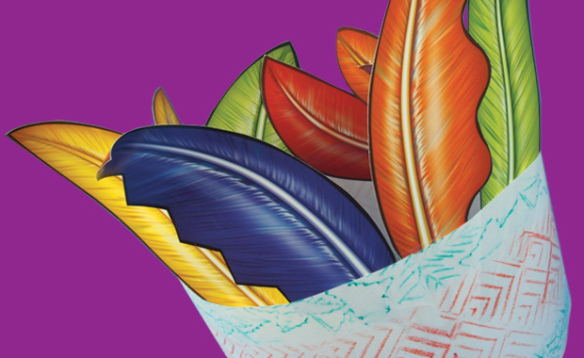
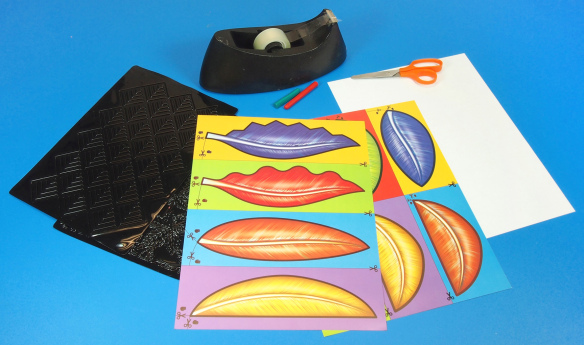
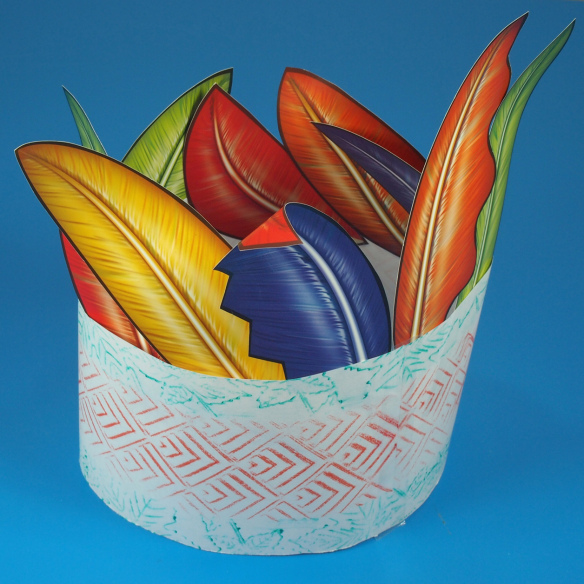
Inspired by what our crafters at the Roylco Summer Art Camp made, here’s how to put together your unique Thanksgiving Hat! Use the R28421 Scissor Skills Paper for this craft. 

Age: 4+

Duration: 15-20 minutes

You’ll Need:

• R28421 Scissor Skills Paper

• R5870 Linear Rubbing Plates

• Sheet of paper, 8.5 x 11″ (20 x 28 cm)

• Crayons

• Scissors

• Tape

Line-06

Putting together the Thanksgiving Hat is super simple!

P9033137

For this activity, you can decorate the head band with any of our special rubbing plates!

P9033140

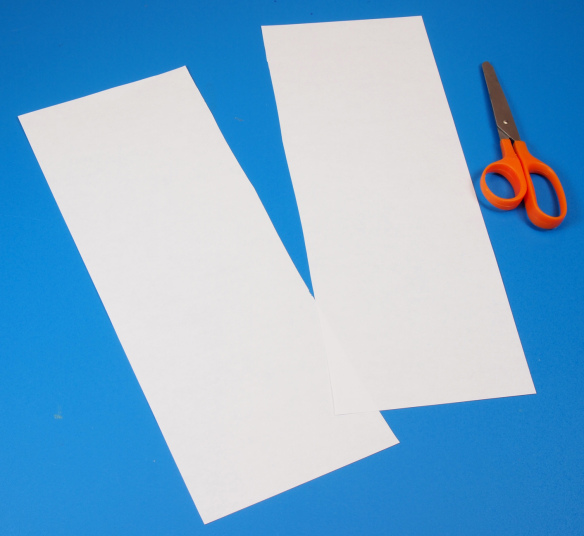
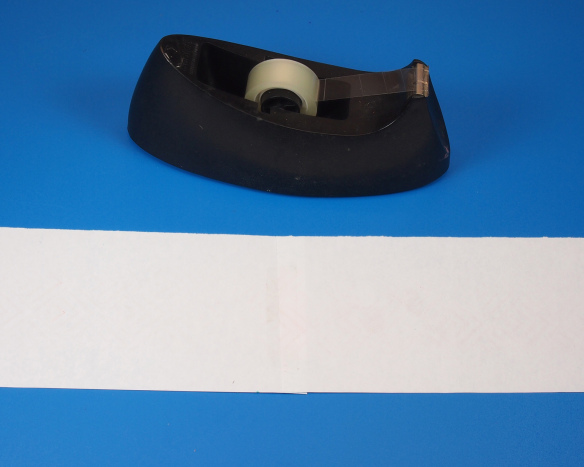
Fold a sheet of paper lengthwise in half. Unfold the paper and cut along the fold line to make two equal strips of paper. You’ll need both strips of paper for the entire headband.

P9033143

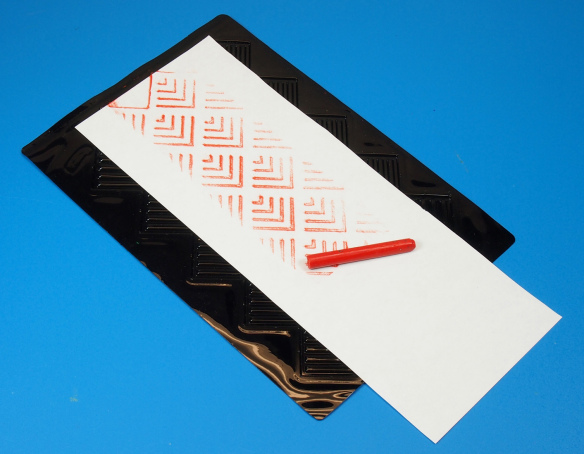
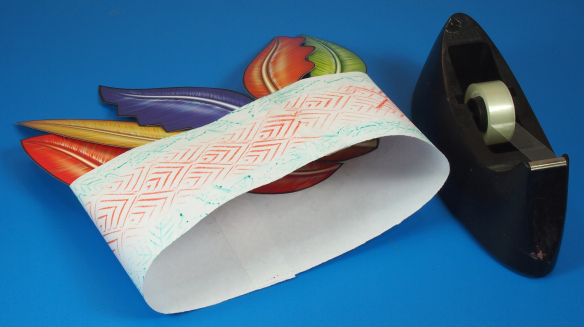
Place the headband on top of a rubbing plate. Use the side of a crayon to rub the pattern onto the headband.

P9033145

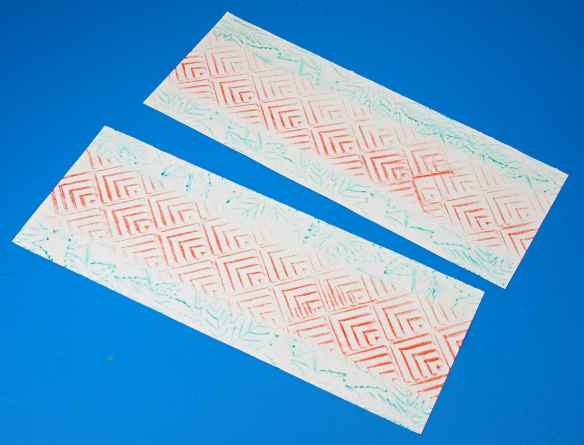
I used a different pattern for the top and bottom headband edges. Try it out with a different color too!

P9033146

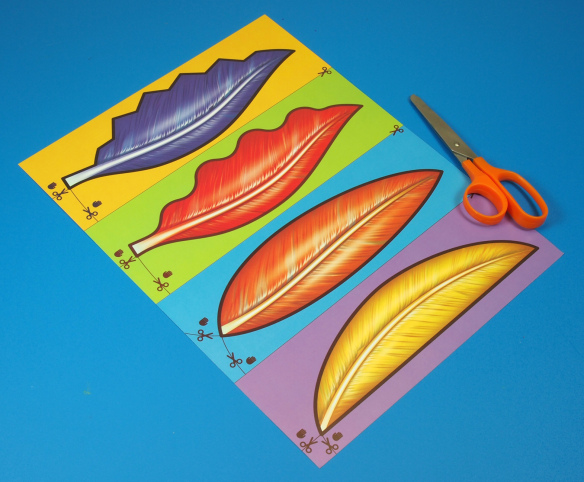
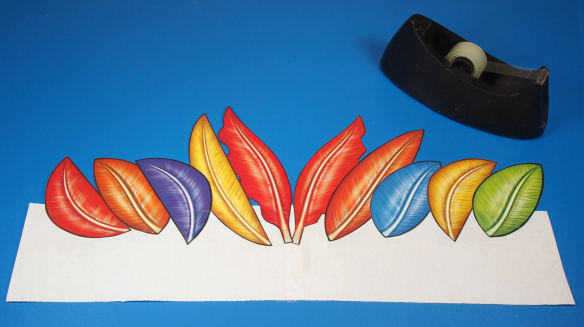
Choose one of the three types of feathers to decorate your headband with. We’ve made an easy set of feathers for beginners with which to practice their scissor cutting skills. The second set is intermediate, with wavy lines. The third, and most challenging, set features jagged edges for students to cut. Choose the most appropriate set of feathers for students to cut.

P9033155

Attach the two headband pieces together with a piece of tape. Join the two headbands horizontally to extend the length of the entire headband.

P9033160

Keep the headband flipped over to the blank side. Line up all your cut feathers along the top edge of the headband and paste onto the paper. The feathers are double-sided so you won’t have to worry about which side you paste them onto!

P9033161

Join the edges of the headband together. Tip: First get students to adjust the headband for wearing. When they have found the right fit, tape the edges at that point.

P9033163

All ready for wearing! If you would like to add some dimension to your hat, curl out the ends of the feathers using a pencil.

CRAFT CHALLENGE:

What else did your students use to decorate their hats? You can use anything available in your craft supply closet or use scrap paper left over from other projects to cut out feathers. Once students have made their hats, sit your class down in a circle and talk about what each student is thankful for from the previous year.

Line-06

Send us your responses to subscriber@roylco.ca along with photos of your students’ hats! We’d love to hear from you!

Art With Ms. K uses our Fossil Rubbing Plates!

017

Ms. Katzin of Art with Ms. K used several of our rubbing plates, including R5870 Linear Rubbing Plates and R5817 Animal Skins Rubbing Plates, as texture mats for clay sculptures. She explores a variety of textures and materials and guides her students to make gorgeous clay pendants!

Ms. Katzin published her post, entitled “Kindergarten Fossils,” on January 17, 2013. She used regular clay to bring out the best textures.

0141

Our rubbing plates are great for introducing texture to pre-K art classes. For this activity, Ms. K got her students to press rolls of clay onto the textured rubbing plates. Once they removed the clay, they could shape the sides of the clay rolls into pendants.

To use the texture rubbing plates for making clay sculptures such as bowls, place a sheet of parchment paper below the clay. Roll out the clay into a flat 1/4″ thick slab. Next, choose your favorite textured rubbing plate. This next step will allow you to transfer the texture onto the clay piece.

Simply press the rubbing plates onto the clay slab and lift off. Gently loosen the parchment paper from the textured clay by peeling off the paper from the corners. When you are finished removing the clay, manipulate the textured clay slab into a curved face for a bowl or a cup. For the most adventurous, shape the clay slab into a dynamic sculpture, like an animal!

I love to see what new project Ms. Katzin comes up with–she IS the definition of art teacher in all aspects. Thanks again, Mollie!

Images and original post © Art with Ms. K.

This post was not sponsored for a review. At LittleFingersBigArt, our mission is to present to our readers and viewers the newest and most creative craft ideas that fans of Roylco have made on their own. Our goal is to allow you and other educators and parents to reuse our products in fun ways so that children always get the best educational experience from them!

We’d love to see more ideas like this one! If you’ve got a brilliant craft idea or have made a version of one of our crafts that you would like to share with us, send an email to subscriber@roylco.ca with photos, descriptions or a link to your work. We will create a feature post and link back to you with full credit. We’d love to hear from you!

Line-11

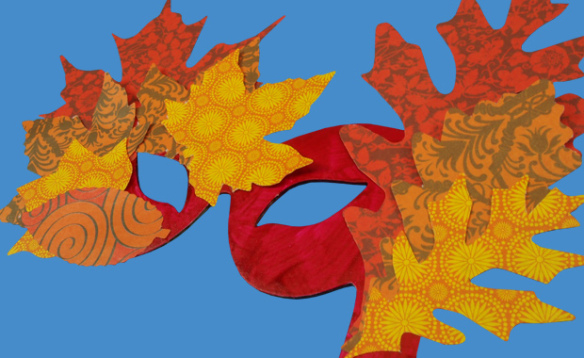
Fall Leaves Mask

Feature-Image-fallleavesmask

Beautiful masks are perfect for reigning in the autumn season! These flashy red, green and gold Masquerade Glasses are easy to make too! Try out our Craft Challenge below and send us photos of your work to get featured in a post.

Find out your craft challenge below!

Age: 4+

Duration: 10-15 minutes

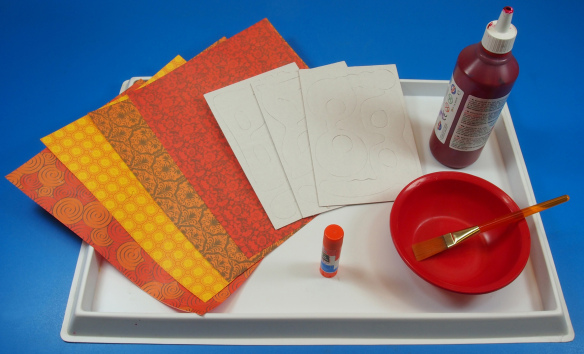
You’ll Need:

R15335 Spring and Autumn Leaves

R52023 Masquerade Glasses

• Glue

• Markers or paint

Optional:

• Paintbrushes

Paint bowls

Line-20

Masquerade Glasses are versatile for kids of all ages to use! Everyone can decorate their unique Masquerade Glasses anyway they like, but the R15335 Spring and Autumn Leaves add a perfect autumn twist to this craft.

P8123087

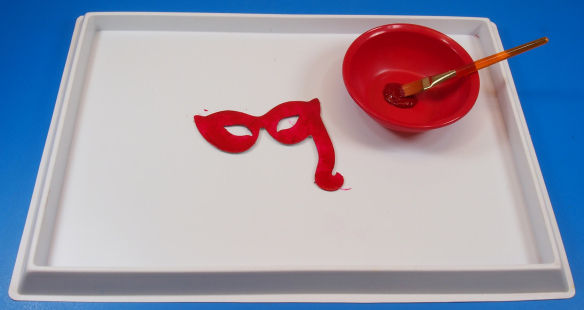
You can use markers instead of paint to color in the R52023 Masquerade Glasses. You won’t have to wait for drying times!

P8123091

Color in the R52023 Masquerade Glasses completely. Make sure none of the card shows through!

P8123093

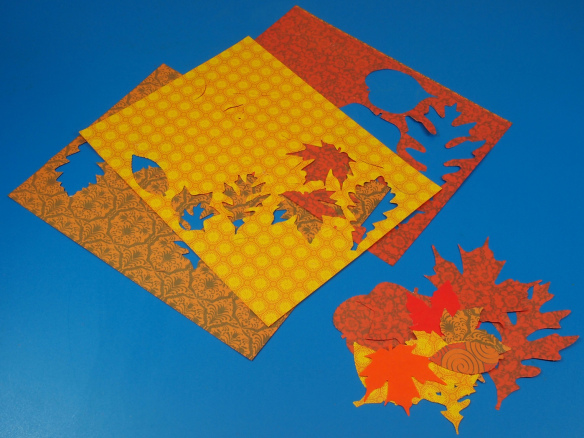
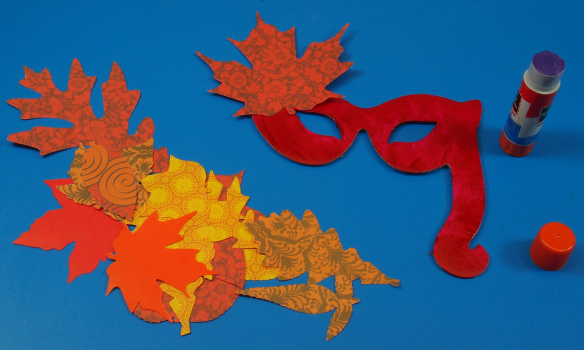
Pop out the R15335 Spring and Autumn Leaves from the backing. The kit includes most fall colors such as yellow, gold, red, orange and green. The leaves are double-sided, featuring a flat color on one side and a pattern on the other side. The patterns are great for adding dimension to your projects!

P8123097

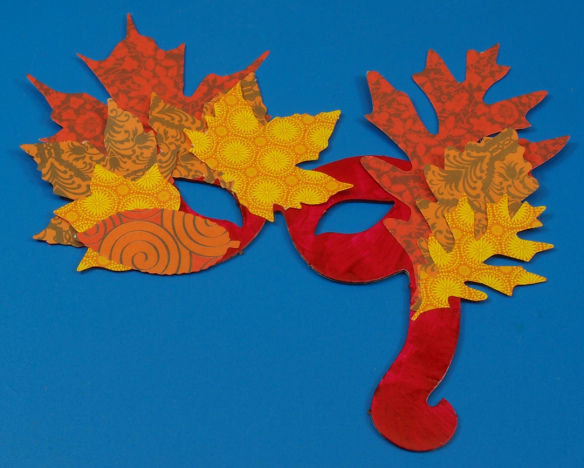
Select the best-looking leaves and arrange them onto the R52023 Masquerade Glasses. Tip: Put the larger leaves on the corners of the R52023 Masquerade Glasses, and lay the longer leaves along the edges.

P8123098


This mask is simple to make, but looks amazing!

CRAFT CHALLENGE:

Go outside while wearing the leafy Masquerade Glasses. Stand by a tree and take a picture! It will look like the leaves of the Masquerade Glasses are a part of the tree!

Line-20

Send us your photos of this project to subscriber@roylco.ca. We will post the photos up in an upcoming post! Thanks for visiting!

Library Arts uses our Animal Print Paper!

On Safari final

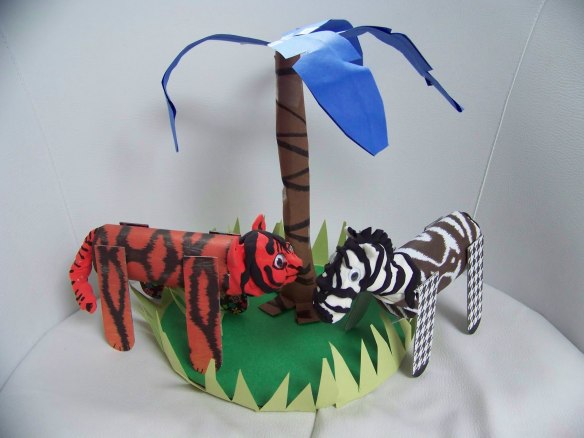
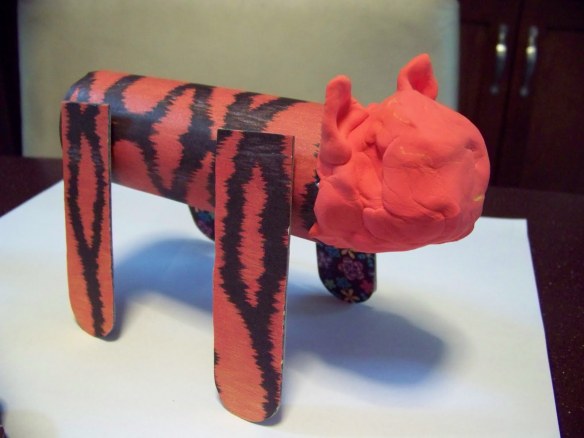
Doris of Library Arts once again uses our printed papers to make fun 3D safari animals! In this tutorial, Doris features our R15256 Amazing Animal Paper! Check out her detailed instructional post. 

Doris posted her tutorial on August 13, 2010 as “On Safari!” Check it out!

100_4987

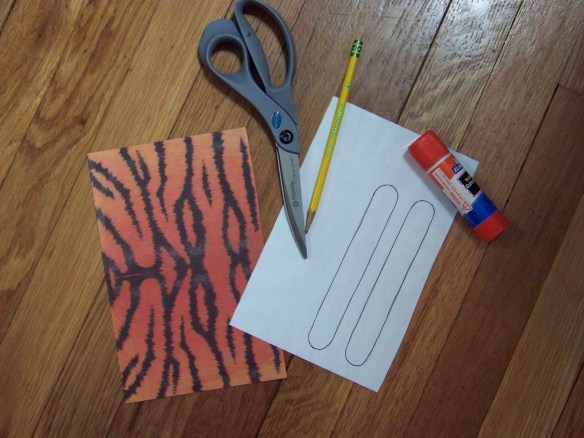
The post features templates to use for making the 3D animals. You will need tongue depressor sticks, a toilet paper cardboard roll and some tin foil.

100_4996

Use our papers to make a tiger, zebra, leopard, giraffe and many more! I adore the creativity of this craft!

Thanks to Doris for this adorable post!

Images and original post © Library Arts.

This post was not sponsored for a review. At LittleFingersBigArt, our mission is to present to our readers and viewers the newest and most creative craft ideas that fans of Roylco have made on their own. Our goal is to allow you and other educators and parents to reuse our products in fun ways so that children always get the best educational experience from them!

We’d love to see more ideas like this one! If you’ve got a brilliant craft idea or have made a version of one of our crafts that you would like to share with us, send an email to subscriber@roylco.ca with photos, descriptions or a link to your work. We will create a feature post and link back to you with full credit. We’d love to hear from you!

Line-09

Craft Spotlight: Stand Up Self Portraits!

Feature-Image-standupselfportrait

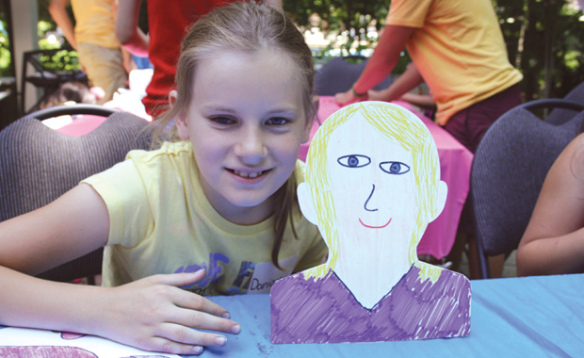
This week’s Craft Spotlight features our Stand Up Self Portraits! Are you gearing up for Parent-Teacher night? Or are you in need of a project that children can use to introduce themselves to each other? Perfect for “All About Me” crafts, Stand Up Self Portraits encourage children to explore self-expression and self-representation!

Stand Up Self Portraits give students the freedom to experiment with their artwork–use crayons, markers, pencil crayons or a variety of collage materials to decorate the appearance of your portrait!

IMG_7431

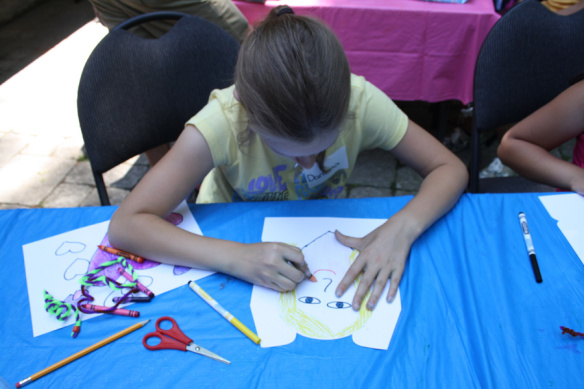
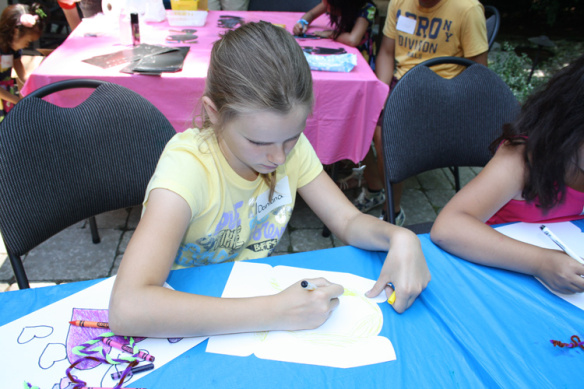
Our crafters used markers and crayons to decorate their Stand Up Self Portraits. They used the indicators on the Stand Up Self Portrait help students locate where various facial features belong. There are six little pinprick indicators in total.

IMG_7432

The two topmost indicators represent the points at which to place the eyes. Draw small circles around the indicators to represent pupils. Enclose the pupils in an almond shape to form the eyes. Add details such as eyelashes and eyebrows.

Use the middle two indicators to draw the nose. Finally, the space between the last two indicators can be used to draw the mouth.

_DSC0063

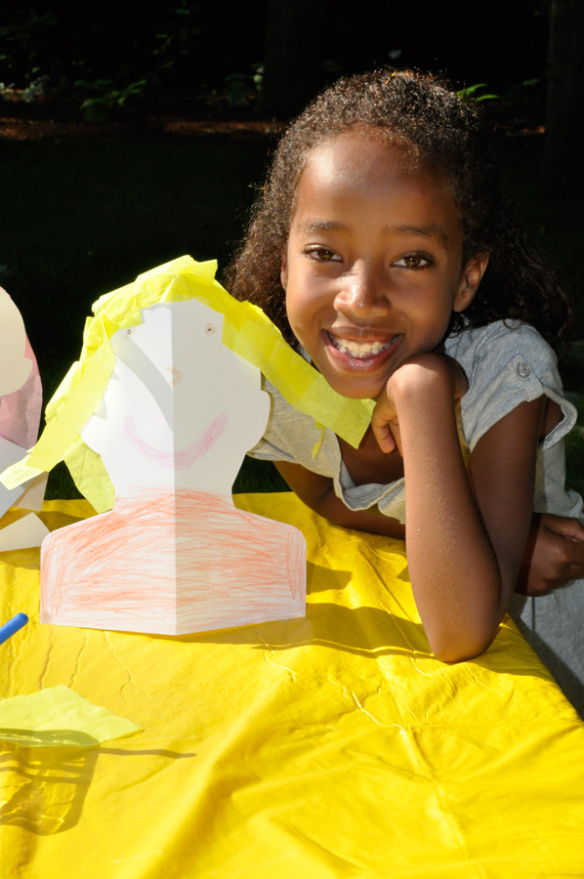
Paste the sides of the Stand Up Self Portrait with yarn, tissue paper or cut construction paper to make the hair!

A great way to introduce students to each other, or prepare the classroom for Parent-Teacher night!

Line-11Let us know how your students’ portraits turned out by sending photos to subscriber@roylco.ca! We’d love to see your classroom artwork!