
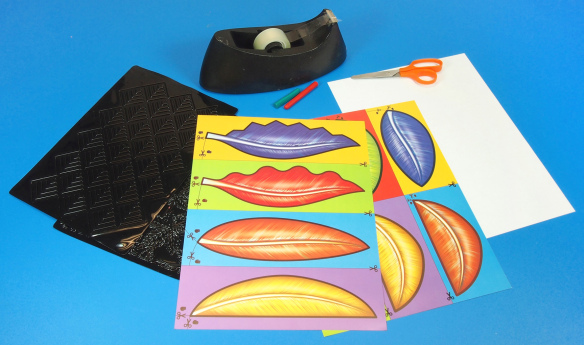
Inspired by what our crafters at the Roylco Summer Art Camp made, here’s how to put together your unique Thanksgiving Hat! Use the R28421 Scissor Skills Paper for this craft.
Age: 4+
Duration: 15-20 minutes
You’ll Need:
• R28421 Scissor Skills Paper
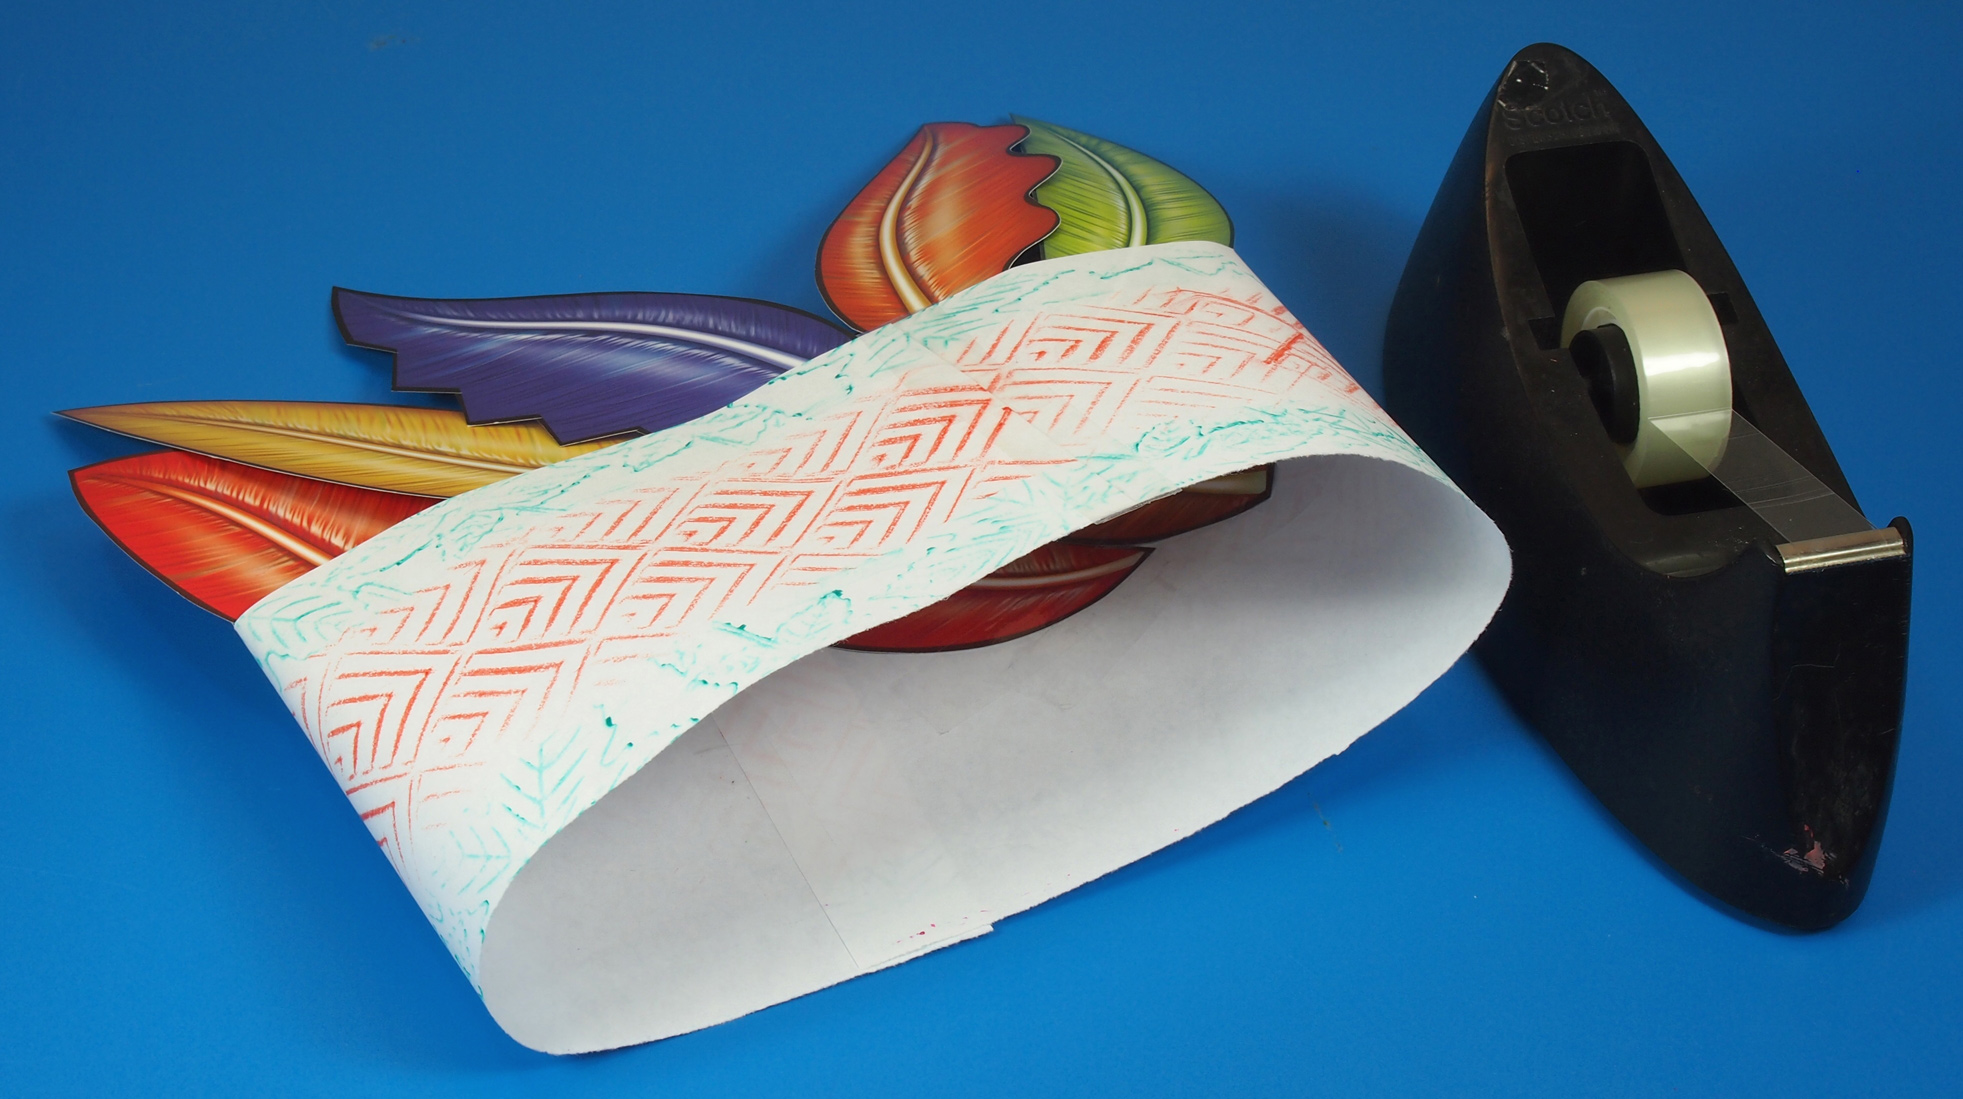
• R5870 Linear Rubbing Plates
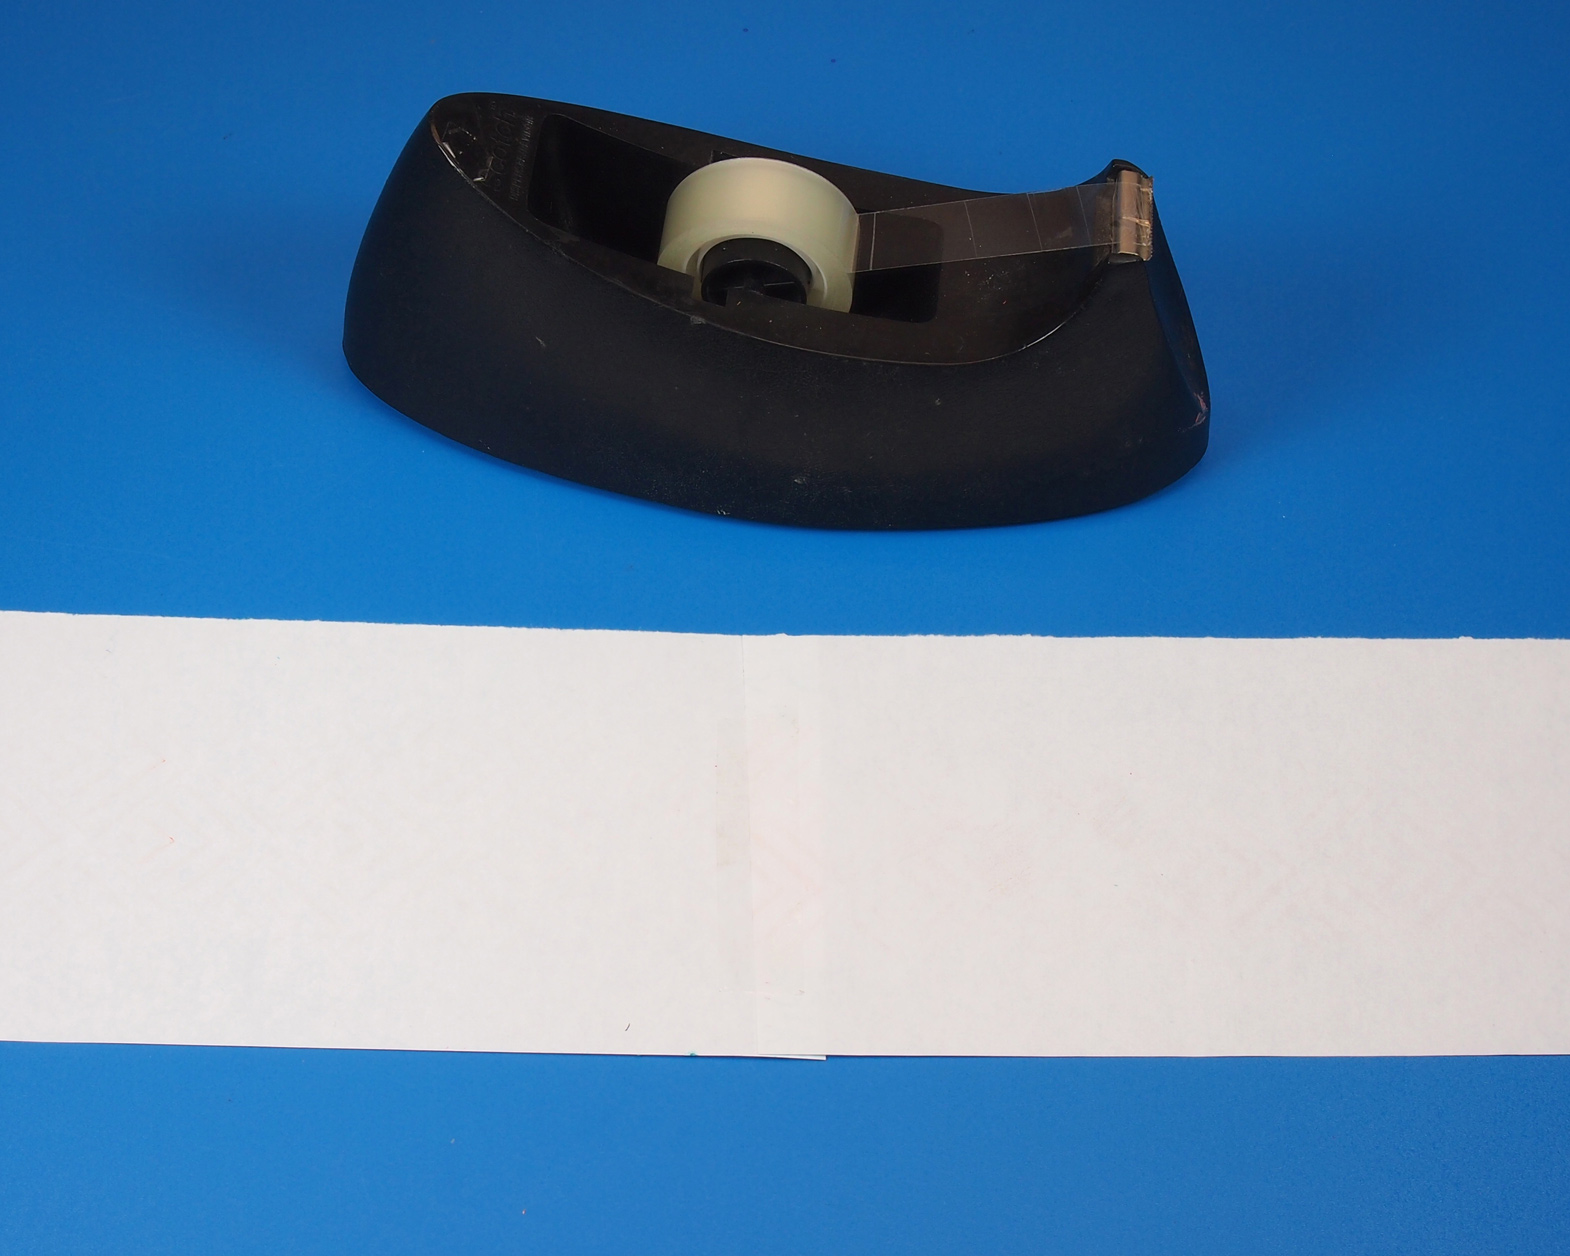
• Sheet of paper, 8.5 x 11″ (20 x 28 cm)
• Crayons
• Scissors
• Tape

Putting together the Thanksgiving Hat is super simple!
For this activity, you can decorate the head band with any of our special rubbing plates!
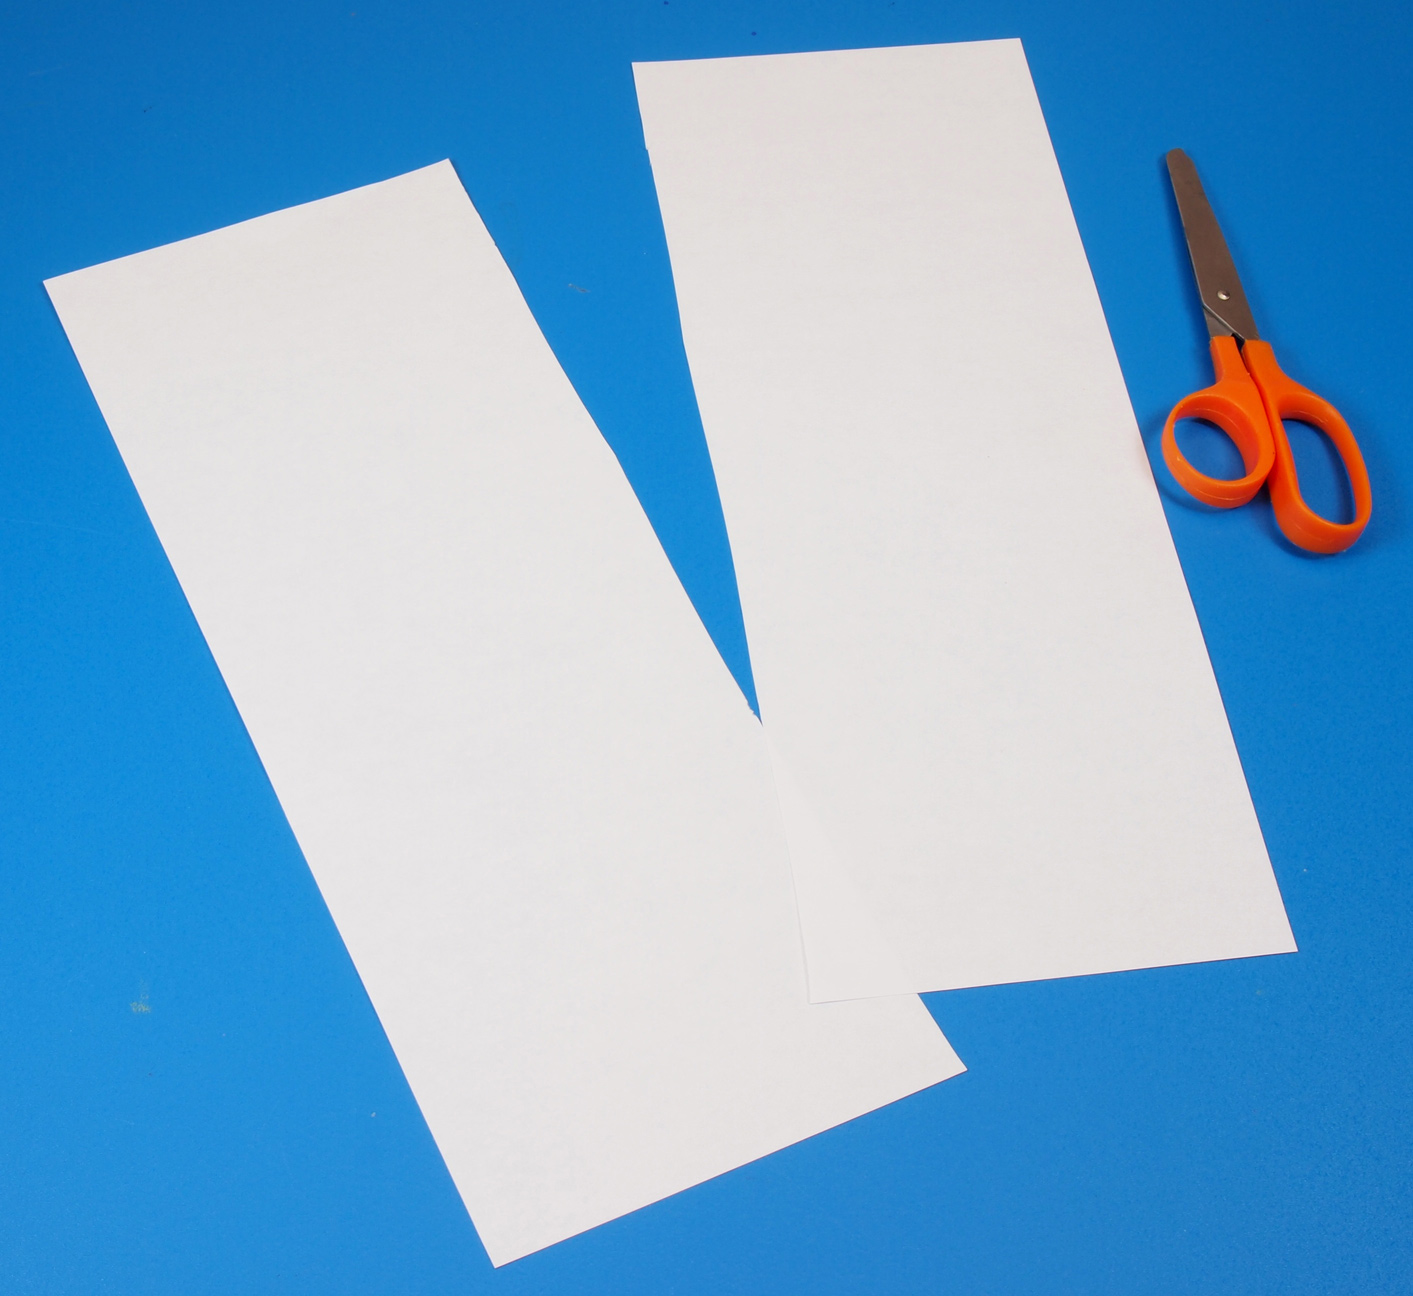
Fold a sheet of paper lengthwise in half. Unfold the paper and cut along the fold line to make two equal strips of paper. You’ll need both strips of paper for the entire headband.
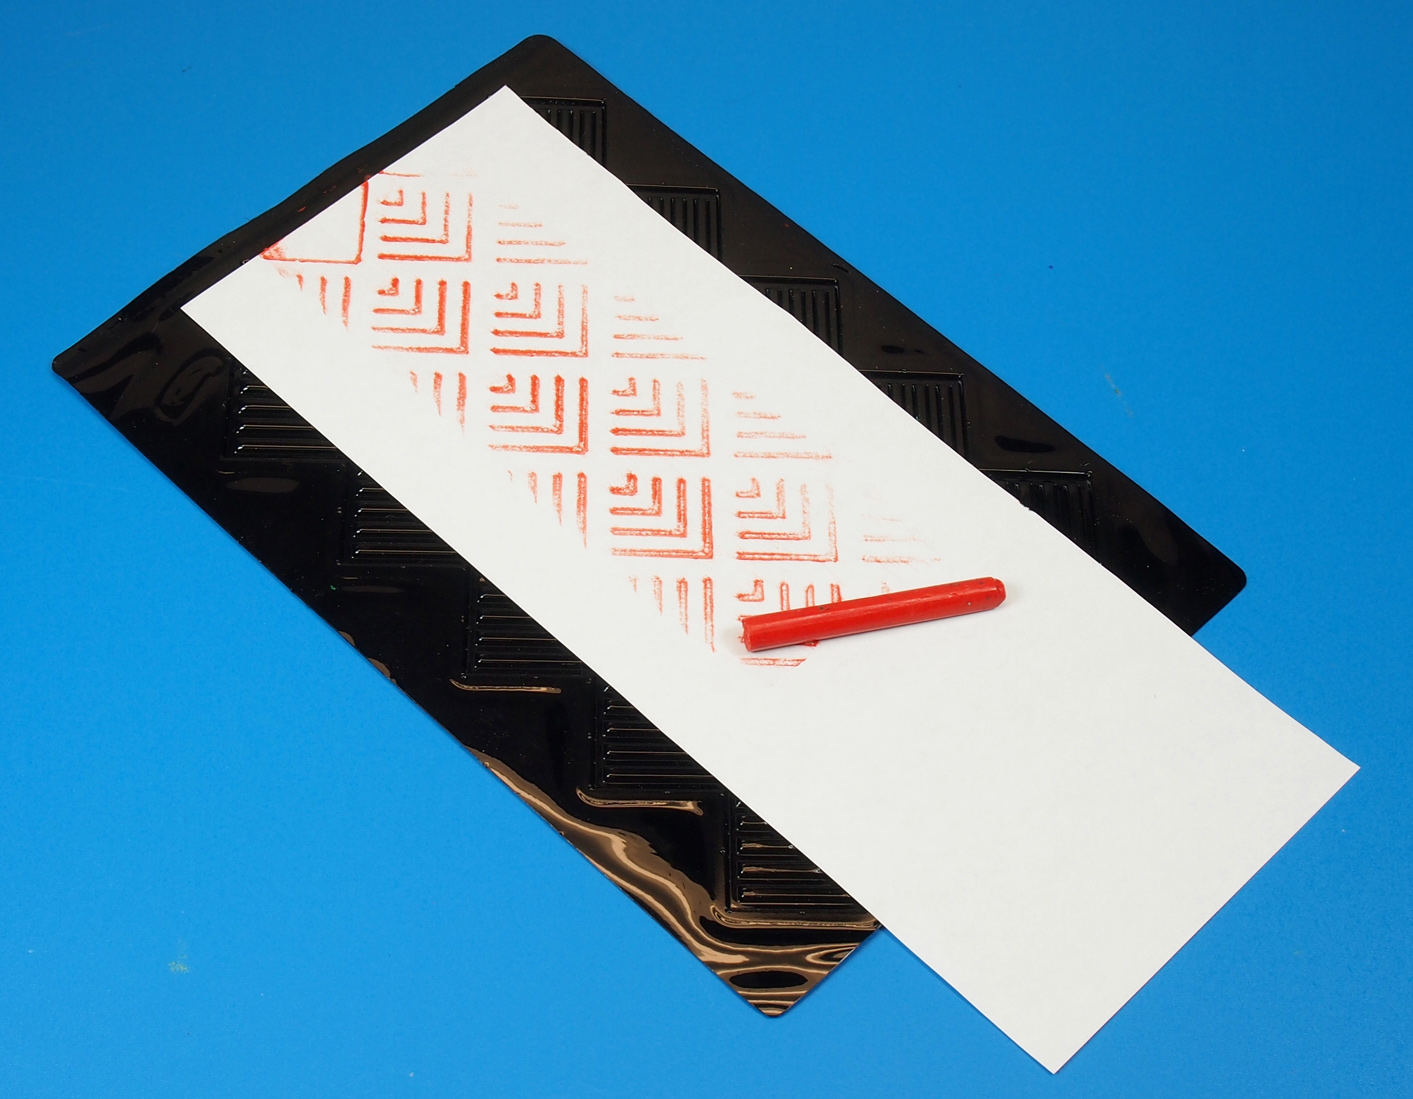
Place the headband on top of a rubbing plate. Use the side of a crayon to rub the pattern onto the headband.
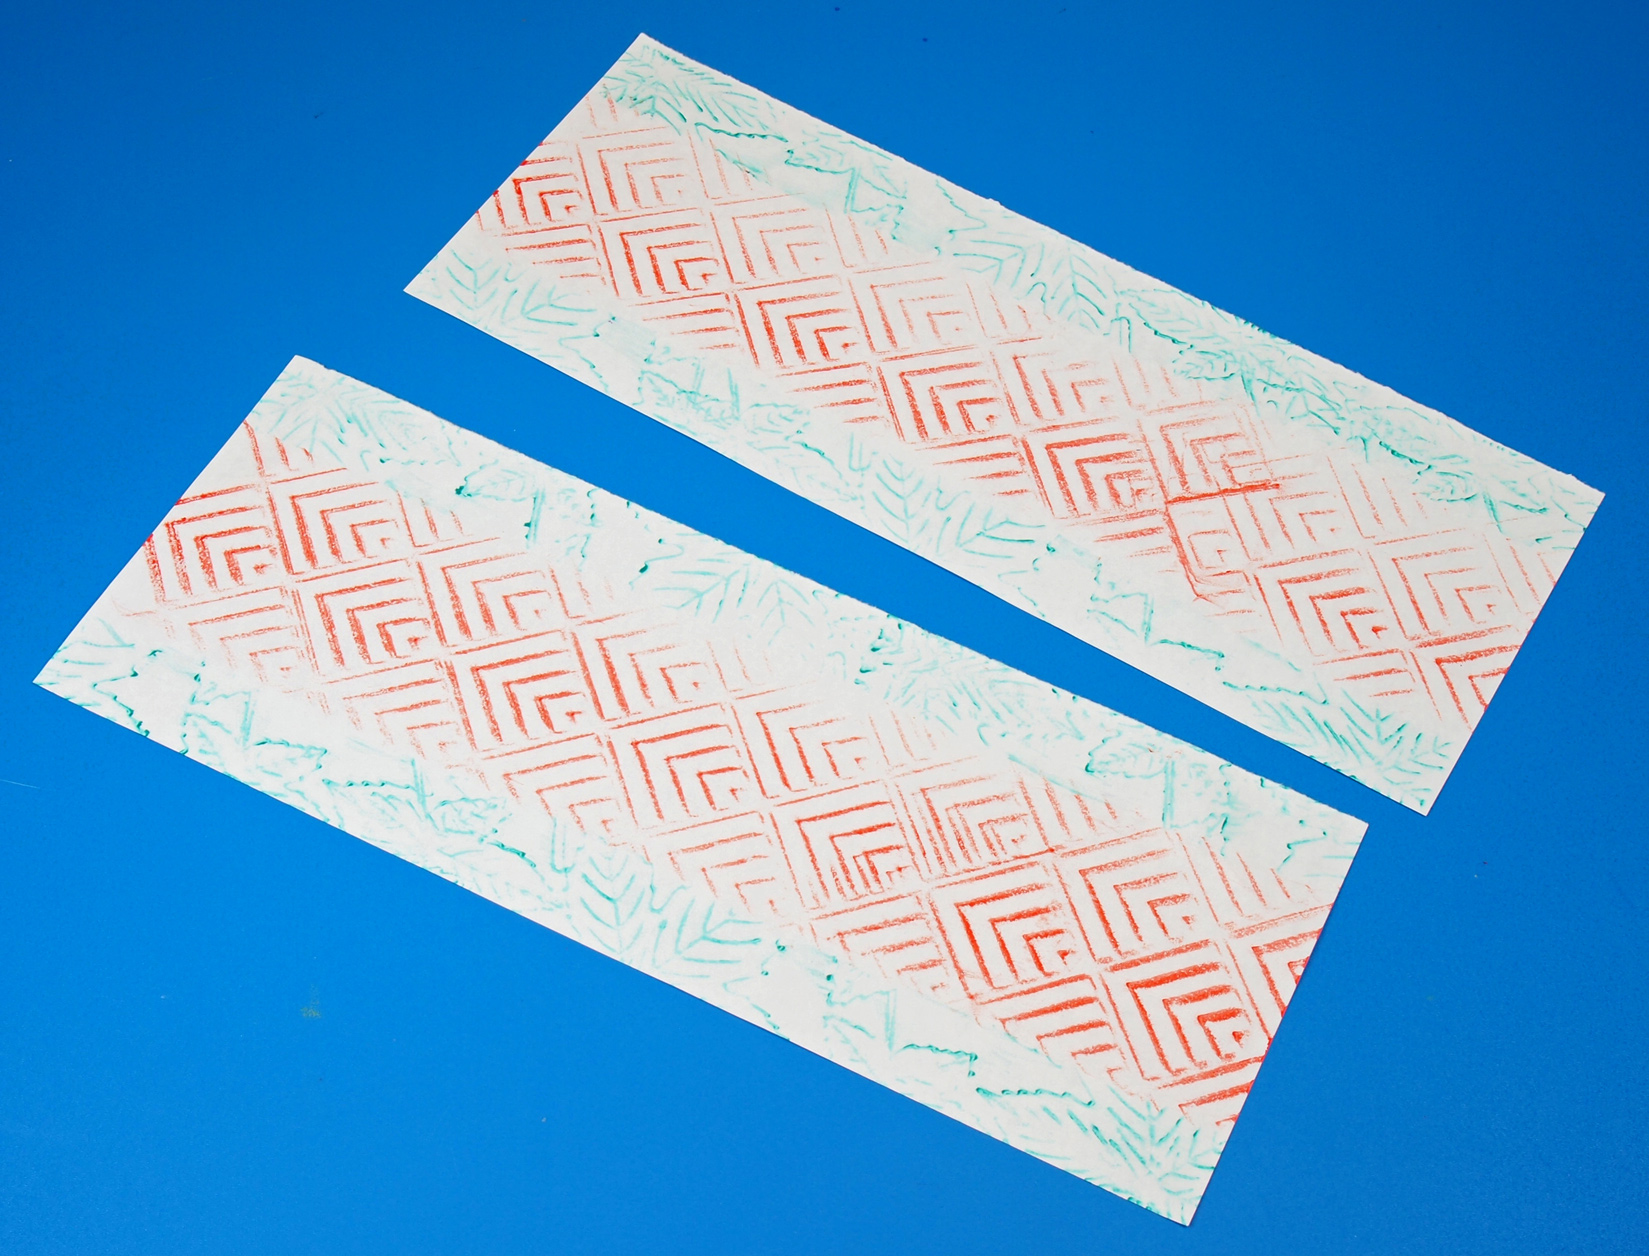
I used a different pattern for the top and bottom headband edges. Try it out with a different color too!
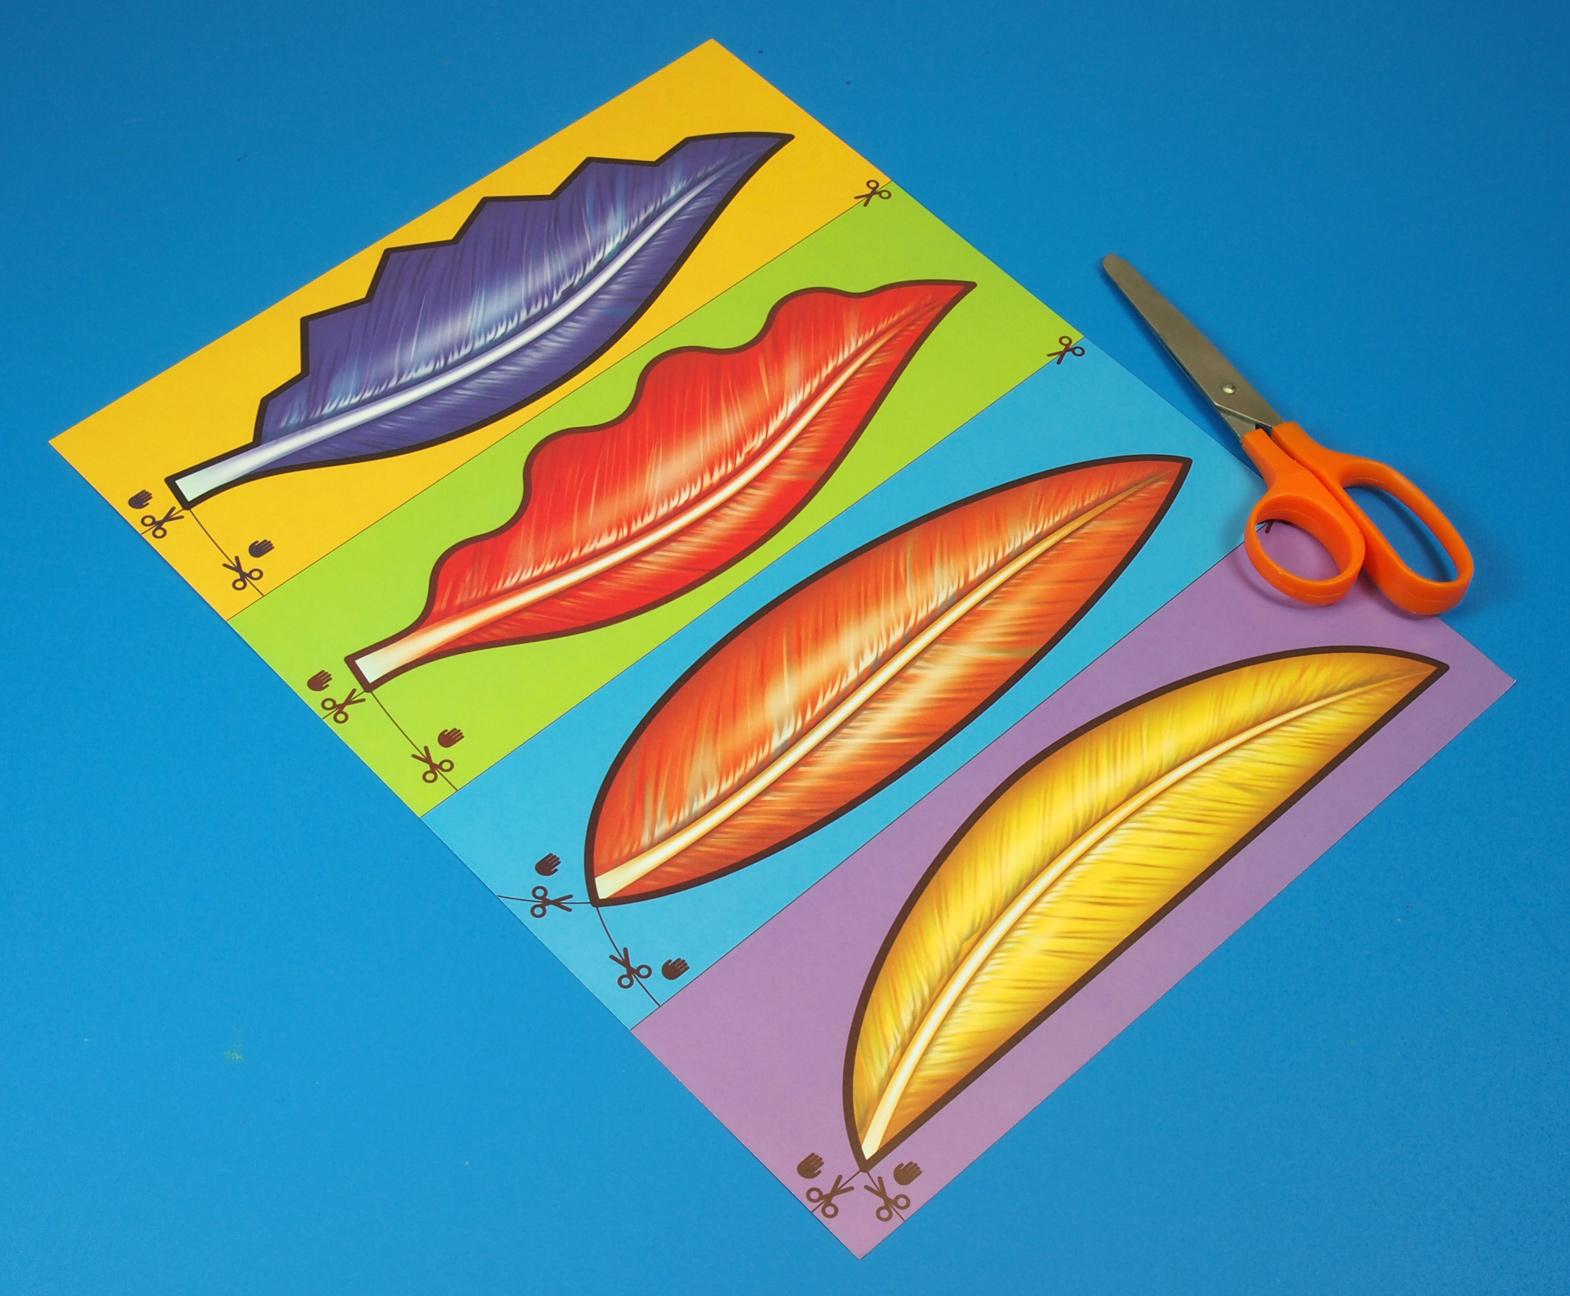
Choose one of the three types of feathers to decorate your headband with. We’ve made an easy set of feathers for beginners with which to practice their scissor cutting skills. The second set is intermediate, with wavy lines. The third, and most challenging, set features jagged edges for students to cut. Choose the most appropriate set of feathers for students to cut.
Attach the two headband pieces together with a piece of tape. Join the two headbands horizontally to extend the length of the entire headband.
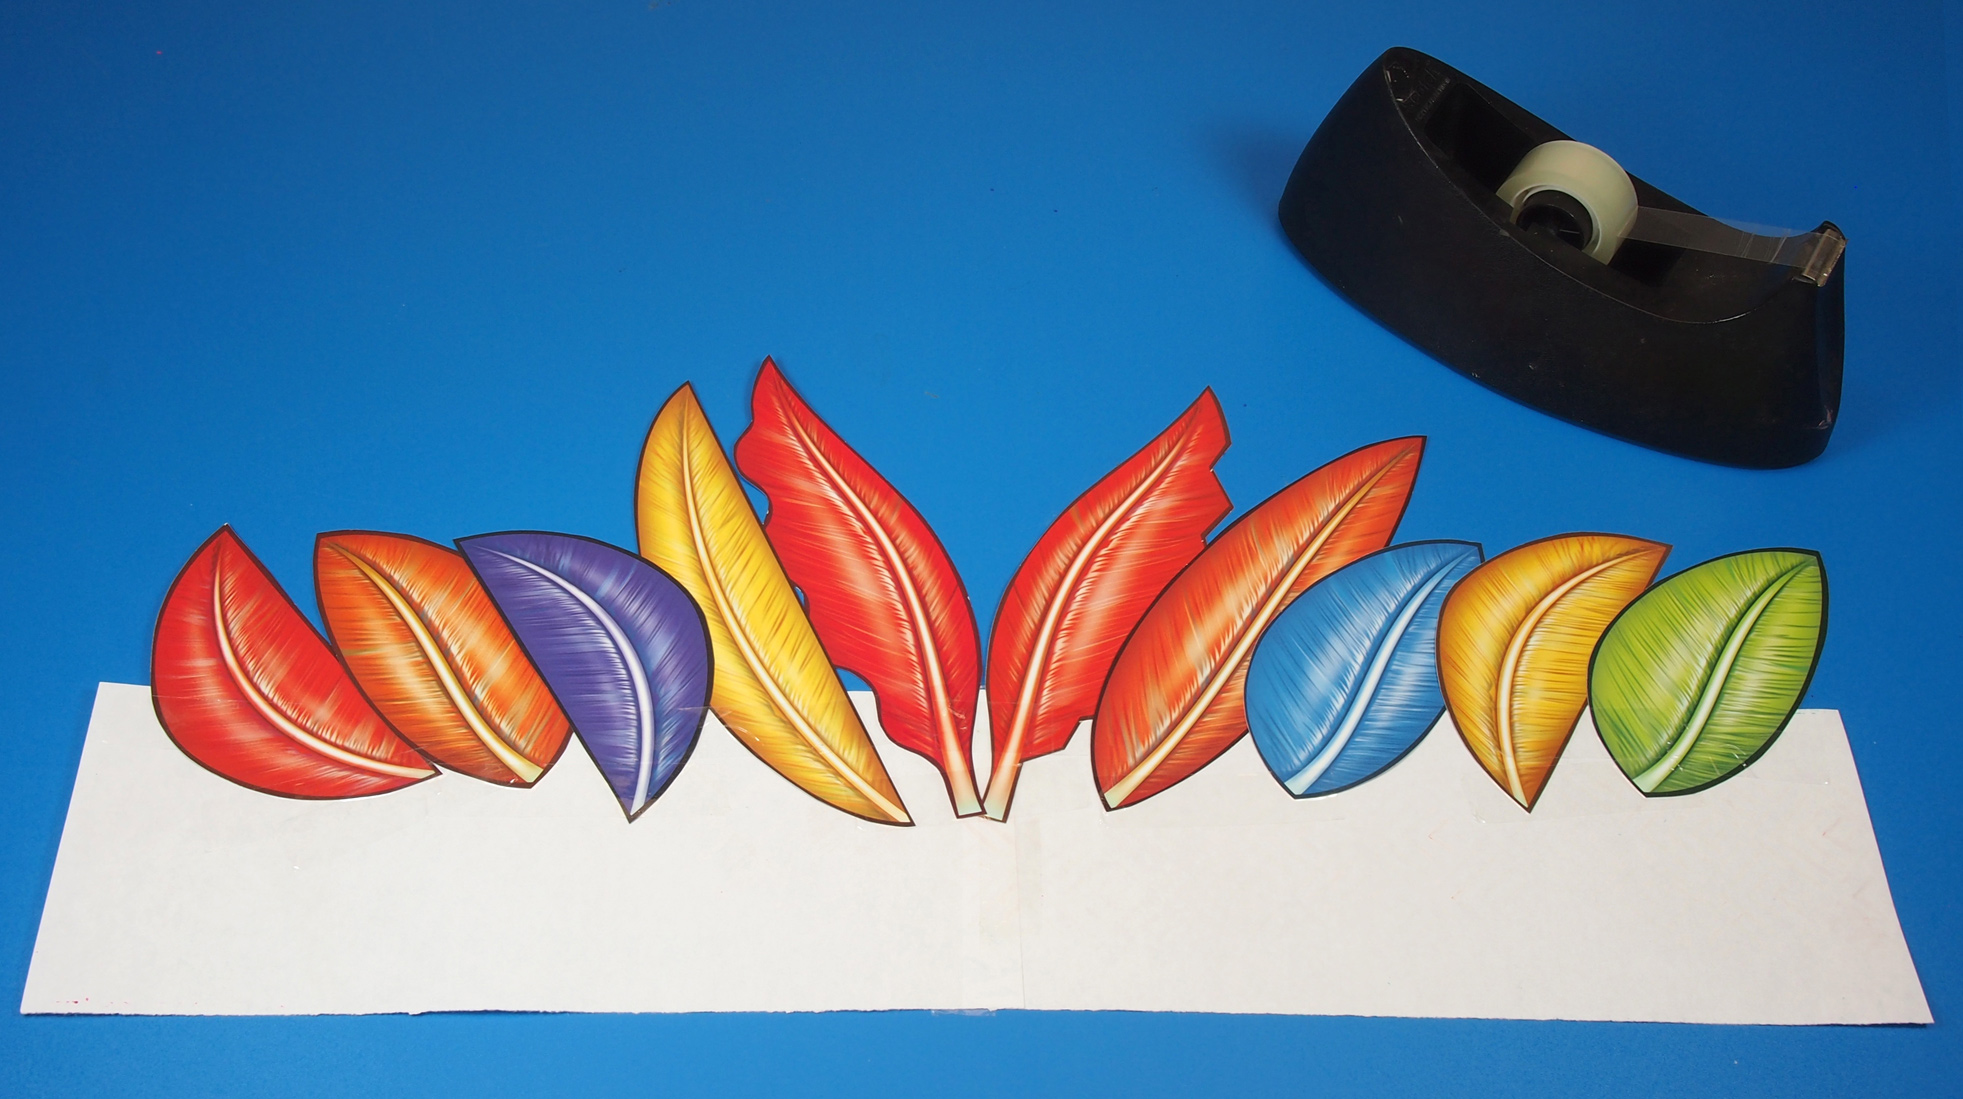
Keep the headband flipped over to the blank side. Line up all your cut feathers along the top edge of the headband and paste onto the paper. The feathers are double-sided so you won’t have to worry about which side you paste them onto!
Join the edges of the headband together. Tip: First get students to adjust the headband for wearing. When they have found the right fit, tape the edges at that point.

All ready for wearing! If you would like to add some dimension to your hat, curl out the ends of the feathers using a pencil.
CRAFT CHALLENGE:
What else did your students use to decorate their hats? You can use anything available in your craft supply closet or use scrap paper left over from other projects to cut out feathers. Once students have made their hats, sit your class down in a circle and talk about what each student is thankful for from the previous year.
Send us your responses to subscriber@roylco.ca along with photos of your students’ hats! We’d love to hear from you!

![]()