Light Learning: Uppercase Letters

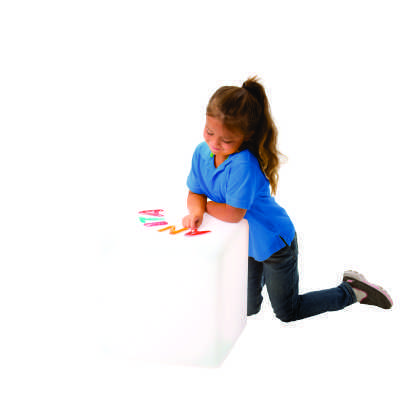
girl with letters on light cube.jpg

Make literacy visual and tactile with these colorful, squishy letters! They are perfect for light table play!

Appeal to the senses while learning the alphabet and spelling simple words! For students with fidgety fingers, these squishy letters make learning language tactile. The small disc inside each letter allows students to develop fine motor skills. Children will quickly learn how to propel the disc by tapping the letter in different areas. We have doubled up on commonly used letters (A, D, E, H, I, L, N, O, R, S, T, U).  All the vowels are red!
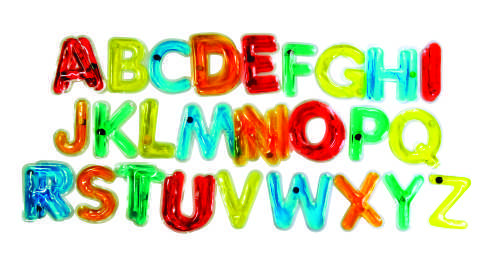
letter alpahbet in lines

Develop fine motor skills! Ask students to move the small discs all the way around a letter. O’s and I’s are great for beginners, while Q, H and K are great to challenge older students.

ABC

Make glowing words! Use a light table or Roylco’s R59601 Light Cube to spell out student’s names, sight words, vocabulary words or pets’ names. Play with colors! Layer letters on top of one another to make new color combinations. This is a great activity for light table play.  For very young light learners these letters are fun to sort by color!

No light table? no problem! A small amount of water on one side of the letters makes them stick to the window. Take advantage of a sunny day and a big window to create a new way to play with light and language!
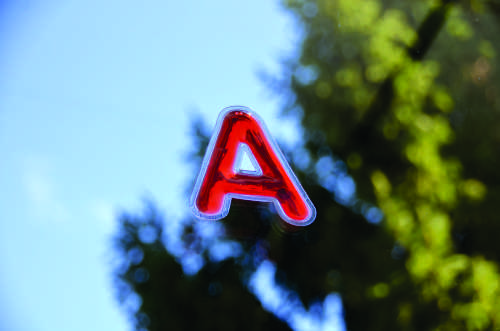
letter on window

Line-08

Like us on FacebookShare this post with your friends, or Subscribe to this blog today to receive original craft project updates every week!

Steampunk Gears Mask

finished craft

Steampunk glorifies sci-fi without advanced technology! Get kids excited about this unique sci-fi genre and the beautiful artwork the genre has inspired with this sparkly mask!

Age: 5+

Duration: 20 minutes (plus drying time)

Learning Outcomes: Get creative juices flowing with this activity. Talk about a popular literary genre and the art and fashion aesthetics it inspired. Encourage creative play. Exercise fine motor skills.

You’ll Need:

Line-01

step 1

Start with one of our Color-In Masks. These masks are a fabulous craft base for all kinds of projects, and they take paint, marker, crayon and glue very well. For this project, we have chosen to paint the mask with brown tempera paint. The brown gave the mask a wooden look, which we felt stayed true to the aesthetics of Steampunk. The mask might curl up a little when you paint it. Don’t worry, it will flatten out again as it dries!

step 2

We had some very cool glittery card stock in our art room, and it just screamed Steampunk to us! One side is super glittery, the other is plain white. On the white side, we used a pencil to trace the outlines of the gear stencils.

step 3

At first, we just cut the outside of the gear stencil. That looked OK, but when we went to design our mask, we decided that it looked cooler to cut out the insides of the stencil too. This can be a tricky step, and card stock doesn’t bend very well, so our solution to get to the inside pieces was to carefully poke a hole in the middle of the sections of the gears we wanted cut out, and wiggle our scissors in that way. Once the gears were cut out, they looked awesome just on their own!

step 4

By the time we cut out all our gears, the mask was dry and it was time to design! We found that laying all the gears out before gluing them down was the best way to decide how we wanted out mask to look. Once we were happy with the design, we glued the gears to the mask. For the finishing touch, we carefully outlined the eye holes of the mask in silver glitter glue!

step 5

These fantastic masks are perfect for Steampunk-themed parties, or just good old-fashioned creative play!

Bundle Savings

Get all the Roylco items used
in this project and save 15%!

$15.28 USD
bundled price
Add Bundle
to Cart

Line-08

Like us on FacebookShare this post with your friends, or Subscribe to this blog today to receive original craft project updates every week!
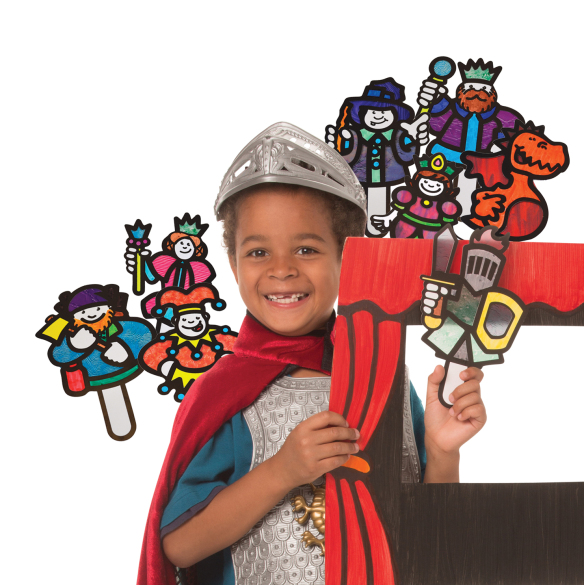
Fairy Tale Shadow Puppets

39203_ShadowPuppets_Catalog Image

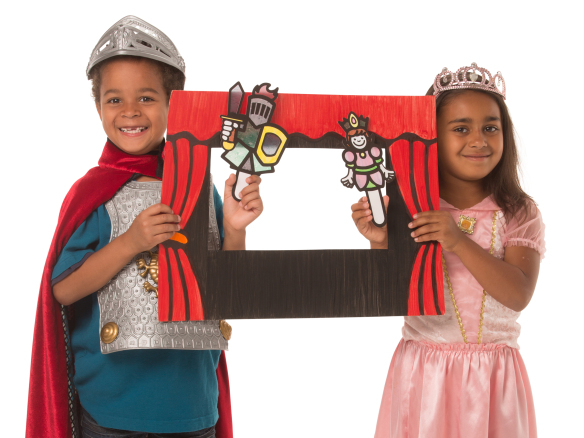
Perform your favorite fairy tales using light, shadow and color!

Puppetry is a great way to get all kids involved with imaginative play. Kids who are shy about speaking in front of their peers can practice performing and public speaking while safely out of sight behind the curtain or stage. Budding writers can participate by writing original scripts for their peers to perform!

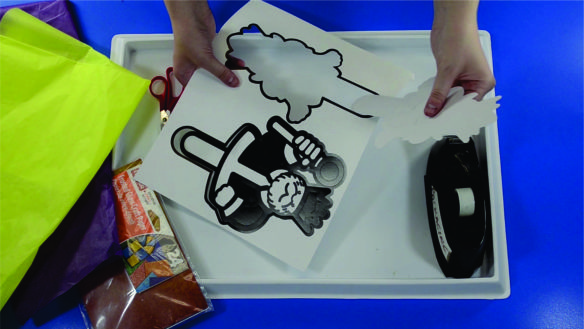
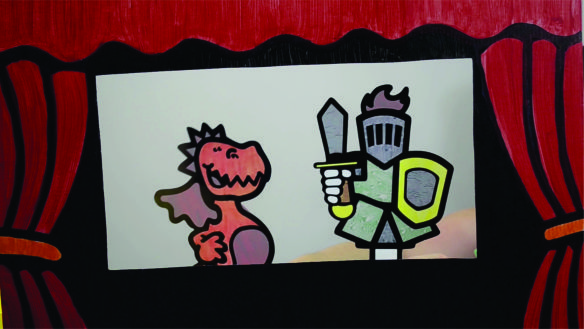
These puppets can be used in a myriad of different ways. Simply pop these beautiful die-cut figures out. Then punch out the die-cut sections that allow light to pass through the puppet to create a unique shadow.

ftsp 2.jpg

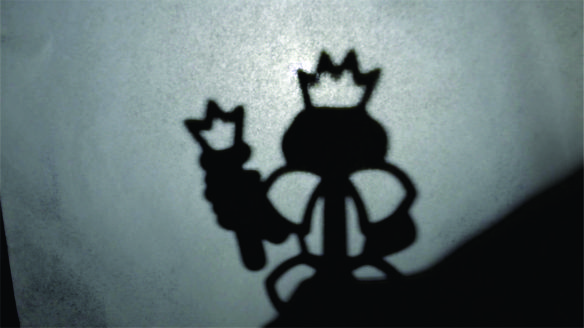
Straight out of the package, they’re perfect for traditional shadow puppetry!

ftsp 3.jpg

You can also use tissue paper or stained glass paper to fill in the openings in the puppets. Then you can use marker, crayon and paint to decorate the white spaces on the puppets.

Once your puppets are decorated, they are ready to perform all your favorite fairy tales!

ftsp 4.jpg

Puppets filled with stained glass paper can also be used like traditional shadow puppets. Just make sure you use a powerful flashlight!

Shadow puppets are an especially great rainy-day activity, because low light and lots of time are a must for creating and performing a puppet show!

39203_ShadowPuppets_Kids

Line-10

Like us on FacebookShare this post with your friends, or Subscribe to this blog today to receive original craft project updates every week!

Leaf Rubbing Plate Name Badges

final craft

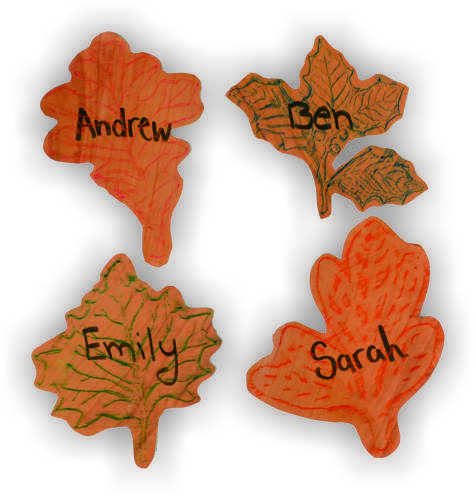
These beautifully detailed leaves make a great backdrop for name badges! This craft is perfect for “Getting to Know You” activities in the classroom. 

Age: 4+

Duration: 5 minutes

Learning Outcomes: Practice writing your name. Exercise fine motor skills.

You’ll Need:

Line-07

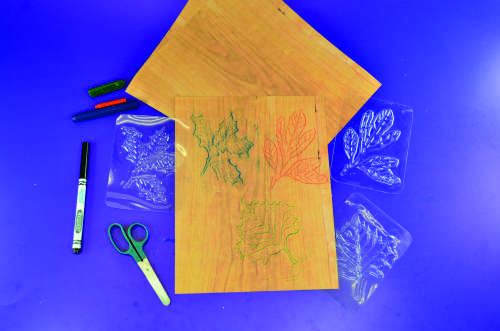
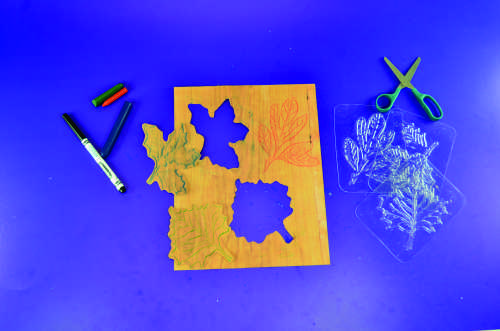
This quick craft is perfect for the first week of school when everyone is getting to know each other. I started with three leaf rubbing plates and a sheet of tree paper (with the grain side up, the bark side doesn’t show the rubbings very well!).

step 1

Start by placing the rubbing plate underneath the tree paper. Three or four leaf rubbing plates fit on one sheet of tree paper, so this activity is great for small groups! Carefully hold both the rubbing plate and the sheet of paper in place, and rub the long edge of a crayon back and forth on the paper above the rubbing plate. The leaf pattern will be revealed!

step 3a

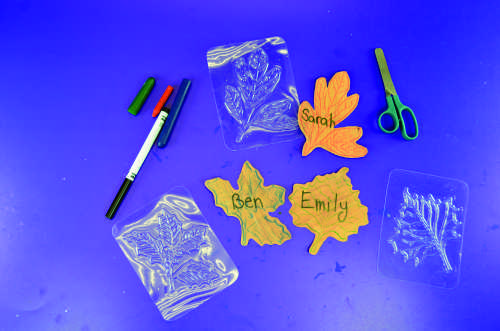
Once the rubbings are complete, have each child cut out their leaf, leaving a small border of tree paper around the crayon marks.

step 3b

Finally, ask each child to write their name on their leaf!

step 4

Once every student has a leaf name badge, they can be used in a variety of different ways:

  • Use a loop of tape on the back of each leaf to give each child a wearable name badge! These are a great tool during Meet and Greet activities.
  • Using two strips of packing tape, secure each leaf to each child’s desk (or place at their table). This creates a fun name placard!
  • Create a classroom display! Using brown butcher paper, create the outline of a tree and post the tree on the wall, classroom door or bulletin board. Have students tape their leaves to the tree to create a leafy “Who’s Who” for your classroom!

Line-14

Like us on FacebookShare this post with your friends, or Subscribe to this blog today to receive original craft project updates every week!


Mosaic Name Tags

finished crafts

Give students an artistic way to label their desks or spots at their table!

This activity is great for the first week of school! Practice literacy and create artistic name plates for each student’s seat.

Age: 5+

Duration: 10 Minutes

Learning Outcomes: Practice spelling names, and exercise fine motor skills.

You’ll Need:

Line-11

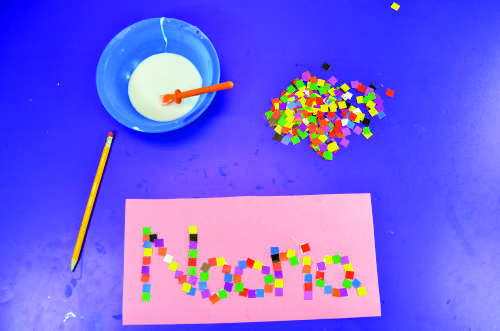
Start with a sheet of construction paper. For this project, we used 4 1/4 x 5 1/2″ sheets (a sheet of letter or A4 cut in half). Challenge the students to write their names in pencil on the sheets, taking up the whole sheet. The pencil lines will guide their placement of the mosaic pieces, and it gives students and teachers a chance to double check uneasy spellers!step 2

Using goo spreaders and white glue, challenge students to glue mosaic pieces over the pencil lines. The goo spreaders help prevent wasted glue and sticky messes! They also exercise fine motor skills, which is crucial in a world that is increasingly becoming technological.

Students can choose their favorite colors, use a wild arrangement, organize colors by letter, or however they want to. When they are finished, they will have a beautiful, unique name plate!

step 8

Use clear packing tape to secure each name plate to students’ desks. This example used double color mosaics, but other ideas include:

  • Use alphabet pasting pieces to mosaic a name plate! Each letter of the student’s name is made up of multiple pasting pieces of that letter. For example, the letter A would be made up of several mosaic pasting pieces showing the letter A.
  • Create a name rainbow! Using pictures of rainbows as reference, challenge students to make the first letter of their names with red mosaic pieces, the second with orange, and so on.
  • Don’t be bound by geometry! Most of our pasting pieces are square, but don’t let that limit kid’s imaginations. Encourage them to rotate, layer, and offset their mosaic pieces to create interesting shapes and textures.

Line-13

Like us on FacebookShare this post with your friends, or Subscribe to this blog today to receive original craft project updates every week!
 

Name Bracelets

finished craft.jpg

This beautiful and tactile craft is a fun spin on traditional bracelets made of strung beads!

Age: 5+

Duration: 5 Minutes

Learning Outcomes: Exercise fine motor skills and practice spelling your name.

You’ll Need:

Line-01

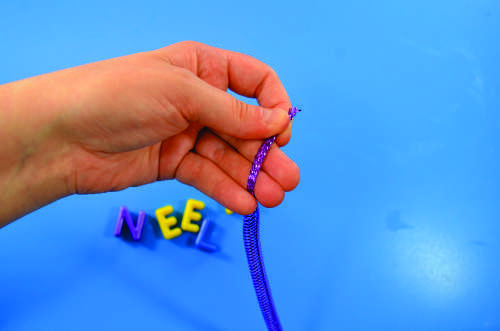
Usually friendship bracelets are knotted or woven out of yarn, but we loved the added tactile dimension of stringing our uppercase letter beads on tubular crinoline! Ours is approximately 1/2″ in diameter. For a child’s bracelet, each child will need approximately 7″ of UN-STRETCHED tubular crinoline and the letters that spell out their names.

step 1.jpg

The tubular crinoline is the perfect stringing medium! Simply pull the end so the crinoline gets thin enough to pull through the holes in the beads. The material is stiff enough to thread easily.

pinch me.jpg

Thread the letters of your name onto the tubular crinoline.


Once your beads are all strung, knot the two loose ends to create a wearable piece of art!

step 4.jpg

Line-08

Like us on FacebookShare this post with your friends, or Subscribe to this blog today to receive original craft project updates every week!


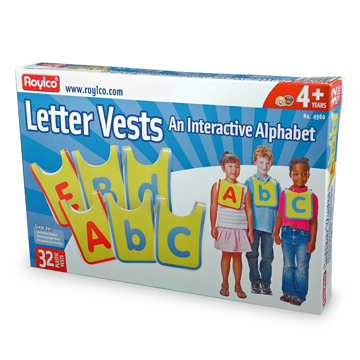
Letter Vests

R4960a

Learn important language skills in a fun and interactive way.

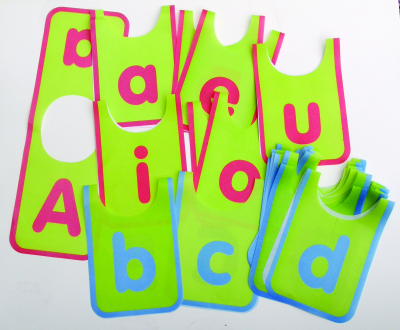
Letter Vests are durable, brightly colored and laminated. The Letter Vests are made with tear resistant material, however under extreme circumstances they can rip. If a rip occurs, carefully remove the vest from the child and apply a small piece of clear tape to the front and back of the tear.

4960

Clean the vest with a damp cloth.

Each vest represents one manuscript-style letter of the alphabet in lower-case on the front, and upper-case on the back. Vowels are featured in red and constants are blue. The letters A,E,L,N,O and S have been duplicated to extend the number of words your students can spell.

4960 letter vests

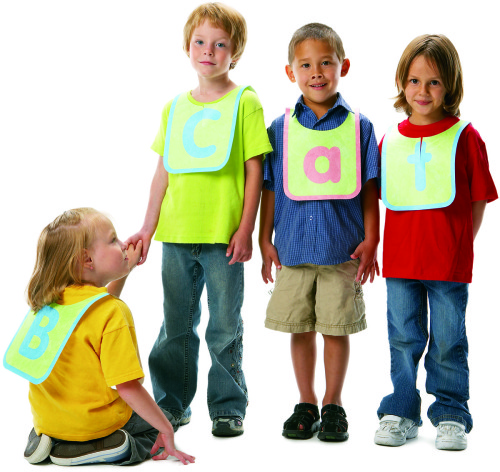
These Letter Vests allow children to learn the sounds of each letter, experiment with rhyming words and discover words in an engaging way.

Start language explorations by giving each child a Letter Vest introducing the letters of the
alphabet. Ask students to order themselves into an alphabetical line. Introduce rhyming words that have the same ending. Start by spelling out the ending of a three-letter word, then go through the alphabet letter by letter to form all possible words ending with the last two letters. Write a list of vocabulary words. Ask students to arrange themselves into the word using the Letter Vests.

Line-02

Like us on FacebookShare this post with your friends, or Subscribe to this blog today to receive original craft project updates every week!
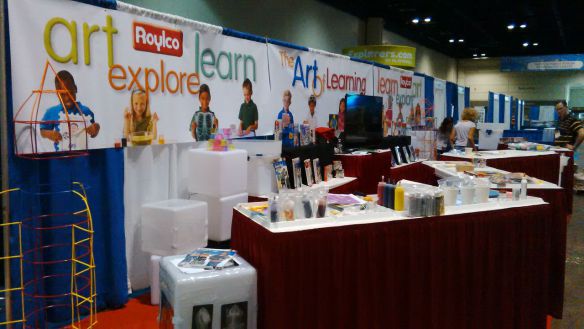
NAEYC 2015 – A Great Turnout!

naeyc 2015

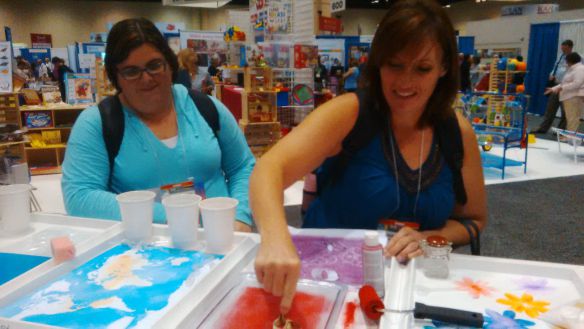
This year, the creative folks at Roylco returned to the Annual NAEYC Conference, which was being held in sunny Orlando, Florida! Check out some of our favorite moments captured on our cameras!

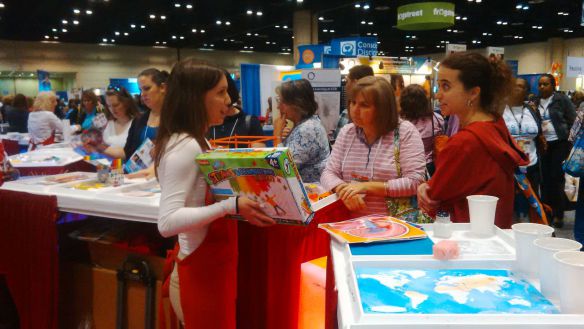
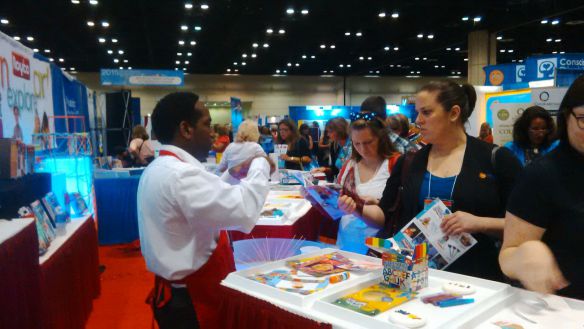
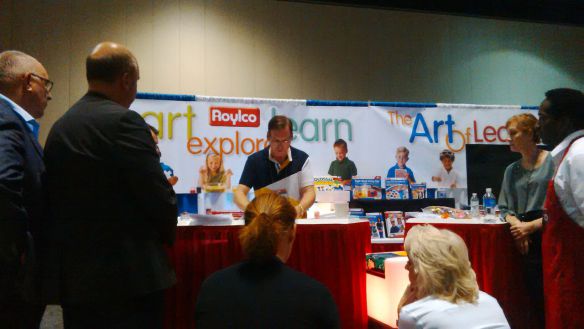
Every year, the National Association for the Education of Young Children hosts a large space for companies who specialize in art education (like us!) to showcase their materials and talk one-on-one with the teachers. We had a prime location nearby the entrance to the hall, and welcomed hundreds of visitors!

naeyc2015

Our booth featured a fantastic array of our products, with 4 tables zig-zagging across the front. This allowed us to demo some of the products to our teacher friends while encouraging a flow of traffic through our booth.

naeyc 2015

We showed off some of our new products too! Look out for some of the following great products coming out next year at your local educational retailers:

R60705 Neon Straws and Connectors

R54490 Chromatography Kit

R48236 Junior Fun Faces Mix and Match Rubbing Plates

R59270 My Body in Action Cards

R49143 All About Me Book

naeyc 2015

We had great fun talking about our published ebooks as well (soon to be available on our website!), including The Art of LearningThe Art of EngineeringThe Human Body: Inside & OutLight Table Magic and Learn Math… Without Knowing It! Each e-book is a gigantic resource for teachers, featuring over 50 ideas for implementing art-based learning through various subjects. The focus is on FUN learning, meaning that we don’t provide any worksheets or practice lessons that students need to learn. Instead, we focus on building quality experiences within the classroom, using those experiences as a strong foundation, and strengthening those experiences with further tie-ins.

naeyc 2015

We love our teachers and strive to make the difference with all our products! Email us at info [at] roylco [dot] com for more information about our 2016 products and e-books!

Line-05

Like us on FacebookShare this post with your friends, or Subscribe to this blog today to receive original craft project updates every week!
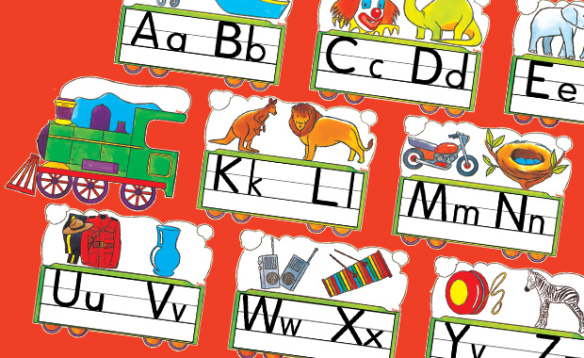
French/English Manuscript Alphabet Train

alphabet train poster

Use these classroom resources as simultaneous wall decorations! Teach kids the letters of the alphabet with clever illustrations. 

The Alphabet Train pieces are designed to be placed horizontally side-by-side across the top of your wall. Each card shows two letters of the alphabet, in both upper and lowercase. Above each letter, we’ve made an illustration of the word that begins with that letter. All illustrations are applicable in both English AND French, which does double-duty for your classroom!

Every day, you can focus on one letter at a time with your students and help them identify the illustration. You can also talk about other words that begin with the letter of the day. Perhaps you could start with names; ask who in the class has a name that starts with the letter of the day. That’s a great technique for getting the conversation started!

Once you have identified the illustration, write the accompanying word onto your wallboard or brainstorming sheet.

Start with placing the locomotive engine at the front of the train. Place the next piece (the beginning of the alphabet) up against the first. When you are ready to progress to the next set of letters, add one more train car to the row. Continue in this way until you have completely filled up the board with the Alphabet Train!

Line-14

Like us on FacebookShare this post with your friends, or Subscribe to this blog today to receive original craft project updates every Monday, Wednesday and Thursday!