Apple Tree Family

apple tree family tree

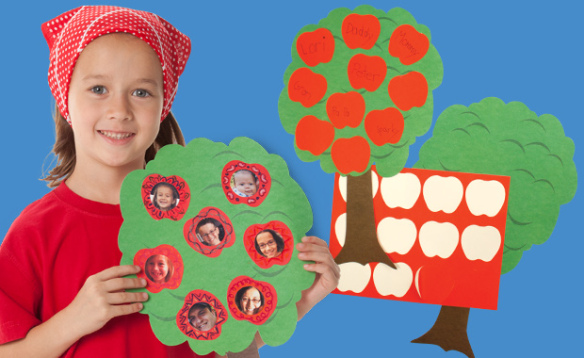
Trace your family history with beautiful imagery using our R49133 Apple Family Tree! 

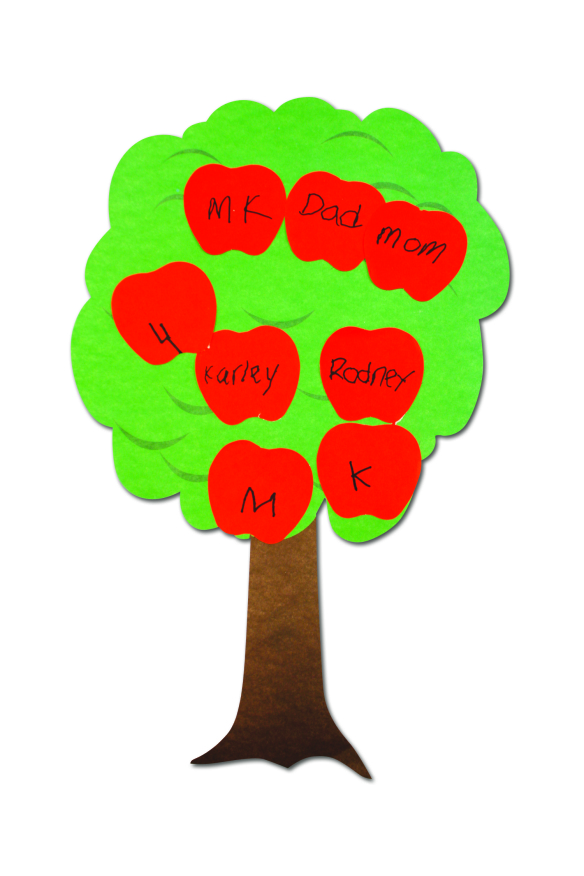
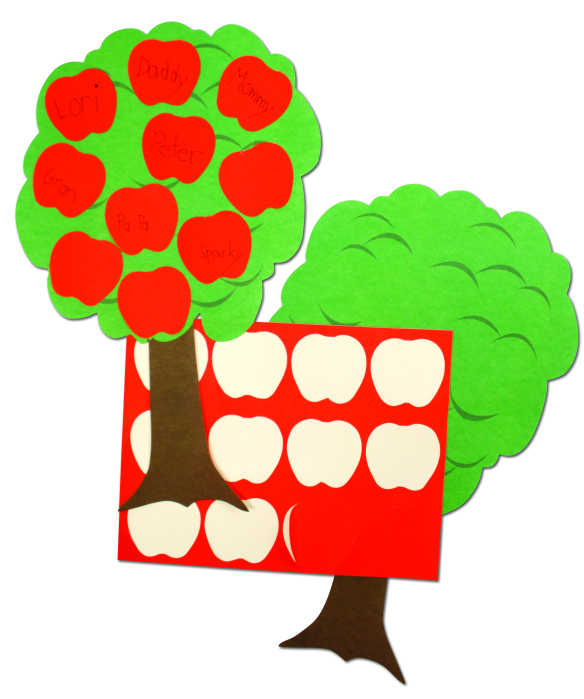
The kit comes with 24 trees and accompanying apple stickers for every student in your class! Remove the stickers and place onto the tree. Kids can cut out small photos of their family members, write the names of their family members or decorate the apples with drawings representing their relatives.

apple tree family tree

The Apple Tree Family Tree is a great way to get students thinking about their family histories, where they come from and key vocabulary words to describe the members of their family (i.e. aunt, uncle, cousin, grandparent, etc…)

apple tree family tree

Share students’ work by inviting parents to visit for a special Family Tree Celebration. Students can take turns explaining their family tree to the rest of the class. You can even coordinate this activity to occur during parent-teacher night!

Line-14

Like us on FacebookShare this post with your friends, or Subscribe to this blog today to receive original craft project updates every Monday, Wednesday and Thursday!

Straws and Connectors City

Straws Connectors City

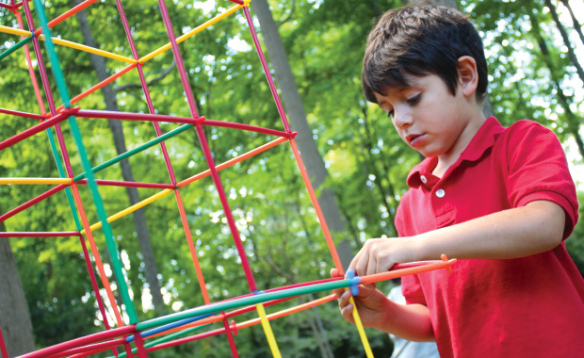
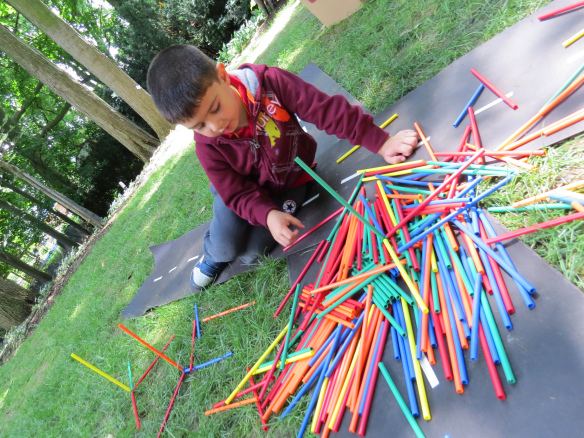
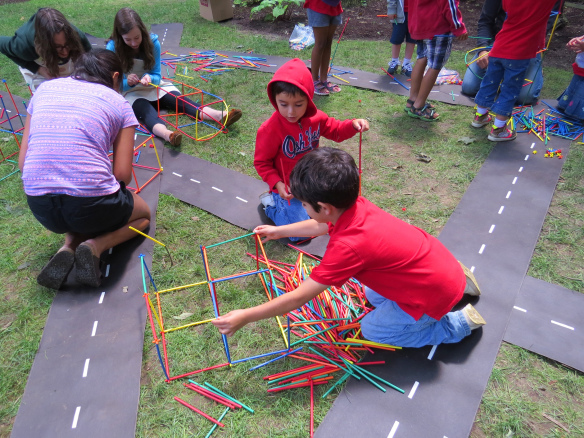
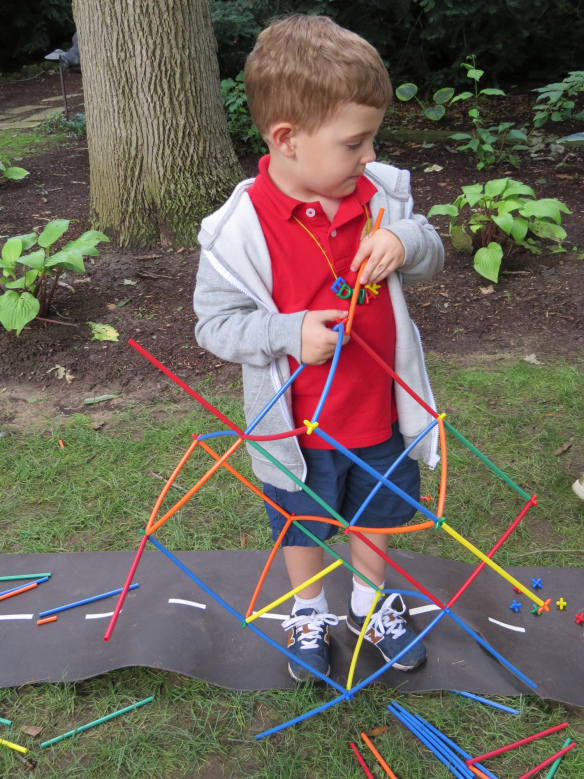
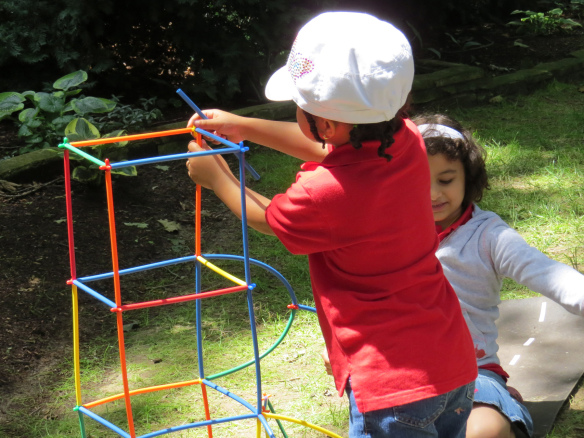
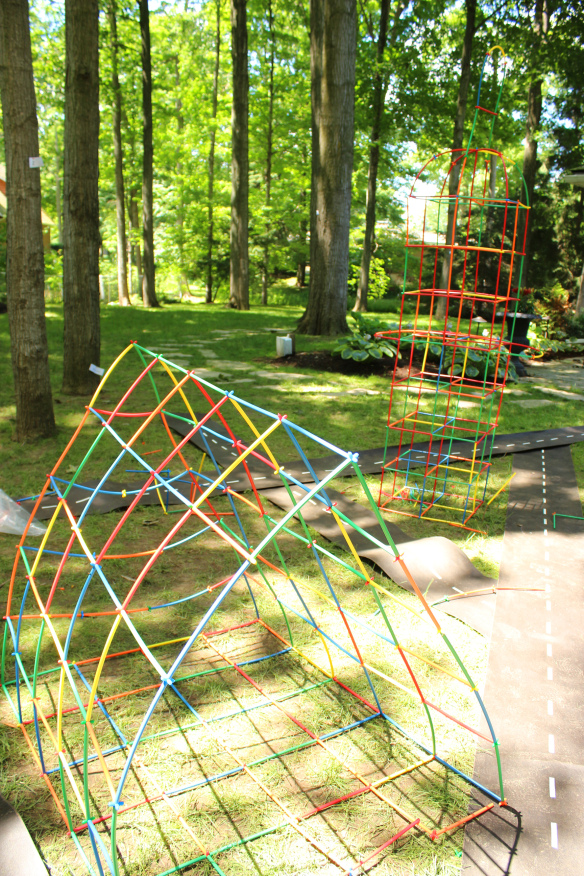
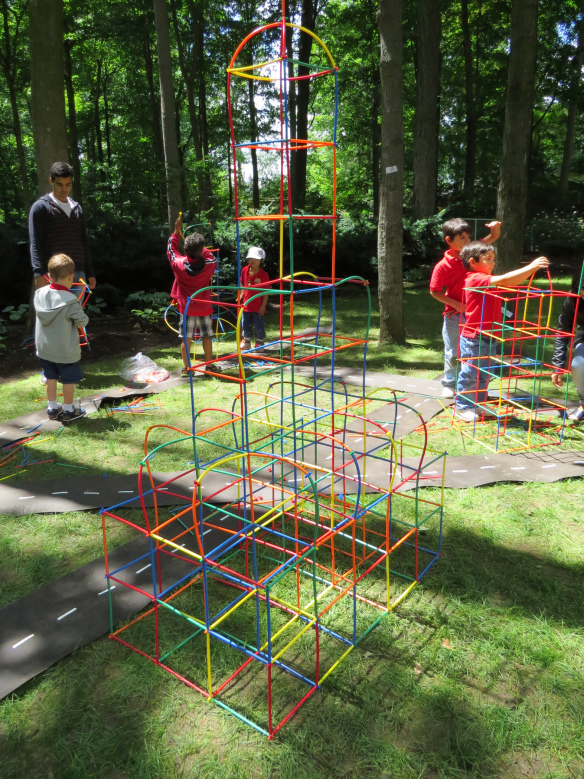
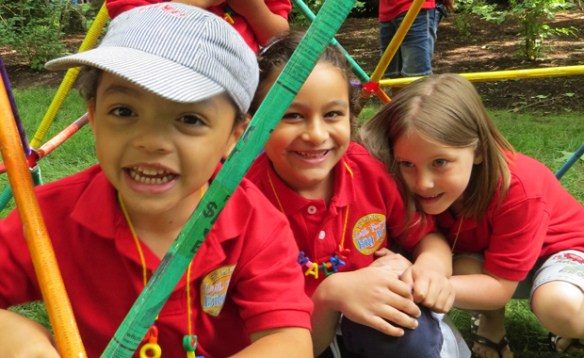
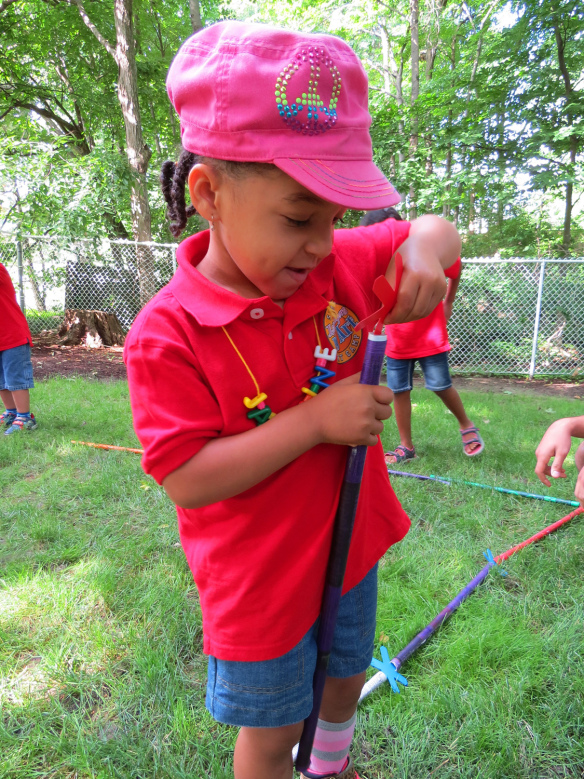
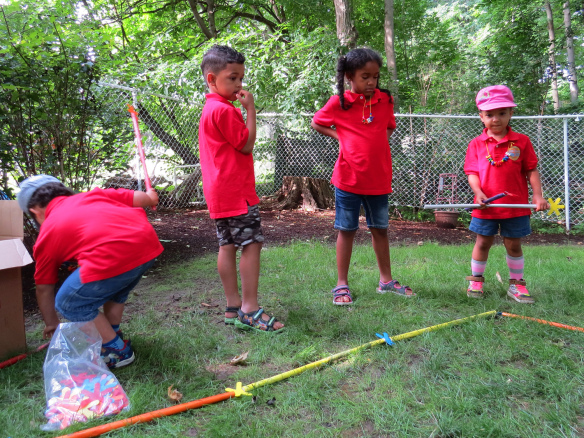
On a nice sunny day, we went outside to build structures as part of our city development and planning lesson! We dropped a TON of Straws and Connectors on the ground and asked the campers to build around the city roads we made from special rolls of tarmac-like paper.

Straws Connectors City

What a mess! Soon to be made into an amazing sculpture with the help of a few creative minds!

Straws Connectors City

Lots of collaborating took place as some campers built off each other’s sculptures.

Straws Connectors City

Some structures required a little reworking!

Straws Connectors City

Others knew exactly what they wanted.

Straws Connectors City

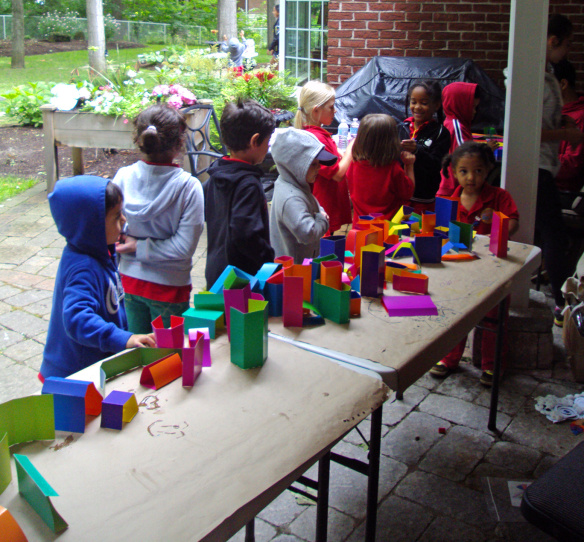
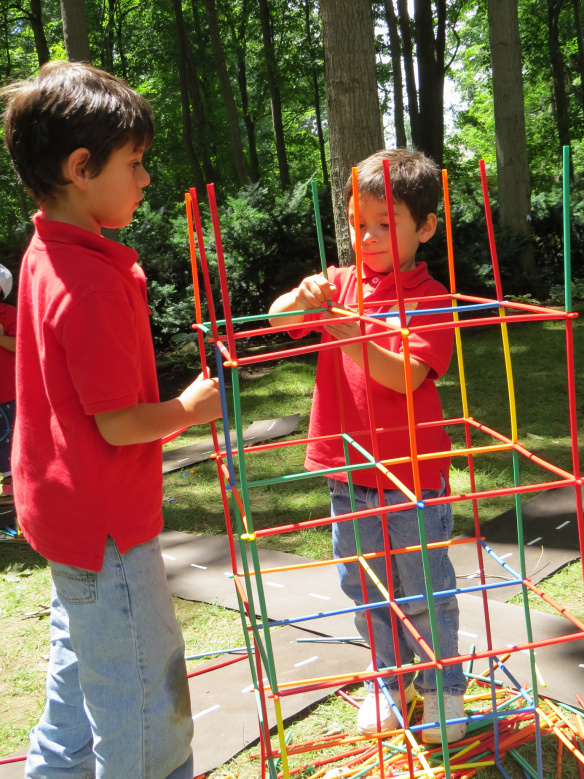
These campers worked together to build a structure of cubes. They added more cubes and then at some point, realized that they needed a bit of variety to their structure…

Straws Connectors City

As soon as one of the camp helpers showed them how to make variations with the straws, the boys were hooked!

Straws Connectors City

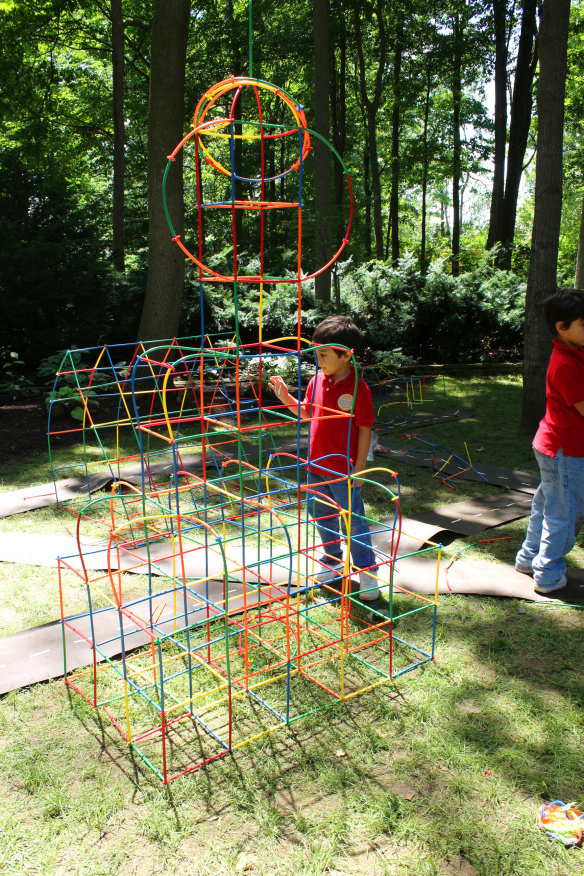
These campers also took on the challenge and added more interest to their building design.

Straws Connectors City

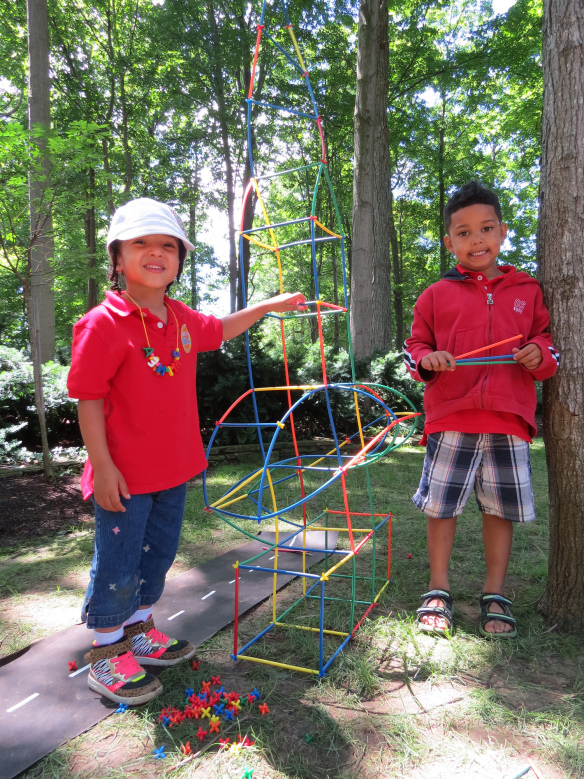
More and more designs popped up in other areas surrounding the “streets.” These designs looked like magnificent building achievements!

Straws Connectors City

We all worked together to make the best out of our designs, and in the end we built a whole city of color! Later, our campers took a walk throughout the “city” to view all the great architectural designs. This is a fun outdoors activity that will last all day and make the most of your students’ problem-solving, critical thinking and design skills.

Line-17

Like us on FacebookShare this post with your friends, or Subscribe to this blog today to receive original craft project updates every Monday, Wednesday and Thursday!

Skyscraper Building Cards

skyscraper building cards

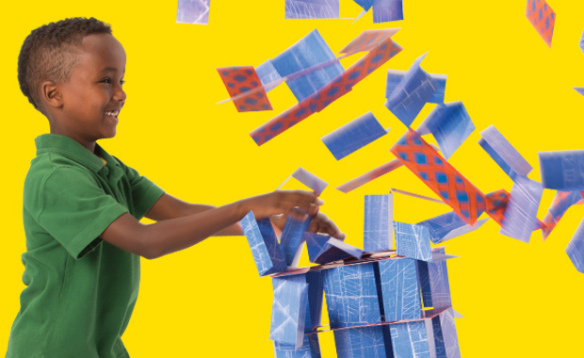
Build ’em up and knock ’em down! Skyscraper Building Cards are a perfect addition to your building play center for kids who love to play architect and Godzilla all in one!

IMG_8370

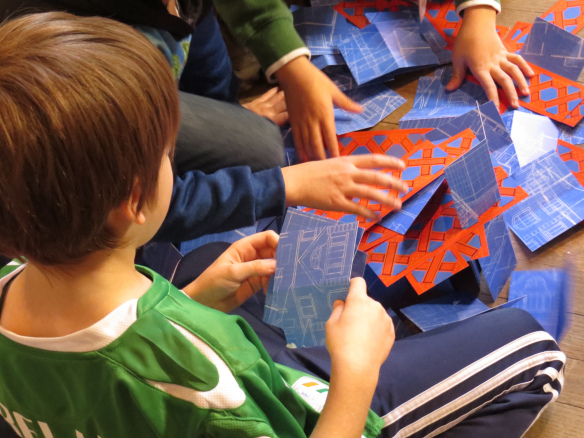
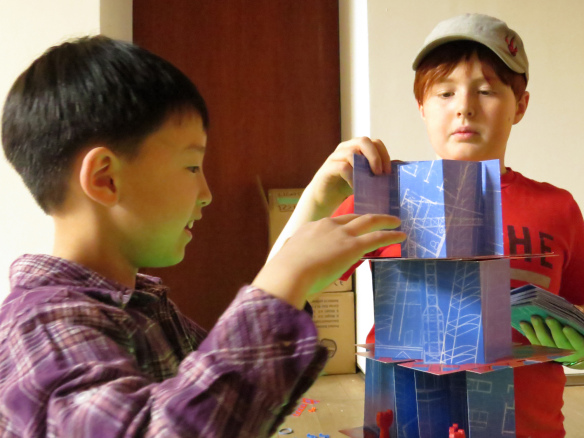
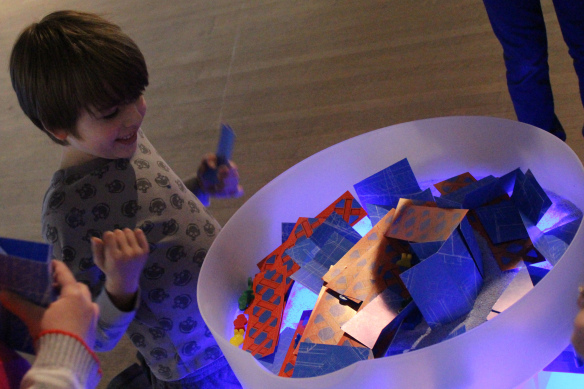
We decided to test how our R60450 Skyscraper Building Cards could be used in a variety of different projects. One of these projects was designed to introduce students to city planning. This project enabled students to work together as a team to create little cities with the basic structural design of the Skyscraper Building Cards. It was up to students to plan where all the buildings went, how high they were built and what types of buildings they were making.

IMG_1813

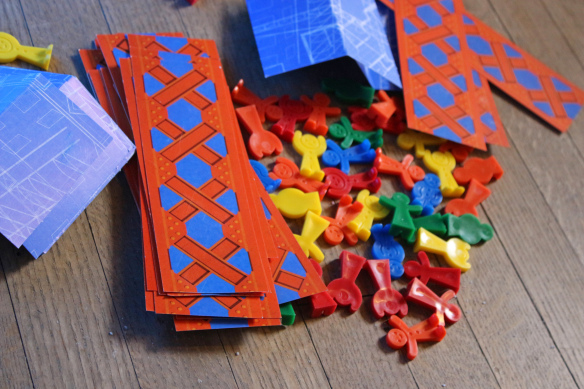
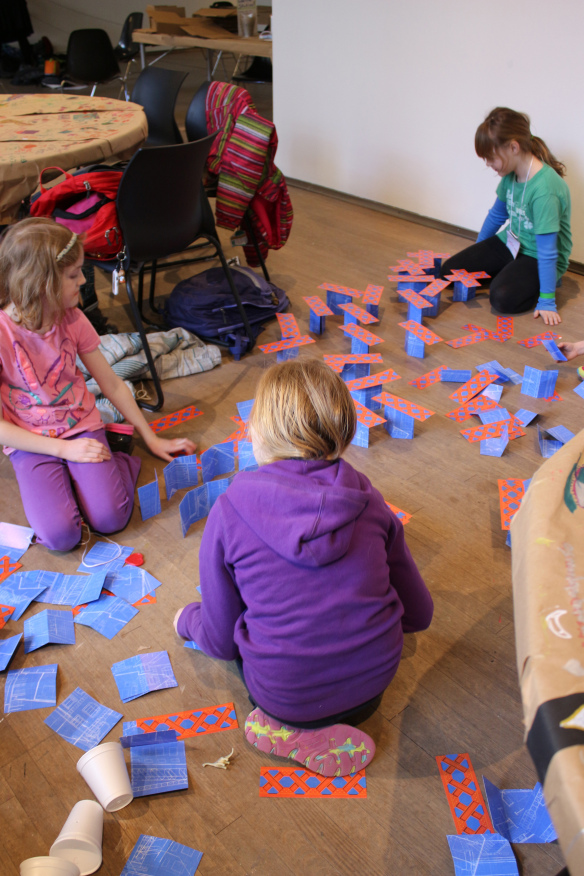
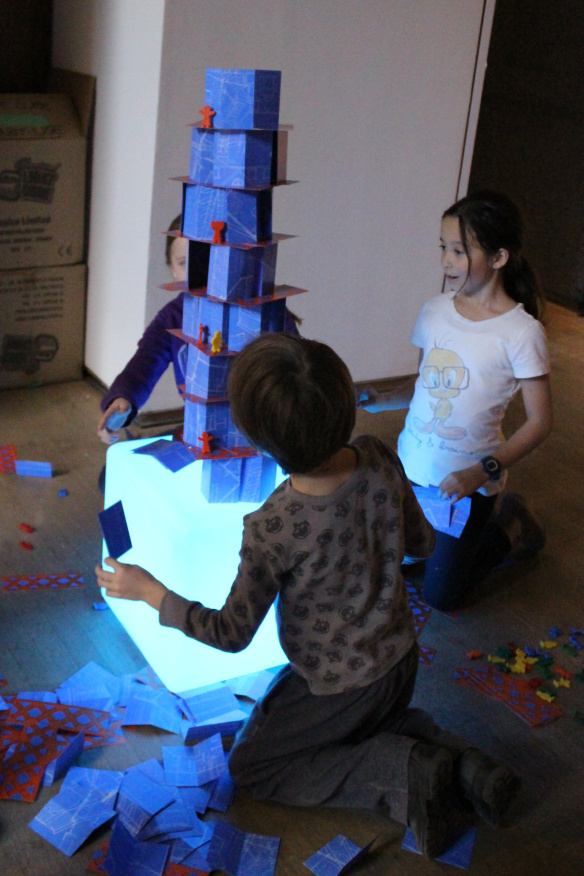
We went to the Design Exchange Museum in Toronto for their March Break camp and set out the materials for the campers. The Skyscraper Building Cards were fairly easy to pick up: the blue cards are made to stand upright while the red scaffolding cards were placed flat on top of the blue cards.

IMG_8072

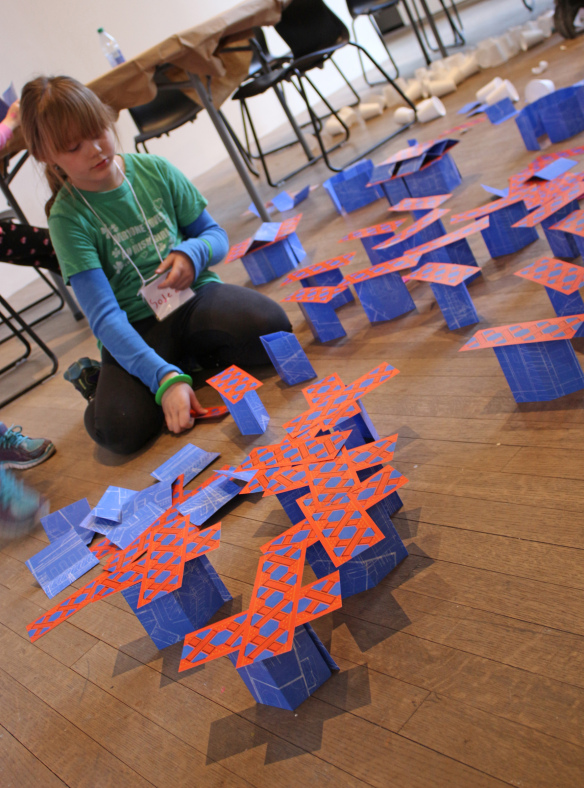
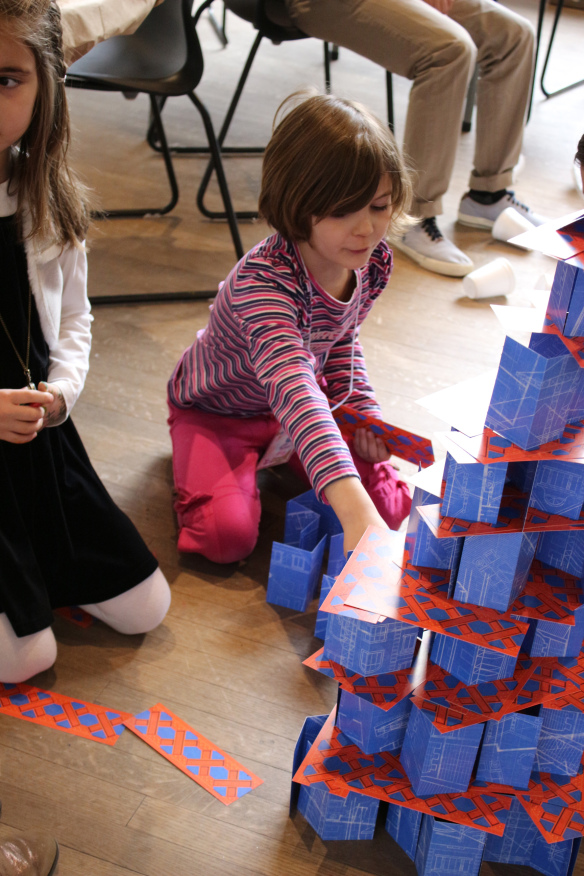
Once campers got the basic idea how to build with the cards, they decided to immediately start building a city. They made many little structures to fill up a large amount of space.

IMG_8078

We loved the way the campers decided to criss-cross the scaffolding cards. This added a bit of interest to their building designs.

IMG_8052

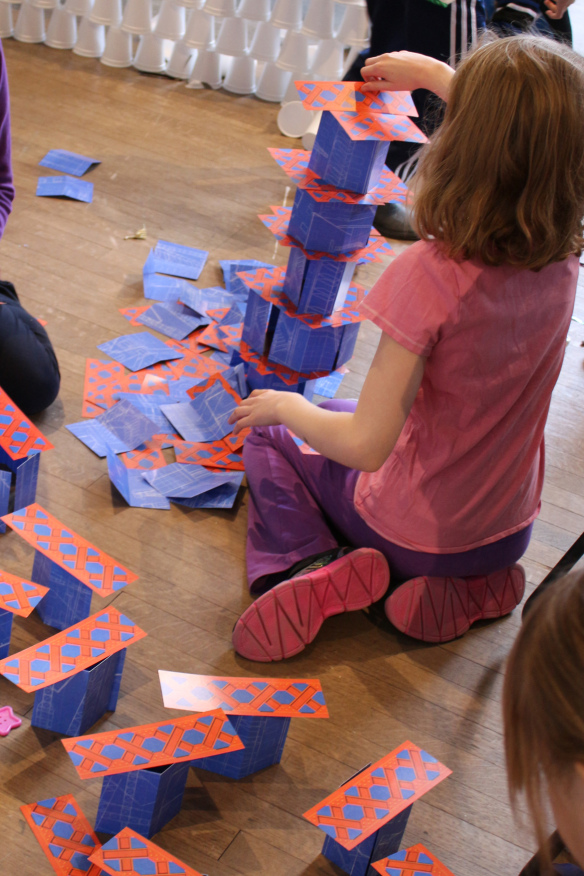
In the same group, one of the campers decided to build upwards instead of outwards. She stacked multiple little buildings together to make a base, then repeated the same design on the next level. This continued until she reached a reasonable height, which prompted the other campers to claim that the surrounding buildings were actually little “houses” and the big building represented the city center.

IMG_2459

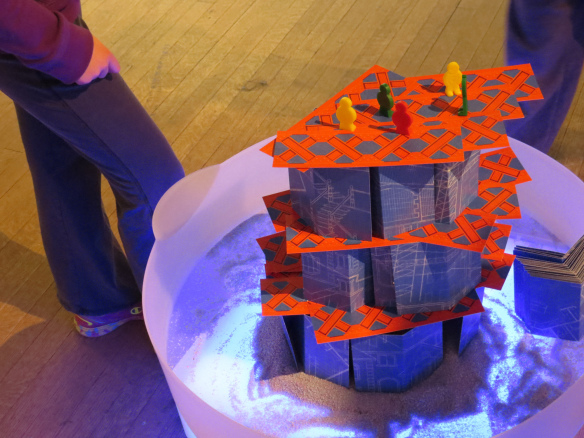
Other campers got right into the fun. They constructed buildings with floors for people to work in. The people toys are our R75304 Super Topplers!

IMG_7993

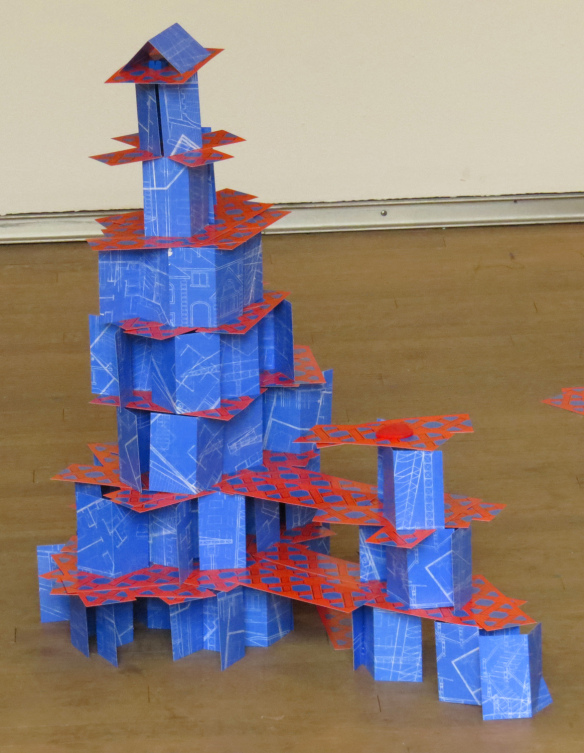
The designs began to get more and more complex…

IMG_1964

This design, for instance, included a 3-level parking garage which was attached to the building by ramps and walkways.

IMG_2445

Finally, we took our structures to the next level by introducing our newest R59630 Sensory Tray! The Sensory Tray is a sand and water table all-in-one, featuring a vibrating mechanism to engage students’ senses even further. We placed a bit of sand at the bottom of the tray to give the structures some stability.

IMG_8386

But once the unit was turned on, it toppled the building right over! It was a great challenge and the campers were eager to rebuild their structures with more stability.

IMG_8363

We had great fun testing out new building designs and challenging ourselves with new ideas and materials!

Line-20

Like us on FacebookShare this post with your friends, or Subscribe to this blog today to receive original craft project updates every Monday, Wednesday and Thursday!

Constructa Clips Neighborhood

constructa clips house neighborhood

Constructa Clips are our versatile building toys–combine recyclable materials using the handy clips, and create anything from vehicles to robots, buildings and more! In this project, we got our campers to contribute to the development of a model neighborhood using simple materials. 

Age: 4+

Duration: 10-15 minutes

Learning Objectives: Open discussion with students about communities, neighborhoods and city planning. Discover all the various aspects of running and maintaining a community, including building up city centers and living spaces. Talk about the different types of living structures (condominums, bungalows, two-storey houses, semi-attached or townhomes, etc). Move your discussion towards an “All About Me” lesson. Ask students to picture their own homes and build them using the card materials and Constructa Clips. Alternatively, get students to brainstorm what their “dream homes” would look like/include.

constructa clips house neighborhood

You’ll Need:

R60160 Constructa Clips

• Card paper

• Scissors

• Pencil crayons/crayons/markers

• Stickers or collage embellishments

Line-20

constructa clips house neighborhood

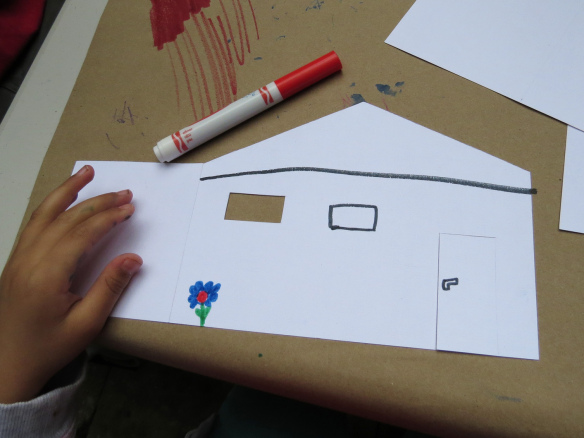
Cut out angular shapes such as rectangles, squares and triangles from the card paper. Students can design their own buildings or mix and match the shapes to create new and interesting sculptures.

constructa clips house neighborhood

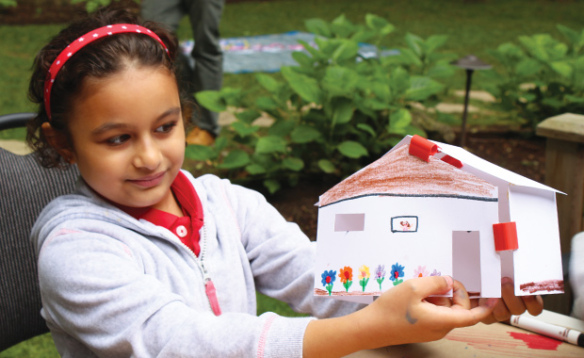
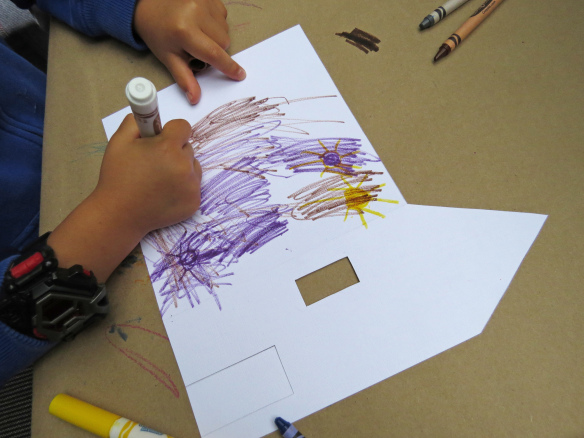
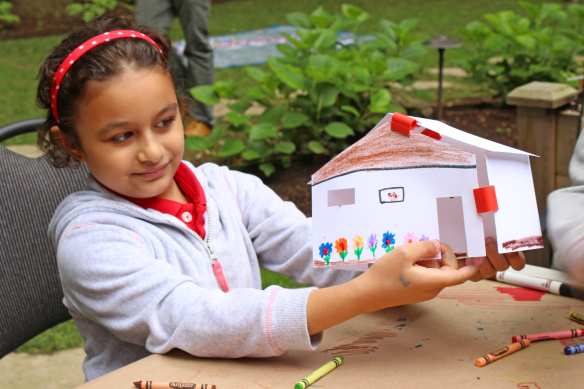
Use crayons, markers or pencil crayons to decorate your card houses! Create a garden, or focus on showing the exterior brickwork of the house. Make cutouts for doors and windows. You may even illustrate the occupants of the house as if they are proudly standing right beside their living area. Don’t forget: you will need to make 2 large size card house shapes and two smaller ones on either side, depending on the type of structure you are designing. Since you are making a 3D model, you will need all 4 sides of your building structure to complete it.

constructa clips house neighborhood

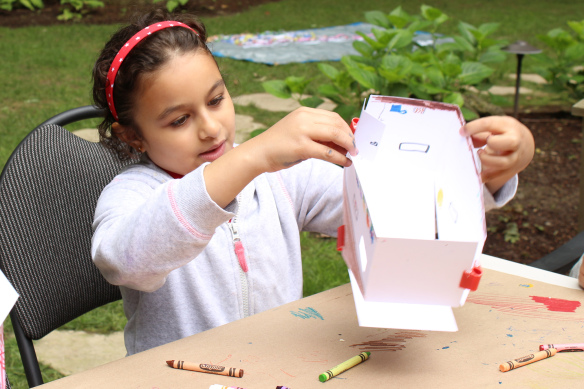
To attach the card sides together, slide an edge into a slot on either end of a Constructa Clip. The plastic “teeth” on the inside will grip the material as it slides in. Make sure you complete all four sides of the structure.

constructa clips house neighborhood

Ready, set… build! This activity can be expanded to children building an entire city using simple materials such as card paper and our Constructa Clips!

Line-17

Like us on FacebookShare this post with your friends, or Subscribe to this blog today to receive original craft project updates every Monday, Wednesday and Thursday!

Double Color Card City

paper card city

Let your little engineers create and build a city all their own using simple materials!

Age: 4+

Duration: 10 minutes

Learning Objectives: Fold unique sculptures to look like buildings using only card paper. Create colorful arrangements with the Double Color Card. Explore structural supports and designs through folded card shapes.
paper card city

You’ll Need:

R22052 Double Color Sheets

• Optional: R60160 Constructa Clips Creative Building Kit

• Flat surface, such as a table or a play center area

• Postal wrap paper (brown recycled paper)

• Tape

• Markers or crayons

Line-16

paper card city

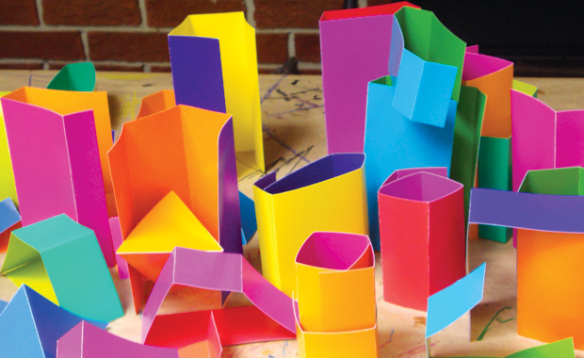
Lay all your materials out onto the flat surface. Cut the various sheets of Double Color Card into several large or smaller rectangle shapes. Crease the shapes at various points. You have to make at least 2 creases in the card. Older students can help crease the cards for the final activity.
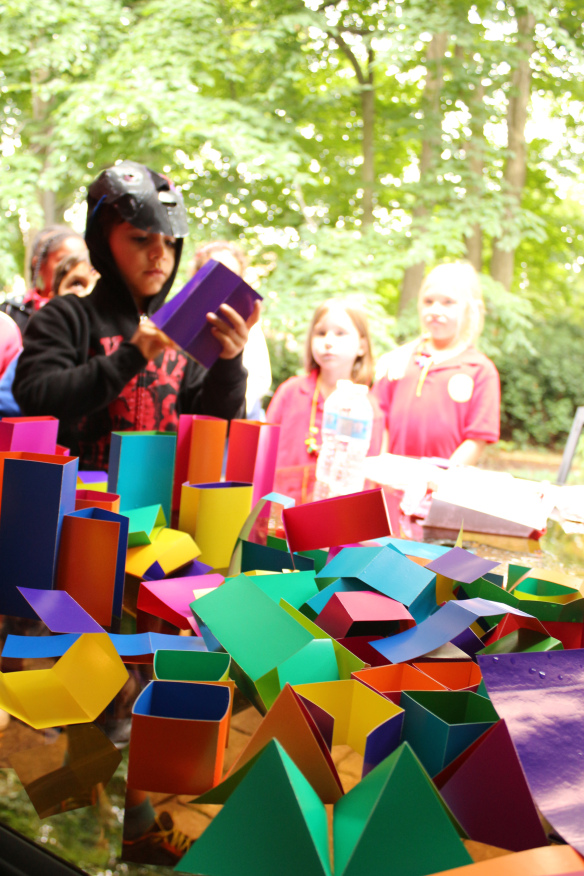
paper card city

Creasing the cards at different points allows your students to make interesting shapes, from tall rectangles to cubes, triangular prisms and more!
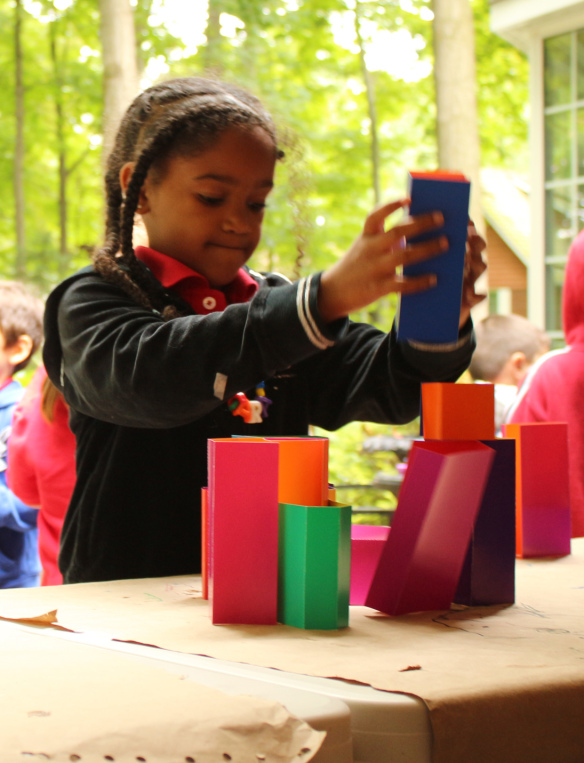
engineering art

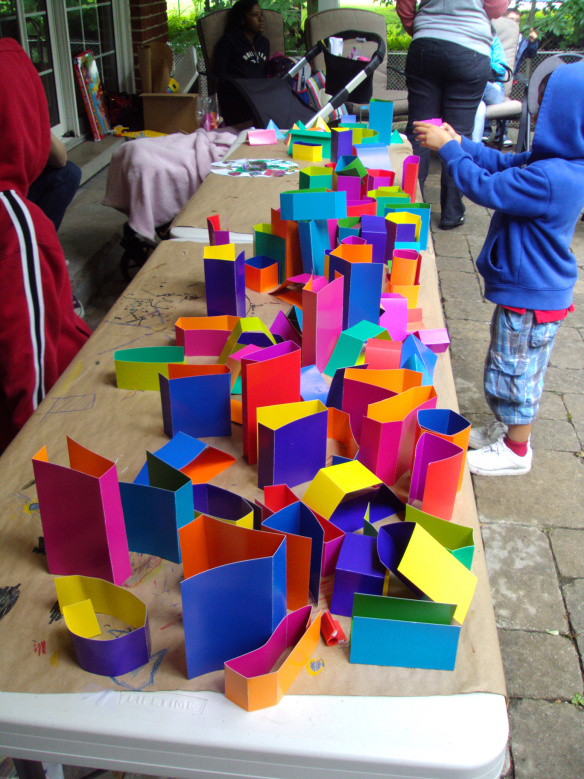
This exercise will allow students to explore ways to align the shapes together and make building sculptures. The objective is to create a little city using all of the shapes provided.
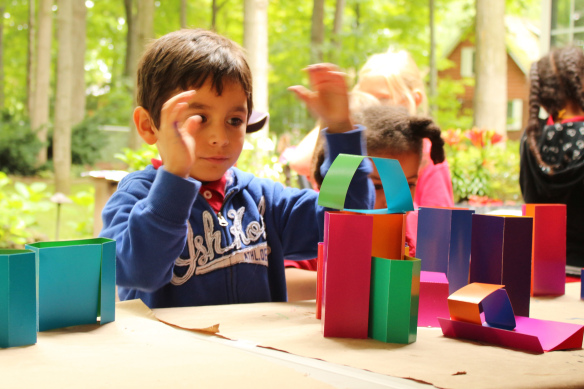
engineering art

Some students stacked multiple shapes together to give their structure more strength.
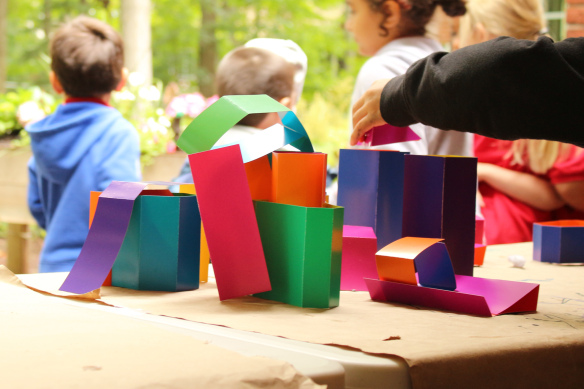
engineering art

Others figured out how to stack on top of one another to create unique building shapes.
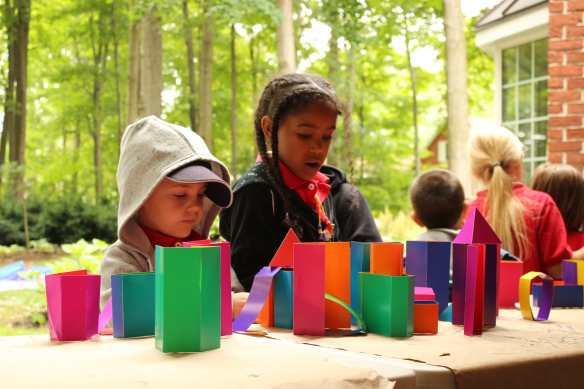
engineering art

As the children aligned all their buildings into a coherent “neighborhood,” we encouraged them to draw streets and small markers onto the paper roll beneath. Make sure the secure the paper roll onto the table with tape!
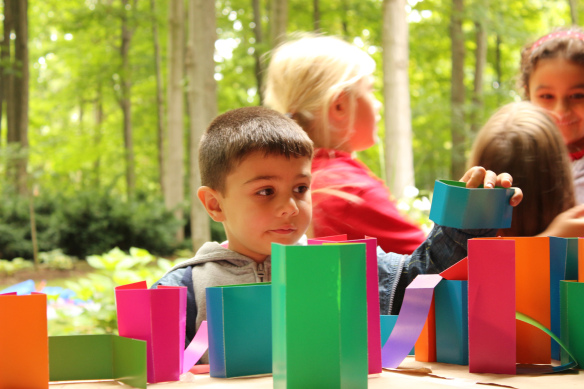
engineering art

The exercise encouraged ongoing collaboration as students often would turn away from one section of the cityscape to work on another. Meanwhile, another student would modify the look of the previous building arrangements.
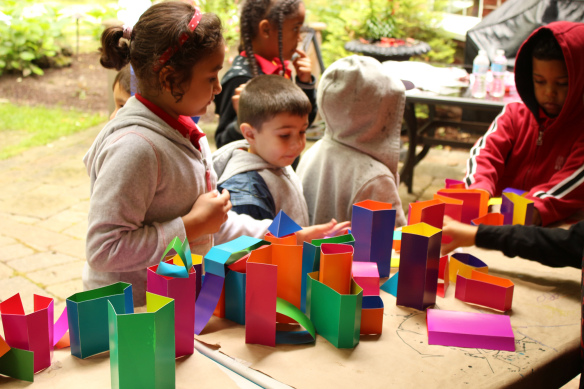
double color card sheet

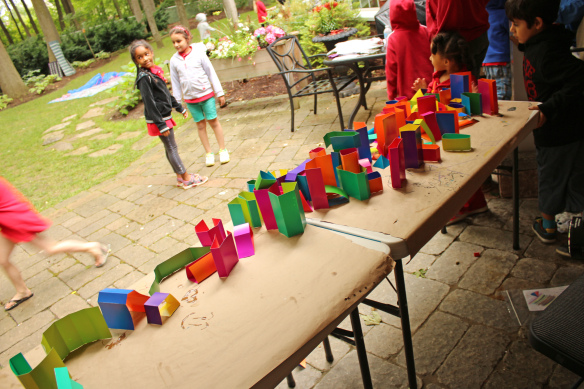
It was an “organized chaos” as the sculptures were shifted around the table surface.
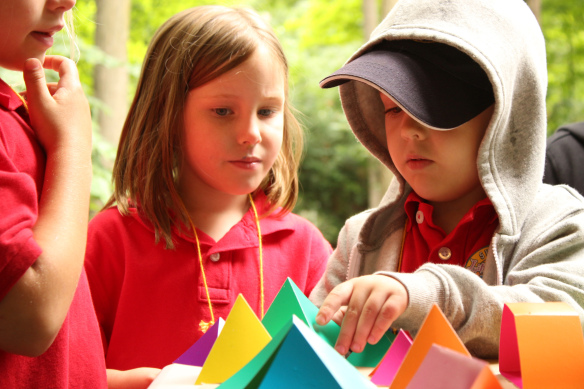
double color card sheet

There was some compromise that needed to be made when arranging the card buildings into different configurations. Some campers felt that the buildings each represented important municipal landmarks such as city hall, the library, museum, art gallery, fire station, subway, bank or hospital, and needed to be placed in certain areas rather than others.
double color card sheet

Here is a look at the finished city, although we still saw “development” in some parts!

Line-04

Like us on FacebookShare this post with your friends, or Subscribe to this blog today to receive original craft project updates every Monday, Wednesday and Thursday!

Mosaic Buttons and Beads

mosaics and buttons

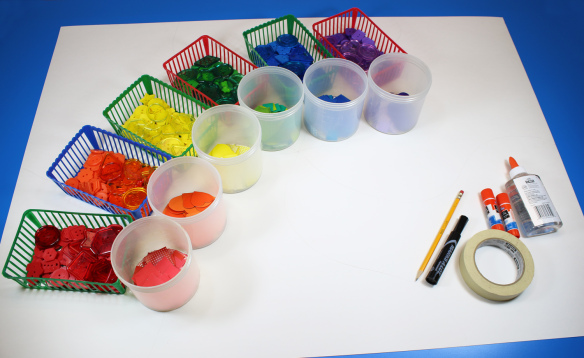
Last year we made a project similar to this one with an assortment of beads and buttons. This year, we are adding a few more mosaic pieces and stylish buttons to our Big Ideas project to turn it into a beautiful art display!

Age: 3+

Duration: 10+ minutes

Learning Objectives: Use multiple materials to create one solid artistic masterpiece. A great group activity that requires students to work together to fit materials into the appropriate blank spots on the drawing. Talk about the different colors in the artwork. Sort the materials into groups by similar colors. Incorporate patterning within the mosaic artwork.

IMG_6978

You’ll Need:

• Mosaics (R15649 Petit Pattern Mosaics, R15639 Spectrum Mosaics)

• Buttons (R2131 Bright Buttons, R2143 Really Big Buttons, R20208 See-Through Buttons)

• Poster board

• Pencil

• Tape

• Glue

Markers

Line-20

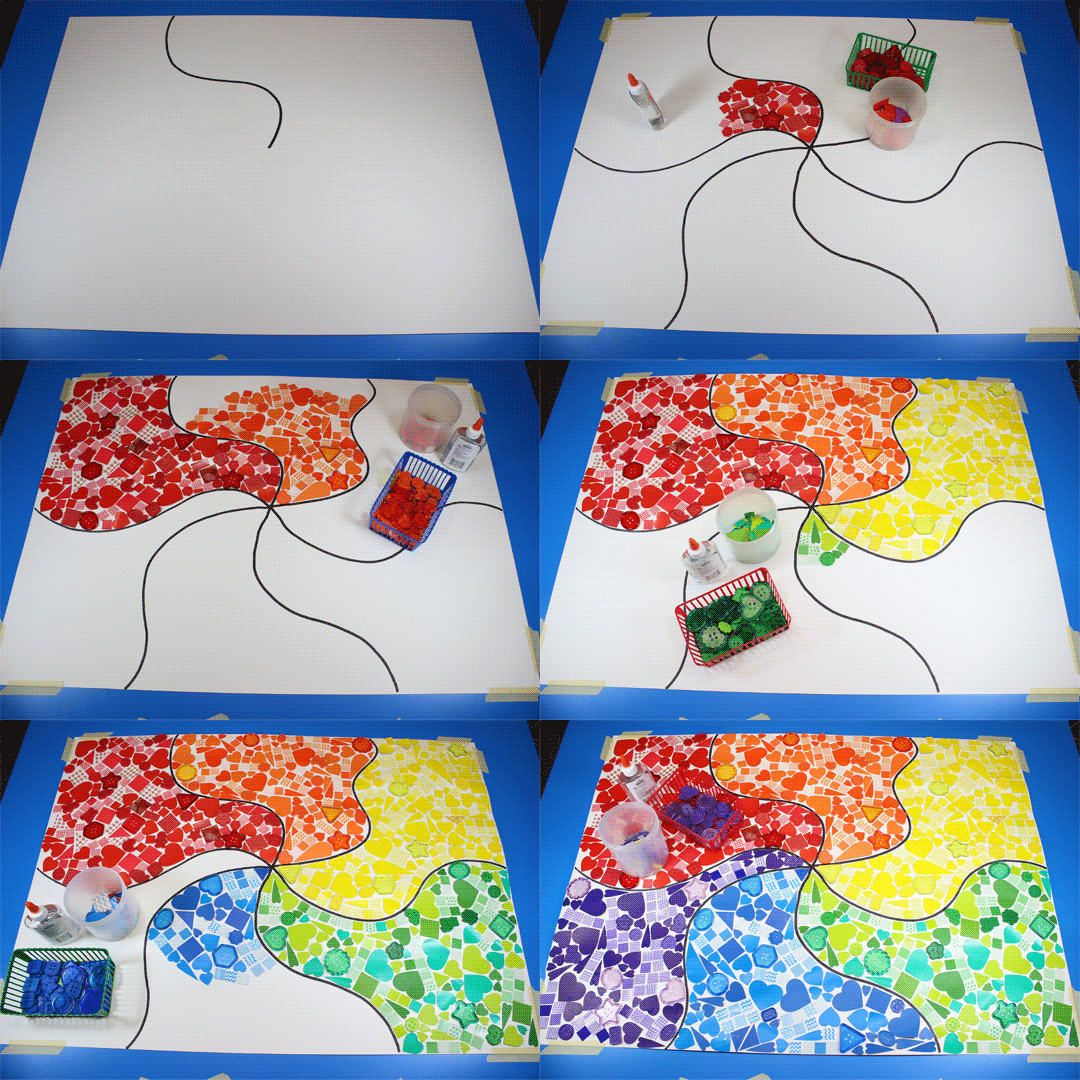
This project can be done over a period of several days or within a single art class. It all depends on the scope of your project. Every student can contribute to the art project or you can separate your classroom into groups of 4 or 5 and get each student to work on their own section in the mosaic artwork.

Mosaic-Animation

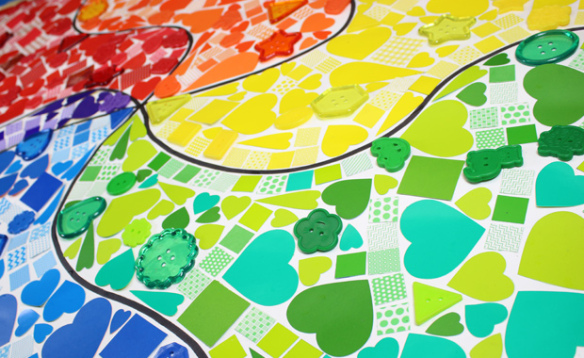
In the animation above, you can see how all of the pieces come together. We separated the giant sheet into six sections. Each section is represented by a specific color. Sort the mosaics and buttons into similarly colored groups, then begin gluing down all the pieces. Rotate the different pieces to glue them down in the appropriate spots. Continue through the entire section and make sure that the buttons and mosaics are snugly fit together. At the end, you get an amazing blend of materials to make a glorious masterpiece!

Line-18

Like us on FacebookShare this post with your friends, or Subscribe to this blog today to receive original craft project updates every Monday, Wednesday and Thursday!

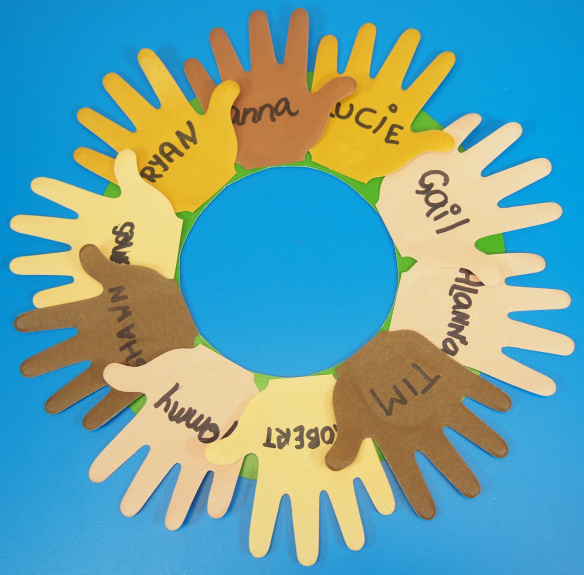
Paper Hand Wreath

2015-04-08-FeatureImage

Celebrate the power of unity through a beautiful wreath made of paper notepad hands, found in our R51220 Hand Padlet!

Age: 3+

Duration: 10 minutes

Learning Objectives: Connect activity to basic discussions about unity and equality or to popular global events such as We Day, Earth Day or International World Health Day! Decorate your classroom with beautiful simple wreaths. Create wreaths as a group activity.

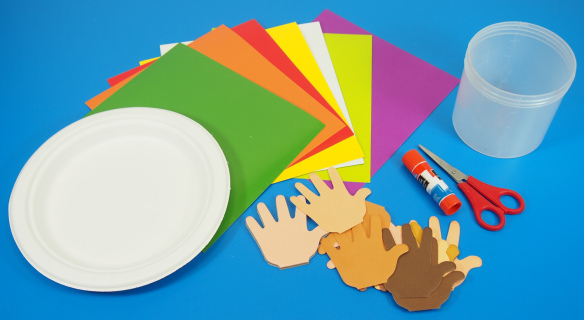
P1016822

You’ll Need:

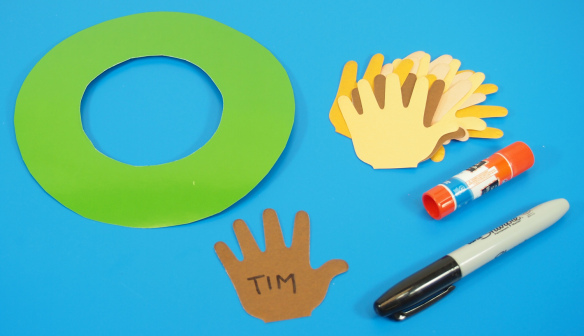
 • R51220 Hand Padlet

R22052 Double Color Card Sheets

• Paper plate

• Scissors

• Glue

• Jar

• Pen

Line-19

P1016823

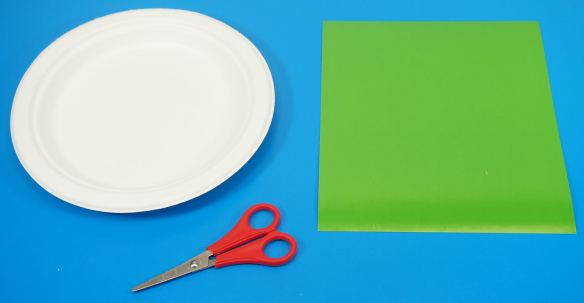
Let’s start off by making the card wreath base. You’ll need a paper plate for reference and a sheet of Double Color Card. You can choose any color of card paper you like.

P1016824

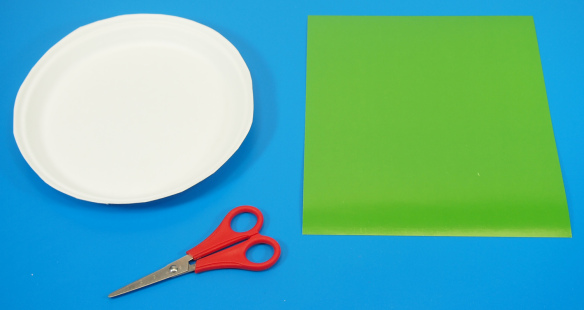
First, cut off the rim around the paper plate to make it fit into the size of the colored card. If you choose to use another type of card for your wreath base, adjust the size of the paper plate to fit.

P1016829

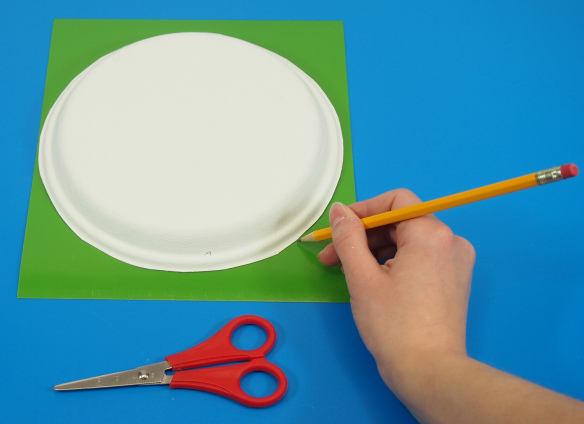
Place the plate onto the card and trace around the cut rim.

P1016831

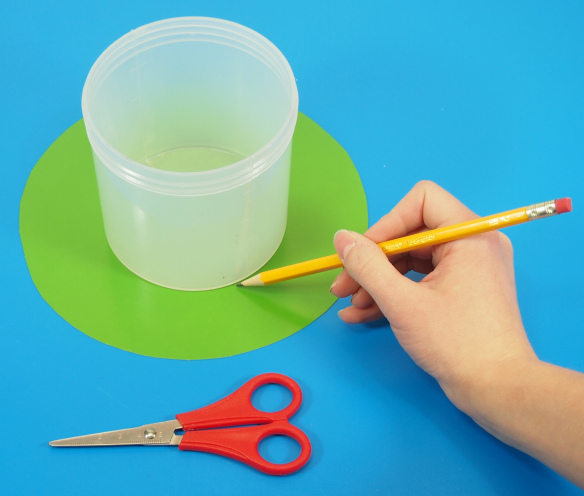
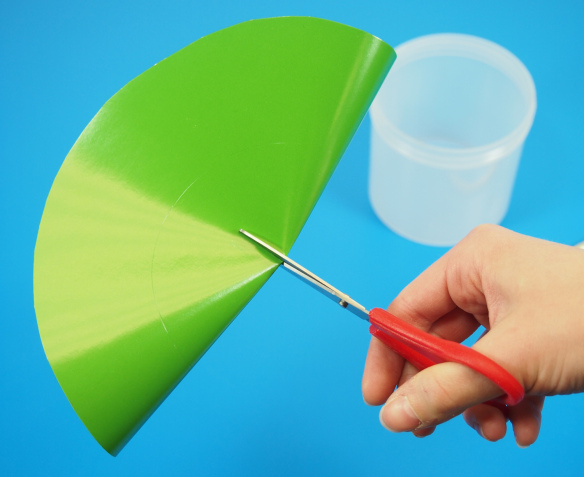
Cut the resulting tracing out. This should form a rough circle. Next, place the bottom of your jar onto the center of the circle cutout. Trace the inside portion.

P1016833

It helps to loosely fold the card circle in half, then cut through the center with your scissors. Use the cut to maneuver your way around the inner circle.

P1016836

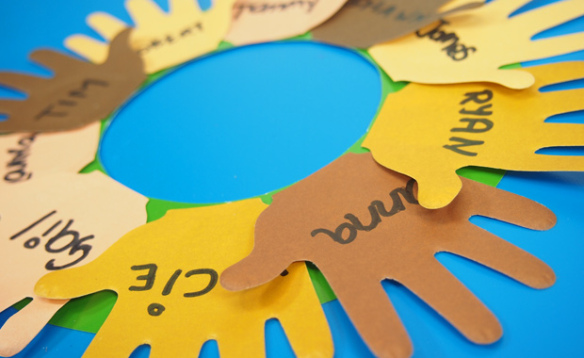
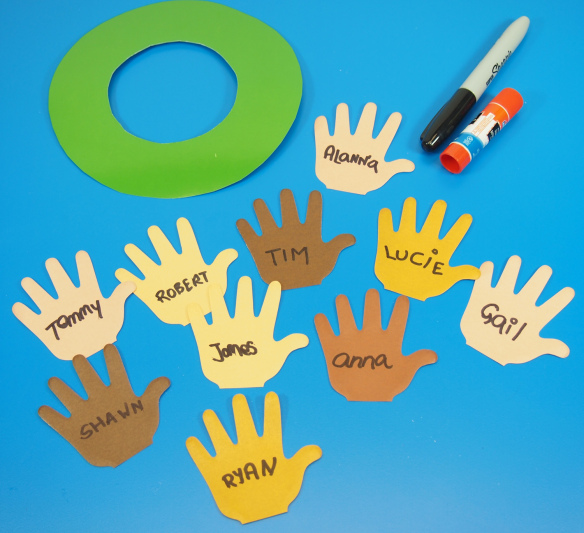
Now you’re ready to start decorating! Grab one of the hand padlet sheets and write the names of your students, or instruct your students to write the names of their peers.

P1016838

You’ll need about 10 names in total to fill the wreath. You can use more to fill up the wreath to its max.

P1016839

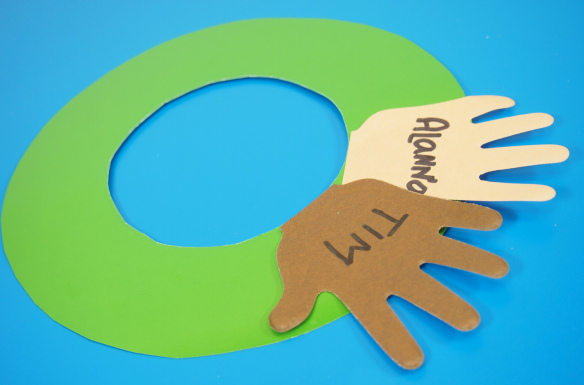
Start to glue down the hands onto the wreath. You can overlap the thumbs to keep them from covering up too much of each name.

P1016842

Work your way around the wreath until you’ve completely covered up the base. Now it looks complete and ready to hang in your classroom display!

Line-20

Like us on FacebookShare this post with your friends, or Subscribe to this blog today to receive original craft project updates every Monday, Wednesday and Thursday!

Spotlight on… Newspaper Builders

newspaper builders

At last year’s art camp, we put together an amazing structure using our Newspaper Builders… What did we make? Read on below for more details! 

newspaper builders

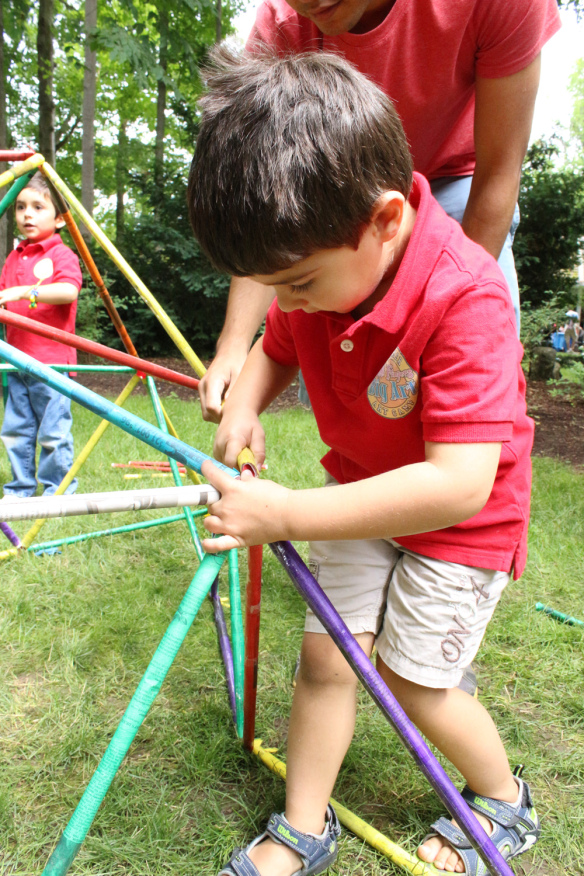
The Newspaper Builders kit includes several clear plastic tubes and an assortment of connectors. They are intended for use with recyclable papers from magazines or newspapers, hence the name! In order to make your tubes, tape the clear plastic tubes to either end of the sheet of newspaper. Roll up the newspaper and tape the roll tightly to secure. Above, Jasmine is fitting one of the connectors into the plastic tube inside of the paper roll.

newspaper builders

The paper rolls were painted before we gave them to the campers. You can use regular tempura paint and just give your paper rolls a once-over. Leave the rolls to dry for about an hour or two. Once everyone understood how we attach the connectors to the paper rolls, we began to build our base.

newspaper builders

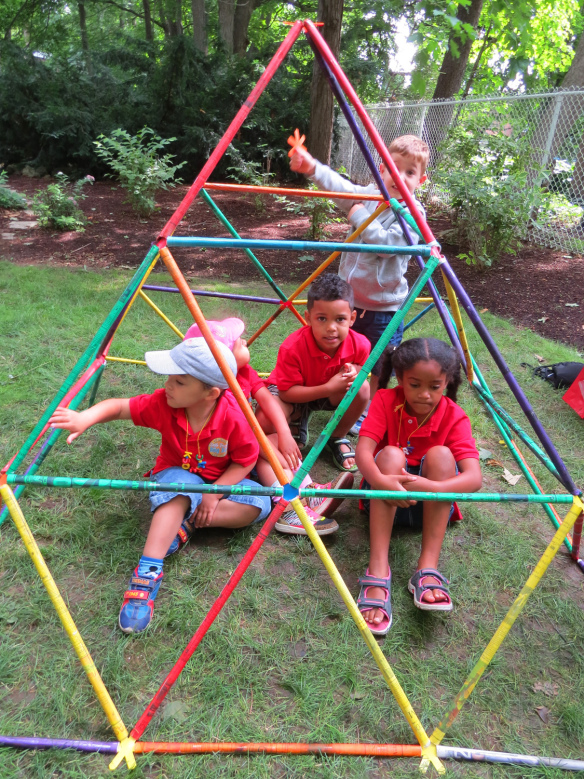
Once we had a base started, we could start building upwards. The kids began aligning the tubes together at 45 degree angles. It’s getting easier to guess the shape of their sculpture at this point, right?

newspaper builders

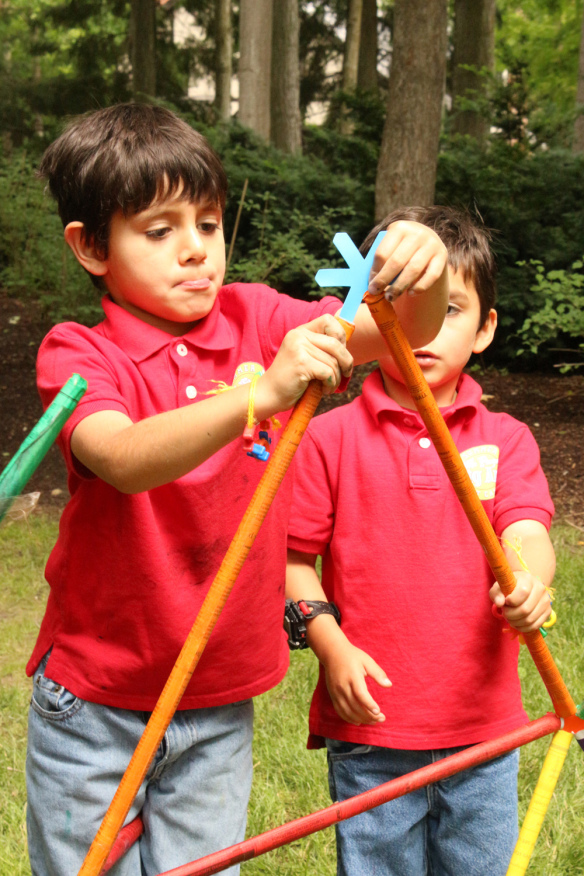
We loved catching collaborative moments like this! The question was whether or not the connector was able to hold up the two tubes together. The boys needed to help each other hold the structure while the rest of the pieces were connected together.

newspaper builders

Now we’re getting somewhere!!

newspaper builders

Have you figured it out yet?

newspaper builders

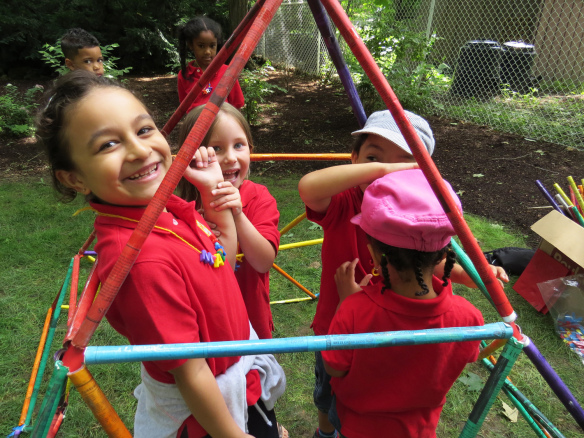
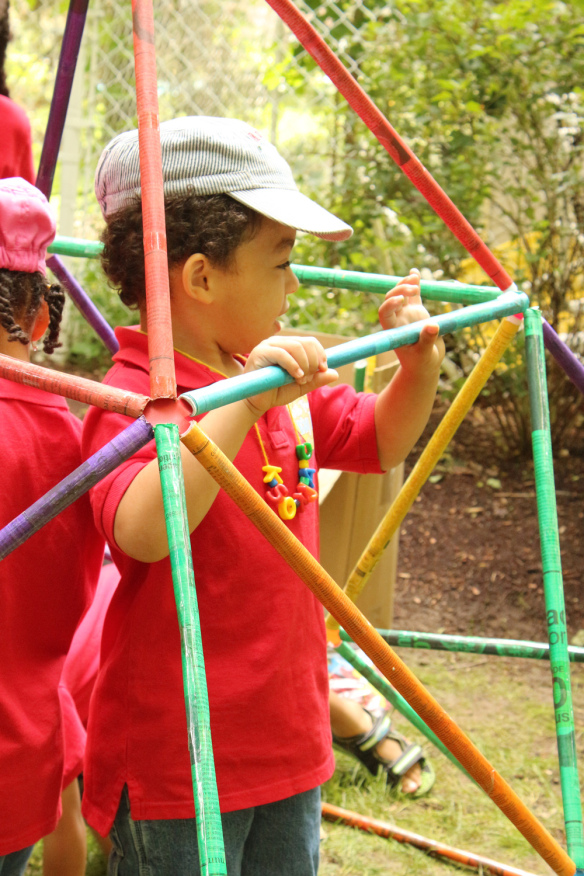
It’s a square-based pyramid! It’s a great idea to build the pyramid as a classroom fort. Children can crawl in through the open sides and use the space for quiet reading or as a play center.

Line-17

Like us on FacebookShare this post with your friends, or Subscribe to this blog today to receive original craft project updates every Monday, Wednesday and Thursday!

Spotlight on… Classroom Tunics

classroom tunics

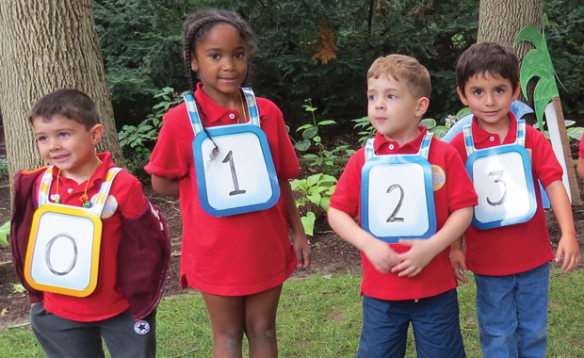
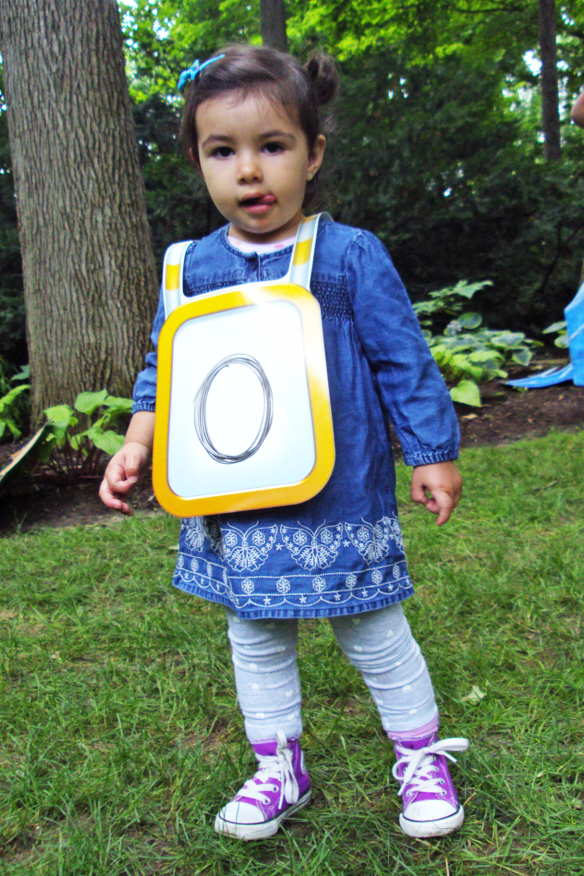
Keep track of your numbers and letters with Classroom Tunics! Every student can take part in the learning fun when they’ve donned their dry-erase pullover.
classroom tunics

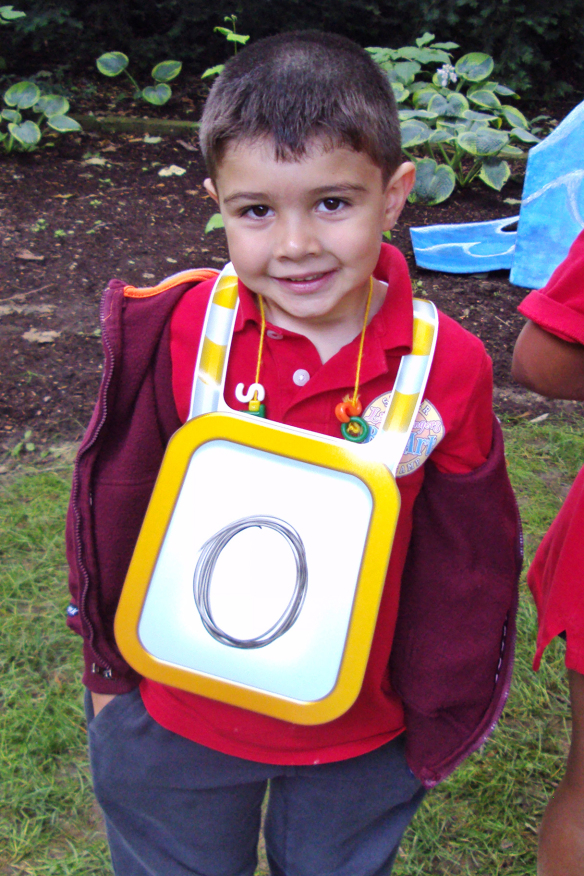
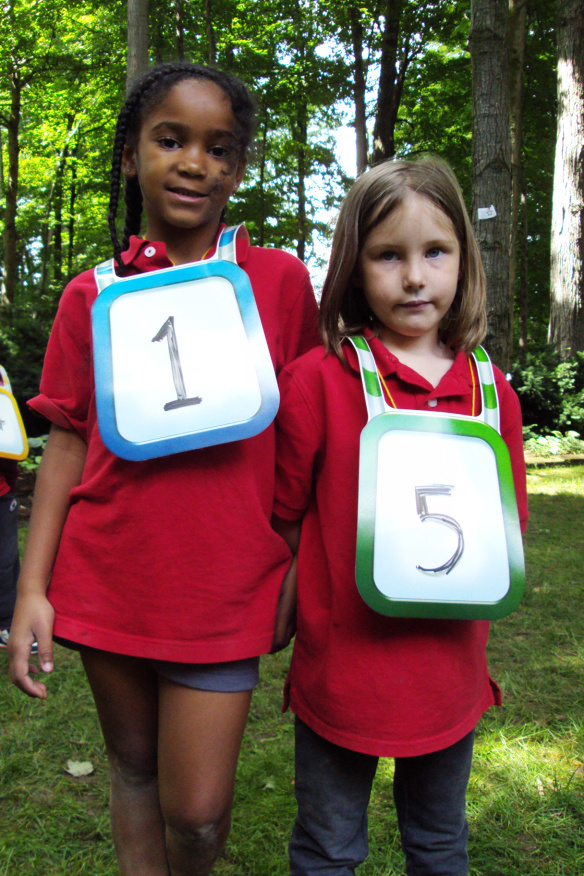
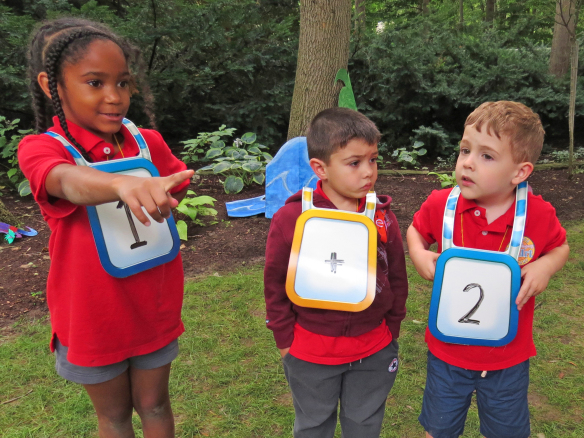
The R49620 Dry Erase Classroom Tunics fit nicely onto students’ shoulders. The tunic is designed to hold in place by the dry erase panels on the front and back. You can use the panels to write numbers, letters or other form of signage!

classroom tunics

The best part is that the dry-erase tunics can be re-used over and over again.

classroom tunics

It’s safe for children to wear and a great way to include students in group activities.

classroom tunics

Our full guide gives you detailed resources for implementing the classroom tunics into 7 important subject ares of the curriculum. Learn how to integrate numbers into everyday learning while engaging students in fun activities such as color matching, sorting and more!

classroom tunics

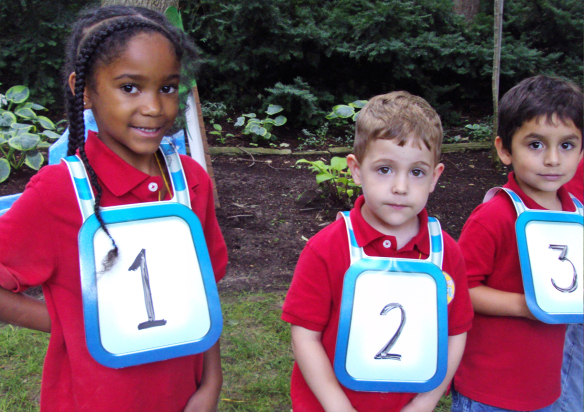
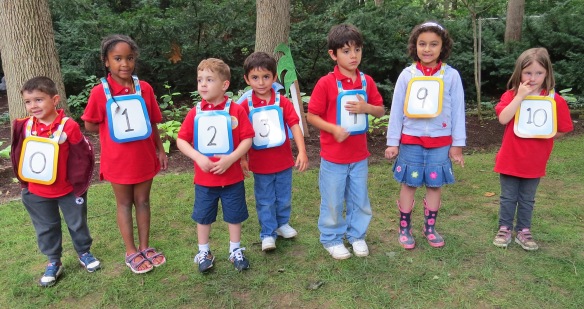
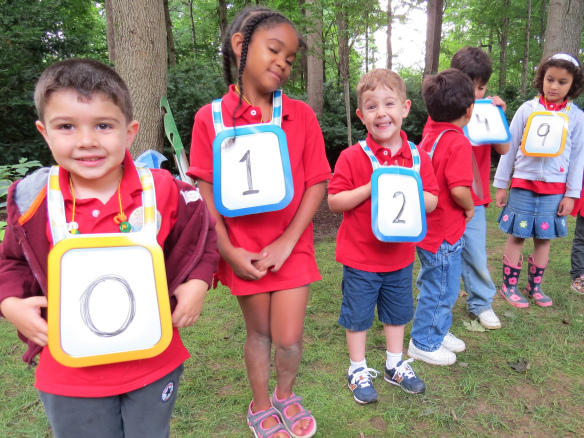
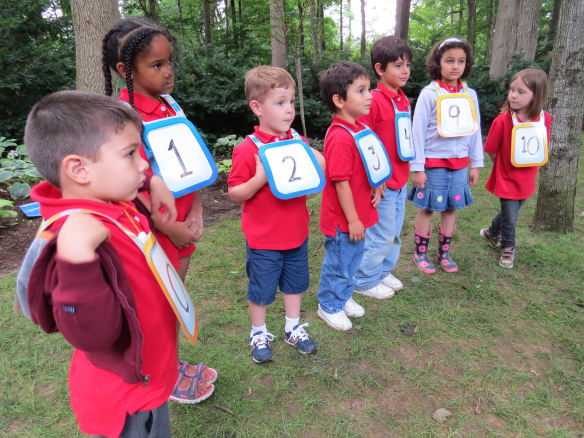
We wrote a number onto each of the students’ vests and asked them to organize themselves in the correct order. We intentionally left out some numbers to give the campers an extra challenge!

classroom tunics

The students all had to work together to determine who went where in the number line. It was a great exercise.

classroom tunics

The best challenge occurred when we changed some of our campers’ vests to subtraction, addition and equal signs. We then chose two students to stand on either side of the operation and work with their peers to figure out what the answer was!

classroom tunics

There are so many great ways to use the Classroom Tunics. Even simply color-coding your students into groups makes the tunics well worth their while in your classroom!

Line-11

Like us on FacebookShare this post with your friends, or Subscribe to this blog today to receive original craft project updates every Monday, Wednesday and Thursday!