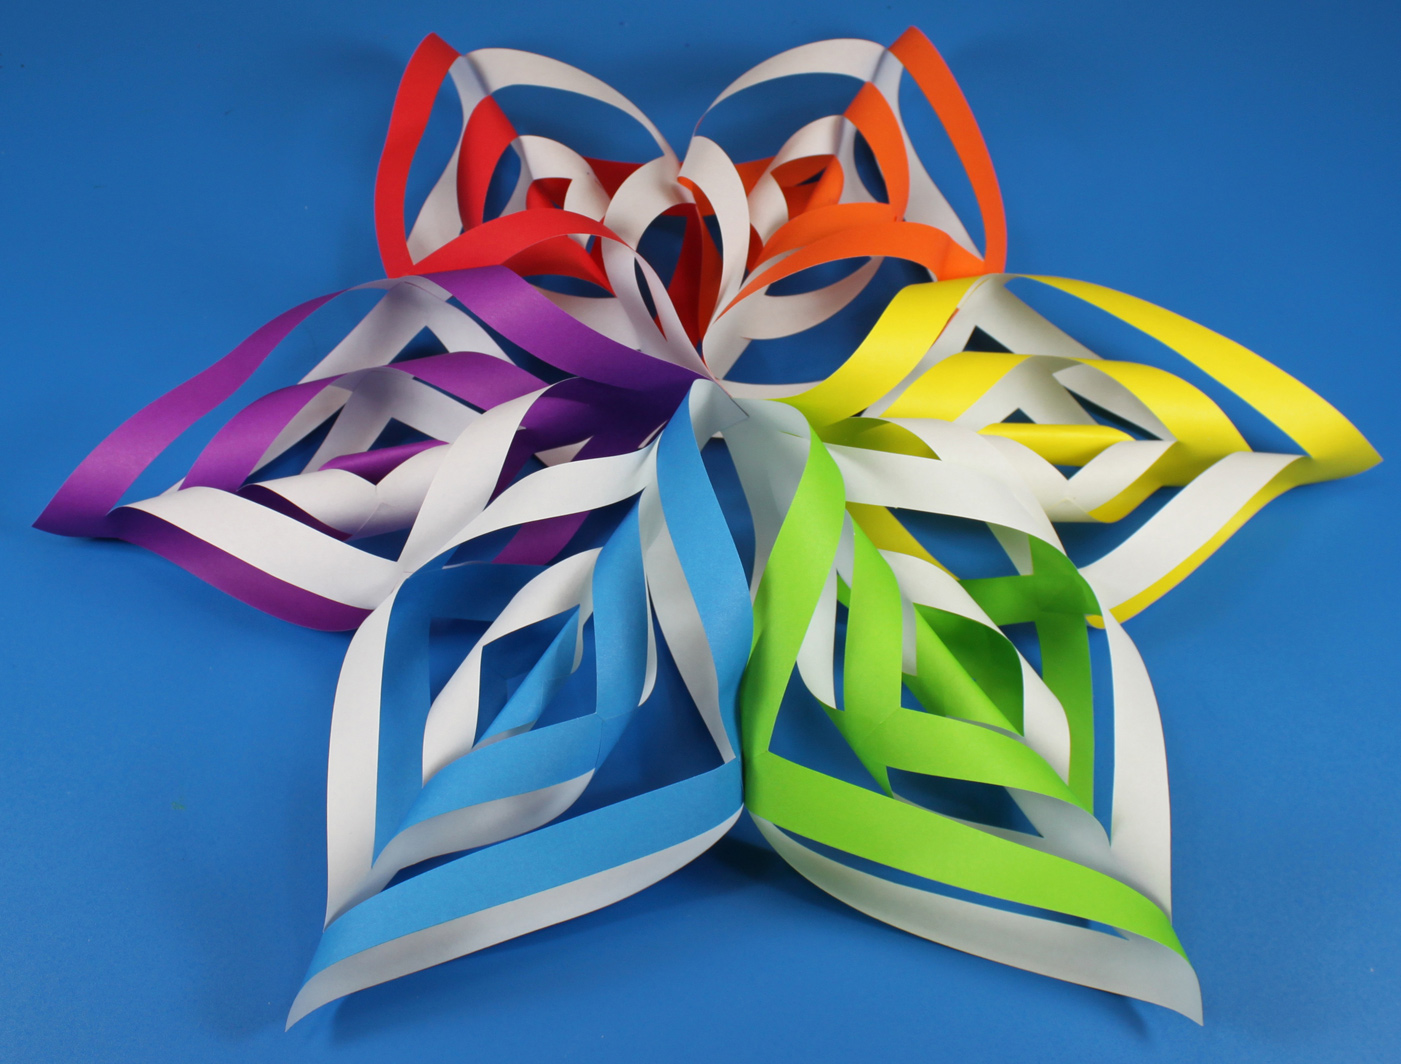
 A whimsical star design hung in your classroom is sure to turn heads! Use our R15350 Cut & Fold Squares for brilliant color.
Age: 6+
Duration: 20-30 minutes
You’ll Need:
• Tape
• Scissors
• Hole punch
 The great thing about this craft is that it looks complicated, but is actually super-easy to make! All you require is square-cut paper, a simple folding technique and a few snips with scissors. I’ll walk you through the process step-by-step, but I’ve also made a few detailed animations to help you through each step.
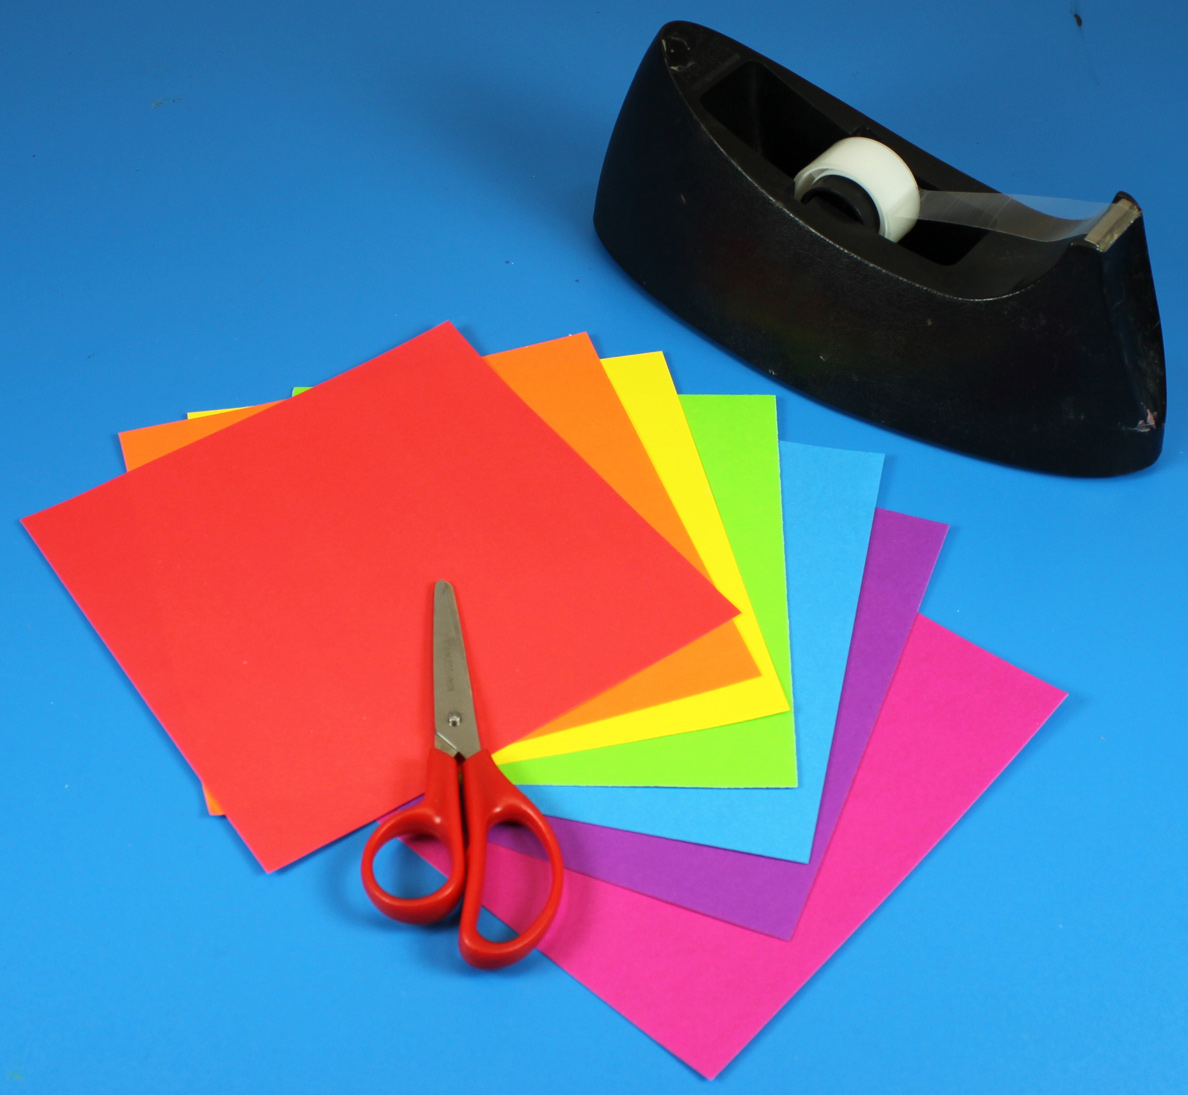 Choose your selection of colors. A rainbow-colored star will stand out just as nicely as a red and green arrangement!
 The Christmas Star is divided into several parts. Each part can be made simply with one Cut & Fold Square and a few cuts with scissors. First fold your square into a triangle.
From the fold line, close to the edge of the triangle, cut 1 long line towards the point of the triangle. Do not cut all the way across the triangle, but stop about 1/2″ below the edge. Make another cut just beside the first. Stop the cut about 1/2″ below the first cut. Make a third cut beside the second cut. Stop the cut about 1/2″ below the second cut. Mirror the same cuts on the other side of the triangle.
 Unfold the triangle back into a square. Turn the square so that it makes a diamond shape. You’ll notice that the cuts make little triangle strips on either side of the diamond shape. Start with the uncolored side facing up. Join the corners of the center together. Use tape to secure.
Next, flip the shape over and join the next two corners together with tape. Flip the shape over again to the uncolored side and join the next two corners. Continue flipping the shape over and joining the next set of corners until you get something like a spiral, which you can see in the last image in the animation.

In order to make a Christmas Twist Star, you will need 6 of the colorful spirals. Alternate the colors of the spirals (such as red, green, red, green, etc) or make one of each color available in the Cut & Fold Squares pack.
To join the spirals, glue the sides together. You should have all 6 spirals glued side by side in a row. Wait for the glue to dry before bending the whole line of spirals into a circle. Glue the sides of the last two spirals together. The spirals will all angle out from the center to look like a large star!
 Punch a hole through the top of one of the spiral points.
 Tie a length of string from the hole to hang the star!
Show us your beautiful Christmas Twist Stars! Send us photos of your students’ work to subscriber@roylco.ca. Wishing you a wonderful winter vacation!
Special Feature this week:
We’ll be updating every day of this week and next week with fantastic holiday crafts you can use in your classroom!
Please note:
LittleFingersBigArt won’t be posting anything between December 18th, 2013 and January 6th, 2014! Have a wonderful winter vacation!

![]()