Spotlight On: Stand-Up People

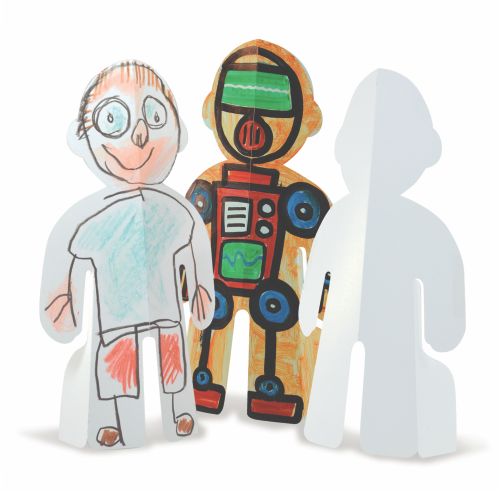
Create cute, miniature people who can stand on their own two feet!

These sturdy card stock figures are terrific for a multitude of different art projects and as components in presentations for other subjects. Use paint, marker, crayon, pencil crayon and collage materials to decorate your stand-up person. The large size (7 1/4 x 11 1/2″) is perfect for bringing out the fine detail in your artwork.

Use these art bases for “All About Me” art! Glue a photograph to the face of a figure, and decorate the body to resemble your favorite outfit. Finish by writing your name on your stand-up person so your classmates will always recognize you!

A great beginning of school activity is pairing students off and challenging them to introduce their partner to the class! Have students interview each other, and create a portrait of their partner to present to the class along with personal facts like age, favorite food, and favorite color!

Are written book reports starting to become a grind? Add a new dimension to them by challenging students to create a portrait of their favorite character in their book. The portrait can serve as a visual aid to help keep other students engaged.

Bring social studies to life with historical figures! Consider assigning each table (or group) a theme, and each student will create a portrait of a different historical figure. If students have a math theme, they might create figures of Ada Lovelace and Pythagoras. A science theme could include Einstein and Marie Curie.

To watch a video a Stand-Up Person come to life, click here: https://www.youtube.com/watch?v=37LTfRUm2UU


Welcome Back to the New Year!

top ten list feature image

Now that we’ve rung in the New Year, we are excited to share our ideas with you over the next little while. Stay tuned for blog posts in a range of subjects, using tools that you already have in your classroom!

We hope that you’ve enjoyed a year of posts from Little Fingers Big Art. Here’s a recap of 10 of our favorite posts:

1.IMG_0139

Use jelly on the Light Cube for a great sensory activity!

2.2015-02-25-FeatureImage

Make lucky four leaf clovers for St. Patrick’s Day, coming up in March!

3.

P1016562

Combine letters in a Word Mobile to generate literacy creativity in students!

4.

Image-04

Guest post from Rebecca Milling about the wonderful creations made with our Straws and Connectors at St. Jerome’s Children’s Home in Nakuru, Kenya.

5.

P1016903

Check out this neat step-by-step tutorial on how to make 3D wall art!

6.

IMG_0811

Use our Tube Crafts to make a birdfeeder… or critterfeeder!

7.

P1016967

Make beautiful tissue paper birds–a great fine motor skills activity!

8.

Animation

Check out our awesome Action Shapes People! Customizable action figures that your students can use for stop-motion animation projects!

9.

Collage-a-Saurus-FeatureImage

Imagine what dinosaurs really looked like with our Collage-A-Saurus and Dinosaur Paper Sheets!

10.

OLYMPUS DIGITAL CAMERA

Turn old doodle paper into wrapping paper for someone’s birthday or for Christmas time!

These are our top ten for the year! Share your favorite post online with your friends.

Leave us a comment to let us know what kinds of posts you would like to see more of!

Line-09

Like us on FacebookShare this post with your friends, or Subscribe to this blog today to receive original craft project updates every week!

Craft Spotlight: Floppy Foam Brushes

Feature-Image-FloppyFoamBrushesTry something new with your painting projects using our versatile and easy-to-use Floppy Foam Brushes! Dip the brushes into paint and dab onto your paint paper for neat effects. Floppy Foam Brushes aren’t only good tools for paint use… See what our Art Campers used them for below in the post!

_DSC0164Our Art Campers filled small plastic containers with white school glue and dipped in their Floppy Foam Brushes. Each Art Camper had a paper heart that was cut from colorful construction paper. _DSC0165The Art Campers then used the glue-dipped Floppy Foam Brushes to sprinkle the glue at random throughout the paper heart. Next, they poured multicolored glitter onto the paper heart and let the glue dry. _DSC0173The next step was to remove the excess glitter, which this Art Camper did by bending the sides of the heart and tilting it over a sheet of paper towel. Using a paper towel helped to eliminate mess by keeping the glitter in one particular spot. We simply funneled the remaining glitter into our glitter containers by curving in the sides of the paper towel and tilting it over the opening to help the glitter slide inside. IMG_2076What beautiful hearts! We left them to sun-dry which really showed off the gleam of the glitter and helped the hearts to dry that much quicker. Line-18Thanks for viewing this post! If you would like to showcase your own painting techniques or have interest in any of the products showcased in this post, please email us at subscriber@roylco.ca for more details! We’d love to hear from you!