The “Helping Hands” Good Deeds Display

Image of Roylco Color Diffusing Hands artwork display on school hallway

Image of Roylco Color Diffusing Hands artwork display on school hallway

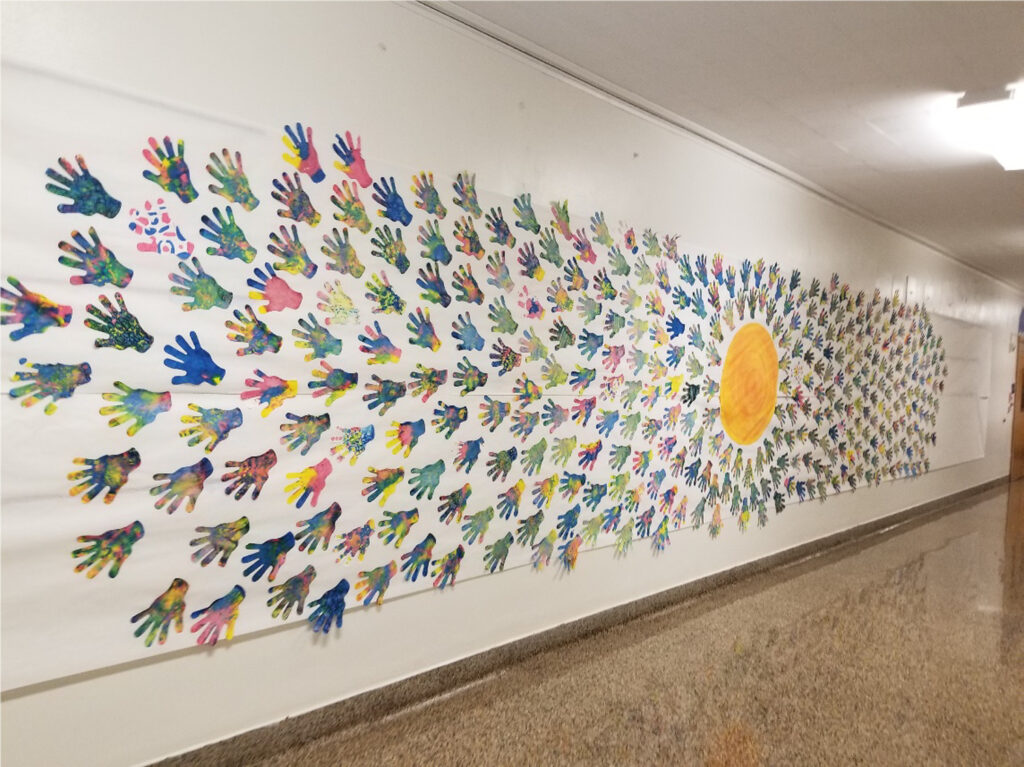
Special Post Contribution: By Amy Klossner

Here are the photos of the project our school completed using Color Diffusing Hands.  They were just perfect.  We read the book Ordinary Mary’s Extraordinary Deed, before painting the hands with liquid watercolors.  It’s a story about a little girl who does one good deed and that person does 5 good deeds then those people do five more good deeds each and so on. Like I said, the hands were perfect for displaying to the students how one good deed (represented by the hand) grows into five more, (represented by the fingers) which grows into 5 more, etc. The “helping hands” displayed that kindness is contagious.

As a spin off, students can write good deeds they are preforming in our school and community on each one of the hands, heart shapes or other inspirational design.


Close up boy decorating color diffusing hand


Close-up of a decorated hand


Children decorating Color Diffusing Hands with liquid water color

How to Decorate Color Diffusing Hands:

Liquid Water Color:  To get the most beautiful color blends, I recommend using liquid watercolor paint in a mister bottle. Spray the colors you like onto the Color Diffusing Hand.  Then use another mister bottle to spray clean water over your colors. Set aside to dry. Be careful where you put them, they can make a mess. To speed up the drying time, I like to hang them up for good air circulation. They should be dry enough to use in about 30 mins.


Washable Markers:  Color the Color Diffusing Hands with washable markers. Do not cover the whole area. Make sure to leave white space. Use a mister bottle to spray clean water over your colors. This will allow the colors to “mingle” and spread.


Image of sketch drawing of Kid 1

Spotlight On: Super Simple Kirigami

child with snowflake.jpg

Immerse your students in the Japanese art of Kirigami! 

Kirigami is a variation on the Japanese art of origami. Unlike origami, however, the folding is not the end product for kirigami. Cuts are made in the paper, and then the sheet is unfolded to reveal the cut-paper artwork!

15218 Kirigami_Pile.jpg

Our kirigami sheets are printed with numbered lines for three different folds. Choose a sheet of kirigami paper. Lay the sheet of paper on a desk or table. First fold the paper in half on line 1. The paper should now be a triangle with the point facing away from you. All the fold styles begin this way. Fold on line 2 from right to left. Fold on line 3 from left to right. This is the final fold for the Triangle style fold. For the other two styles, fold on line 4 from right to left. This is the final fold for the Snowflake style fold. Finally, the final fold of the Lotus style is to fold on line 5 from left to right. Once you have folded your paper, cut out your design. Use our suggestions or experiment with your own!

We created a video to walk you through the folding and cutting process!

Line-17

Like us on FacebookShare this post with your friends, or Subscribe to this blog today to receive original craft project updates every week!