The “Helping Hands” Good Deeds Display

Image of Roylco Color Diffusing Hands artwork display on school hallway

Image of Roylco Color Diffusing Hands artwork display on school hallway

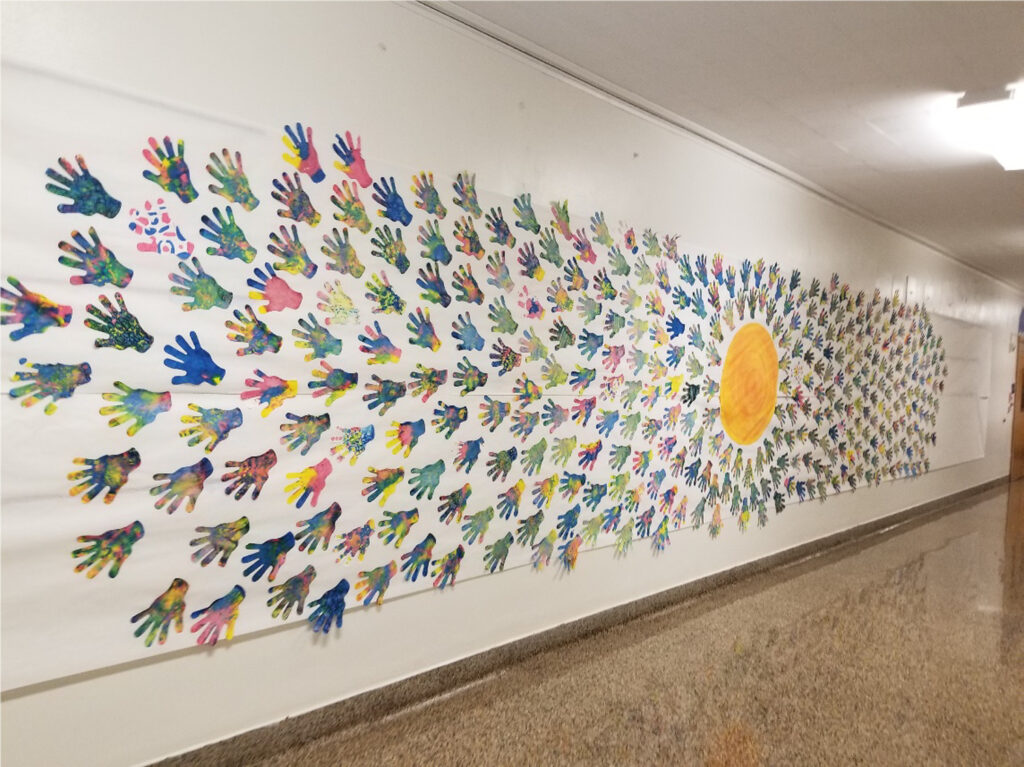
Special Post Contribution: By Amy Klossner

Here are the photos of the project our school completed using Color Diffusing Hands.  They were just perfect.  We read the book Ordinary Mary’s Extraordinary Deed, before painting the hands with liquid watercolors.  It’s a story about a little girl who does one good deed and that person does 5 good deeds then those people do five more good deeds each and so on. Like I said, the hands were perfect for displaying to the students how one good deed (represented by the hand) grows into five more, (represented by the fingers) which grows into 5 more, etc. The “helping hands” displayed that kindness is contagious.

As a spin off, students can write good deeds they are preforming in our school and community on each one of the hands, heart shapes or other inspirational design.


Close up boy decorating color diffusing hand


Close-up of a decorated hand


Children decorating Color Diffusing Hands with liquid water color

How to Decorate Color Diffusing Hands:

Liquid Water Color:  To get the most beautiful color blends, I recommend using liquid watercolor paint in a mister bottle. Spray the colors you like onto the Color Diffusing Hand.  Then use another mister bottle to spray clean water over your colors. Set aside to dry. Be careful where you put them, they can make a mess. To speed up the drying time, I like to hang them up for good air circulation. They should be dry enough to use in about 30 mins.


Washable Markers:  Color the Color Diffusing Hands with washable markers. Do not cover the whole area. Make sure to leave white space. Use a mister bottle to spray clean water over your colors. This will allow the colors to “mingle” and spread.


Image of sketch drawing of Kid 1

French/English Manuscript Alphabet Train

alphabet train poster

Use these classroom resources as simultaneous wall decorations! Teach kids the letters of the alphabet with clever illustrations. 

The Alphabet Train pieces are designed to be placed horizontally side-by-side across the top of your wall. Each card shows two letters of the alphabet, in both upper and lowercase. Above each letter, we’ve made an illustration of the word that begins with that letter. All illustrations are applicable in both English AND French, which does double-duty for your classroom!

Every day, you can focus on one letter at a time with your students and help them identify the illustration. You can also talk about other words that begin with the letter of the day. Perhaps you could start with names; ask who in the class has a name that starts with the letter of the day. That’s a great technique for getting the conversation started!

Once you have identified the illustration, write the accompanying word onto your wallboard or brainstorming sheet.

Start with placing the locomotive engine at the front of the train. Place the next piece (the beginning of the alphabet) up against the first. When you are ready to progress to the next set of letters, add one more train car to the row. Continue in this way until you have completely filled up the board with the Alphabet Train!

Line-14

Like us on FacebookShare this post with your friends, or Subscribe to this blog today to receive original craft project updates every Monday, Wednesday and Thursday!