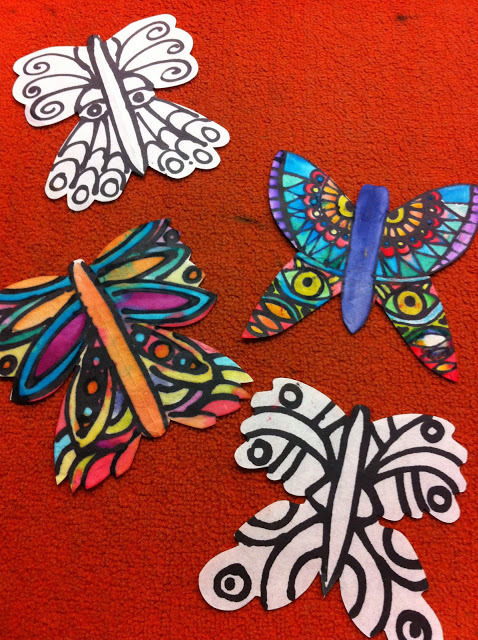
Create awesome effects on Color Diffusing Paper! The Drip, Drip, Splatter, Splash blog posted their butterfly artwork which used Color Diffusing Paper, permanent marker and watercolor paints.
The post was published on April 17, 2013 and is entitled, “Butterfly Art.” Click here to visit the page!
Using permanent marker helps to create definite lines that students can use as guidelines for painting. We suggest to first have your design sketched out onto scrap paper. Once you are satisfied with the look, place a sheet of Color Diffusing Paper on top. Trace the outlines with black marker onto the Color Diffusing Paper.
Watercolor paints work best with the Diffusing Paper as it gets absorbed into and throughout the paper. This neat effect is due to the process of diffusion. Diffusion happens when the particles in watercolors meet a material like diffusing paper that has little to no water content. As a result, it is always trying to fill in that area with watercolor particles.
The first part of the post shows a beautiful picture of the various butterfly renditions made with Color Diffusing Paper. Scroll further down the post to see other variations made with different materials!
Thanks to Shelly P for sharing her work!
Images and original post © Drip, Drip, Splatter Splash
This post was not sponsored for a review. At LittleFingersBigArt, our mission is to present to our readers and viewers the newest and most creative craft ideas that fans of Roylco have made on their own. Our goal is to allow you and other educators and parents to reuse our products in fun ways so that children always get the best educational experience from them!
We’d love to see more ideas like this one! If you’ve got a brilliant craft idea or have made a version of one of our crafts that you would like to share with us, send an email to subscriber@roylco.ca with photos, descriptions or a link to your work. We will create a feature post and link back to you with full credit. We’d love to hear from you!


