Tropical Fish Stained Glass Frames

tropical fish stained glass frames

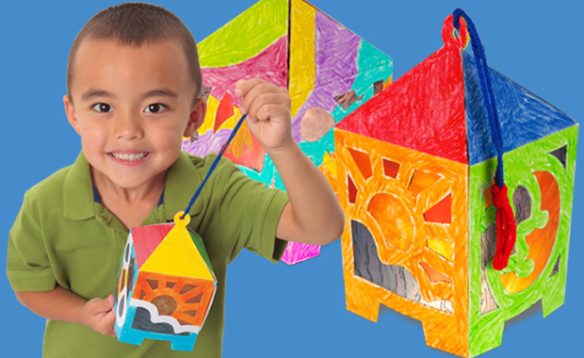
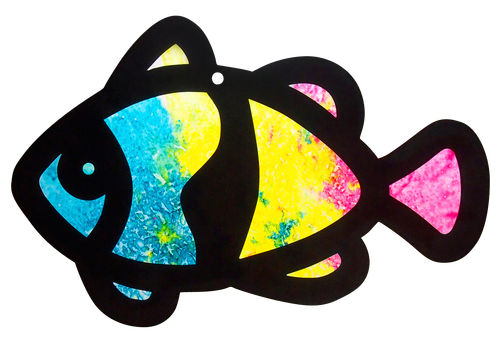
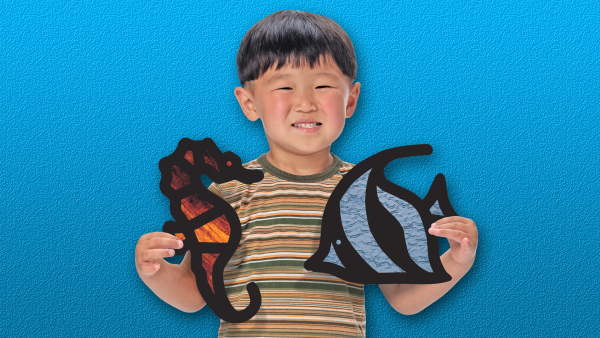
Tropical Stained Glass Fish are perfect little activities for students to exercise their fine motor development while building knowledge of colors, shapes and light!

Our set of tropical fish is ideal for introducing fish to your students. Each design is based on a real fish. Show students the frame and then discuss the actual fish, what it is called and where it lives.

Start by popping out the frame from the backer sheet. Throw away scraps and remove the interior pieces. Note: There are two designs for each fish: One faces left and one faces right.

Use colored tissue paper or Roylco’s R15257 Stained Glass Paper to decorate the frames. Start by laying the frame over the paper and lightly tracing each of the interior spaces of the frame with pencil onto the paper. Remove the frame and redraw the outline of the shape with a large border around it. Cut out the new, larger shape and glue or tape onto the white side (back) of the frame. Repeat with the rest of the shapes within the frame. Once complete, you can glue the “mirror-image” frame onto the back of the frame and sandwich the pieces of colored paper between the two frames or leave the white side exposed.

52087 Tropical Fish

Once the frames are finished, hang them up. The finished artwork looks great in a window. Alternatively, hang them from the classroom ceiling. Add some crepe paper seaweed to finish off your ceiling ocean scene.

Make an aquarium classroom mural! Arrange the Stained Glass Frames on a bulletin board. Draw, cut out and add other sea animals and vegetation. Cover the whole board with crunched up cellophane (available at gift stores where they sell gift basket wrap). The cellophane will give an artistic water look to your mural.

Make your own Stained Glass Frames! Start with a sheet of black construction paper. Draw a simple design on the paper using large, simple shapes. Poke the tip of a pair of scissors in each shape and using that as a starting point, cut out the shapes. Fill with colored tissue paper or Stained Glass Paper.

52087 Tropical Fish Stained Glass boy

Watch a video below to learn more about making your Stained Glass Tropical Fish come to life!

Line-20

Like us on FacebookShare this post with your friends, or Subscribe to this blog today to receive original craft project updates every week!

Striped Stained Glass Frames

striped stained glass frames

Take your stained glass images to a whole new level! Instead of cutting out larger pieces of transparent paper, use a more economical approach that helps students develop their fine motor skills.

Age: 5+

Duration: 15-20 minutes

Learning Objectives: 

You’ll Need: 

R52074 Junior Stained Glass Frames

R15257 Stained Glass Paper

• Scissors

• Glue

• Pencil

• Ruler

Line-07

striped stained glass frames

You can choose any stained glass frames from our collection, but the Junior Frames have larger surfaces to cover, making this striped technique much more effective.

striped stained glass frames

Choose a sheet of transparency paper. Our Stained Glass Paper is designed to illuminate its colors when near a light source. Normally, stained glass frames are hung on windows so that sunlight can illuminate the colors in the artwork.

striped stained glass frames

Our Junior Stained Glass Frames feature a bit of background space around the sides of the subject. To fill up the space, flip the Stained Glass Frames upside down. Cover one of the openings with a sheet of transparency paper (flip the frame over to double-check the appearance of the sheet), then trace around the opening, leaving a bit of a space to allow you to glue it down.

striped stained glass frames

Cut out and glue down the background sheets. Next, take a few assorted sheets of transparency paper and cut them into strips that run along the longer side of the sheets. You can mix and match as many sheets as you like. This is a great exercise for building scissor skills as students have to exercise patience and carefulness as they cut out each of the strips. You can even get them to draw ruler guidelines so they can visualize where they need to cut along.

striped stained glass frames

Rub a bit of glue around the border of the stained glass image. Lay the strips of transparency paper across the frame, pressing down to adhere the strips to the glue. You can position the strips horizontally, vertically or diagonally. Just be sure to follow the same pattern all the way through the entire frame.

striped stained glass frames

To finish your designs, cut off any excess strips that overlap with other parts of the stained glass frame. When you flip the Stained Glass Frames right side up, you will see that the main parts of the frame have been striped, while the background is a solid color. This produces a neat effect that students will love to see!

striped stained glass frames

Check it out! Although this exercise is a little complex, it gives students the chance to see how an alternative technique to regular stained glass projects produces a really cool end result!

Line-04

Like us on FacebookShare this post with your friends, or Subscribe to this blog today to receive original craft project updates every Monday, Wednesday and Thursday!

Spotlight on… Stained Glass Lanterns

stained glass lantern

Fill in the cutout spaces of these unique 3D lanterns! Features 4 separate images on each side of the lantern. Use our R15257 Stained Glass Paper to fill them in.

R52093 Stained Glass Lanterns are easy to decorate and fold up for a lantern garland or seasonal display! Each of the lanterns are pre-cut and scored for easy assembly.

While the designs are laid flat, cut out pieces of the Stained Glass Paper to fit over the holes. Glue the pieces down onto the borders to fully cover the openings. Completely color the outside of the lantern using markers or crayons.

Stained Glass Paper features a beautiful mix of colors in the same color family–for instance, the orange sheets have splashes of yellow and red in them to give them the appearance of real stained glass. In addition, the sheets are semi-transparent, so they allow light to pass through.

Fold up the lanterns and slip the tabs into the slots to secure. The design allows you to attach a length of string to the top of the lantern, so you can hang it along a garland or directly from the ceiling!

To learn more about the history of lanterns, click here!

Line-15

Like us on FacebookShare this post with your friends, or Subscribe to this blog today to receive original craft project updates every Monday, Wednesday and Thursday!