Make Chinese Lanterns for Chinese New Year

The Chinese Lantern Festival is a Chinese festival celebrated on the fifteenth day of the first month in the lunisolar Chinese calendar. It marks the final day of the traditional Chinese New Year celebrations, and it falls on March 2nd for 2018.During the Lantern Festival, children carry paper lanterns and go out at night. People also go to temples to solve riddles on the lanterns.

Age: 5+

Duration: 8-10 minutes

Learning Outcomes: Explore cultural assumptions and symbols. Practice folding and taping. Exercise Fine motor skills. Create a cute take-home craft.

You’ll Need:

Ideas:

  • Use your own imagination and add some decorations to the lanterns.

Bundle with Textured Rubbing Plates

Bundle Savings

Get all the Roylco items used
in this project and save 15%!

$25.06 USD
bundled price
Add Bundle
to Cart

Bundle with Optical Illusion Rubbing Plates

Bundle Savings

Get all the Roylco items used
in this project and save 15%!

$25.06 USD
bundled price
Add Bundle
to Cart

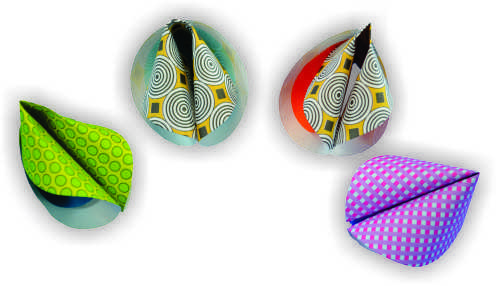
Paper Fortune Cookies

fortune cookie finished craft.jpg

An adorable way to send small notes of praise or encouragement!

Age: 5+

Duration: 5 minutes

Learning Outcomes: Explore cultural assumptions and symbols. Practice folding and taping. Exercise Fine motor skills. Create a cute take-home craft.

You’ll Need:

Line-01

  1. Use a small loop of tape to secure a tissue circle to the center of the white side of a craft circle.
  2. Fold the paper circle in half, with the printed side of the craft circle on the outside. Crease approximately an inch in the center of the fold. Leave the rest of the fold un-creased.
  3. Unfold the circle. Turn it 90 degrees.
  4. Fold the edges of the circle on either side of the center crease in so they overlap slightly. Do NOT crease.
  5. Use the center crease as a fold line to fold the tube in half. Do NOT crease.
  6. Use a small loop of tape to secure the two sides together, forming the completed fortune cookie.

Ideas

  • Include fortunes! On a small strip of paper (approximately 1 x 3″) write a message or short, encouraging phrase. Insert the strip of paper into the tube before you fold it in half, and continue as instructed. Present the fortune cookie to a friend on their birthday, Valentine’s day, or any day as a random act of kindness!
  • Create a fortune cookie garland! String several fortune cookies on a piece of yarn and hang the garland from the ceiling, around a door or window, or along a desk!
  • Try reversing the direction of your first fold! This will create a fortune cookie with a white and tissue outside and a patterned inside.

Bundle Savings

Get all the Roylco items used
in this project and save 15%!

$16.56 USD
bundled price
Add Bundle
to Cart

Line-17

Bug Sculptures

16036 - CHILD SHOT-red_web
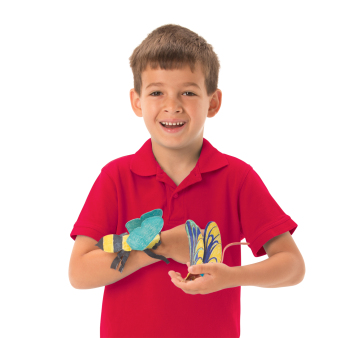
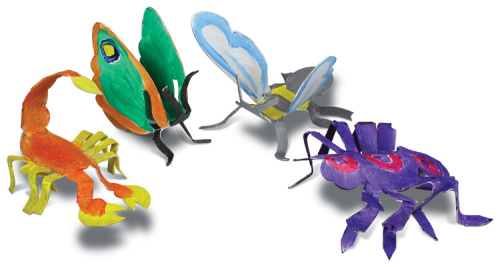
Use water to sculpt life-like insects! This ingenious technique using 100% recycled material will create beautiful 3D designs that your students will be proud to call their art!
Before starting, make sure you lay down newspapers or a paint tray onto your working surface. This will help keep the water in one area for easy cleanup.

Choose your insect design. There are 8 bug designs in total, including a bee, spider, rhino beetle, stag beetle, moth, butterfly, scorpion and dragonfly.

16036-CraftGroup2

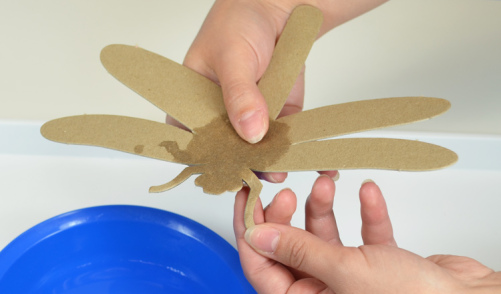
Wet both sides of the chipboard design. The water will soak through the material, allowing it to bend without tearing. Curve, crease and form wings, legs and antennae.

16036-Bending

When you are finished, prop the sculpture in between small objects to hold the sculpture’s shape as it dries. When dry, color the insects with paint and display the finished pieces in a lifelike nature exhibit!

Line-15

Like us on FacebookShare this post with your friends, or Subscribe to this blog today to receive original craft project updates every week!

Lace Paper Kaleidoscope

OLYMPUS DIGITAL CAMERA

Introduce your students to the swirling, colorful, mesmerizing power of a kaleidoscope using simple materials and our R22054 Lace Paper.

Age: 5+

Duration: 10-15 minutes

Learning Objectives: Explore the properties of kaleidoscopes through light and color. Make beautiful artwork. Learn about color mixing principles. Create a fun project that will keep students entertained for hours!

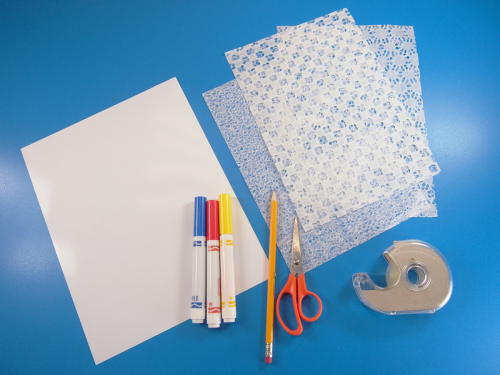
You’ll Need:

Line-03

OLYMPUS DIGITAL CAMERA

R22054 Lace Paper is another addition to our line of textured papers. This special paper has the feel of our Color Diffusing Paper but features a variety of woven patterns.

OLYMPUS DIGITAL CAMERA

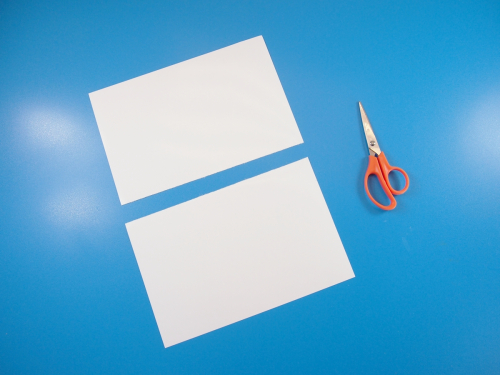
You will need to cut your sheet of high gloss paper in half. This will allow you to make more than one kaleidoscope!

OLYMPUS DIGITAL CAMERA

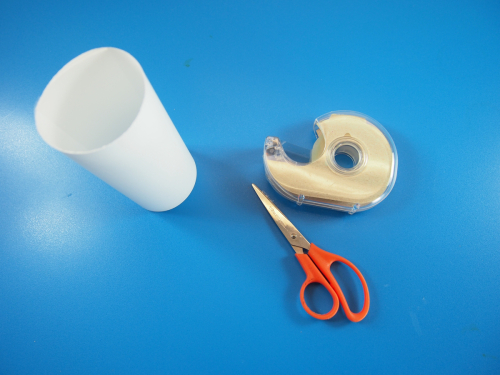
Roll one half of the high gloss paper into a cylinder and secure with tape. This will form your kaleidoscope tube.

OLYMPUS DIGITAL CAMERA

Make sure that the glossy side is rolled on the inside of the kaleidoscope tube. You can see the highlighted surface on the inside of the tube! This is what we want to achieve.

OLYMPUS DIGITAL CAMERA

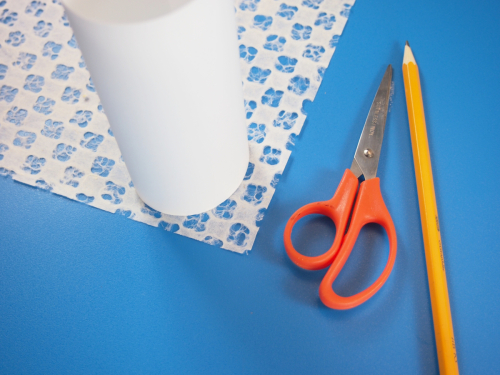
Stand the cylinder onto the R22054 Lace Paper. Trace around the outside circumference of the tube and cut out the resulting tracing.

OLYMPUS DIGITAL CAMERA

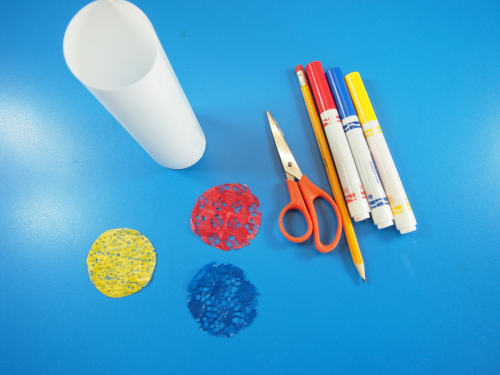
Color in the Lace Paper cut circles with markers. Use different colors. I used primary colors, but you can use any that you like.

OLYMPUS DIGITAL CAMERA

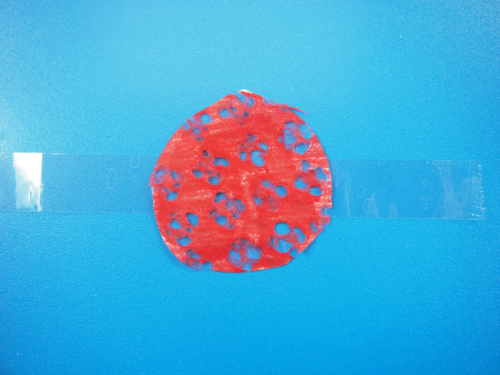
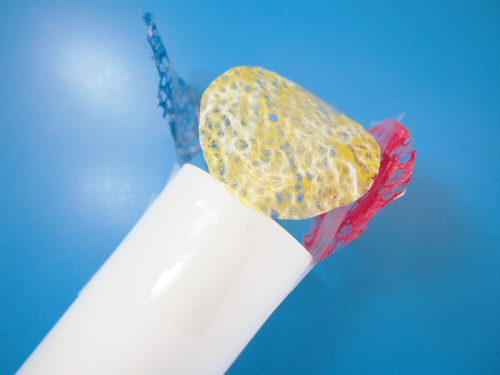
Pull a strip of tape that’s triple the length of the circle. Lay one of the lace circles flat across a strip of tape that’s facing sticky side up.

OLYMPUS DIGITAL CAMERA

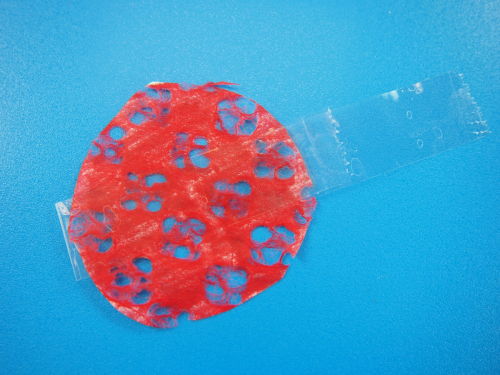
Fold the one side across the middle of the circle, leaving a bit of length on one side. This will be the handle for each of the circles on the kaleidoscope.

OLYMPUS DIGITAL CAMERA

Tape the circle against the edge of the kaleidoscope tube. Do this for all your other lace circle pieces.

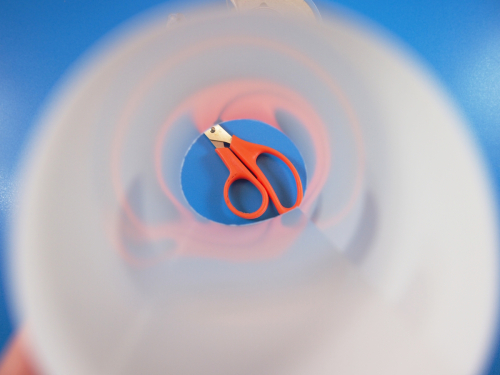
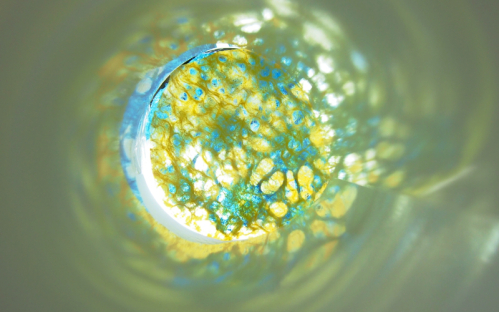
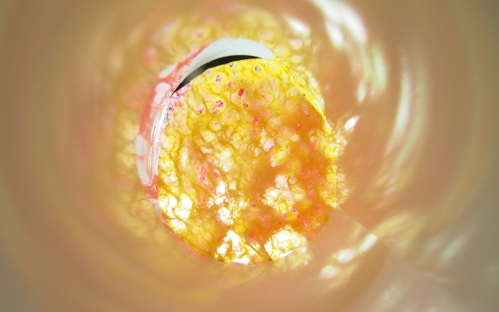
As you look through the opposite end of the kaleidoscope, fold the circles over top of each other in various combinations. Observe beautiful intertwining patterns!

Check out the different kinds of lovely color combinations using different layers of the kaleidoscope circles:

OLYMPUS DIGITAL CAMERA

OLYMPUS DIGITAL CAMERA

OLYMPUS DIGITAL CAMERA

Line-03

Like us on FacebookShare this post with your friends, or Subscribe to this blog today to receive original craft project updates every week!

Lace Paper

22054_Lace Design Paper_Craft Fish


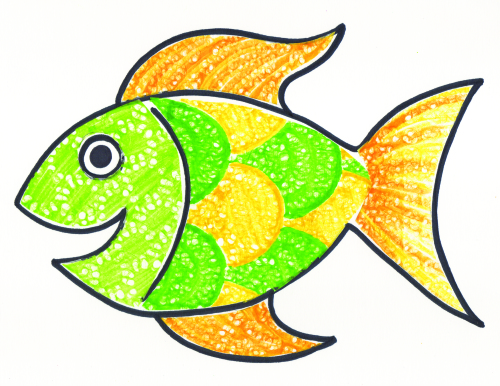
Create, design, decorate and embellish a variety of paper projects with our multipurpose Lace Design Paper! The lightweight material and lacy textures are perfect for a multitude of cut and paste projects. Features 8 beautiful designs ranging from checkered to flowery and ornamental. Our special paper has the look and feel of thick tissue paper with multiple pressed patterns, and can be dyed to any color or pasted onto any surface for a fabric-like feel with paper-like versatility!

Lace Paper comes in 8 assorted intricate designs. Choose a design that will fit your project best. For this initial project, we will be dyeing the Lace Paper in different colors and then cutting it up to use as an embellishment for book-covers, cards and a variety of other projects!

Use a broad-tipped marker and gently add some color onto the Lace Paper. You don’t have to color the entire sheet. Color only a small amount.

Spray a bit of water onto the marker ink and watch as it soaks through the material—just like our Color Diffusing Paper! You can add more marker colors and spray those spots with water or continue spraying with water to simply diffuse the color even more throughout the sheet.


Leave the Lace Paper sheet to dry overnight. For fast results, place the paint tray and Lace Paper outside in direct sunlight or position underneath a desk lamp. Once the paper is dry, use for craft activities!

Here are some suggestions on what to do with your dried and dyed Lace Paper designs! We will go into more detail with each project further into this guide.

  • Paste sections of the material onto a paper mâché mold and create a lacy textured effect.
  • ŸCreate a colorful butterfly using materials from the Dollar Store.
  • Fold the Lace Paper sheet twice to make a cute card for Valentine’s Day.
  • Make little bunting flags!
  • Decorate clothes for a paper doll.
  • Design a stained glass frame with black construction paper and Lace Paper.

Line-09

Like us on FacebookShare this post with your friends, or Subscribe to this blog today to receive original craft project updates every week!

Accordion Critters

R10300-A

Bounce around with R10300 Accordion Critters! Use the full color animal projects to teach children how to fold paper accordion style—an essential exercise for developing fine motor skills.

Paste the finished accordion-folded legs onto the cute animal characters and string them up to use as puppets! Encourage creative thinking with dramatic play, literacy, basic lessons in biology and physical education.
10300-Illustration-01

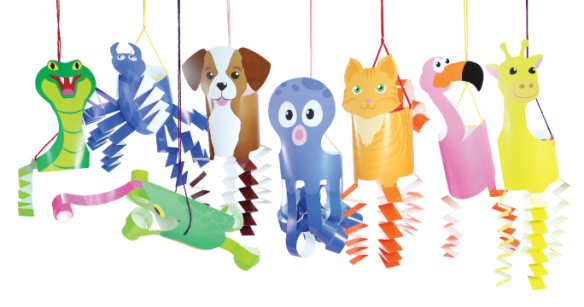
The Accordion Critters are printed in full color and simply need to be popped out of the paper backing. There are 12 different kinds of animals. Pick a cat, dog, snake, frog, elephant, pig, spider, octopus, monkey, sheep, flamingo or giraffe. Each animal has different indications for where the paper strips go.

Before assembling the animals, exercise your students’ understanding by asking how many legs each animal has. They can use the markers on the animal bodies to determine how many legs are required, or they can guess. Not all of the animals in the pack have the same number of legs. In fact, the animals with the most legs are the octopus and spider! Give the octopus and spider to older students, or partner two students together to complete these animals.
10300-Illustration-02

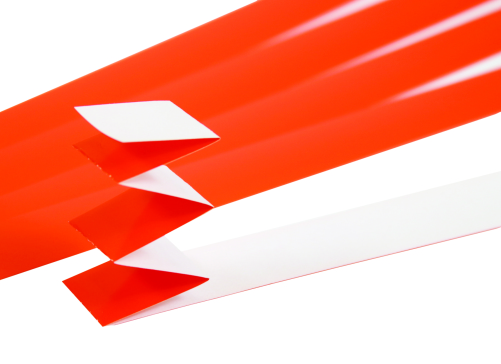
Start with the separate pile of paper strips. The paper strip colors coordinate with the color of the critters’ body. Accordion fold the strips or combine with other colors to make interesting braid patterns. Note: We suggest that younger students use the basic accordion
folding technique to make their Accordion Critter legs. Older students can exercise fine motor skills while adding a new paper folding technique to their repertoire!
To accordion fold the legs, start at the top. Fold the edge of the paper strip down about 1” (2 cm) then flip the strip to the opposite side and fold down 1” (2 cm) again. Continue doing this all the way down the length of the paper strip.
10300-Illustration-03

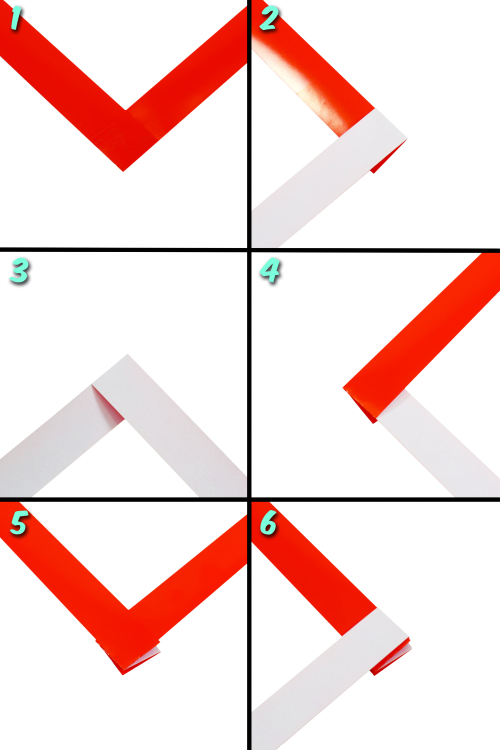
To braid the strips, place one paper strip face down on a flat surface. Place a second paper strip on top of the previous strip, of a 90° angle to the top edge. Flip the second paper strip so that it faces upwards. Tape the two strips together. Fold the bottom paper strip up and over the top strip so that it goes in the opposite direction. Repeat for the second paper strip. Continue folding the paper strips up and over each other all the way to the end. At the very end of the braid, tape the ends together to secure the entire braid. If you braid two different colors, you’ll notice that the colors alternate throughout
the braid.
10300-Illustration-04

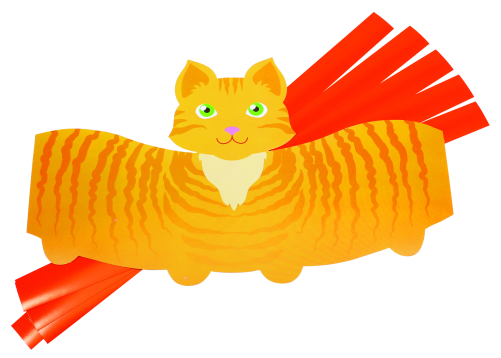
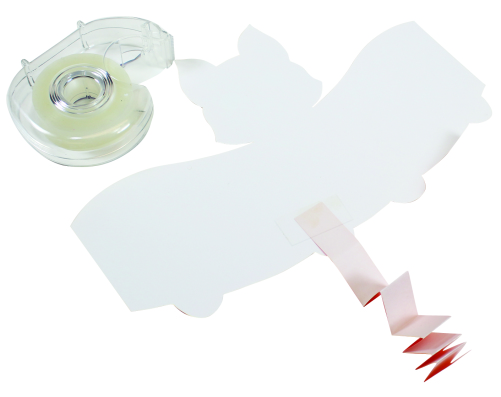
Lay the Accordion Critter on a flat surface and attach the legs onto the leg base with tape. Hold the Accordion Critter up at its sides. Notice the two side edges are flat and line up when you curve the body. Join the two sides together to make the Accordion Critter body curl into a cylinder. Secure with tape. Add tongues to the frog and snake. You can curl or accordion-fold the tongue.
10300-Illustration-05

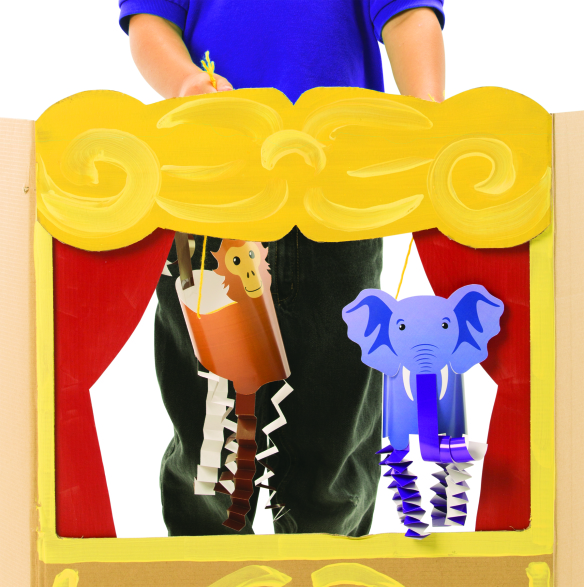
To finish the Accordion Critter, cut a length of string to hang the Critter. Tie the ends of the string onto the pre-punched holes at the sides of the Accordion Critter. Children can grasp the middle of the string to hold the Accordion Critter up like a puppet. You can additionally hang the Critter off a ledge or from the ceiling using a hook or piece of tape. Accordion Critters are fun to play with! Exercise both fine and gross motor skills with paper folding and with puppetry!

Line-07

Like us on FacebookShare this post with your friends, or Subscribe to this blog today to receive original craft project updates every week!

Super Slick Craft Paper

15314 Super Slick Craft Paper fan web

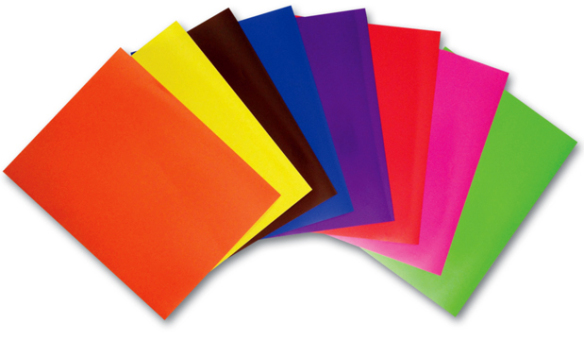
Shape super shiny crafts with R15314 Super Slick Craft Paper!

Coming in 8 vibrant colors, it’s sure to add a pop to your everyday paper crafts. Not only is this perfect for cut-and-fold crafts, but it’s also thick enough for gluing projects too. Use permanent markers, gel pens, glitter glue pens or other paper shapes to decorate the paper. The back of each sheet has a matte finish that makes it easy to glue onto most surfaces.

15314 Super Slick Craft Paper art web

Ideas:

  • Make a bright lighthouse! Cut out different colored rectangles and squares to build a lighthouse. A square for the door, long rectangles for the stripes going up the lighthouse, etc. This is great for practicing shapes with smaller children. Use similar crafts with different shapes (circles, triangles etc.)
  • Design a house! Use old milk cartons or small cardboard boxes for a base. Wrap the house in your favorite color and cut out various shapes for doors, windows etc. and decorate.
  • Great for all types of crafts! Use to make wreaths, paper chains, custom greeting cards for special occasions/people and any other paper crafts you can think of!

Stay tuned for a Super Slick Craft Paper project post coming up this week!

Line-15

Like us on FacebookShare this post with your friends, or Subscribe to this blog today to receive original craft project updates every week!

Tessellations Nature Mobile

OLYMPUS DIGITAL CAMERA

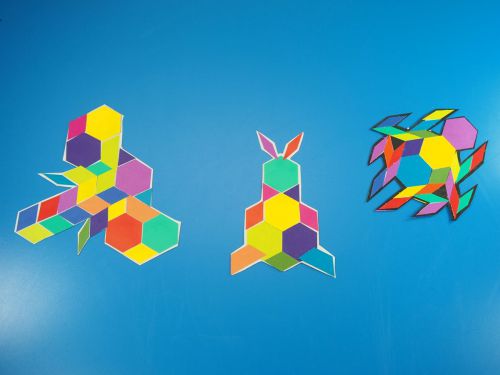
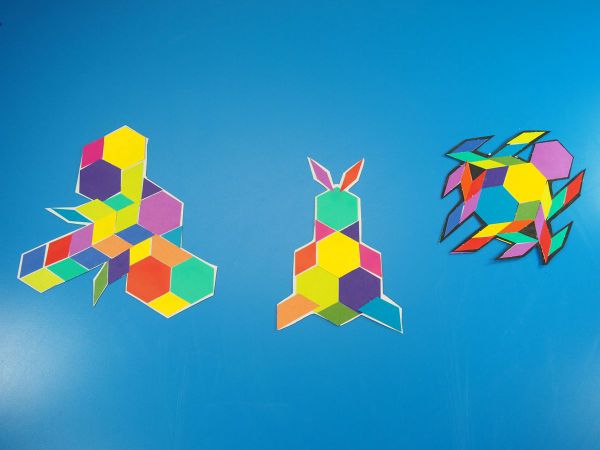
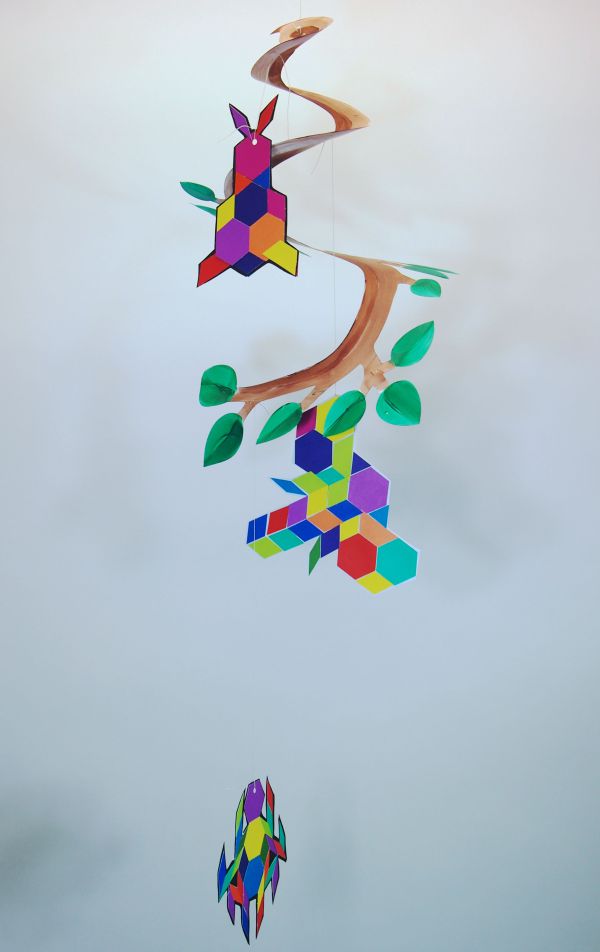
Don’t hesitate—tessellate! We’ve got a load of fun animal designs you can make from the R15664 Tessellations Mosaics. Turn your beautiful artwork into a hanging mobile using our R51302 Nature Mobile.

Age:

Duration:

Learning Objectives:

You’ll Need:

Line-12

OLYMPUS DIGITAL CAMERA

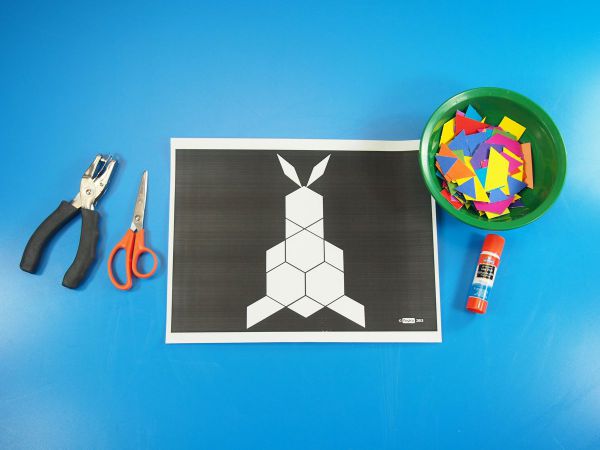
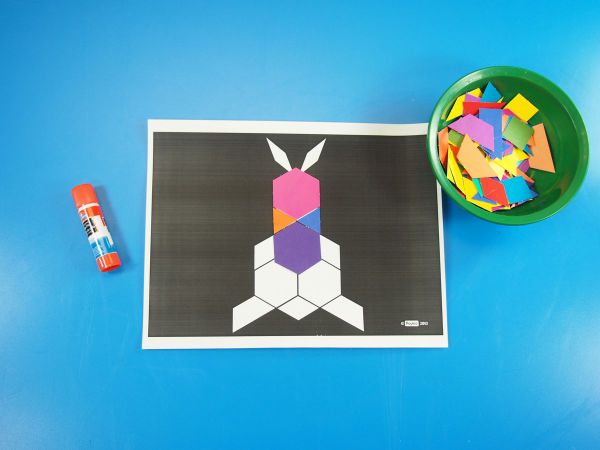
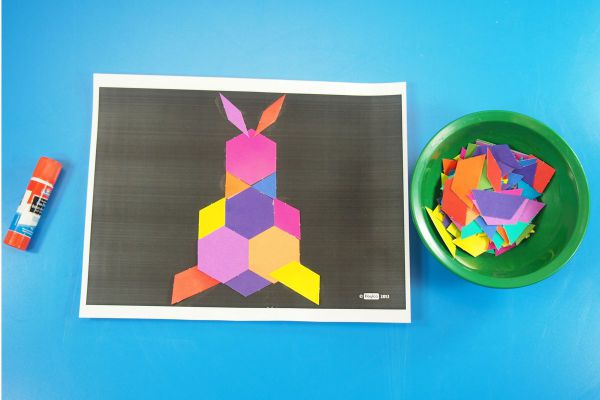
Print out the artwork onto photocopy paper and arrange the Tessellations Mosaics onto the paper. Use the outlines within the design as clues to what kinds of shapes you’ll use to fill in the designs.

OLYMPUS DIGITAL CAMERA

The shapes and sizes of our Tessellations Mosaic are similar to traditional Pattern Blocks but in different colors. You can use your Pattern Blocks resources with our mosaics.

OLYMPUS DIGITAL CAMERA

Our Tessellations Mosaics are capable of presenting you with the same educational value as Pattern Blocks but are more plentiful to allow your entire class to benefit from the experience of putting them together. These mosaics help to build critical thinking skills and allow students to explore the properties of geometric shapes. Using the Tessellations Mosaics, you can explore a variety of puzzle-solving exercises below or come up with your own!

OLYMPUS DIGITAL CAMERA

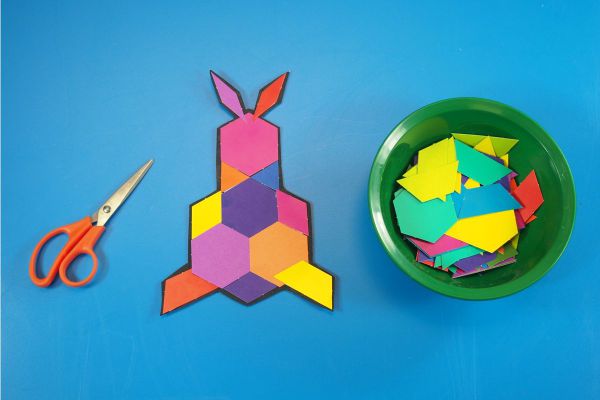
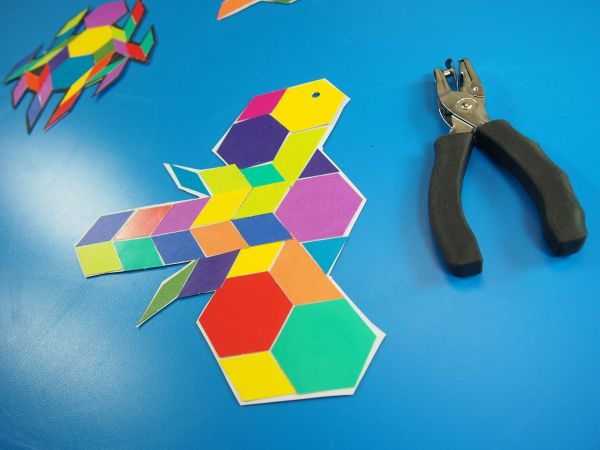
Cut around the outside edge of the animal tessellation.

OLYMPUS DIGITAL CAMERA

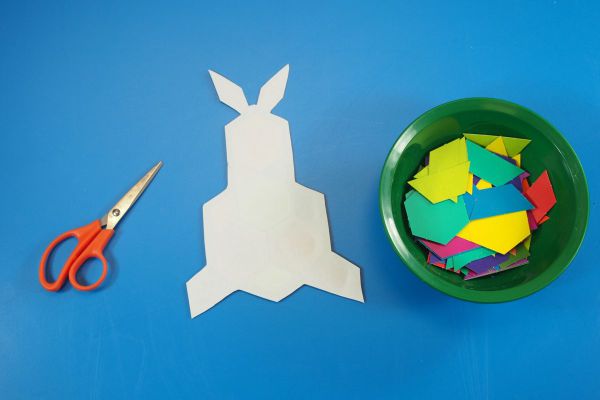
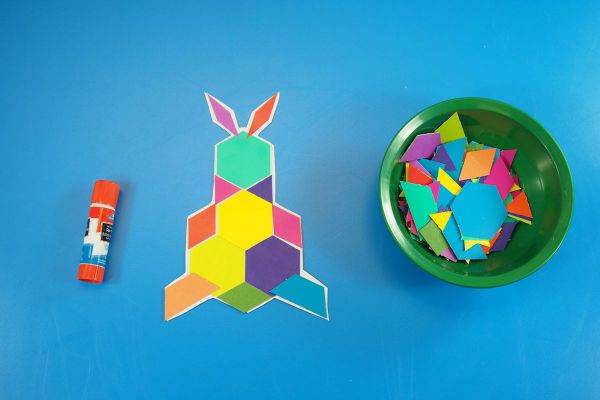
Flip the card sheet over to the blank side. Give your students more Tessellations Mosaics to fill in the other side.

OLYMPUS DIGITAL CAMERA

Challenge students in older grades to not look at the opposite side of the cutout to match the arrangement, but instead come up with a new one!

OLYMPUS DIGITAL CAMERA

Once students are satisfied with their new pattern, they can paste it down to the back of the cutout.

OLYMPUS DIGITAL CAMERA

Punch a hole through the top of the cutout and attach some string to it.

OLYMPUS DIGITAL CAMERA

Tie the other end of the string to our R51302 Nature Mobile Maker to make a Tessellations Mosaics mobile! The bright and beautiful colors of the Tessellations Mosaics work very well against the subtle nature-inspired design of our Nature Mobile Maker.

Line-09

Like us on FacebookShare this post with your friends, or Subscribe to this blog today to receive original craft project updates every week!

Repurposed Brown Paper Art (Christmas Edition)

IMG_7757

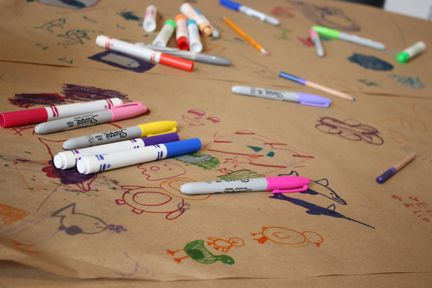
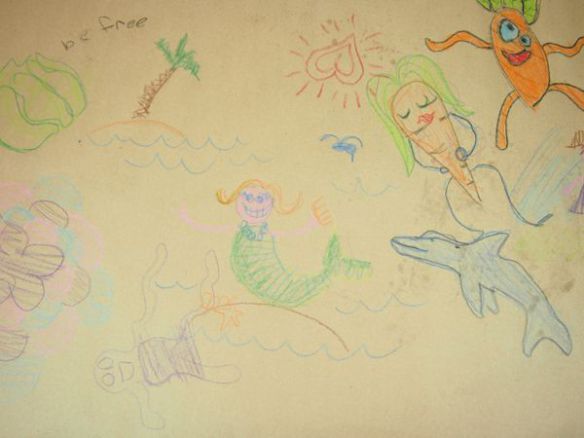
We always hear about great ways to get kids thinking creatively, while doing some sort of double duty. By this, I mean putting down brown packing paper onto tables to protect the surfaces, while giving kids the ability to draw or doodle to their hearts’ content! Well… what do you do with that paper after it’s all done? Read on for more, but a word of advice: DON’T throw it away!!
Age: 3+

Duration: 15 minutes

Learning Objectives: Create artistic talent, generate creative thinking skills. Repurpose old art in a new and fun way.

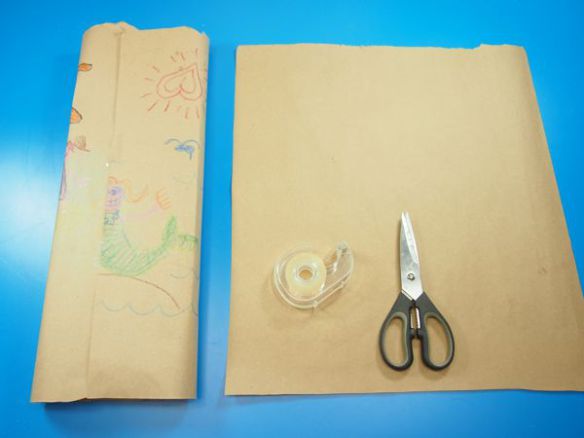
You’ll Need:

  • Brown Wrapping Paper
  • Markers/pencil crayons/crayons/pens
  • Tape
  • Scissors
  • Ribbon

Line-03

Click to view slideshow.

Over the years, we’ve worked with children at various art camps and picked up a few pointers along the way. One of our good educator friends gave us this hint: cover up workspaces with brown wrapping paper. Get the students to doodle when they are bored or need some creative stimulation. It’s always good to have a canvas available at all times!

But what do you do with it when it’s all filled up?

P1010379

Remove the brown drawing paper off the table and cut the best artwork out into large rectangles (about a meter or yard wide, depending on how big the previous workspace was).

OLYMPUS DIGITAL CAMERA

Flip the rectangle sheet over. Place a boxed item such as a new toy or a small keepsake into the center of the wrapping paper.

OLYMPUS DIGITAL CAMERA

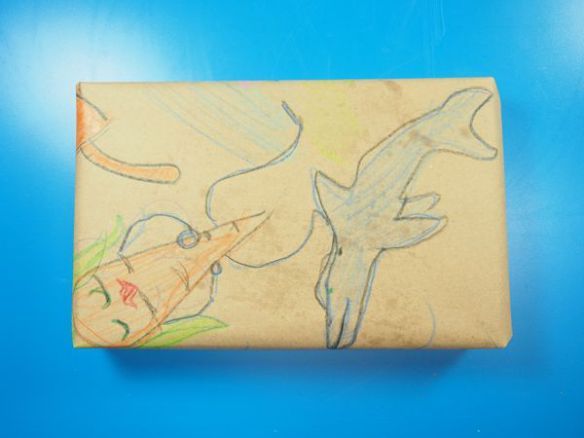
Fold in the long sides. Cut off any of the excess and tape the two edges in place. Fold down the sides as you would for wrapping a gift and cut off any other excess. Tape the sides closed.

OLYMPUS DIGITAL CAMERA

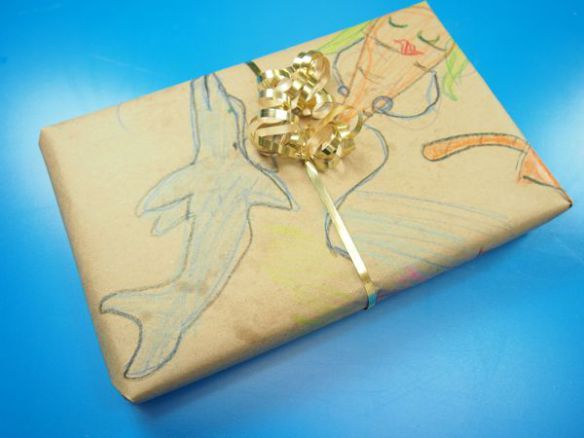
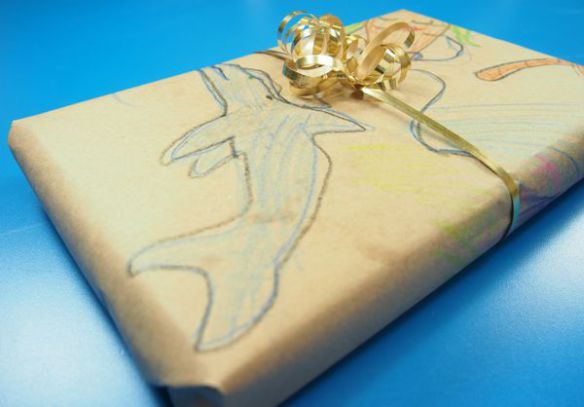
This is what you’ll be left with after you flip it right side up.

OLYMPUS DIGITAL CAMERA

To give your wrapped present extra special flair, add on a gold ribbon or bow. Tie it in the center and curl the ribbon with scissors.

OLYMPUS DIGITAL CAMERA

A great way to spread Christmas or birthday cheer any time of year!

Line-14

Like us on FacebookShare this post with your friends, or Subscribe to this blog today to receive original craft project updates every week!